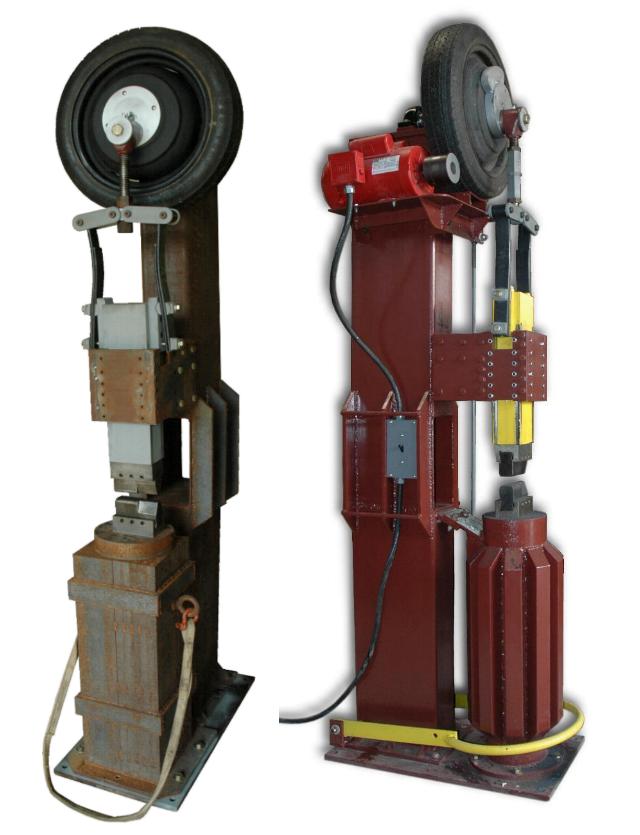
 X1-a Trail Assembly and the Complete X1-b
The only major difference between our two hammers is the anvil construction.
Both demonstrate methods I published on our Junk Yard Hammer page.
The first assembly of the X1-a brought to light a number of issues.
We corrected those then mounted the motor and tested the hammer.
It ran well but we had height adjustment problems.
The scale assembly drawing was made and the second hammer was corrected on assembly of the frame.
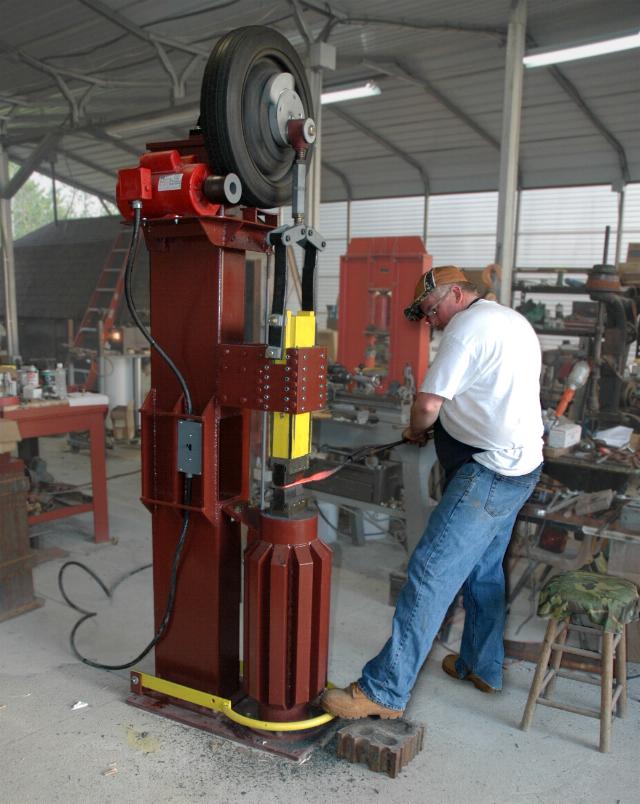
Dave Testing the X1-b
This was a HAPPY day!
We had run the X1-a quite a bit but it was just tacked together, shims and counter weight had not been installed, the ram guides not adjusted or well lubricated. .
Having all these things right made a big difference in how the hammer ran.
AND paint helps you feel a lot better about something you've built.
The only change that needs to be made is to correct the treadle link length so we do not need to use a heel block to run the hammer.
When we changed the frame height we knew this might be a problem.
But it was not enough problem not to run the hammer!
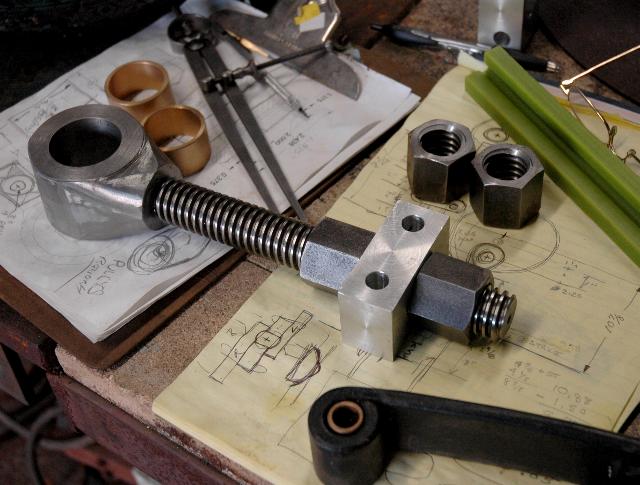
SHOP STILL LIFE : Parts Progress - Pitman, Guides and Spring
This shows our original height adjustment.
While it is simple and worked the screw that extended below the toggle block moved side to side opposite the crank and had possible interference problems with the springs.
This is one of those difficult things to figure out on paper. This was replaced with a turn buckle type adjustment and that will be replaced by a single screw and tube which has more range for the space and is less expensive to make.
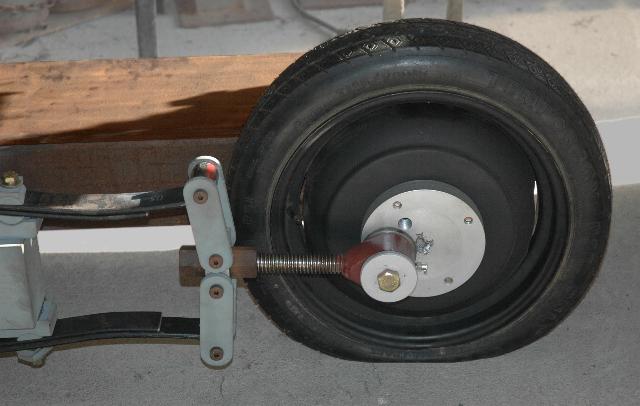
FLAT TIRE HAMMER
While doing some final welding on the X1-a frame we turned the hammer on its side only to discover it had a flat tire!
Hammer check list:
Oil Bearings
Oil Guides
Check Die Bolts
Check Tire Pressure. . .
Four Hammer Comparison:
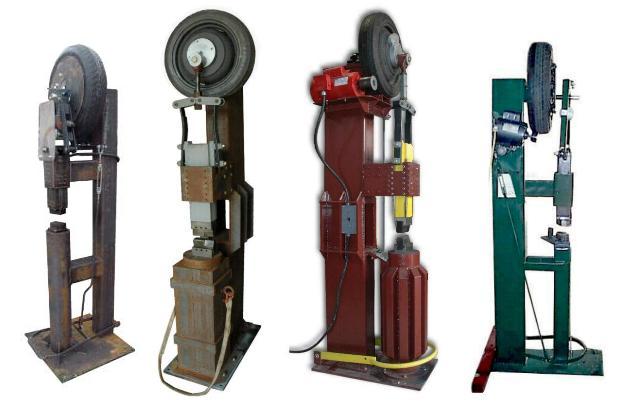
Clay Spencer
50 lb. Group Kit Build
$2500 Complete
In 2008 |
anvilfire X1-a
Test Assembly
|
anvilfire X1-b
Final Build
|
Original Ray Clontz
Tire Hammer
by Steve Barringer
sold for $600 As Shown |
The X1 has a ram weight over double the Clay Spencer Tire Hammer at left and runs roughly the same speed.
The X1's also weigh 4 to 5 times as much as the other hammers.
However, for their size they are a light weight hammer.
1,700 pounds vs. 3,300 for a 100 pound Little Giant.
While the extra weight in steel adds cost you would not want a much lighter 110 pound hammer.



The only major difference between our two hammers is the anvil construction. Both demonstrate methods I published on our Junk Yard Hammer page.
The first assembly of the X1-a brought to light a number of issues. We corrected those then mounted the motor and tested the hammer. It ran well but we had height adjustment problems. The scale assembly drawing was made and the second hammer was corrected on assembly of the frame.
This was a HAPPY day! We had run the X1-a quite a bit but it was just tacked together, shims and counter weight had not been installed, the ram guides not adjusted or well lubricated. . Having all these things right made a big difference in how the hammer ran. AND paint helps you feel a lot better about something you've built.
The only change that needs to be made is to correct the treadle link length so we do not need to use a heel block to run the hammer. When we changed the frame height we knew this might be a problem. But it was not enough problem not to run the hammer!
This shows our original height adjustment. While it is simple and worked the screw that extended below the toggle block moved side to side opposite the crank and had possible interference problems with the springs. This is one of those difficult things to figure out on paper. This was replaced with a turn buckle type adjustment and that will be replaced by a single screw and tube which has more range for the space and is less expensive to make.
While doing some final welding on the X1-a frame we turned the hammer on its side only to discover it had a flat tire!
Hammer check list:
Four Hammer Comparison:
50 lb. Group Kit Build
$2500 Complete
In 2008
Test Assembly
Final Build
Tire Hammer
by Steve Barringer
sold for $600 As Shown
The X1 has a ram weight over double the Clay Spencer Tire Hammer at left and runs roughly the same speed. The X1's also weigh 4 to 5 times as much as the other hammers. However, for their size they are a light weight hammer. 1,700 pounds vs. 3,300 for a 100 pound Little Giant. While the extra weight in steel adds cost you would not want a much lighter 110 pound hammer.