Feather Hammer is the term used in Europe for a Spring Helve Hammer.
The most significant fault on this hammer is the way the treadle is hinged from one side so that the hammer can only be operated from the right side and front but not the left side.
The treadle also has very long travel.
The operator should be able to approach the machine from a bit more than 180° and operate the hammer with a few inches of toe motion.
The reason for this mounting of the clutch is the belt shifting mechanism.
However, it would be possible to locate the motor and clutch back shaft at 90°.
This would require a two axis or ball joint at the link to spring connection.
This hammer also has a cam operated spring pivot to raise and lower the ram.
 The Clutch
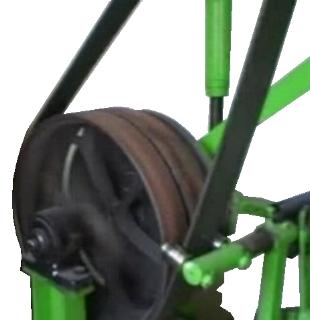
This hammer uses a standard belt shifting clutch with idler and fixed pulley.
These are found on many machines from the water power and steam power line shaft era.
This system uses two pulleys the same size on the back shaft.
One pulley runs on bearings on the shaft and the other is keyed or fixed to the shaft.
When disengaged the belt runs on the loose pulley and when engaged on the fixed.
As the belt is shifted from one to the other there is some slipping to soften the engagement.
Szymek says it works well to run the hammer slow.
 The Dies
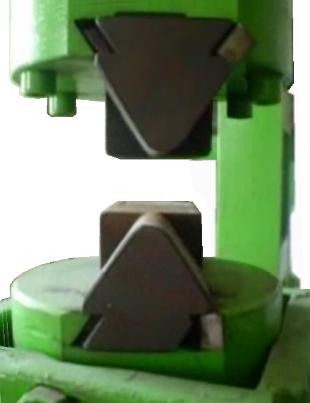
These dies are nicely made and are wedged which is unusual for a DIY hammer.
However, the drawing side is much too aggressive.
This will work great for texturing but should have a flat on top about 1/2 the width of the flat side.
The flat sides have nice sloped and rounded corners as they should.
On the ram the upper die holder is held on with socket head cap screws (SHCS).
It would be better if these were countersunk so that they do not interfere with work at steep angles and the operators vision.
Good visibility is important on an artist blacksmiths hammer.
The better you can see, particularly from above, the more accurate work you can do.
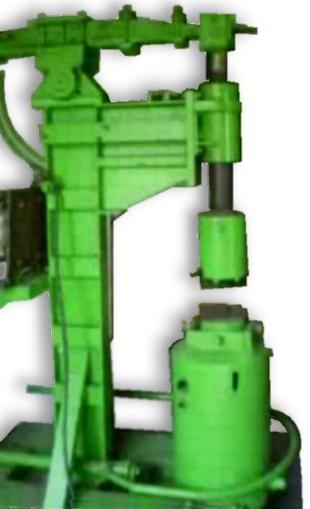
One troublesome issue is that the anvil is a tank filled with concrete.
It is too light but could be corrected.
Overall this is a well built hammer with the exception of the concrete anvil.
While it may not compare to a commercial hammer it will do a LOT of work for someone.
Szymek is 21 years old and his father and grandfather are both metalworkers and smiths.
Video 1 A tour of the hammer.
Video 2 Forging with the hammer
Catalog of Junk Yard and DIY Hammers


 NOTE: These images were captured from low resolution on-line video.

This hammer uses a standard belt shifting clutch with idler and fixed pulley. These are found on many machines from the water power and steam power line shaft era.
This system uses two pulleys the same size on the back shaft. One pulley runs on bearings on the shaft and the other is keyed or fixed to the shaft. When disengaged the belt runs on the loose pulley and when engaged on the fixed. As the belt is shifted from one to the other there is some slipping to soften the engagement. Szymek says it works well to run the hammer slow.
 The Dies
These dies are nicely made and are wedged which is unusual for a DIY hammer. However, the drawing side is much too aggressive. This will work great for texturing but should have a flat on top about 1/2 the width of the flat side. The flat sides have nice sloped and rounded corners as they should.
On the ram the upper die holder is held on with socket head cap screws (SHCS). It would be better if these were countersunk so that they do not interfere with work at steep angles and the operators vision.
Good visibility is important on an artist blacksmiths hammer. The better you can see, particularly from above, the more accurate work you can do.
One troublesome issue is that the anvil is a tank filled with concrete. It is too light but could be corrected.
Overall this is a well built hammer with the exception of the concrete anvil. While it may not compare to a commercial hammer it will do a LOT of work for someone.
Szymek is 21 years old and his father and grandfather are both metalworkers and smiths.
Video 1 A tour of the hammer.
Video 2 Forging with the hammer
Catalog of Junk Yard and DIY Hammers