|
|
| |
| |
| |
|
| |
|
| |
| |
| |
| |
| |
| |
| |
| |
| |
| |
| |
| |
|


|

Tell them you found it on anvilfire.com!
Blacksmithing and metalworking questions answered.
|


|
|
|
It's been over 4 years since Bill Ganoe and I built the primitive forge at the Tucson Presidio, and it has been used for an estimated 300-400 hours over that time.
The basic design has served extremely well. Some changes have been made (not only to the forge, but to our blacksmith station overall), so I decided this
update was long overdue.
|
 |
|
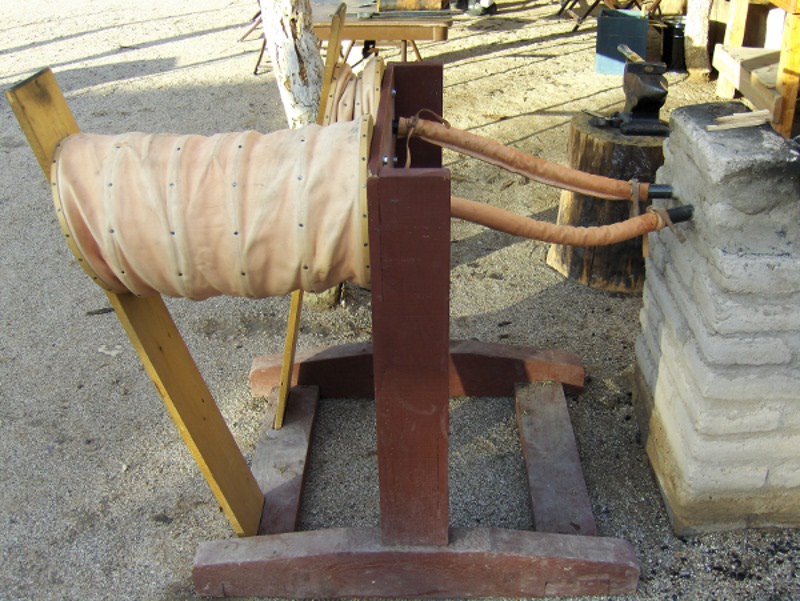
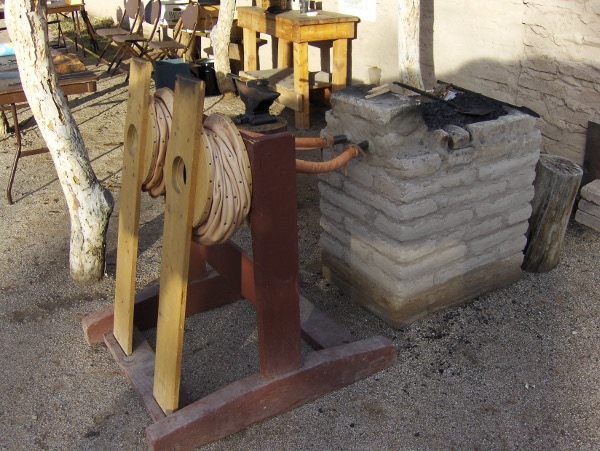
Overall view of the current layout. The forge body itself is virtually unchanged; the biggest alteration was the new bellows assembly. I built
it using mostly rough-sawn timber, and coated it with milk paint, with a finish surface of tung oil (linseed would be accurate, but tung cures
much more quickly). The 2x6 uprights are joined by big tenons (just glue, no nails or screws) into the 4X6 "feet". The lungs are
12" diameter leather tubes, a supple grade, 4oz weight. They are nailed to internal wooden ribs with upholstery tacks, which were clinched on
the inside for extra grip. I puzzled over a source for the ribs until my wife came up with the solution: 12" embroidery hoops from a craft store!
They were perfect: strong, light, and cheap. (The cashier was rather bewildered by a 50-something male walking out with their entire stock
hanging on his left arm.)
|
 |
|
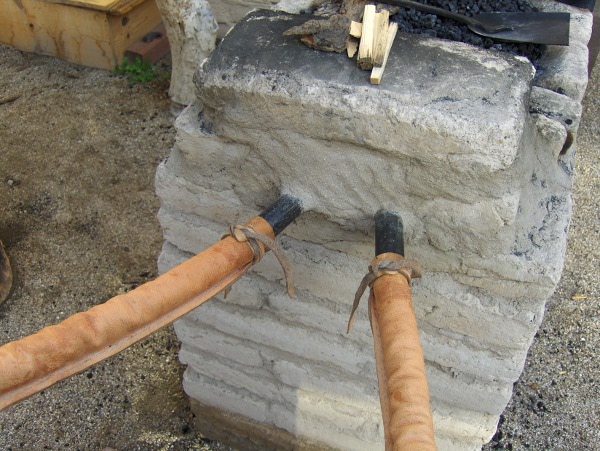
The leather hoses are new, and somewhat larger in diameter than the first pair. The tuyere inlet pipes were upped from 3/4" pipe to 1".
I thought this would allow more air input with less work, and it proved so; but the fire did not increase in intensity as much as I expected.
Possibly, the narrower "high-pressure" air stream stoked the fire nearly as well as the bigger input.
|
 |
|
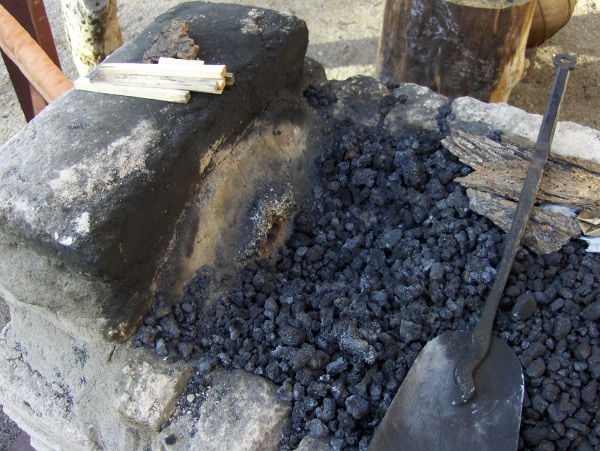
The forge, cleaned out and ready to fire. There have been several work sessions on this clay hearth (I rebuild the clay around the tuyere every summer, during
off season) and you can see some slag collecting around the port. This does not hurt the operation of the forge. If it gets too thick, I just chip most of it
off with a poker. Lighting the forge is really easy. We put some scraps of paper, and sticks of wood in front of the port, on top of a hot coal I take from the baker's
oven in the Presidio courtyard (the bakers always fire up a couple of hours before us!). Blow a little air, quick ignition.
|
 |
|
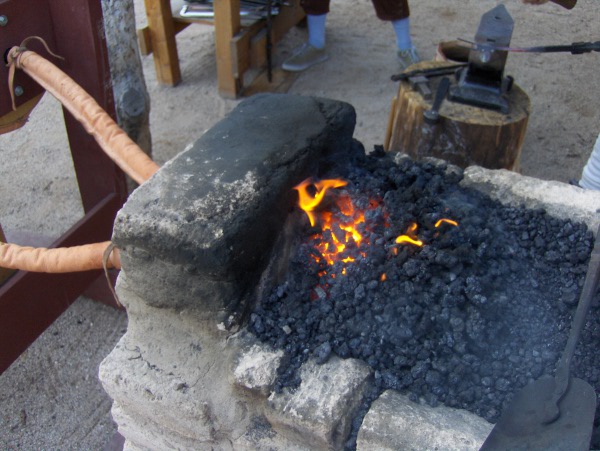
Another view of the forge, to show the entry valves on the "paddle boards". I put in simple, hanging flap valves on the inside, made of 1/8" birch plywood
with lightweight leather facing for gaskets. They work great. This is one feature I like about two-lung bellows designs: since the valves hang vertically, the slightest
air pressure opens and closes them. You don't need to overcome the valve's weight to open them, as in a great bellows.
|
 |
|
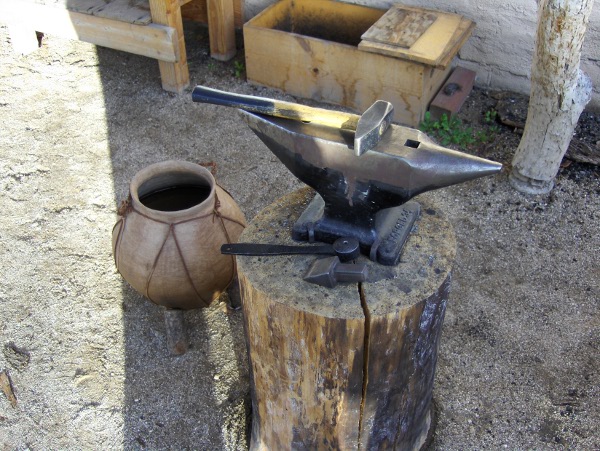
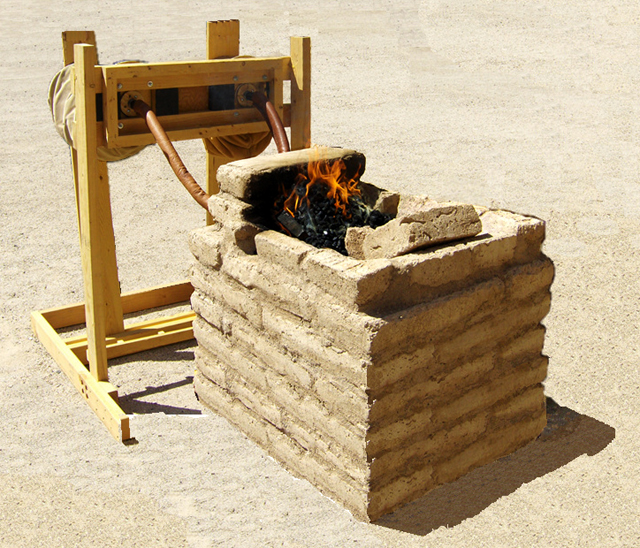
Lit up. We get a nice little fireball, about fist-sized, hanging in the fuel pile above the tuyere. We can easily bring 1/2" iron to welding heat in a short while.
|
 |
|
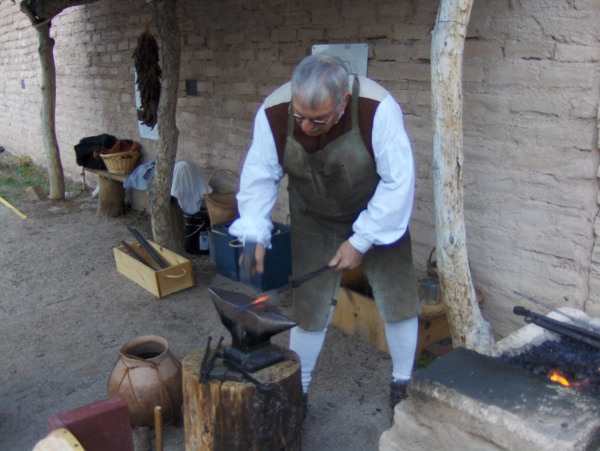
We decided to invest in a new set of tools. Foremost was the Peddinghaus 35kg anvil.
This anvil style is rather like the Spanish bigornia type used
in the colonies during the 18th century. I have to admit it's fancy for the Tucson Presidio, but I really don't have the skill to turn out good work on
a little 30-lb yunque, or block anvil, as they may have used out here.
A Spanish anvil would be shaped like this, but instead of feet, it would have a big square shank buried in the stump, like a huge stake.
Also note our quench bucket: a clay pot (olla), hand-built by an artisan in
Tubac, a small town about 30 miles south of Tucson.
|
 |
|
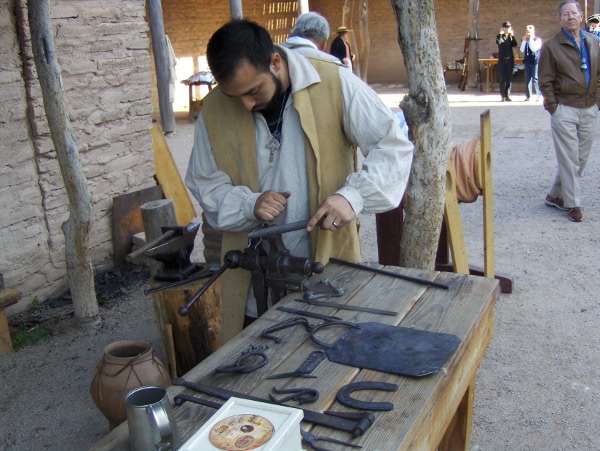
One of our volunteers, Dennis Buller, forging an eating fork. Behind him are some of my wood boxes for carrying materials, finished in either oil or
milk paint. We are trying to eliminate all buckets!
|
 |
|
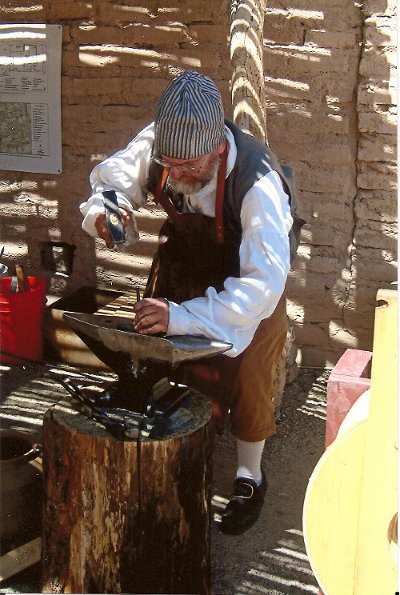
Another volunteer, Adrian Vega, working on another fork, cleaning it up with a file. I built the worktable out of 2x8 dimensional lumber; in future, I may
try a new one with rough-sawn lumber for a more rustic look. We display some of our wares for demo purposes.
|
 |
Yours truly, doing some detail work.
I am chiseling decorative lines on a gate hook, much like the modern hook-and-eye door holder, but forged from
strip stock instead of being bent from thick wire.
|
|
This forge exceeded my expectations in performance, enough so that I built a slightly larger copy in my back yard for my own hobby blacksmithing.
I really like the side-blast design. I've grown to dislike bottom-blast iron firepots, especially for the small work I am doing now for colonial-era demonstrations.
Consider trying one: they are really easy to build and operate. It's hard to get simpler than a pile of mud!
|
|
Building the Adobe Forge Part I Introduction and Materials
Building the Adobe Forge Part II Construction
Building the Adobe Forge Part III Testing Forge and Bellows
References and Links
|
|
|


Building the Adobe Forge Part I Introduction and Materials
Building the Adobe Forge Part II Construction
Building the Adobe Forge Part III Testing Forge and Bellows
References and Links