|
|
| |
| |
| |
|
| |
|
| |
| |
| |
| |
| |
| |
| |
| |
| |
| |
| |
| |
|


|

Tell them you found it on anvilfire.com!
Blacksmithing and metalworking questions answered.
|


|
|
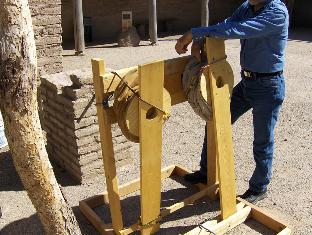
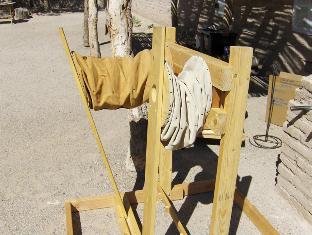
Weekend #5 (8/28/10). Baptism day for the forge, and Bill has just unpacked and partially assembled his concertina-type bellows. They're constructed of dimensional pine lumber, with two 11" diameter lungs, each with six internal plywood-cutout rings secured to the leather bag with tacks. In each lung, two of the rings form the ends, and they have small (about 3" dia) holes; the input end has an internal leather flap valve. The four internal "stiffening" rings are basically hoops, just to hold the leather roughly into shape. Below are two views: input end (still with the transport bungees on), and side view, with one lung extended, the other compressed.
|
|
|
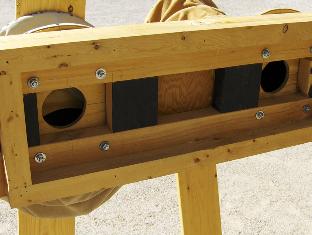
Output side of the bellows. We want a temporary, easily disassembled way of piping air from 3" holes to 1" iron pipe, so...
|
|
|
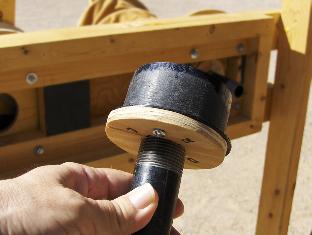
Simple adapter, consisting of a plastic drain cap, a plywood disk with a 1.25" hole in the center, and an iron pipe nipple screwed into the disk. Ugly, but fast and cheap. I'll make some better-looking versions next year.
|
|

|
Adapters push-fit into the output holes.
|
|
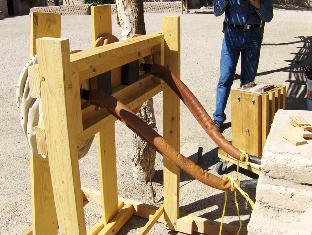
Leather air-hoses in place. I stitched up two 20" hoses from some old 4-5 oz leather I had lying about, and stiffened them internally with 16 ga galvanized wire coils I wound around a piece of electrial conduit. They fit inside the hoses nicely, and flexed well, keeping the hoses from kinking. (Excuse the yellow nylon twine holding the hoses tight on the tuyere pipes; dang it, forgot the iron tie wire!)
|
|
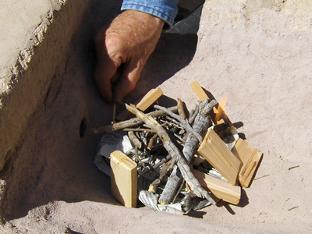
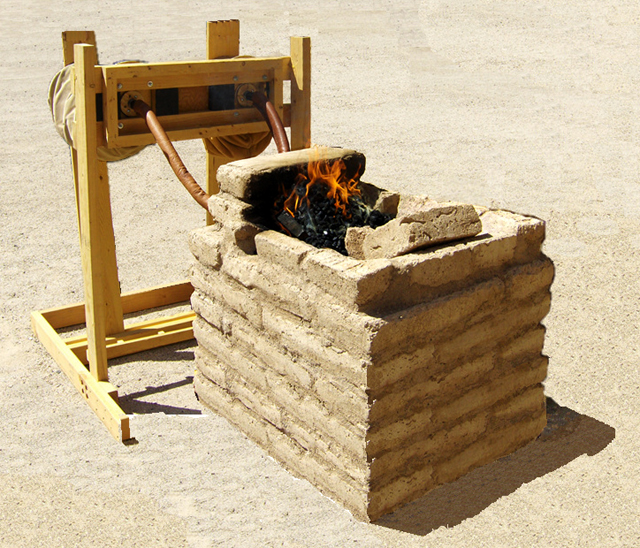
Lighting up, with newspaper and twigs. The tuyere fanned this starting fire pretty well, blowing "on" it, rather than "through" it.
|
|
|
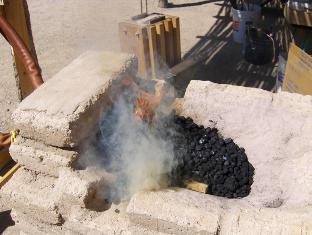
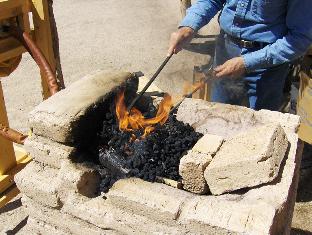
After sprinkling on a little green coal, and getting it to catch, Bill put on a few shovelfuls and raked it carefully up over the fire. You have to re-orient your thinking 90 degrees when using a side-blast; you bank fuel up against the tuyere wall, instead of filling a fire pot from the top.
|
|
Me, getting into the bellows-monkey zone. With practice, you build up a rhythm that Bruce Blackistone described to me: start compressing lung B just a fraction of a second before lung A is fully compressed, and vice versa. You can get a fairly constant air blast. The fire is going well, and we have piled in a few adobe chunks in the hearth to allow us to keep the total fuel mass small. During the demo season, the hearth may be filled up with a big mass of coal; it will only burn at the tuyere end. (This picture shows the big mural on the south Presidio wall. It's meant to give an idea of the full size of the fort in its heyday.)
|

|
|
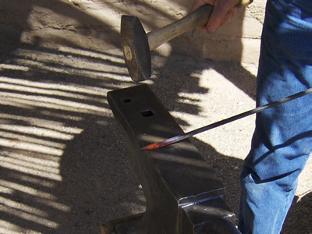
First project: Bill starts heating 1/4" square stock for nails.
|
|
Bill begins a nail. (Yes, we need an 18th-century frontier anvil, and one is in the works! I hope to have it ready by December of this year.)
|
|
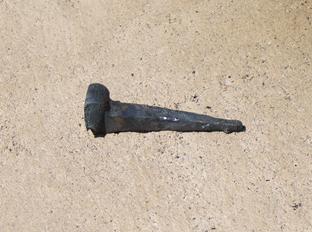
Our first artifact. Kind of made me choke up.
|
|
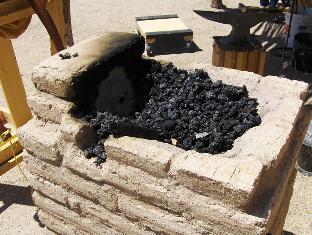
After operating the forge for about an hour, we tore the fire down. The clay hearth was a success, so far. On the right, close up, you can see the mound surrounding the tuyere where the clay actually fired; it's rock hard, with virtually no cracking. (The soot ring is rather marked.)
|

|
One property of this forge that I forgot to plan for: a masonry forge takes a long time to cool down! No problem in a closed shop, but in open air, with daily threat of downpour, you have to wait over an hour for the hearth to cool enough to put a wooden cover on it. During demo season, after four-plus hours of operation, we may have to let the forge cool overnight and take chances with evening showers, or devise a sheet metal cover that does not look too out of place in an 18th-century settlement.
My thanks to Bill Ganoe, Rick Collins, Jeff Coleman, Mike Starace, and the rest of the Presidio Unit who helped us complete this project.
At this point, we don't plan to fire up the forge again until demo season begins, in late October. By next year, we hope to have a period anvil (and perhaps a bickern), and maybe even a Mark II version of the bellows, with bigger lungs, and virtually no modern-looking lumber or hardware. We plan to post updates as extensions to this article on the Anvilfire site. Till then!
|
Building the Adobe Forge Part I Introduction and Materials
Building the Adobe Forge Part II Construction
Adobe Forge Update 2015 Modifications and Improvements
References and Links
|
|
|

Weekend #5 (8/28/10). Baptism day for the forge, and Bill has just unpacked and partially assembled his concertina-type bellows. They're constructed of dimensional pine lumber, with two 11" diameter lungs, each with six internal plywood-cutout rings secured to the leather bag with tacks. In each lung, two of the rings form the ends, and they have small (about 3" dia) holes; the input end has an internal leather flap valve. The four internal "stiffening" rings are basically hoops, just to hold the leather roughly into shape. Below are two views: input end (still with the transport bungees on), and side view, with one lung extended, the other compressed.
After operating the forge for about an hour, we tore the fire down. The clay hearth was a success, so far. On the right, close up, you can see the mound surrounding the tuyere where the clay actually fired; it's rock hard, with virtually no cracking. (The soot ring is rather marked.)
One property of this forge that I forgot to plan for: a masonry forge takes a long time to cool down! No problem in a closed shop, but in open air, with daily threat of downpour, you have to wait over an hour for the hearth to cool enough to put a wooden cover on it. During demo season, after four-plus hours of operation, we may have to let the forge cool overnight and take chances with evening showers, or devise a sheet metal cover that does not look too out of place in an 18th-century settlement.
My thanks to Bill Ganoe, Rick Collins, Jeff Coleman, Mike Starace, and the rest of the Presidio Unit who helped us complete this project.
At this point, we don't plan to fire up the forge again until demo season begins, in late October. By next year, we hope to have a period anvil (and perhaps a bickern), and maybe even a Mark II version of the bellows, with bigger lungs, and virtually no modern-looking lumber or hardware. We plan to post updates as extensions to this article on the Anvilfire site. Till then!
Building the Adobe Forge Part I Introduction and Materials
Building the Adobe Forge Part II Construction
Adobe Forge Update 2015 Modifications and Improvements
References and Links