| |
 |
 |
 |
 |
 |

Figure 01 |

Figure 02 |
 |
 |
-GURU
|
 |
Tonight I'll be demonstrating how I make brass candle sticks, twist handles and rams heads.
|
 |
 |

Figure 03 |

Figure 04 |
 |
 |
-GURU
|
 |
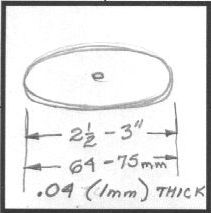
These items are made from 1/4" (6.4mm) brazing rod and .042" (1mm) brass shim stock. When available I use .050" (1.25mm) sheet brass for basses and larger pans. Detail pieces are made from other standard size brazing rod (3/16" and 1/8"). I buy bare rod except for the 1/8" size which is used as filler and for welding (brass).
|
 |
-GURU
|
 |
All the work is done using an oxyacetylene torch for welding and silver soldering.
|
 |
 |

Figure 05 |

Figure 06 |
 |
 |
-GURU
|
 |
I generally make all my candle cups in batches.
Pans are blanked out on a press or by trepanning on a drill press. For centering the blanks all have a 3/16" hole. I do the dishing in an oak stump with a very shallow dishing depression.
In brass I like a slightly faceted surface to give is that "hammered" look.
I use the same processes for making steel cups. Theses I make from 16 ga (1.6mm) plate and dish smoothly (just a choice).
|
 |
 |

Figure 07 |

Figure 08 |
 |
 |
-GURU
|
 |
Cups are made from brass or copper tubing when available. I made several "monkey" tools with radiused edges and then use a large ball pi en hammer as a top die and tap it in to make the flare. The cups are carefully cut to the same length and debured first.
I've used numerous tubing sizes with varying results. Today to get a good fit on candles I would probably fabricate the cups from strip.
|
 |
 |

Figure 09 |
The brass and brass/copper cups are silver soldered to the pans (steel ones are brazed). After this step the assemblies are soaked in vinegar, sanded with 320/400 grit wet or dry sandpaper and buffed. Some of this must be redone later but it is easiest to do them loose first.
|
 |
 |

Figure 10 |
When doing large numbers of candle sticks I turn a short 3/16" tenon on the brass rod for the stems. You can also hand file a short tenon. These do not need to be long. Just enough to hold the parts together while soldering.
I use a flat end pin punch to upset stem while it is held in a vise.
|
 |
 |

Figure 11 |
For decorative "bushings" I coil some 3/16" and 1/8" brazing rod and cut it on a diagonal. These rings are slipped onto the stem and then silver soldered into place.
I use a single ring on the candle cup and a double on bases
|
 |
 |

Figure 12 |
There is a low silver solder that matches brass very well. If you don't over do the solder and leave just enough fillet this looks very nice. Again, this technique also works in steel with brazing if you are going to paint the work.
|
 |
 |

Figure 13 |

Figure 14 |
 |
 |
-GURU
|
 |
I am using brazing rod because it is easy to obtain. But it is limited in size. 1/4" (6.4mm) is the max in most places. So mass must be built up.
For closed twists I used four pieces, squared and chamfered then welded together. For open basket twists I use round but I HAVE used twisted square. The round polishes much easier.
The squaring and chamfering is done hot. The rods are heated on a fire brick using a torch. The surface flushes a slightly lighter color just as it is hot enough.
Use rapid tight taps for forging. Small brass rod doesn't need much force. All your tools should be clean and polished.
|
 |
 |

Figure 15 |

Figure 16 |
 |
 |
-GURU
|
 |
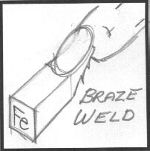
After forging I weld the center of the bundle then weld the sides using 1/8" coated brazing rod plus borax as needed.
|
 |
 |

Figure 17 |
After welding I heat the end mass and tighten it up with some light forging. This gives the rods a little taper at the ends so they blend in.
These pieces can then be welded together as in the chandelier OR attached to a fireplace tool for a classy brass handle. I also use them on the dustpans I make (see demo no. 78 Shovel 2).
|
 |
 |

Figure 18 |

Figure 19 |

Figure 20 |
 |
-GURU
|
 |
For this I make a barbed end and attach the end by brazing and building up a shoulder. Flame sculpture.
|
 |
 |

Figure 21 |
While doing all this torch work I found it helped to build a hanger next to the forge where my torch could be hung while lit. The little gas wasted between heats is nothing compared to the time required to constantly relight and adjust your torch. This is also an ideal situation for an "economizer valve". But it still needs to be a convenient location.
|
 |
 |

Figure 22 |
The pieces can be used to make a basket twist in a handle or small ones in a candle stick. I could never keep the fancy candle sticks long enough to photograph. . sorry!
In the basket twist I carefully use the twist tight and untwist method. Here the weld is covered with a couple rings that are silver soldered. On the chandelier and larger pieces I use wrapped collars from 1/8" (3.2mm) stock that the ends have been forged to a round taper.
|
 |
 |

Figure 23 |
The buildup method of using brass rod can be used to make all sorts of things.
I'm sure you can guess where this is going.
|
 |
 |

Figure 24 |

Figure 25 |

Figure 26 |
 |
-GURU
|
 |
The second piece is bent (for convenience) and then a third welded on.
The upper part with the horns is welded to the lower part then forged to dress. We have demos on using eye punches and animal faces elsewhere.
|
 |
 |

Figure 27 |
This guy is then welded onto a barbed end like the previous handle. I always terminated these in a built up shoulder. They LOOK screwed on but are absolutely non-removable.
|
 |
-GURU
|
 |
All these pieces are soaked in vinegar overnight. Then excess silver solder or brass filed. Fine sandpaper is used to dress all overheated brass. Then polishing starts.
You can polish by hand using Dupont Orange rubbing compound (automotive paint supply). I use it on heavy canvas (old jeans material). Then cotton T-shirt material. It takes lots of "elbow grease" but it works. Don't start until the sandpaper finish work is complete.
It is best to have buffing equipment (see our "wheels" article on the 21st Century page). However, many parts of these can only be polished by hand so plan on having some Dupont orange around in any case.
|
 |
 |

Figure 00 |
Questions
|
 |
PETE FELLS
|
 |
Applause instead! That was a classy bit of design and execution Jock.
|
 |
WITAN
|
 |
What type of twister did you use . . wrench . . vise?
|
 |
-GURU
|
 |
Although these are my designs. The ideas were inspired by Dona Meilach's Decorative and Sculptural Ironwork.
No twister used. Just tongs. This stuff works like hot butter.
|
 |
FCB
|
 |
Is a coal forge too dirty to use for brass?
|
 |
-GURU
|
 |
Coal can be used but it is very difficult. The brass melts just above the forging point. I would use it to anneal. Then forge cold.
|
 |
DAVE ATWOOD
|
 |
What does the vinegar do?
|
 |
TOM STOVALL
|
 |
Vinegar = acetic acid
|
 |
-GURU
|
 |
The Vinegar is used to remove the flux and oxides. Stronger acids do a better job but I generally don't keep them around.
|
 |
FCB
|
 |
Ahhh, I bet gloves are in order here. I imagine the heat travels very quick!
Have you ever worked with naval bronze?
|
 |
-GURU
|
 |
Yes, brass and copper do not let you heat one end and work the other. I even gave up gloves. Tongs only! No, I've never worked Naval Bronze.
|
 |
PETE FELLS
|
 |
Guru, why are you doing the fancy barbed Joint?
|
 |
-GURU
|
 |
The joint doesn't need to be barbed but I don't like things that come apart! I just did my first one that way and have always done it the same since. .
|
 |
-GURU
|
 |
The vinegar does about half the job. The rest is done with sandpaper or buffing.
|
 |
TOM STOVALL
|
 |
Jock, I ain't much on working brass, but the collar thingy was worth the price of admission. Consider it stolen. :)
|
 |
TEDD HARRIS
|
 |
Good ideas are what this Pub is about. Gotta share! :)
Jock, I think the candlesticks look great! The ideas are good for working all kinds of metal
|
 |
-GURU
|
 |
Even with the polishing the brass is actually easier to work. Its just expensive to buy and to find sources. That is why I worked mostly in brazing rod.
Back when I was doing this the big expense was the silver solder. It was when the Hunt Bros were cornering the silver market (late 1970's). Remember $35/oz silver? That's when I bought silver solder. . . :(
|
 |
COBB
|
 |
guru what would you use to coat copper and brass to keep the tarnish down?
|
 |
-GURU
|
 |
I didn't coat most of my brass work but this should have all been lacquered with clear lacquer. This is especially true of the more complicated pieces.
|
 |


Demonstration by Jock Dempsey
December 20, 2000
Figure 01
Figure 02
Figure 03
Figure 04
Figure 05
Figure 06
Pans are blanked out on a press or by trepanning on a drill press. For centering the blanks all have a 3/16" hole. I do the dishing in an oak stump with a very shallow dishing depression.
In brass I like a slightly faceted surface to give is that "hammered" look.
I use the same processes for making steel cups. Theses I make from 16 ga (1.6mm) plate and dish smoothly (just a choice).
Figure 07
Figure 08
I've used numerous tubing sizes with varying results. Today to get a good fit on candles I would probably fabricate the cups from strip.
Figure 09
Figure 10
I use a flat end pin punch to upset stem while it is held in a vise.
Figure 11
I use a single ring on the candle cup and a double on bases
Figure 12
Figure 13
Figure 14
For closed twists I used four pieces, squared and chamfered then welded together. For open basket twists I use round but I HAVE used twisted square. The round polishes much easier.
The squaring and chamfering is done hot. The rods are heated on a fire brick using a torch. The surface flushes a slightly lighter color just as it is hot enough.
Use rapid tight taps for forging. Small brass rod doesn't need much force. All your tools should be clean and polished.
Figure 15
Figure 16
Figure 17
These pieces can then be welded together as in the chandelier OR attached to a fireplace tool for a classy brass handle. I also use them on the dustpans I make (see demo no. 78 Shovel 2).
Figure 18
Figure 19
Figure 20
Figure 21
Figure 22
In the basket twist I carefully use the twist tight and untwist method. Here the weld is covered with a couple rings that are silver soldered. On the chandelier and larger pieces I use wrapped collars from 1/8" (3.2mm) stock that the ends have been forged to a round taper.
Figure 23
I'm sure you can guess where this is going.
Figure 24
Figure 25
Figure 26
The upper part with the horns is welded to the lower part then forged to dress. We have demos on using eye punches and animal faces elsewhere.
Figure 27
You can polish by hand using Dupont Orange rubbing compound (automotive paint supply). I use it on heavy canvas (old jeans material). Then cotton T-shirt material. It takes lots of "elbow grease" but it works. Don't start until the sandpaper finish work is complete.
It is best to have buffing equipment (see our "wheels" article on the 21st Century page). However, many parts of these can only be polished by hand so plan on having some Dupont orange around in any case.
Figure 00
No twister used. Just tongs. This stuff works like hot butter.
Have you ever worked with naval bronze?
Jock, I think the candlesticks look great! The ideas are good for working all kinds of metal
Back when I was doing this the big expense was the silver solder. It was when the Hunt Bros were cornering the silver market (late 1970's). Remember $35/oz silver? That's when I bought silver solder. . . :(
iForge is an Andrew Hooper Production
HTML Copyright © 2000 Jock Dempsey, www.anvilfire.com
Webmaster email: webmaster at anvilfire.com