| |
 |
 |
 |
 |
-GURU
|
 |
Tonight's demo is a preview of a four part demo on manual fly presses and press tooling.
These presses were demonstrated by Russell O'Dell at the
Kayne and Son blacksmith shop last Wednesday.
Russell had come to pickup his new #6 flypress from the Kaynes while demoing a new #5 right out of the box.
This press had been delivered that afternoon and was put on the stand minutes before the demo started.
The Kaynes are insisting on taking delivery of only the best premium quality presses.
The fact that they could randomly take one out of a crate and have it working the first time with no adjustment is impressive.
I was so excited about these presses I could not wait to show you some what they could do.
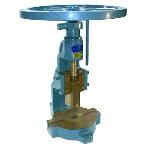
What IS a fly press? A fly press is a flywheel driven press. It operates on inertia.
The flywheel is attached to a screw that moves the ram up and down (see detail of image above).
When the tool on the ram contacts a piece of work it must slow down and stop the flywheel.
This produces a tremendous amount of force.
The exciting thing about these little presses is that a third or a quarter turn using no more force than you would use to close a door will produce the effect of using a sledge to drive your tool.
Not only do you get tremendous force you have fantastic control of the positioning and amount of the force.
The typical tooling for one of these machines looks like the die sets used in a punch press.
However, for forging operations on hot steel the tooling can be much simpler.
This demo is going to show some of the tooling and how simple it is to make, as demonstrated by Russell O'Dell on a #5 flypress from Kayne and Son.
|
 |
 |
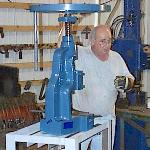
Figure 2
Click for Detail |
The tools and techniques we are going to show were demonstrated at the Kayne and Son shop by Russell O'Dell, a professional blacksmith from Tennessee that produces reproduction Colonial hardware.
Russel had only been using a fly press for a couple months and had developed all the tools shown here for jobs as he needed them.
|
 |
-GURU
|
 |
This demo was done using a #5 fly press from Kayne and Son.
This is the middle size of three the Kayne's carry.
The #4 and #5 produce the same force but the #5 is bigger.
The #6 is a considerably larger machine.
All three can be seen on the Kayne's website.
|
 |
 |

Figure 3
Click for Detail |
One of the first things Russell did was fuller a groove in a piece of 1" bar.
The wheel was gently "bumped" as the bar was rotated.
With almost no effort and no noise the bar had a smooth even groove fullered into it.
Then Russell changed to a set of narrow, almost sharp fullers and proceeded to cut the bar of 1" (25mm) steel in two like working hot modeling clay!
Russell's upper tools are all made with a 3/4" shank created from common 3/4" bolts.
Lower tools can set on the platen or fit the hole in the base of the machine or a bushing reducing the size of the hole.
|
 |
 |
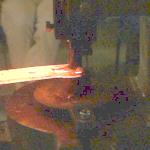
Figure 4
Click for Detail |
The next thing Russell demonstrated was taking a bite out of a piece of 1/4" (7mm) bar with a 1" diameter punch.
The amazing thing about this set of tools was that the hole in the die was 1/8" oversize!
Normally punch and die fits are very close but these were a complete mismatch!
Russell just adjusted the die to one side so there was a snug fit on the side he was notching with.
Oh by the way. . . all these tools are MILD steel!
|
 |
 |
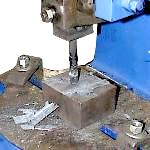
Figure 6
Click for Detail |
This is a little slitting punch.
It it the only tool used during Russell's demo that was tool steel.
This one is S-7. The smaller the tool for this work the higher a hot work rating it needs such as H13 or H27.
A large block is being used to space the work up so the top tooling does not have to be overly long.
A tool holder could also be used to extend short top tools.
|
 |
 |
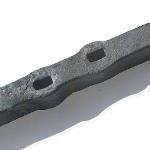
Slit Holes |
Result of the slitting punch. Its not pretty.
Russell was just holding the piece by hand and didn't have any guides setup for his demo.
For jobs of this type you want to setup guides or a "fence" to hold the work in alignment.
Be sure that the guides are not located where the work will swell against them.
Often adjustable guides are made using a couple screws and lock nuts.
But if the work is not going to vary then guides are often permanent pins or plates.
Dowel pins make handy guides if you drill a series of holes in a base plate.
But when you need something NOW, welded pins or bars are quick and dirty
|
 |
 |
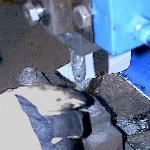
Figure 7
Click for Detail |
This is a piercing punch.
It has a blunt rounded end and is slightly tapered.
Russell lubricated the piercing punch with Never-Sieze.
The die has an over sized hole and a piece called a "stripper" plate.
The striper holds the work down while the punch is extracted.
Never-Seize is sold by the Kaynes for lubricating the guides on their power hammers.
It is also a good hot work lubricant and general anti-sieze compound.
I use it on anything that might rust that I want to be able to take apart later. - guru
|
 |
 |
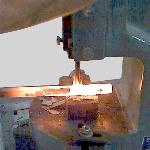
Figure 8
Click for Detail |
Here Russell is punching a 1/2" hole in 3/4" stock.
The punch is driven about 3/4 of the way through the bar with a few gentle turns of the fly wheel.
Then the bar was flipped over and the hole finished, silently and with almost no effort!
When done the bar was still hot enough to punch a second and maybe a third hole!
|
 |
 |
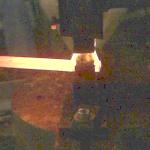
Figure 9
Click for Detail |
Finishing punching the hole.
|
 |
 |
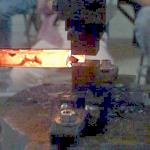
Figure 10
Click for Detail |
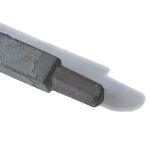
Russell also forged tennons on the end of round bar using a pair of little flat dies.
Just a few bumps of the press and a nearly finished tennon was produced.
|
 |
 |
Tennon |
Roughed Tennon (from demo sample).
If you are a bad judge of sizes the stop nut on the top of the screw can be adjusted to limit your stroke so that perfect size parts come out each time.
The same can be done when fullering to limit depths. For necking operations this produces nice perfectly centered work.
|
 |
 |
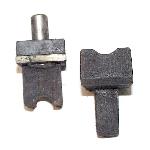
Figure 11
Click for Detail |
This is an example of the simple tooling that can be made to fit these presses.
This is a finishing set for a tennon.
The upper die is made from a 3/4" bolt cut off to produce a shouldered shank and then arc welded to a couple blocks of mild steel scrap.
The lower tool is a standard hardy hole swage tool.
Changing these tools only takes a few seconds.
|
 |
 |
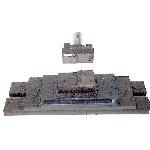
Figure 12
Click for Detail |
This is another simple tool. It is just built up from scrap bar. The long pieces at the base produce slots to bolt it down via the T-Slot bolts in the base of the fly press. Some of the material is just stacked for height.
The top die is made from another 3/4" bolt and some scrap steel. This tool makes offsets cold in 1/8" by 1" flat bar to make glass window clips.
|
 |
-GURU
|
 |
Russell had over a dozen tools similar to the above made from scraps of mild steel.
They were all covered with a heavy coat of oil and scale indicating that they had seen lots of use.
For details of Russell's tooling see:
|
 |
-GURU
|
 |
These are relatively inexpensive machines that do more than a treadle hammer and perhaps less than a power hammer but also do tasks that neither of the other machines do well.
The fly press can double as a punch press for blanking and shaping sheet metal or as a bending press replacing a slow hydraulic press.
In all a very flexible easy to use tool.
Even though I have several punch presses and a hydraulic press I would love to have one of these machines in my shop.
Among their other virtues is that they move slow and are very forgiving.
That makes them easy to learn to use as well as safe to let others use.
Questions, Comments?
|
 |
vicopper
|
 |
Thanks for the info, Jock! Now I have another tool I just plain HAVE to have.
Do you suppose I can get Steve to deliver (to the Virgin Islands. .. )? (grin)
|
 |
vicopper
|
 |
One aspect that I find very appealing is the low sound level, as compared to even a treadle hammer, to say nothing of a Power Hammer.
|
 |
-GURU
|
 |
VI, The small one is not very heavy, only 374 pounds. ;)
|
 |
-GURU
|
 |
Yes, these are absolutely silent. Much quieter than working on an anvil or any other machine.
|
 |
vicopper
|
 |
That is surprisingly light for a piece of equipment that can exert so much force.
|
 |
vicopper
|
 |
I'm looking forward to the rest of the demo. Thanks for the effort, Jock!
|
 |
-GURU
|
 |
The manufacturers do not give the specs so I will be calculating the force based on the flywheel section and the screw.
But I would guess that the little #5 develops 20 tons when pulled quickly.
|
 |
Ntech
|
 |
Great demo and a good tool. I have seen these in action and they work well.
|
 |
vicopper
|
 |
That's an impressive amount of force to be so easily controlled manually.
It seems that it is only recently that this piece of equipment has resurfaced, even though they have been around for a long, long time.
|
 |
-GURU
|
 |
The problem is that they were not popular in America and the forging books only talk about the big machines used to press plate and do heavy forgings.
In Europe they are used in production situations like punch presses are used here.
The trick is that these machines are a little different than the typical fly press.
These have a "fast" four start screw so they move quickly.
The typical fly press has a single or double start screw and produces much more force.
But they move too slowly for forging operations.
These machines are especially designed for long stroke operations like forging.
|
 |
LINKS:
|
 |
|
 |
