| |
 |
 |
 |
 |
-GURU
|
 |

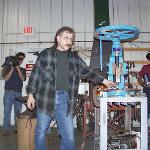
On Wednesday November 12 George Dixon put on a flypress demo at the Kayne and Son shop in Candler, NC.
The once a month meetings generally attract just the Western NC blacksmiths but this month's demo had people also coming from
Alabama, Kentucky, Mississippi and Virginia. Roughly 75 people attended.
|
 |
 |
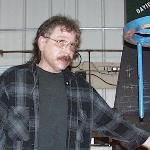
George Dixon
Click for Detail |
For those of you that do not know George he was the last head blacksmith at
Samuel Yellin Metalworkers in Philadelphia, PA.
George was the first publisher of ABANA's Hammer's Blow and ran the 1998 ABANA Conference in Asheville, NC.
He is now located in Swannanoa, NC and is the author/publisher of
Traditional Metalsmith Magazine.
|
 |
 |
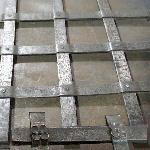
Sample 1 |
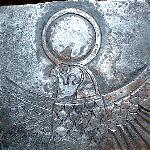
Sample 2 |
Sample 3 |
 |
-GURU
|
 |
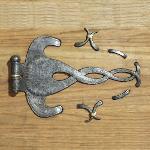
George brought a variety of samples illustrating work done with the help of a press and to show finishes he uses.
To add to the excitement of the evening the local television station Channel 13 was there to interview George and film his demo.
|
 |
 |
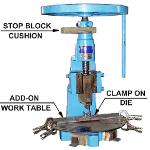
Figure 5
Click for Detail |
The Kaynes have added a large half round work table to the #5 flypress they use in their shop and clamp on their tooling using
Vise-Grip welders clamps. A V bending die is shown.
They have also made a softwood stop block to hold the screw up when not in use.
This can also act as a cushion to reduce wear and tear on the screw and stop nut.
The block has a U shape cut out so that it just slips on and off the screw.
|
 |
 |
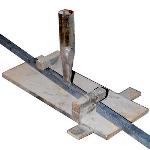
Figure 6
Click for Detail |
The first tool George demonstrated was a hot slitting tool and hold down fixture.
George's fixture has the stripper tabs in opposite directions so the the bar is slightly twisted to one side to keep it snuggly aligned against both stops.
Fixtures of this type must be carefully aligned before starting work.
|
 |
 |
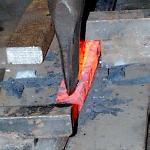
Figure 7
Click for Detail |
Hot slitting in progress.
The chisel has a tapering oval cross section and a curved edge.
The curved edge lets the chisel be walked along in the groove as it cuts deeper and deeper.
The slit is started on both sides, pushed through about 3/4 of the depth and then finished from the opposite side.
George had a little trouble making a clean slit because he was not familiar with this machine.
In his shop he uses a large old flypress without the adjustments on the small presses.
|
 |
 |
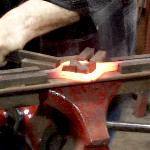
Figure 8
Click for Detail |
After slitting the bar George demonstrated a jig for forming the finished element.
The jig is used on one side of the bar, then the bar flipped over and worked on the opposite side and then repeated until the shape is finished.
The jig is used from one side only in order to make a symmetrical part.
If the jig had guides on both sides and it was not perfect the parts would not be symmetrical.
|
 |
 |
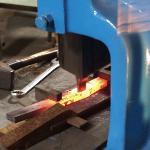
Figure 9
Click for Detail |
George demonstrated hot punching with a flat front oval punch.
The order of operations are the same as for punching manually except they are much easier.
The first side is punched 2/3 to 3/4 of the way through then the part is flipped over and using the color of the cooler spot the punch is aligned.
A short push and the hole is completed.
A high temperature lubricant like Never Seize or Punchieze should be used.
|
 |
 |
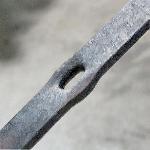
Figure 10
Click for Detail |
The finished hole is smooth and clean with a slightly different character than from hand punching.
This hole could now be drifted round and produce a perfectly smooth round hole with a nice swell in the bar.
|
 |
 |
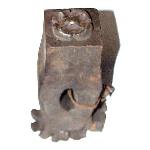
Figure 11
Click for Detail |
Rosette embossing tool from the Yellin shop.
This tool has a hard steel die with a shank pressed into a soft wrought iron body.
If this tool were not a museum piece the spalled mushrooming would have been dressed before use.
|
 |
 |
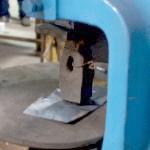
Figure 12
Click for Detail |
Instead of a lower die a rubber pad was used. This saves making a pair of dies.
Rubber pads can be used for all kinds of forming AND punching. They are commonly used in commercial operations.
Annealed sheet steel was embossed on the flypress using the rubber pad and rosette die.
The finished impressions did not have sharp detail but were a good start on parts to be cut out and finished by hand.
|
 |
 |
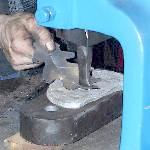
Figure 13
Click for Detail |
Chasing veins in a leaf blank.
This is being done on a soft lead pad.
Each vein is formed in a new place on the lead because it forms a groove in the lead that you don't want as a starting point.
Starting in a new place assures that the veins have a similar shape.
Note that soft tin can be used instead of lead.
Both are recycled by melting and pouring to produce a new clean surface.
|
 |
 |
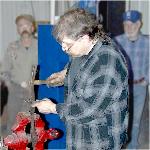
Figure 14
Click for Detail |
Some of the leaf shaping was done on the flypress using a round ended tool (like a ball pien hammer) on a rubber pad.
Final shaping was done on an edging stake held in a vise as shown.
|
 |
 |
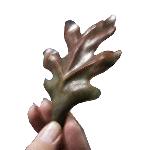
Figure 15
Click for Detail |
The leaf was finished using a dry brush technique using special paints called Gilders Paste.
Please excuse the fuzzy photo.
|
 |
 |
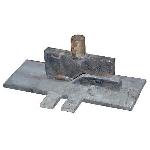
Figure 16
Click for Detail |
Offset Bender
This is a simple two piece offset bender.
It could be used on various types of presses.
Title link goes to Press Tooling article.
|
 |
 |
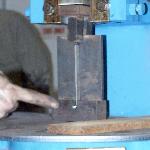
Figure 17
Click for Detail |
Hinge Roll
George's method of using one of these is different than mine.
George tapers the leading edge of the hinge blank where I leave it square and have no trouble.
To see when the rolling is finished George uses a threaded screw for the arbor.
It is easy to see the slot in the head of the screw stop turning when the work bottoms out.
I have found it easy enough to tell by feel using a large arbor press.
On a small fly press the stop nut can be set to prevent over travel if identical parts are being made.
|
 |
|
 |
Links:
|
 |
