Swan Demonstration by Bill
Epps.
http://www.besmithy.com
June 9, 1999
Bill-Epps : |
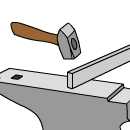
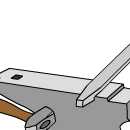
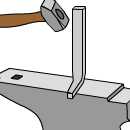
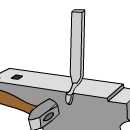
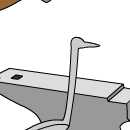
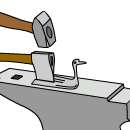
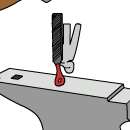
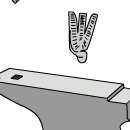
Start with a piece of 1/2 X 1 x 1 1/2. Drive the corner into itself and let it spread. |
|
||||||||||
Bill-Epps : |
|
|
||||||||||
Bill-Epps : |
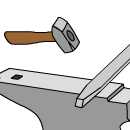
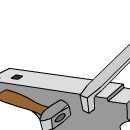
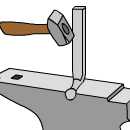
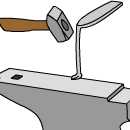
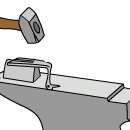
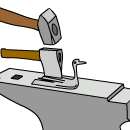
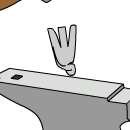
After it is good and thick, let about a 1/2" hang over the anvil. Set down with a 1/2 blow 1/2 on and 1/2 off the anvil. |
|
||||||||||
Bill-Epps : |
|
|
|
|||||||||
Bill-Epps : |
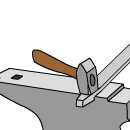
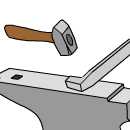
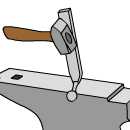
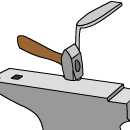
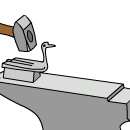
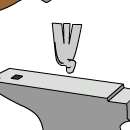
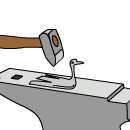
Set it down until it is back to the 1/2" thickness, then come to the side of the anvil and drive the metal back into itself. | |||||||||||
Bill-Epps : |
This is how we will make the neck and head. | |||||||||||
Bill-Epps : |
|
|||||||||||
Bill-Epps : |
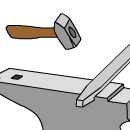
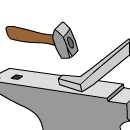
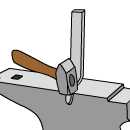
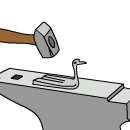
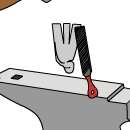
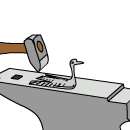
Keep working back and forth at a good heat, keeping the 1/2" thickness at 1/2" | |||||||||||
Bill-Epps : |
|
|
||||||||||
Bill-Epps : |
|
|
|
|||||||||
Bill-Epps : |
Ok, now we neck drawn out, and we are going to start shaping the head. | |||||||||||
Bill-Epps : |
|
|
|
|||||||||
Bill-Epps : |
|
|
||||||||||
Bill-Epps : |
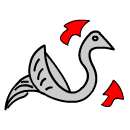
The metal that you have pushed down on the end, flatten out, on the front side of the anvil (nearest you) pinch out the beak.. (Aren't these pictures KiWi did great, I don't have to explain so much, cause you can see it. Wait til the end and you will see it happen) | |||||||||||
Bill-Epps : |
|
|
||||||||||
Bill-Epps : |
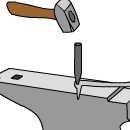
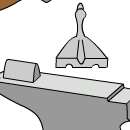
After it starts looking like a swan head, next step we will punch the eyes. | |||||||||||
Bill-Epps : |
|
|
|
|||||||||
Bill-Epps : |
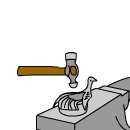
You punch the eyes on both sides. This head should be approximately 3/16" to 1/4" | |||||||||||
Bill-Epps : |
|
|
||||||||||
Bill-Epps : |
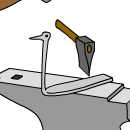
Now come back about 2 1/2 to 3" and cut off. | |||||||||||
Bill-Epps : |
Do this over a cutting plate, not on the face of your anvil. |
|
||||||||||
Bill-Epps : |
|
|
|
|||||||||
Bill-Epps : |
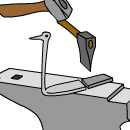
Now use a fuller to fuller the bottom in the center the, top on either side of center. This will make the tail spread much further and much quicker. | |||||||||||
Bill-Epps : |
|
|
|
|
||||||||
Bill-Epps : |
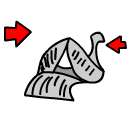
Now that we have it fullered, we will start spreading the tail. . | |||||||||||
Bill-Epps : |
|
|
|
|||||||||
Bill-Epps : |
We are going to thin this down to about 1/8" thick. It should spread real wide. We are out of sink here (. I am getting ahead of myself here.). After you thin this down to about 1/8" thick, you mark from the corners of the tail coming inward to about a 1/2" of center, this is going to make the wings. Do the same on the other side, leaving about 3/4" in the center. | |||||||||||
Bill-Epps : |
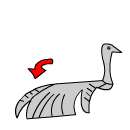
Here we have wings cut out, at this point, I lay the neck forward a little just to get it out of the way . |
|
||||||||||
Bill-Epps : |
Use a file to dress up the edges. That is what is being shown here. |
|
||||||||||
Bill-Epps : |
|
|
||||||||||
Bill-Epps : |
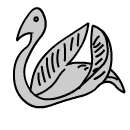
Just cross-pien the wings to give the texture of feathers.. To me, texture gives style. This is where the diagnol cross-pien really comes in handy. | |||||||||||
Bill-Epps : |
|
|
|
|||||||||
Bill-Epps : |
Now we got it textured, we roll the center part down and curl it under slightly. This forms the tail | |||||||||||
Bill-Epps : |
Ok, now use a cupping fuller (block with a round hole in it.), and a ballpien hammer to radius the bottom and fold the wings up. | 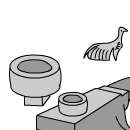 |
||||||||||
Bill-Epps : |
|
|||||||||||
Bill-Epps : |
As you cup the bottom, the wings will fold up |  |
||||||||||
Bill-Epps : |
|
|||||||||||
Bill-Epps : |
Now we even these up with our bottom radius swedge and ballpien hammer. | |||||||||||
Bill-Epps : |
With a good heat, roll the neck back and tuck the head down |
|
||||||||||
Bill-Epps : |
|
|
||||||||||
Bill-Epps : |
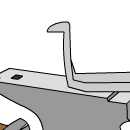
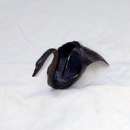
It should look something similar to this when you get through. It works for holding busines cards . Use a larger piece to start with, and make a larger version and it will hold stationery and a pencil. This was shown to me by Heiner Zimmer from Germany about 2 years ago. | |||||||||||
Paw-Paw : |
Bill, did you texture the wings and tail both sides, or just the outside? | |||||||||||
Bill-Epps : |
I do it on both sides, running the wing feathers outward, and the tail feathers along the body. | |||||||||||
Paw-Paw : |
Gentlemen, a round of applause for our demonstrator, and a standing ovation for his lovely bride, Sharon. She interprets Bill's mumblings, puts up with our ribalad comments and never utters a word of complaint. Thank you, Sharon & Bill! A team exstrodinair! | |||||||||||
Jock-D : |
Great job Bill! :) For those of you that don't know, Bill makes his own diagonal pien hammers. Its the only "special" blacksmithing hammer that makes sense to me. It works well for both texturing and drawing. | |||||||||||
iForge is
an Andrew Hooper Production
Copyright © 1999 Bill Epps
HTML Copyright ©
1999 Jock Dempsey, www.anvilfire.com
Webmaster email: webmaster@anvilfire.com