| |
 |
 |
 |
 |
J-J
|
 |
This is the welded ring flower and leaves The Great Bill Epps taught me this Christmas and suggested I demo. It's not as pretty as The Masters, but what is?
|
 |
 |
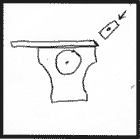
Figure 01 |
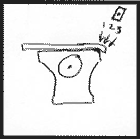
Figure 02 |
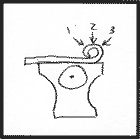
Figure 03 |
 |
J-J
|
 |
Start with a piece of 1/2" sq x 18" long. Upset the tip to a bevel for forming a ring with 1/2" inside dia.,
|
 |
J-J
|
 |
Then working over the far edge of the anvil, start the small diameter ring downward, then turn it back up to close.
|
 |
 |
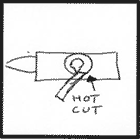
Figure 04 |
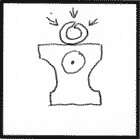
Figure 05 |
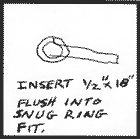
Figure 06 |
 |
J-J
|
 |
Hot cut the ring, maintain a p[arallel to the initial bevel. Slip the ring over the end of your remaining stock, keep it just near the tip, close up the circle and forge weld.
|
 |
 |
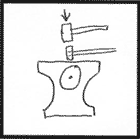
Figure 07 |

Figure 08 |
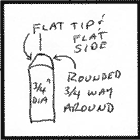
Figure 09 |
 |
J-J
|
 |
After forge welding, reheat, and drop the shank into the pritchel hole. If it won't go, draw it down a bit.
|
 |
J-J
|
 |
Then work the welded portion into a convex shaped round wafer about 2" in diameter, and keep the edges about 1/8" think.
|
 |
J-J
|
 |
i'm back, sorry lost the connection.
|
 |
J-J
|
 |
next step is making the sheep's foot punch.
|
 |
 |
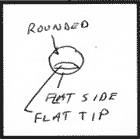
Figure 10 |
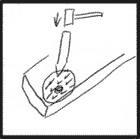
Figure 11 |

Figure 12 |
 |
J-J
|
 |
Easiest way for me to describe it is to draw a round tip of about 30 degrees, grind the tip flat to about 1/4" and flat grind one side. then round up the edges of the tip slightly.
|
 |
J-J
|
 |
As in figure 11, use the punch to place a divot dead center, then 3 around that center divot, then work your way in circles til you are near the edges.
|
 |
J-J
|
 |
Be sure the divots are deep and crisp, and i like the rounded part of the punch facing the outer perimeter of the flower.
|
 |
J-J
|
 |
Now, as in fig 12, draw the stem down. (I believe i said to use sq stock at the beginning of this demo. I intended to say round stock.) Draw down to about 5/16" and taper the tip about 6 inches below the flower.
|
 |
 |
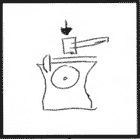
Figure 13 |
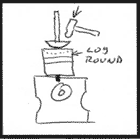
Figure 14 |

Figure 15 |
 |
J-J
|
 |
Now, i reheated the flower, took it over a hollowed wood block with a ball pien and made it wavey.
|
 |
 |
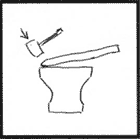
Figure 16 |
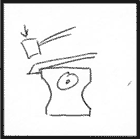
Figure 17 |
Figure 18 |
 |
J-J
|
 |
Now we need to make a couple leaves. Take your remaining stock (or a new piece), square about the first 1", draw a square point, use offset hammer blows over the far edge of the anvil to set down to adjacent sides. Now you have it like fig 18.
|
 |
 |
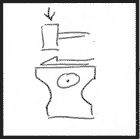
Figure 19 |
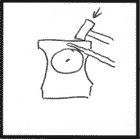
Figure 20 |
 |
 |
J-J
|
 |
Sit the square tip on a bias on the anvil, actually i do this on the near edge, and flatten it out, then move to the horn to broaden the leaf base.
Draw out the stem for about 3 inches prior to flattening out the leaf.
|
 |
 |
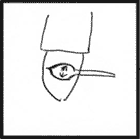
Figure 21 |
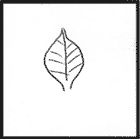
Figure 22 |

Figure 23 |
 |
J-J
|
 |
Now, move on to veining with a chisel. first make the center vien, then several side veins. Using a curved or s shape chesil is a nice touch.
|
 |
 |

Figure 24 |
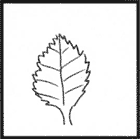
Figure 25 |
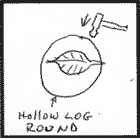
Figure 26 |
 |
J-J
|
 |
Now, I take a welding (chipping) hammer, pretty sharp edged, and make the rose pedal indentations in the sides of the leaf, favoring the front face of the leaf show they will show good upon completion.
|
 |
J-J
|
 |
Then go over the hollow wood block with the ball pien hammer to give some curve shape to the leaf. face goes down on the block.
|
 |
 |
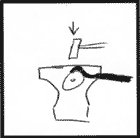
Figure 27 |
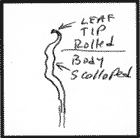
Figure 28 |
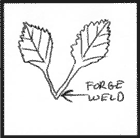
Figure 29 |
 |
J-J
|
 |
To finish the tip, roll it back over the anvil horn a bit so it doesn't stick straight out.
|
 |
J-J
|
 |
Now make another leave or two...actually roses come in sets of 3, 5 and 7 i'm told.
|
 |
 |
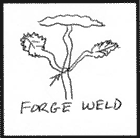
Figure 30 |
Forge weld them together now, or wire wrap them in place over the stem and forge weld them all at once.
|
 |
 |
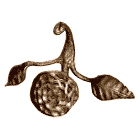
Figure 31 |
Roll the tip of the stem, curve the leaf stems and you have a curtain retainer for fitting beside the window and holding the lower part of the curtain back from obstructing the view.
|
 |
J-J
|
 |
I'd sincerely like to thank Bill Epps for sharing this with me. I never fail to learn new things when around Bill. Any questions?
|
 |
Mills
|
 |
How would you do the leaves if you were to form them from the stem?
|
 |
gypsy
|
 |
Good demo, verry nice!!!
|
 |
Ralph
|
 |
Nice demo J-J and Bill
|
 |
dunchadh
|
 |
To make it look bronzish what did you do just brush it with a brass brush when hot?
|
 |
JOCK D.
|
 |
Great demo JJ considering the conditions at home. Thank you.
|
 |
Steve C
|
 |
JJ you say you make the divots in the edges of the leaves, do you stand it on the edges or just hammer the edges flat?
|
 |
Ntech
|
 |
JJ, what is the size of the impression the punch makes ?
|
 |
Ten
|
 |
Nice Job JJ. Some pics ain't up, but nice demo.
|
 |
Gilly
|
 |
Thanks J-J very nice
|
 |
J-J
|
 |
Sorry, still getting use to the classroom for the first time!
|
 |
J-J
|
 |
1. Sit the bottom edge of the leaf on the anvil face and tap it with the welders hammer. it won't bend the lower edge.
|
 |
rocker
|
 |
Nice demo JJ! When you forged the leaves to the stem, did you use Borax and bring to white heat? Is this called jump welding?
|
 |
Steve
|
 |
Is this a stand alone piece or do you normaly use it on something?
|
 |
J-J
|
 |
if you want a brass patina, bring the whole piece to about 400 degrees and brass brush. you migbht just want to try the blossom and a bit on the leave instead of the whole thing.
|
 |
J-J
|
 |
If you want a brass patina, bring the whole piece to about 400 degrees and brass brush. you migbht just want to try the blossom and a bit on the leave instead of the whole thing.
|
 |
Bill
|
 |
the flower in the pic looked like it had raised vaines?????
|
 |
Ntech
|
 |
What size is the impresstion the punch makes ?
|
 |
J-J
|
 |
Forming the leaves directly off the stem just required taking a chisel and splitting off 2 or 3 vertical segments and turning them out 90 degreess to work.
|
 |
J-J
|
 |
the divot from the punch is about 3/8" (9.5mm) side and over 1/8" (3mm) wide, about 1/8" deep.
|
 |
J-J
|
 |
this demo leaf was made using a leaf veining tool. since not everyone will have one i gave the basic how to way of making a leaf.
|
 |
J-J
|
 |
I forge welded using ezweld, or antiborax as it's name is on the can, and welded at an orange heat.
|
 |
J-J
|
 |
I just learned this piece at Christmas of this past month, so haven't used it on anything except the curtain retainer, but could be used in the field of a major piece inside a grate border, or as a stand alone decoration.
|

