| |
 |
|
|
|
-GURU
ANVILFIRE
|
|
Tonights demo will be a continuation of last week's.
Last week we discussed punching holes and slitting. Tonight we are going to look at how far to slit and what we can do with it.
|
|
|
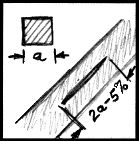
Figure 15 |
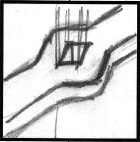
Figure 13 |
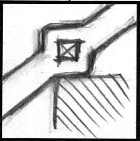
Figure 14 |
|
-GURU
ANVILFIRE
|
|
A little logic will tell you how long to slit for a punched hole. For a square it is the length of two sides minus about 5% to alow for drifting a snug fit.
|
|
|
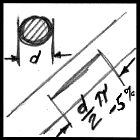
Figure 16 |
For round holes it is a little tricker.
|
|
|
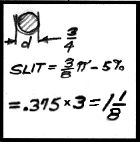
Figure 17 |
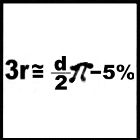
Figure 18 |
|
|
-GURU
ANVILFIRE
|
|
The minus 5% lets you round PI to an even 3 (whoops) and the adjusted length of the slit is 3 time the radius.
|
|
|
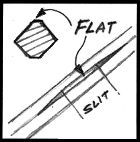
Figure 19 |
For punching square bar on edge you need to start by forging a narrow flat to set the chisle on. After making the flats mark the length of the slit on the flat.
|
|
|
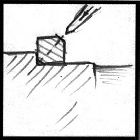
Figure 20 |
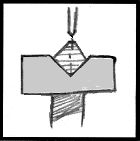
Figure 21 |
|
|
-GURU
ANVILFIRE
|
|
There are several ways to support the work to split it on edge. Supported on the anvil shelf, in a set tool (shown) or on a swage block.
|
|
|
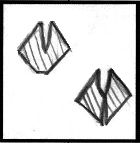
Figure 22 |
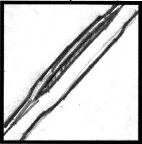
Figure 23 |
|
|
-GURU
ANVILFIRE
|
|
Split the work about to center and then turn it over and finish from the other side. When done close up the split and square the stock back up.
|
|
|
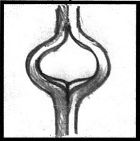
Figure 24 |
Now to make something. Above we have split the bar several inches (about 5-6 in 5/8 bar).
We can open this up to make this pleasing shape made of triangular bar. . .
|
|
|
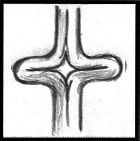
Figure 25 |
The open oval shape can be used on its own or we can continue to mash it down like this.
|
|
|
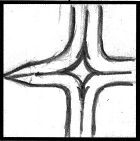
Figure 26 |
Then it can be flatten and the ends pointed as shown. For the mass of these corners to work out you need to bring the side points up to a welding heat and reweld just a little back into a square when you point it.
|
|
|
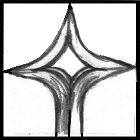
Figure 27 |
This one has had the bar cut off and pointed on the end too. This gives us two different shapes. A four pointed star and a mid bar element.
|
|
|
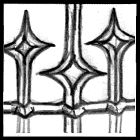
Figure 28 |
Using these two elements and more square bar split on the corner you can produce this VERY distintive piece. All using the same techniques.
|
|
-GURU
ANVILFIRE
|
|
Very stout. Makes an ugly looking wepon too. . .
|
|
RALPH
|
|
Jock, didn't some of Francis' work on display at Flag have that detail?
|
|
-GURU
ANVILFIRE
|
|
It may have. The first time I saw this was at the Ripley, WV conference in 1984. Josh Greenwood made one at an open forge just showing off!
|
|