| |
 |
|
|
|
-GURU
|
|
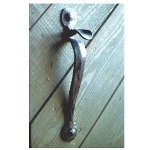
This is a latch I forged for our front door (which I also made). This latch is heavier and more robust than the typical type that is a reproduction of light Colonial types.
The original above is forged from 304 stainless steel and had a lite coat of wax to darken the scale. No other finish has been applied in about 20 years.
The bolts are standard 3/8" bolts that were reheaded to look like large rivets or rose head nails. The door is 2-3/8" thick.
|
|
|
Figure 1 |
The pull is made from a piece of bar about a foot long for a large latch and 10" for an average sized latch.
|
|
|
Figure 2 |
The thumb latch is made from a smaller piece of the same stock.
|
|
|
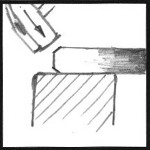
Figure 3 |
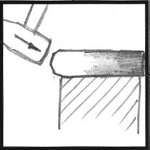
Figure 4 |
|
|
-GURU
|
|
Step one is to chamfer and round the ends of the bar. This is done roughly as there will be lots more dressing later.
|
|
|
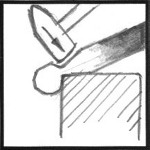
Figure 5 |
In the same heat neck down a section equal to the width of the stock on a rounded corner of the anvil. Flipping the work over helps form the corner equaly.
|
|
|
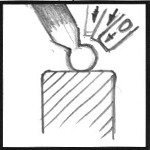
Figure 6 |
After forming the shoulder the inner corners are rounded off.
|
|
|
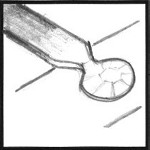
Figure 7 |
Then the end is flatened. This can be a little thinner or a whole lot. I like to taper the end from the center. A lot of correcting of the shape can be controlled at this point.
|
|
|
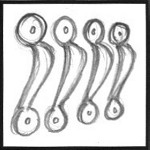
Figure 8 |
Before I made this latch I had made a dozen or so plain pulls. Practice, practice. . . It make a big difference.
|
|
|

Figure 9 |
To form the part where the thumb latch fits through square up a section about 3/4" long. I did this on the horn or the anvil, it could be done better with a spring swage with squared ends.
|
|
|
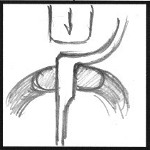
Figure 10 |
The shoulder below this thick section was gently rounded and the "pull" part of the latch flattened. Then the piece was clamped in the vize to make the 90° bend.
|
|
|
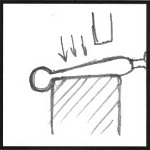
Figure 11 |
The bottom end was then formed like the top and the lower part of the pull forged to a long taper.
|
|
|
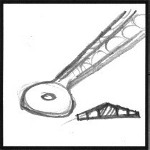
Figure 12 |
I like the cross section to have a raised center ridge.
|
|
|
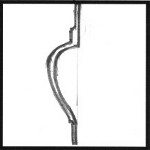
Figure 13 |
Then the overall shape is formed.
|
|
|
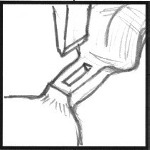
Figure 14 |
Now the thumblatch slot is punched or slit. I did this with a chisle made especialy for the job. It was shaped like a cold chisle on the end and had a slightly tapering shank about the size of the slot.
|
|
|
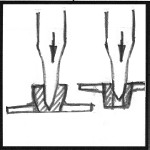
Figure 15 |
The slot was cut through from the top, and then the back. Slitting does not remove any material and you need it in this part.
|
|
|
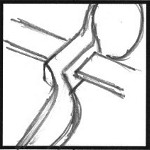
Figure 16 |
After slitting the hole I used a piece of rectangular stock to dress and square up the hole.
|
|
|
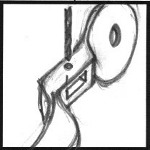
Figure 17 |
A 3/32" hole was drilled for the thumb latch pivot. You may want to wait and do this with the thumb latch in place if you don't have a good drill press vise to clamp the part in.
|
|
|
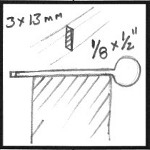
Figure 18 |
The round end of the thumb latch is forged like the others above. Then the remaining material is drawing out to 1/8" x 1/2".
|
|
|
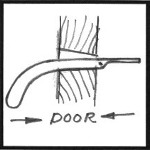
Figure 19 |
The length of the thumb latch is determined by the thickness of the door. The inside end curves down to make a latch lift and pull on the inside of the door. If you curve this too tight you may not be able to get it into the door. You may want to play with this before riveting the latch together.
|
|
|
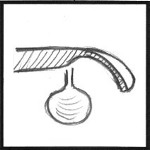
Figure 20 |
The thumb part of the latch curves down and is cupped up on the edges. Cup it first then curve over the horn.
|
|
-GURU
|
|
Cut a small piece of round bar for the pivot pin and test the fits. Rivet the ends gently to hold it all together.
|
|
|

Figure 21 |
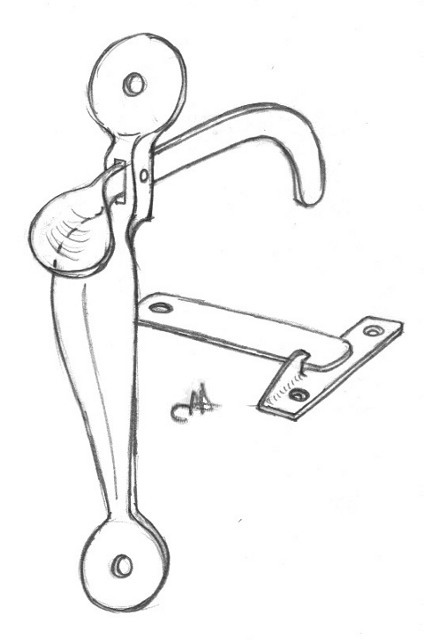
The other parts of the latch include the latch bar, the holder and the strike plate as shown. The bent end of the thumb latch lifts the latch bar out of the strike plate.
Strike plates vary depending on the door and frame design.
|
|
|
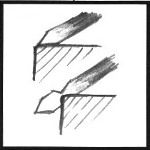
Figure 22 |
Other finial ends can be made of the same stock. Here we point the end first.
|
|
|
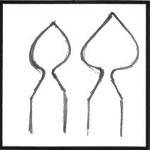
Figure 23 |
Then the shape is rounded and then flatten to the desired thickness and width.
|
|
|
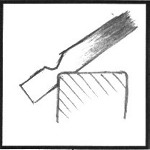
Figure 24 |
For fancy ends the necking is done first.
|
|
|
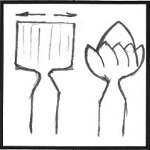
Figure 25 |
Then the end is fullered width wise and flattened. The desired shape is then sawed or chisled out. Designs are often chisled into the surface.
|
|
|
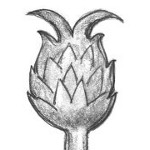
Figure 25b |
This is a pine apple finial used on hinges and latches. After forming the whole is dished out to increase the apparent mass.
|
|
|

Figure 25c |
This is a mill stone finial design of mine that I want to use on my shop door hinges if I ever get around to making them. There are dozens of "standard" finials and you can create an infinite variety of your own.
|
|
|

Figure 26 |
The assembled latch with bar and strike behind. Click for detail.
|
|
-GURU
|
|
Questions? Comments?
|
|
PPW
|
|
Jock, looks good as usual. Read the log, I think we've got a couple of volunteers at least thinking about doing a demo or two.
|
|
Bryan
|
|
Very nice, Jock. and the finial designs add a lot of variety! :)
|
|
PF
|
|
A literal classic, thanks Jock
|
|
PF
|
|
A literal classic, thanks Jock
|
|
Brogan
|
|
Cool Demo!! Thanks!
|
|
JimG
|
|
What do you use as a pivot pin for the thumblatch?
|
|
-GURU
|
|
Jim, I used a piece of 3/32" stainless welding rod.
|
|
Bryan
|
|
The plain door pull looks very 'do-able" on its own.
|
|