| |
 |
 |
 |
 |
-GURU
|
 |
This is an award winning candle stick design by Josh Greenwood. It is beautiful in its utter simplicity. The three legs give it great stability and a large foot print without being heavy. This design is also easy to modify to make it your own. Feet can be created or a drip pan installed. Round textured bar could be used with a floral motif. The legs could be set into a base.
|
 |
 |

Figure 1 |
These are approximate dimensions. The bar length could be up to 5 feet long. The stock size helps to have enough material for the candle cup.
|
 |
 |

Figure 2 |
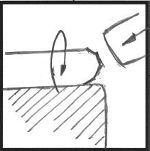
Figure 3 |
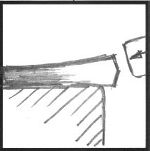
Figure 4 |
 |
-GURU
|
 |
Start by upsetting the end of the bar for the candle cup. Dress and round the end before upsetting. The crowned end makes the upset go better by focusing the blow in the center of the bar. It also helps reduce excessive flare at the end.
|
 |
 |
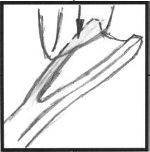
Figure 5 |
Start the speading of the end with a narrow fuller. This helps create a hollow end so the bottom of the cup blends into the shaft nicely.
|
 |
 |
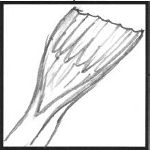
Figure 6 |
Then using the same fuller or the pien of a straight pien hammer spread the end of the bar.
|
 |
 |
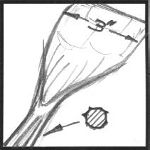
Figure 7 |
After spreading by fullering smooth the end and taper the shank giving it an octagon section blending to square corners. The width of the end needs to be 2.5" to 3" (65 - 75mm) to fit around a standard 3/4" (19mm) candle.
|
 |
 |
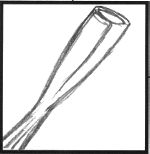
Figure 8 |
Roll the cup with some overlap. You may want to form it around a drift or the end of a spud wrench. Be sure the bottom closes but don't overwork it.
|
 |
 |
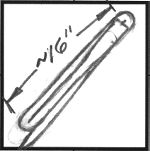
Figure 9 |
Point the opposite end with a long taper. Leave the point blunt (so it doesn't hurt furniture).
Then fold the bar in thirds with the cup about flush on one end and the point extending from the taper beyound the other.
|
 |
 |
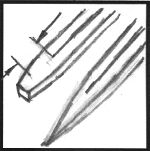
Figure 10 |
Forge weld about 2" of the overlap then draw out into a point. Try not the reduce the size of the bar stock until after the weld for the best blending.
|
 |
 |
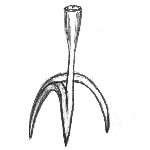
Figure 11 |
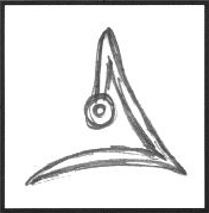
Figure 12 |
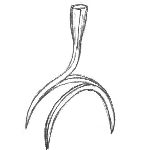
Figure 13 |
 |
-GURU
|
 |
Now, make your bends and center the cup between the equaly spaced legs. Dress the points with a file and then wax and you are done.
As mentioned in the introduction there are many variations you could apply to this.
|
 |
-GURU
|
 |
Quenstions? Comments?
|
 |
Gator
|
 |
That's really nice Jock, I like the way it flows...how long to make?
|
 |
jj2k
|
 |
Nice demo Jock. How long does one take to make?
|
 |
Ntech
|
 |
Nice project, I like the legs. Clever idea.
|
 |
PF
|
 |
Darn Guru; That's out and out elegant!
|
 |
-GURU
|
 |
A couple hours tops. Less if you use a power hammer to make the cup.
|
 |
Milt
|
 |
Guru - Neat item. When you form the candle cup, do you just fold it over or do you need to try to forge weld that too?
|
 |
oofftaa
|
 |
what would you charge
|
 |
Bryan
|
 |
Guru, do you weld the cup or just fold it closed?
|
 |
-GURU
|
 |
The cup would not need to be welded as it is plenty strong enough. The overlap looks nice as is.
Price? Whatever the market will bear. I'd say $100 unless making them in quantity.
|
 |
Gator
|
 |
After the initial folding, do you open it up to weld one corner at a time...move cup out of way?
|
 |
-GURU
|
 |
Weld the corners one after the other. Yes, you need to bend the cup bar to one side to make the weld.
|
 |

