| |
 |
|
|
|
-GURU
|
|
I must profusely appologize for the delay in this demo.
I have had the files on hand for nearly two months and have not had time to set it up.
Tonight's Demo is by Genia Burch a protege' of Bill Epps.
Genia is an accomplished smith and equally at ease with the hand hammer or power hammer.
This is her first iForge demonstration. Our 156th.
|
|
|
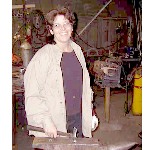
Figure 1
Click for Detail |
Hi guys...hope I'm not here by myself.
This figure I am at the anvil and I have gotten all my tools together.
I am using a gas forge, cross peen hammer, power hammer, rounding hammer, top/bottom, & half round fullers, a mounted vice, sander/polisher and 5/8" square bar.
|
|
|
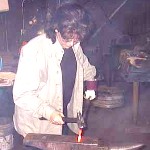
Figure 2
Click for Detail |
I am using a 5/8" sq bar approx 18" long you can use 1/2, 3/4,or 3/8". I prefer the 5/8".
Start by taking a good heat to one end and hammering 2 sides to a short point @ 90 degree intervals
|
|
|
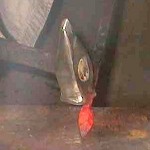
Figure 3
Click for Detail |
Laying the bar on the front side of anvil face put a notch approximately
3 to 4" back from point and working 2 sides 90 degrees apart (hit, turn, hit, turn) same sides as point.
|
|
|
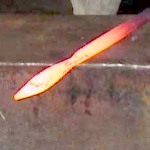
Figure 4
Click for Detail |
It will look something like this and now i have stared tappering the stem.
|
|
|
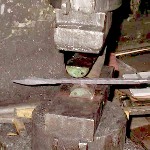
Figure 5
Click for Detail |
I got tired on the anvil and switched to the power hammer and finished tappering the stem.
|
|
|
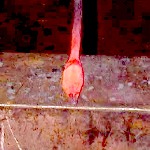
Figure 6
Click for Detail |
Getting ready to flatten petal out.
|
|
|
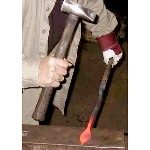
Figure 7
Click for Detail |
With the cross side of the hammer in the center of petal put a fuller groove going the length of petal.
|
|
|

Figure 8
Click for Detail |
Flip over and put 2 fuller grooves on the out sides of petal. It will look like figure 9 and 10.
I do this to help spread the petal more evenly
|
|
|
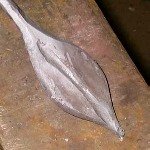
Figure 9
Click for Detail |
Center fuller
|
|
|
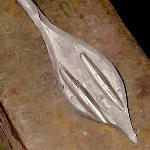
Figure 10
Click for Detail |
Side fullers
|
|
|
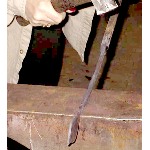
Figure 11
Click for Detail |
I used the power hammer to help put fullers in and now I am straightening up my stem and petal.
|
|
|
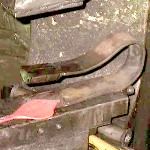
Figure 12
Click for Detail |
With the top and bottom 1/2 round fuller I placed my petal in the middle (only half of my petal is in fuller) and while hammering I am pulling away from hammer.
Then I flip it over and repeat this step by pulling it away from hammer.
It will help keep it uniform.
|
|
|
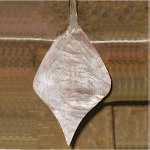
Figure 13
Click for Detail |
This is how it looks when I have done both sides to my liking.
|
|
|
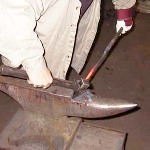
Figure 14
Click for Detail |
I have placed the petal on the step of the anvil and I am tapping it to start a roll.
|
|
|
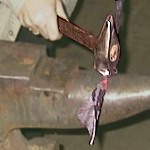
Figure 15
Click for Detail |
Still tapping and rounding out petal to where it over laps slightly to make a small cup.
|
|
|
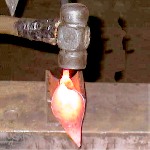
Figure 16
Click for Detail |
I changed to a rounding hammer and using a 1/2 bottom rounding fuller in my hardy. . .
I tap on the petal to get it uniform and rounder.
|
|
|

Figure 17
Click for Detail |
Using the horn of the anvil I am curling the tip of my lilly.
|
|
|
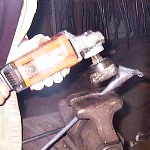
Figure 18
Click for Detail |
Here I am using a polisher( this is not an angle grinder it is a low RPM sander polisher)
I like my hands and eyes too much to attempt to use a grinder with a wire brush on it. LOL
|
|
|

Figure 19
Click for Detail |
I have heated the opposite end of my bar and am putting a point on it to roll in to a cute little curl as seen in figure 20.
|
|
|
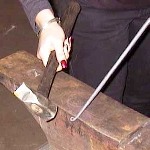
Figure 20
Click for Detail |
Finishing my curlyque.
|
|
|
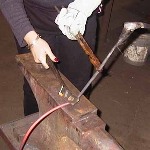
Figure 21
Click for Detail |
Little past center of my bar in the middle I heat and bend 90 degrees and this is where I am going to start my curl for the base of the candle holder.
|
|
|
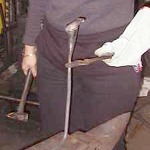
Figure 22
Click for Detail |
Here it is bent at 90 degrees
|
|
|
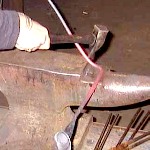
Figure 23
Click for Detail |
Heating the center of my bar I am using the cross ping hammer to start rounding the curl around the horn of the anvil.
|
|
|
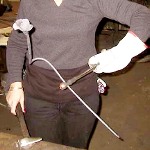
Figure 24
Click for Detail |
This is the start
|
|
|
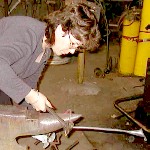
Figure 25
Click for Detail |
Working around the horn of the anvil i am making my base spiral
|
|
|
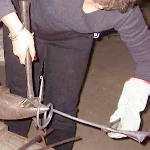
Figure 26
Click for Detail |
Finishing the base on the horn.
|
|
|

Figure 27
Click for Detail |
All done!
|
|
|
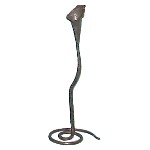
Figure 28
Click for Detail |
Finish with clear coat after polishing.
|
|
mackaymountain
|
|
Have you ever tried forge welding on a stem to save from drawing out?
|
|
terry-f
|
|
Grate job Gina. I always enjoy wacthing you work
|
|
GURU
|
|
Very nice Genia.
I'll fix the broken images.
|
|
mackaymountain
|
|
Nice job!
|
|
dimag
|
|
Very cool,Genia,see,ya did great!Lookin' good too.:)
|
|
irnsrgn
|
|
nice job Genia, great work
|
|
Paw Paw
|
|
Genia, very well done!
|
|
Genia
|
|
Thank you all for being patient with me.
|
|
Jim C.
|
|
Genia: Nice work; thanks.
|
|
Sharon
|
|
Darlin girl you did a great job in your outline as well as the work. Mom is sooo proud of you
|
|
Sharon
|
|
Genia, I am so proud of the presentation as well as the piece. You and Dad do good work together:)
|
|
Woody
|
|
Great Demo Genia
|
|
Milt
|
|
Thanks for the demo -- neat project.
|
|