| |
 |
 |
 |
 |
BILL
EPPS
|
 |
Everybody ready? Here we go!
|
 |
BILL
EPPS
|
 |
Last Week, Ralph Douglas did a simple "Candle Holder" and I thought it would be a good idea to do several of these, cause everybody makes a candle holder of some sort or another. Jock seemed to think it was a good idea as well, so here we go.
|
 |
 |
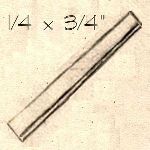
Figure 0 |
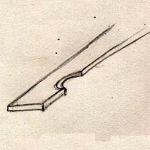
Figure 1 |
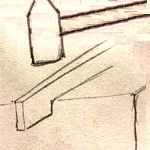
Figure 2 |
 |
BILL
EPPS
|
 |
On this particular candle holder, I use 1/4 X 3/4" by aproximately 12" long flat bar. (Any size will work, I just like this size best.) I come back approx. 1" from the end, and make a little divit using a piece of 3/8" round rod. I take a good heat and draw it down at the back of the divit to about 1/4" square. Then I bend the flag (piece left on end) 90 deg. away from the set down.
|
 |
 |

Figure 3 |

Figure 4 |

Figure 6 |
 |
BILL
EPPS
|
 |
I use the cross-pien to draw this flag out very thin, and it needs to stretch out to about 2 1/2" to 2 3/4" long to accommodate a 3/4" diameter candle. Keep the corner crisp and square.
|
 |
 |
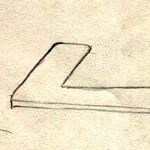
Figure 5 |
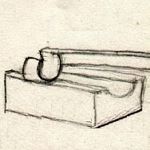
Figure 7 |
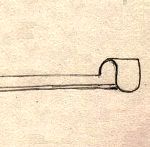
Figure 8 |
 |
BILL
EPPS
|
 |
After I get it drawn out thin and long, keeping the same width on the top flag, the I go to a bottom swedge using my cross-pien and start turning it into a circle. "You want the circle to end up w/about a 3/4 ID. In figure 8 we are just closing up the circle.
|
 |
 |

Figure 9 |
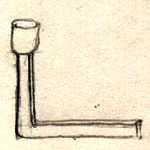
Figure 10 |

Figure 11 |
 |
BILL
EPPS
|
 |
After you close it up to about a 3/4" ID, you will probably have about a 1/4 of the diameter left open.
Now come down to about the center of the bar, make a crisp 90 deg. corner.
This particular piece was 12" long when I started (about).
So about 6 or so inches down is where I make the crisp corner.
Then from the corner of this bend out to the end of the bar, I begin to taper it down to where the end of the tail ends up about 1/4" square.
|
 |
 |
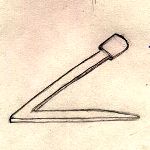
Figure 12 |
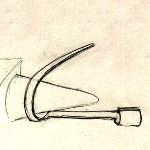
Figure 13 |
 |
 |
BILL
EPPS
|
 |
This drawing is not exactly accurate, because the taper should begin at the bend and run all the way out to the end.
After I have it tapered, I come to the horn and start scrolling the bottom. This will form the base.
|
 |
 |

Figure 14 |
|
 |
BILL
EPPS
|
 |
Level up your base to where it will stand up straight, and it looks something like this.
There are all kinds of versions, you can put twists in the shank or whatever.
This is my 'simple' candle holder, and I thought it would be fun to share with you.
|
 |
brandi54
|
 |
how do I make the bend "crisp"
|
 |
BILL
EPPS
|
 |
Any questions?
|
 |
BILL
EPPS
|
 |
That is a good one :) I will try to explain it.
You bend it over the edge of the anvil, the you have to bump up the corner just a little, and flatten it back to the original dimension or thickness to get a square corner.
|
 |
P-F
|
 |
That's elegant Bill..one piece!
|
 |
Milt
|
 |
Does the candle holder part have some spring to it so several sizes of candles can be used?
|
 |
Ntech
|
 |
Very nice, simple and has class.
Thanks Bill!
|
 |
P-F
|
 |
It is a doggy little problem Brandi.
Looking at old work, they make it look easy and natural
|
 |
BILL
EPPS
|
 |
If there are no further questions, then we will get back to it. (the pub that is)
|
 |
|
 |
Thank you Mr. Epps, love to learn
|
 |
BILL
EPPS
|
 |
Milt, yes it does have a bit of spring. To achieve this (Do Not Quench It) after you have formed it.
I didn't think to say this. I have made these so long, sometimes I forget.
|
 |
Steve C
|
 |
Thanks Bill always enjoy your demos.
|
 |
Milt
|
 |
Thanks for the Demo, Bill
|
 |

