Black Beauty Burner works great : I received my new burner and it works great. I had a Ward reducing tee venturi burner which worked well but the Black Beauty is better. It seems to heat up faster and the price is well worth it. Thanks Guru.
Fire Damaged Hammer : Hmmmmmmm. . . . IF the hammer has babbit bearings they may have softened and grabbed the shaft. But I THINK Fairbanks used bronze bearings. I'll call a friend later today and ask. He has rebuilt a number of Fairbanks hammers.
IF the shaft has rusted inside the bearings then it has grown (like bolts do) and will be seized VERY tight (as noted). If that is the case keep oiling and try judicious hammering with a bronze or dead blow hammer axially in any direction that there appears to be some play that it can be moved. A tiny amount of movement will shear the rust and allow some oil in. IF you can get it to move ANY amount (even only .005") then keep moving it back and forth and keep oiling. IF you start getting rust stained oil running out then you are doing the right thing. I could take a LOT of this to get it free enough to turn.
Try using a heavy pry bar and the sling wrapping method you used before. The added leverage will apply much more torque before lifting the hammer. To get MORE then apply the method pulling down against the frame with a chain type come-along (Tuggit). I've had nylon slings hold tight enough on a large diameter to bend a 1.25" square pry bar. Be careful how you anchor on the frame. You don't want to break a chunk out of it.
I had a Little Giant that sat out in the weather a few years that locke up. . . It took months of applying WD-40 before I got the shaft freed. After all that I realized that I could have just loosened the bearing caps on the LG. . . Yeah, I know the Fairbanks doesn't have bearing caps. . .
Good luck. Be patient.
Ahhh... I think you are more likely to overheat your welder than to put enough heat into the shaft fast enough to do any good. You might have more luck heating the frame to get it and the bearing to grow. The problem in both cases it creating a temperature differential. In most cases when heating big things both pieces heat the same from conduction and you get no benefit (advise from someone who has taken apart tapered fits on things from 5 to 10,000 HP.)
THANKS for the feedback on the burner.
Pulling a 10,000 HP w impeller :
This pump impeller had five 1.5" puller holes about 5" deep. I designed a special puller with hollow pulling studs with heaters in each stud. The studs were made from special 5/8" ID 1.5" DOM tubing. Careful graphical mapping showed that we would get a ring of heat in the impeller before heating the shaft.
The fit was a long taper about 8" in diameter with two big keyways over 1" square.
The puller had a 50 ton hydraulic jack at the top. The jack was tensioned to its max, the power turned on, a specified time was waited, THEN a sledge hammer was taken to the puller. . . This always destroyed the pressure gauge but one or two blows and the impeller usually popped off with a resounding "pong" and death knell ring.
When taking apart much smaller Triumph automobile axle hubs a shop press was used and pumped up to near its max. Then heat applied. It was very exciting when the fit broke free as cheap auto shop press frames are very springy and all that energy is released with quite a bit of motion.. . . usually parts of one sort or the other flew across the shop. That is why I sold off the cheapo press I had and never looked back. . . If your press frame can't take maximum pressure (about 1.5 times the cylinder rating) without deflecting more than a few thousandths of an inch then it is a dangerous machine.
Fairbanks Hammer : Thanks Guru, I realized if I lay the hammer on its side, the shaft oiler holes will be at the top and offer a better chance of the oil to migrate properly. I will get an air hammer and tap on the shaft end that is exposed. I am hoping if I keep tapping, oiling, and applying rotational torque it will pop. I am wondering if debris from the fire and metal bits fell into the oil holes and those particles could be the source of obstruction.
Would it be ill advised to drill into, and blow out, the bottom of the oiler holes. I understand that I might also create a burr which could make things worse....
Clearing oil-grease holes :
Sounds like a good idea. I would not worry about hurting the shaft. You can polish any divots you create after you remove it. Use a flat ended drill.
Using a pneumatic hammer is a good idea. I've always been a proponent of impact tools to break things loose. Many many small blows. . . However, in this case you may need more energy due to the mass of the crank wheel.
Clearing oil-grease holes : One of the Little Giants I owned many years ago had been greased via the ram lube holes then painted over the solid grease several times. . . Luckily the hammer had been painted more than used during that period of its life. Paint was cleared with a small hand held drill bit then MIG welding wire and flushing with WD-40.
My old flat belt drive South Bend Lathe had common oil holes in the main bearing caps. I've put flip lid oil cups on them to keep out dirt and improve lubrication. I've done the same on my hand crank drill press.
The first old drill press I had was also painted many times over dirt, sand and chips swept into the T-slots in the base. They were completely filled and sis not appear to exist. It took several hours with a chisel and WD-40 to clear the hard packed paint and chips. This old machine had what I called the "Craters of the Moon" table for all the holes and overlapping holes drilled in the table. . . Even with all that abuse and a number of missing parts it was a great old machine.
Both the lathe and the drill press mentioned above have back gears. These have often missed oil holes that are often missed resulting in excessive wear. On the pulley side there is a oil hole that must be oiled on one of the belt surfaces. On the gear side the oil hole is often filled with a screw that must be removed to oil the bearings. When working on old machinery it is good to know these things and give them your attention.
Clearing oil holes : I had an old mill that some chuckle head had installed zerks in all the oil holes. At least it was clean but pretty dry grease. I found that using cheap WD-40 generic with a straw, one could "excavate" the old dried grease by spraying your way in. VERY messy but worked well. Used much of a 6 can case but at about a $ a can then was pretty reasonable. Note that WD-40 and most of the cheap generics are mostly Stoddard solvent and so work much better as a solvent then a lubricant.
Hello, I recently inherited my great grandfather's anvil. It is in pretty poor condition, which is very upsetting, but I would like to find out more about it for our family to have for keepsakes. I do most of my hammering on a railroad anvil I made a while back and don't intend to use this anvil for working on seeing it is old and doesn't appear to be in shape to be used. I do have pictures I could share if someone would be kind enough to email me I will send them. The marings are barely able to be read but hopefully someone with more knowledge could have some insight as to maker or timeliness of when it was made. My grandfather said he has had it for at least 40 years and his father for at least 40 years as well but doesn't know past that. Thank's to whoever may be able to help, it would be greatly appreciated. My email is cjohnson@challengerdoor.com or cojobro77@gmail.com
I need help identifying an old anvil I inherited from my geandfather. Any insight would be greatly appreciated
I have pictures I could send as well. Thanks to whoever may be able to help
Propane pressure and freezing tanks : I'm running into my seasonal problem where my propane tanks freeze a bit during the winter months. I start out at 30 PSI, but they eventually run down to 10 PSI after a couple hours. That's about when I get burn-back and whiffing in the burner.
I tried ganging two 20-lb tanks together, but that only gets me to that ~2-hr mark, from about 1-1.5 hrs using one tank. I can't get water out to the shop to try the water bucket idea. But I do have one idea to run past the group.
What if I used a larger orifice and ran my tanks at 10 PSI, or maybe even lower? The draw would still be the same, since I need the same heat, but would I get more time out of the setup? Or would the tanks just start out at 10PSI, then go down to something unusable in the same amount of time? I'm not sure how gas works when cooling off. Either the available pressure drops (in which case I suspect this would work) or the available flow rate drops. If it's the flow rate, then I would still be out of luck.
Thanks.
The pressure in a tank of propane drops as the temperature drops. If you had a burner that would run at a lower pressure, you would theoretically be able to operate longer.
However, the tank pressure wouldn't stop at 10 PSI -- if you kept drawing propane at the same rate it would continue to drop. And it probably wouldn't take long to get to 5 or 2 PSI, or whatever minimum your burner needed to operate.
Finally, simply putting a large orifice in a venturi burner isn't likely to drop the minimum operating pressure by much. What it *will* do is make the burner run richer, meaning, among other things, that you need to draw more propane to get the same heat. That will only make the problem worse, along with wasting propane and probably poisoning you with carbon monoxide.
So you have very little to gain with a bigger orifice, and a lot to lose. (If your burner used a blower, running with a bigger orifice and a lower pressure would work fine. But you still wouldn't buy much extra time from your bottles.)
Freeze-ups and Blower Burners :
My big blown forge had severe freeze up problems.
The only way to get around freeze up is with a larger bottle of gas with MORE mass. The mass is thermal energy storage for evaporating the liquid fuel. Note however that even large bottles will freeze if you try to draw too much gas AND when the total volume of liquid is low in the bottle.
The advantage to the water tank heat sink is that water releases a tremendous amount of energy as it converts from liquid to solid.
Corey; telling us what country the anvil is in can help a lot too. If I was asking about a used car saying it was in Russia increases the chance it's a Lada rather than a Ford.
Over 100 countries participate here it's the World Wide Web after all.
Tank Freeze-up : "Tanks" for the info on freeze-up. Real good to know before I spent time experimenting. A water tank would be nice, since it's free, but my shop is unheated, so moving that much water back and forth every time isn't an option I want to deal with.
I'm also going to explore heating the tank during forging sessions. Heat tape isn't all that expensive, so any thoughts about wrapping a tank with that? They've got thermostats that shut off at something like 50F, so I'm not worried about overheating.
First, though, I'm going to try aiming a small electric space heater at the tank. I don't know if that has enough heat, but that experiment is free, since I've already got the heater. I'm not worried overheating there, either, as I can easily monitor as I go along. I really don't think it puts out enough to overheat anyway.
Marc,
You don't necessarily need a huge amount of water. The heat of vaporization of propane is only slightly higher that the heat of fusion of water; freezing 3 gallons of water would release enough heat to offset vaporizing a 20# bottle of propane. You also don't need to submerge the whole bottle -- an inch of water around the bottom of the propane bottle will transfer a great amount of heat.
More surface contact does help as the water freezes though -- it might be hard to freeze the three gallons I mentioned without submerging the bottle deeper.
Nonetheless, even a fairly small amount of water can make a considerable difference, so that's the first thing I'd experiment with.
Heat Sink : Another way to go with water is to use a stock tank heater in the water to prevent it from freezing at night. Being immersed in water and operating just warm enough to prevent freezing of the water this is a very safe method. It DOES require having some electricity in your shop.
IF you rig up a tank to use a water heat sink it helps to anchor your cylinder so it does not float as it empties.
In the end, a 100 pound bottle cures a lot of problems, including how often you need to purchase fuel.
Questions that keep one awake CLOCKS :
Can you tell the difference by sight between a clock that the pendulum is used to keep the time and a clock that the motion is decorative?
Do you remember wind up alarm clocks?
Unless you are about my age I suspect not. A friend of mine who is under 60 doesn't remember these. Old alarm clocks were made relatively cheaply and had short lives providing young boys such as myself with an endless supply to take apart and try to fix. . .
Electric clocks rapidly replaced the old wind up mechanical clocks. My friend does not remember a clock without a snooze button. . . What a difference 10 years makes. The old wind ups went off once and would ring until the spring ran out OR you turned it off.
Last. . . Are synchronous motors suitable for general time keeping?
Tank Freeze-up : Ok, ok, I'll rethink the water bucket challenge. I'll look for a tub big enough for a propane bottle, but not so big that I'll need 20 gallons to get a few inches deep. I currently haul a 5-gal bucket as my slack tub. A second bucket will help with balancing Ōś║.
Clocks : I remember taking those old wind-up clocks apart to see how they "tick". Every once in a while I could put it back together, too.
I would think that a synchronous motor would keep pretty good time. Another remembrance form earlier times - I believe that power companies keep very close track of the 60-cycles they deliver, and one reason was for that very reason - timekeeping. What I remember is they would count the cycles during the day and adjust the generators to make sure they got 5,184,000 cycles in a 24 hour period. It's been a while, though. I should spend some quality time with Google to see how true that is.
CLOCKS and STOVES : What made me wonder is that school clock systems were setup so that all the clocks in a school could be set from the main office. Of course power outages and glitches occur and this could be the reason rather than inaccuracy in the clocks. . .
What REALLY upsets me is the number of electronic clocks that do not have a built in battery (like a computer) OR a simple capacitor. A little 1/2" long capacitor will hold enough charge to keep a digital clock going for many hours. They can also provide the power requirement for old fashioned volatile memory. I learned this in the 80's when I was programming early industrial controllers. I could pull a volatile memory card from my sample controller and drive the half hour to the shop, install it and have it work. This was not recommended practice but it worked.
I ran into this again a few years ago when our kitchen stove was accidentally put into self cleaning mode with a pie in the oven. . . . When smoke started rolling out I found there was no "off" for self clean mode and the door lock. I forced the door open to remove the pie and put out the fire. Then I followed the instructions found on-line to leave the power to the stove turned off for several hours to reset the mode. . . It didn't work. It didn't work overnight and it didn't work over a WEEK! We finally gave up on having an oven. 6 years later I tried again and sometime during that LONG period the chip had lost the state it was in. I can't believe this dangerous device is in millions of homes. . . .
THE WORST PART: Every brand of stove made in the last couple decades uses the SAME idiotic chip. AND. besides the state being maintained by capacitance. . . the CLOCK is NOT maintained - the slightest glitch and it must be reset. . .
Generally, synchronous motors keep time extremely accurately. (Assuming you're on the grid, of course.)
I did read a few years ago that a particular section of the national grid (in Texas, if I remember right) was experimenting with letting frequency float within maybe a 1 HZ range. Apparently it saves energy if generators can be allowed to slow slightly when load increases, rather than pouring on the coal to maintain RPMs. Of course, the test section had to be isolated from the rest of the grid (either disconnected or isolated with inverters). I never read how the test came out or whether it might be extended elsewhere.
Oh,
And I'm guessing that pendulums that are just for show move more uniformly, rather than going fastest at the middle of the stroke and gradually slowing to a stop at each end. But I can't remember the last time I looked at a fake pendulum clock.
For a middle grade novel : Hi I am writing a novel with a character who is a blacksmith. I d very much like to get some help with understanding some of the basics of how a blacksmith works . Of course IŌĆÖm happy to speak on the phone if that is easier . Right now I am based in New York City . Thanks in advance
For a middle grade novel :
Barbara,
Click on my name here in maroon and send me an email. OR look on our home page (bottom) for my phone number.
To get started we will need to know the WHEN of your smith and the WHERE. Then there are different types of smiths. In the US I call early general smiths pioneer blacksmiths. They did everything they could with the tools at hand including shoeing horses, building and repairing wagons and all type of general metal work. In Europe the trades were well established with many specialists. While a Master Smith had to be able to do a little bit of everything they were not shorers or wheel wrights. In China there were various types of smiths the most common being the traveling or itinerant smith who repaired cast iron items such as cooking pots. While smiths were an esteemed craftsperson in the West in India they were a low cast worked due to working in the dirt. . .
AND a great misconception from modern media is that every smith made blades, swords and weapons. These were specialties long long ago a variety of specialists performing each task, no one person doing the entire job. A General Smith was much more likely to make axes, chisels and plain irons for other craftsfolk than knives.
Pendulums : Yes, electronic clocks with pendulums move in a non-pendulum manner and scream "FAKE!" to me a long distance.
In slightly earlier times; say the 1800's they used to import knife blades by the barrel from England to make knives here in America for instance.
Very few smiths would smelt their own iron from ore---there there are a few outliers that did in certain times and places.
Remember that being a smith meant you were part of a group---the single smith working alone is VERY MUCH A MODERN FANTASY! Expect a minimum of 3 to 5 other people in the shop working at differing tasks. If you were isolated most of them might be your children and even your spouse! (Medieval guild rules stipulated that a woman could only work in the smithy of their Husband, Father or Brother---you don't make rules about things that didn't happen.
If you are interested in historical smithing I can help till about the CE/BCE divide and I have some sources that are earlier than that!
Let us not forget open windows and ballistic methods of alarm clock silencing.
My wife is a big fan of the set the alarm an hour early and hit the snooze button multiple times. Meanwhile the alarm on my watch will have me out of the bed and dressing and she can't even hear it!
One more thought on "freezing" propane bottles. If I wanted to use a minimum amount of water, I'd get the smallest cheap submersible fountain pump, and put in a drywall bucket mostly full of warm water. I'd make a simple grate (say two pieces of 1/4" round welded in an X) to put on top of the bucket and rest the propane bottle on. The hose from the pump would have a magnet on the free end, and maybe a crude nozzle, that I'd stick near the top of the propane bottle.
The water running down over the bottle should keep the pressure from dropping too far. You'd get ice on the bottle, but probably not much in the bucket itself (you shouldn't get any unless your shop was below freezing with the forge running). If the pump did get frozen in somehow, though, you could bring the bucket back inside so it didn't freeze solid and ruin the pump.
ballistic methods of alarm clock silencing : hahahahaha ha. . .:)
I too would rather sleep until time to get up and NOT have a snooze button
It takes a Village :
I'm sure that before there were rules or apprenticeships if a smith did not have family thee would always be someone in the village to help out when striking needed to be done or the wineskins pumped for a large project.
I just watched an English documentary on youtube (Hands: Powers of the Metal), where the whole family worked in the family foundry. Two interesting points, one was that absolutely no safety gear was used, all the family in their daily dress, and second, the wife (in her skirt) kept track of things on the foundry floor "watching for injuries".
While I do not recommend the lack of safety gear (I've been guilty of the same), it is refreshing to see HOW IT WAS in the real life of people who got us to where we are today. Most of the great advances and many of the great structures of our world were created before OSHA.
This is one reason I despise our selling scrap metal overseas. The blood price has been paid in OUR friends, neighbors and family's lives and it should NOT go to enrich foreign countries. In fact, our coal industry currently has a greater problem with disabling lung disease due to cutting rock and creating silica dust than when "black lung" was supposedly at its height. Selling resources is what third world countries do - WE should not do the same.
Traditionally even artists had apprentices to do the grunt work while learning the craft. We also don't think of "day labor" as much; but it was a fairly common item way back when. You would hire extra people for harvesting or other labor intensive jobs and they would work a number of different sorts of jobs over the year.
I was listening to NPR recently and they had a report on how silicosis in miners was increasing as we were mining thinner coal seams and so more sandstone was being excavated. Unfortunately the OSHA laws were focused on Black Lung and the safety requirements are different for silicosis---one of the oldest occupational dieses having been noted by the ancient greeks!
Propane Freeze : When I had a shop in the mountains,elevation 5500ft, I experienced a loss of pressure and bad flame. I was using a 20 gallon bottle. I discovered that if it was full, there was not enough space for the liquid to boil off into gaseous form. by only filling it to 15 gallons, the problem was solved.(Not to mention easier to handle)
15 pound fills. . . I saw an article a couple years ago about exchange bottles often only having 15 pounds of fuel rather than 20 (the amount supposedly being paid for). Its a grey area for weights and measures folks because the exchange bottles and signs do not state the amount of fill. . so there is a lot of room for cheating. Buyer beware.
Old Anvil : It's my turn to have an anvil that's been in my family for generations. It weighs 127.5 lbs although the stamp on the side indicates 132 lbs. It has a little "shelf" on the side (Carriage Maker's Anvil?) Someone etched 1851 on it, but I don't know when or why. There's an almost legible stamped name that starts with "WA" and ends with "D" (all caps). Maybe 9 or 10 letters total. I could send pictures. Would love some history/info on it.
Just curious : I recently came across a small anvil while cleaning out an old house and I am very interested in learning more about it and what it is used for. I have been searching the web for hours and I've only manages to find 1 like it. It sold on ebay last year for $150. post didn't have much info so all I really know is it is a 10lb bench anvil made in usa. That one and the one I have are the only ones I have seen stamped USA. Thanks in advance
coal : A friend gave me some anthracite coal, nut size. Can I mix it with bituminous.
MikeC---a name like WARRANTED?
Samantha; not happy with the answers from the other site? Have you sent the pictures to the Guru here?
From the pictures: with a raised mold line down the center of the face, the 10 pound weight and the indent with USA proud. It's a cast iron ASO made for light duty bench work. Never got a good answer on how you know it was made in USA. If it sold for 150 US$ someone was taken advantage of...
I notice that there seems to be one on ebay right now that looks like your pictures and with a starting price of US$75 and 0 bids
Larry; what do you want to do with it? Gravel your walk or forge weld or ???
Warranted : Thomas, Good catch.
Mixed coal : I don't recommend it. The two require much different handling. Its like mixing gasoline and diesel fuel and expecting your car to run on it. . .
10 pound bench anvil :
Samantha, I'm embarrassed to say that of the hundreds of anvil photos we have posted that there are no bench anvils. This in spite of several of our members being collectors of such.
Bench anvils are mostly hobby anvils used for very light bending and wire work. They are heavier than a Jeweler's anvil and lighter than a Blacksmiths' anvil. Most were made by tool manufacturers, not anvil manufacturers. Note however that blacksmith anvil manufacturers made "real" anvils in this size range. For the price paid I would hope it is one of the later. IF its a 10lb. ASO as Thomas noted its only worth about 50 cents to $1 a pound and only use is as a door stop or garden ornament.
ASO's (Anvil Shaped Objects)
Click my name and send me a photo and I'll help as much as I can.
Auction Websites : Hello, I'm wondering what online auction sites people use and TRUST when looking for blacksmith tools?
I saw some nice stuff on "proxibid", but the reviews of the site were not great.
Thanks in advance,
Well I generally consider on-line sources as bing the most expensive way to buy blacksmithing tools; most of the time you may be better off just buying directly from smithing suppliers.
Also what country are you in. A source that is good in the UK might be quite expensive in Argentina. We have folks from over 100 countries participating on this forum on the World Wide Web.
Guru, suppliers are drying up. Do you know any on the west side of the Blue Ridge? I live in Staunton.
coal : ThomasP. All types of forging including welding. I gravel my drive with clinkers.
Guru, suppliers of coal are drying up. I used to get it in Elkton closed. Do you know where I can buy it west of the Blue Ridge. I live near Staunton.
Coal : I don't know what to say. . . we had a coal advertiser (Marcum Coal) but their supplier closed their mine after less than a year. . .
Currently I use nothing but propane, oxy-acetylene and arc welding. I would love to afford an induction forge. I have some coal in reserve (maybe 500 pounds) but no coal forge. I also have some charcoal. My next solid fuel forge is going to be an oriental trough forge and box bellows. I'll be burning charcoal.
The Kaynes are buying coal from SE West Virginia,
Mixed Coal : One can successfully mix bituminous coal and industrial coke. This is a good combination, burn as you would regular coal and the coke makes for a cleaner fire.
Mixing antracite and bituminous, as has been stated, is mixing two very different fuel sources that do not lend themselves to pairing.
Clocks : Back to the subject of clocks. My grandparents used a Westclox windup alarm clock for as long as I can remember. As for electronic clocks, I use a GE alarm clock that I bought for a very few dollars back in the mid seventies. It still works like a champ.
coal : Mr. Sundstrom, have you checked with R. S. Monger and Sons in Harrisonburg (VA)? I bought 800 lbs of coal from them a couple years ago. I live in your general area. (Stuarts Draft)
Identify my anvil made in sweden : Have 127 lbs made in sweden anvil has 341 stamped underneath the heel end also has oval depression on bottom and anA on side with weight
How do you know it was made in Sweden? Have you actually weighed the anvil?
A brand new anvil! Any help on make and age
Brand new? Then its less than a year old. . .
Comunication :
Folks, lets learn to communicate. This is not texting (something I DO NOT do or even have on my phone. . ). This is a forum with unlimited space to formulate a question and give descriptions.
Lets start with the BASICS from elementary school English. Who, What, where , when and why?
Who are you? An email address helps to make a response. . . Where are you posting from? The Klondike, Altoona, Quebec, Rio de Janeiro, Johannesburg, Perth, Mumbia? Where YOU are and where you found or purchased your item (anvil or tools) can make a difference in possibilities, rarity, price. . . If you are in England, Australia or India it is unlikely that your anvil is a Peter Wright or a Mousehole. The why is another story.
When: NEW (as above with qualifiers) means now. Do you mean new to you or the anvil is new?
What is it? We cannot identify without a basic description and probably photos. A quick glance at this forum log will tell you (hundreds of times) that you can send images to me and I'll try to help you.
Descriptions need details but NOT dimensions. First, LOOK at a few of the hundreds of anvil photos in our gallery. While to the neophyte all anvils look the same, to the experienced every brand and era of anvil is as distinct as people's faces. Some are long, some short, some stout, some lean. Castings have marking that stand out from the surface while most old forgings have their markings stamped IN with large stamps or punches. The exception being Kohlswa, a cast steel anvil with the markings scratched into the pattern making look similar to stamped markings. . . Letter styles have changed over the years most old markings having serifs and late markings none.
As Thomas likes to put it, "I have an old truck. Can you tell me the model, how old it is and the type engine?". . . . Oh, by the way, can you guess where I am?
coal : Guru and Josip, thanks for your responses. I called R.C. Monger and Sons. They sell all types of coal and are in Harrisonburg Va. It goes for less than $10.00 per bag. He said they have shipped to Colonial Williamsburg. So glad to find out. Thanks, Larry
coal : Larry I'm glad I could help.
hammer steel : How close is agricultural tool bar steel to 1045?
and can i use it to forge a rounding hammer?
hammer steel : how would i ask a metal yard for steel to make a rounding hammer 2/4 pounds/
Steel :
Brent, See our FAQ, "Steel, Where to buy it" and "Steel Product Types".
Steel yards in general do not deal in alloy or high carbon steels. You need to go to a steel specialty house such as Admiral Steel or Speedy Metals IF you are in the United States or Canada. They sell steels by specification codes.
"Agricultural Steel" is listed as AISI 1080 but since it is not a specific steel it could vary from there down to mild steel.
Also see our Junkyard Steel FAQ.
Check out a small machine shop and see if they have any drops of alloys that would work.
Hammer steel : ThomasP & guru thank you for the advise i will look into those places and check out the machine shops.
Hammer steel : Thomasp and guru, Thank you i will look into that and chech out the machine shops
Anvil Identification : Hello, Guru's. Im in need of identifying an anvil id recently purchased, in the UK. Ive done some research, but its hard to find anything concrete, with the anvil having no markings of make or age. Ithas no shelf, no pritchel, hardie in the hang end, square holes under horn and hand end and underneith. It also has a slight protrusion on one side, giving it a extra half foot. im more than happy to send pictures, thank you for yoir time!
Devin, Having no markings make it tough. There were hundreds of anvil manufacturers in the UK and most of their forgers learned the trade at Mousehole forge OR from forgers that did so most LOOK like Mousehole Forge anvils. There are a few exceptions but the details are tough to see.
Having no pritichell hole supposedly dates the anvil as being made before 1838. But I do not know where this supposed fact came from. However it seems to be roughly accurate. The "fifth foot" you have noted was also common and ranged from a slight bulge to a tapered block about 1" square at the base.
As the feet look less and less distinct the older an English anvil seems to be. Late anvils have nicely squared feet with the line continuing from one side to the other. Anvils from the middle 1800's have roughly triangular feet (when viewed from the side), those from the early 1800's and late 1700's are just points and those from the 1700's just a continuation of the rectangular body. These style changes seem to be the same across many manufacturers, everyone following the leaders with the exception of copying Peter Wright's slight flat across the feet under horn and heel.
Horseshoe found in Fort Lauderdale : Digging pits for new trees we found a hand forged horseshoe with 5 old nails stuck in it next to a canal in Fort Lauderdale. I'm guessing its early/mid 1800's. You folks are the experts - can I send a couple photos for you to look at? Many thanks - Steve
Horse Shoes : Steve, You actually don't have the right place. We are primarily artist blacksmiths and knifemakers, not farriers (shoers).
Shoes 100 years old are no different than modern shoes when hand made which a lot still are. Pull offs and thrown shoes often have nails stuck in them. 200 year old shoes are still not much different EXCEPT that if it is as early as you state then the material it is made of will be wrought iron (pure iron with a wood like grain from slag inclusions), rather than modern mild steel. The grain often shows when an item rusts.
OFF-LINE :
We have had the worst luck in the past few months. This week's outage was due to our server host being forced to move their facility on short notice due to the building they were in being sold. . . They actually physically moved our server twice! The first time to a temporary location and the second to a spiffy new permanent location. . .
The second move required a bunch of technical changes to our server which are STILL being sorted out.
Horse shoes : Well, I am a historic archaeologist by training, so if you send me some GOOD pics I might or might not be able to tell you something... But yes, horse shoes haven't changed much in the last 200 years. There are some minor differences in the nailhead style and hole punching between Spanish and English shoes prior to 1800, but a Spanish shoe from ca. 1500 is pretty well identical to a Roman shoe from 300 AD. It's one of those function determines form things.
Had a new student yesterday, a 30 year old father. At Lunchtime I sat him down and had him read Paw Paw's safety Demo's.
Thank-you that they are still available.
Silent but deadly :
I also have newbies in the shop. . . First lesson is that noisy machinery is obviously dangerous but that heavy things are just as dangerous and make no warning sounds. Dropping things, having things tip over on you. . . can be just as dangerous as machinery.
David Kayne dropped a swage block on his foot at the 1998 ABANA Conference. Broke the bones in the middle of his foot. Took a long time to heal.
A number of years ago I was using my bandsaw and had sat a swage block on the cabinet. Vibration caused the block to move off the edge of the saw. . . It fell just inches from my foot, made a divot in the concrete floor as well as dinging the block. If it had fallen that 3 feet onto my foot I would have been seriously injured.
A friend of mine was working on some machinery and dropped the end of a large shaft on his hand. Mashed a couple fingers seriously. It took years for them to heal. All it took was a split second and a bad plan for supporting the shaft.
Second lesson, Always were safety glasses.
Third lesson, Wear cotton in the shop. Its easy to find yourself in nice warm flamable synthetics in winter weather. . .
Forth lesson, black iron can be nearly 1,000 degrees.
. . .
More Shop Rules from Paw-Paw :
From our story page.
Paw Paw's 12 Rules.
Blacksmiths 12 Commandments
Safety Rules : One item I have never seen rules for is the handling of hot iron in a slack tub. Years ago I had a piece of 1" tubing that was hot on one end. I immersed it in the slack tub, the water inside it turned to instant steam and that shot out the top end. Luckily I didn't have it aimed at my face or other sensitive area. Another lesson I learned is that Kevlar gloves are great for holding hot iron, but make sure they are totally dry. Water turns to steam and they are an open weave material. If you feel the stea, it's too late.
anvilfire Health and Safety Tips :
10. Glove Safety
Wet gloves are worse than no gloves at all. Dry gloves are a must when doing hot work or arc welding. If wet the water rapidly conducts heat and can scald or cause steam burns. Arc weldors can be shocked through wet gloves (or other clothing). Even high tech fire resistant fabrics and insulated gloves do no good when wet. - anvilfire.com
19. Forging Pipe
Pipe is best be worked in oval or V dies so that compression is from more than two directions toward the center. Rapid light taps are better than heavy blows. Extreme care should be taken when quenching as super heated steam can blow through the pipe to the hand holding it. - anvilfire.com (also General Tips No. 55)
Daily Tips 26. Pipe for Bending
I keep a variety of lengths and diameters of heavy black iron pipes as bending "wrenches" or cheater bars. These are useful for bending bar stock into coils or spirals. You can adjust the radius by the diameter and how far you slide the pipe up or down the stock (how close to the bend). Pieces of pipe of various diameter also make good forms for bending coils such as to make chain or rings. These can have a tab of steel welded into them to clamp in the vise. Take care when cooling pipe in the slack tub, avoid the geyser effect and possible steam burns. - Bruce Blackistone & Co.
I was warned about wet gloves by a cooking show warning about wet pot holders and kitchen gloves.
While quenching in the slack tub is still very common many smiths now reject using one and let all steel air cool on a plate on the floor (never directly on concrete). This avoids hardening not so mild steel as well as inadvertently cracking tool steel too hot to be water quenched.
As noted the safety tips above are in two lists. Our tips have been gleaned from 20 years of our forum posts plus other sources. There are 183 "daily" tips so they run twice a year. The safety tips are a much shorter list and run 6 times a year. The other lists vary in length and run 5 to 7 times a year.
Tips :
I currently have two students who are on odd schedules. I've told them to check into anvilfire for a few minutes daily and read/learn the daily tips. Hopefully they are doing so as there is a lot of wisdom there from myself and the community.
Tip Typos :
Wow. . .just read all the Safety Tips aloud to someone and noticed a LOT of errors. Then I ran spell check. . . fixed lots of spelling errors and typos. I must have been in a hurry when I edited them.
Being able to come back and fix things is the best thing about web publishing.
Server Errors and Posting Issues :
In mid January our server was physically moved from one location to another and IP addresses had to be changed. This should have been a simple change but all sorts of problems popped up during the move and sometimes attempts to fix things made problems worse. They are finally fixed.
If you are a google Chrome user then there are other problems. Google unilaterally decided that most of the Security Certificate industry was not doing their job and wrote Chrome to issue security warnings on perfectly legitimate sites (such as our store). Our store has a perfectly good security certificate issued by a reputable issuer and tested routinely by a security audit company as required by credit card companies and the US Government. But not Google, the new Evil Empire (having replaced Microsoft for that honor).
Many web sites run into the types of problems we have had over the past few months and they simply disappeared because the technical issues were too great to recover from. We are here for the long run and should be here for the next 20 years or when I die, whichever comes first. . .
Before Painting Steel, Listen to a Corrosion Professional :
SV Seeker talks to a Corrosion Expert
The fellow in this video says basically the same thing I have been telling the Blacksmithing World for over 20 years about finishing steel, "CLEAN, zinc prime, base coat, top coat paint (or some 2 coat system)".
Its a bit more complicated. The cleaning can be grit blasting or chemical cleaning with low chloride substances or wash. I have issues with so-called zinc primers that may or may not work. A high zinc solids (98%) is second only to galvanization and can be applied in the shop. It is the best way to go. Over that top coats can vary. I like automotive finishes.
Consider old automobiles rusting away in a scrap yard. Look at the unscratched hoods and tops. While dull they are still in good shape. Rust free. Many of these are 30, 40 and even 50 years old. As a blacksmith you should be able to produce a finish good for 20 years if not chipped or worn through. Location such as salt air or industrial/automotive fumes may shorten this.
In recent years powder coating has become very popular. However, it has serious issues. One is that it cannot be repaired in the field. It must be burned off, the metal cleaned and then the finish replaced.
Pay peanuts and you get monkeys (or shop gorilla's).
Shop Chemicals - Citric Acid and Sparex : I was shopping for some citric acid from an industrial supplier and then checked with Walmart for food grade citric acid. It was 40% the cost of ordering from McMaster-Carr AND shipping was free witch made it about 1/3 the cost of the industrial technical grade which is not as pure. . .
If you use Sparex it is the same as Sodium bisulfate pool ph lowering compound. I've been trying to find the difference between Sparex-1 (for ferrous metal) and Sparex-2 (for non-ferrous metals) but all I can find is that Sparex-2 has about 6% sodium sulfate. Both use the same MDS which no longer include the chemical composition. . . The sodium sulfate is highly water soluable so it may be to help the bisulfate to dissolve (or stay in solution). Just a guess.
The pool chemical is much cheaper than the Sparex marketed primarily to jewelers. Some use it and see no difference.
I wonder if the sodium sulfate could act as a buffer. One think I read about it on wikipedia is that it reacts with sulfuric acid to form sodium bisulfate. So if a reaction somewhere in the pickling process produced sulfuric acid, the sodium sulfate might neutralize it before it attacked the metal.
Of course, I don't know whether or how sulfuric acid might form -- indeed it seems a little counterintuitive that it would.
Sodium sulfate :
Apparently its primary uses are as filler in powdered detergent, drier in making paper and as a flux/defoaming agent in glass making. It is a neutral salt. Other than a filler I do not know how it applies to Sparex.
I do a fair amount of copper and use the pool Ph down. works a treat and much cheaper.
In Shop Chemicals (on the cheap) don't forget Roach Prufe which is boric acid at a much better price---especially if you find the old stuff at the flea market that was 100% instead of the 99% modern stuff.
Roach Prufe : Did you know that the professional exterminators use Boric acid to kill Roaches. The only difference is the expensive stuff they use has an attractant in it so the roaches got for it like a kitten to cat nip. Sprinkle Roach Prufe or plain boric acid in you kitchen and bathroom cabinets and it will kill ants and roaches. You have to renew it once in a while as it blows away and also gets damp so it is not loose.
In some places building codes require boric acid to be blown it into wall spaces with the insulation.
Need Help with Bandsaw Tires :
I have an old 1950 Delta Rockwell 20" Wood working bandsaw that needed new tires. The original tires were rubber and had dry rotted to the point that hunks fell off. . .
After years of searching I found that aftermarket folks were selling polyurethane tires that fit and were true and beautifully pre-crowned. While they were difficult to install they worked GREAT! For a while. .
After a couple years of almost no use the tires will not stay on, the unique center key creeping out of the groove and throwing off the blades. . .
The solution is to either replace the expensive tires every couple years OR to glue them on (as were the originals). However, while many glues are polyurethane, I can find no glue that is rated FOR polyurethane elastomer.
Permabond claimed they had glue for this application (PT321, PT326) but only sold it in case lots and could not direct me to a distributor. . . The second part number is for a slow set version which is probably the best for the difficult to install bandsaw tires. Its a two part polyurethane that requires a special dispenser. .
There are lots of glues made of polyurethane but I can find none FOR polyurethane.
Jock have a look at Pliobond. We use it to adhere polyurethane foam to steel and aluminum at work. McMaster Carr has it in pints
Ptree, Thanks. Looking into it. Sounds good but has nothing specific about polyurethane in all the literature I've read.
pliobond. : It is a thermoset and very resistant to solvents, so make sure it is where you want the adhesive.we use it on foam and it works. not too expensive from McMaster carr like $15 a pint if I recall
Never used any of their stuff, but the Barge Cement website lists two products recommended for urethane ("Infinity System" and "Super Stick").
Power hammer linkage : Just a brain fart i guess , but if using a shock absorber as in junk yard hammer build causes the dies to "float" what if you use a setup similar to motorcycle shock where damper and spring are combined?
looking forward to hearing from other builders .
Shock Absorber Hammer :
Nico, The problem is that the shock wants to absorb the energy and hold the mass still. While it worked SO-SO on our hammer it is very inefficient and got worse the faster the hammer ran. Instead of harder blows at top speed you got softer or NO blows.
It was a great experiment of something a number of us had been thinking about for years. There are many much better ways to build a power hammer.
My next "experimental" project is going to be a springless treadle hammer. The anvil is on arms that lift it 1/4 to 1/2" as the hammer comes down. The weight of the anvil then raises the hammer. Its a form of counterblow hammer. The motion of the anvil is slight enough that it shouldn't be a problem.
anvil : hi , i have an Anvil made by hay budden & it has a # 181904 stamped on it ..... it also has a #107 stamped on it ,how do i find out the value of this ?? it is 25" long don't know the weight
I have a 150# Fisher anvil is there any way to determine true age?
I have a 150# Fisher anvil is there a way to determine true age? Thanks
Fisher Anvil Age :
Some Fishers have patent dates but these have nothing to do with when they were made. Some Fishers can be dated by style but not all. Late Fishers made in the late 50's and early 60's had no logo or marking other than an oval paper label.
Kelly; You don't know the weight when you just posted it, 107#? Also the value depends on WHERE it is and CONDITION. Even in the USA anvils can vary in price by several dollars per pound based on location and Condition cam make it anything from scrap metal price to US$6 a pound if Location and Condition maxes out.
1890s steel hardening : I am trying to find out information about the steels of this time period - typical composition, and how they were hardened. In my own research so far I have found conflicting or incomplete information. I guess I am talking European industrial practice, but also related to the artisan blacksmith of that era in Britain and northern Europe.
What would typical Carbon % be? Or would there have been a range, with the exact value being application specific? Hardening would have been water or brine quench? Or whale oil? Tempering to a typical hardness, or again varied depending upon application? Was any kind of surface carburizing / case hardening in use (with bone and charcoal for example)?
I am trying to reproduce as closely as possible an artifact from roughly 1890, possibly up to a decade or two earlier. The original cannot undergo any kind of destructive testing and I only have very intermittent access to it. There's a small chance I might be able to get it analyzed for chemical composition with an XRF Spectrometer, but that will still leave a bunch of unknowns.
Any hints that might help narrow things down would be great - thanks! Though I think what is going to happen in the end is a lot of trial and error...
1890s steel : That's a tall order, as you've discovered. It could be anything from Bessemer steel to cast steel (crucible) to shear steel (carburized wrought iron), all depending on the object and its designated price point. Carbon content can vary from 0.5% up to 1.2%, again depending on intended use and availability. The quench medium also varies depending on what the maker specified and the shape of the object. Whale oil was typical for springs and complex shapes, but true quench oils were under development at that time as well. Brine would have been most common, but can be tricky, especially at the higher end of carbon content.
Composition would be iron and carbon with a little manganese (0.3% - 0.8%) for "ordinary" steel, higher for specialty steels (up to 11% Mn for jail bars, for instance, as high-Mn steels resist filing and sawing). The first high-speed steels were developed in the 1880s as well, and these would have tungsten. You have picked an interesting era, when steel metallurgy was going through some major changes.
1890s technology :
As Alan noted this is a transitional era (beginning or end?). Many smiths were still using millennia old technology which is based on passed down experience and NO metallurgical science. Metallurgical science is pretty much a development after 1890's (actually 1900). And even then it takes time for the new technologies to filter down to actual practice. As late as the world war era's many smiths still believed that coarse crystallization in steel was the result of strain resulting in failure, rather than the crystallization due to improper handling and heat treating resulting in failure.
The growth in technology was so great during this period that we went from the steam era to the electric and gasoline era and publication of the first Machinery's Handbook in 1914 which probably covered 90% of all common shop technology that is still in use today.
This was a time when hardness testing was practically non-existent. While engineers and researchers were developing our modern methods they were generally not in use. Hardness testing of the time consisted of the file test (if the file skated across the part, it was hard), AND the anvil test (the smith would take a freshly hardened tool and cut a notch in the waist corners of the anvil). The anvil method can be seen recorded in the many old anvils with sharp barbs along the edges of the soft body.
Tempering using colors was by route methods based on centuries of experience with greatly variable carbon steels. One learned that one item was drawn to a purple brown and another to a straw and another to a dark blue. There was no measurement of hardness other than success.
Smiths are also one of the ultimate recyclers. They collected and traded in scrap metal just as most of do today. In an 1890's shop a smith (even a manufacturer or large smithy) might have had steel stocks that were 100 years old. No? I've got wrought iron that is 200 years old that I will be processing into parts. . .
Temper Colors :
While today we have pretty temper charts with color like mine (link in post above) the smiths prior to modern color photography and printing only had word descriptions for the colors. Our charts today are fairly bland but old charts had sunrise pink and bird's egg blue. Color words and adjectives varied from one country and language to another. The lists had the colors and the item type to be tempered (knife, wood chisel, punch . . .) but no temperatures as do modern charts.
It was a MUCH different time.
1890s thanks : Thank you for the info Alan and guru. It is all helpful to me, and it is always good to learn a little more about a subject.
15n20 vs 1095 which is better for damascus? just started blacksmithing dont know much yet. going to be mainly making jewlery and 1095 is cheaper, but is it better as for quality?
1095 vs 15n20 which is better for damascus? just started smithing and mainly am going to make jewelry. just wanted to know wich would make a better product.
15n20 and 1095 : The thing about damascus is you need two different alloys to show contrast. The easiest to heat-treat (and you will need to heat treat for good contrast) is 1084 layered with 15n20. The 1084 etches darker than 1095 and is available from New Jersey Steel Baron Llc. 15n20 has 0.75% carbon and 2% nickel, and thus etches bright. Boiling in water after etching helps set the oxides on the dark layers, and recently people have started soaking overnight in a strong solution of instant coffee after the initial etch in ferric chloride. This seems to really make the darker layers pop.
If you just weld up a stack of one or the other you will not get any contrast.
I guess with jewelry, you'd need to harden only to get contrast. So perhaps something like 1018/1084 would work (even though that would give you a really lousy edge on a knife).
About the only jewelry OR damascus I've done is a pair of cable damascus cuff links. If what I read was right, the contrast in that is due to decarb on the surface of the strands, so sort of the same idea as 1018/1084.
But you should definitely start with something tried and trued -- and following Alan's advice is always a good idea. I'm just thinking that you may have more freedom to experiment later, if you aren't wedded to getting a uniformly hard piece.
Laminated Steels fo Jewelery :
Probably the highest contrast is wrought or pure iron and pure nickle (Nickle 200). Wrought welds easily in a coal forge but at relatively high temperature. Nickle requires an aggressive flux such as Fluorite (CaF2). This is not a hardenable or "blade steel" combination. It is an art steel (See Decorative and Sculptural Ironwork by the late Dona Z. Meilach for examples).
There is also Mokume Gane, the Japanese non-ferrous version of laminated metals. These use copper and brass, copper and silver and so on. They are welded in a kiln or furnace (some have used forges) and then the results forged or rolled. The pattern development can be the same as laminated steels.
Pattern development is an art. The vast majority of amateur smiths make what is known as "random" pattern steels. However, there are many controllable and named patterns. See Advanced Damascus Patterning by J.D. Smith. THEN there is "mosaic Damascus". This is the result of welding shapes together OR simple bars in a grid to produce anything from letter and number characters to fine art in the structure of the steel. See Meier Steel Daryl is retired but still an inspiration to several generations of smiths.
Enjoy the adventure!
Matt; boy are you lucky! That time period is smack dab in the middle of when "Practical Blacksmithing", Richardson, was written. It is a collection of "posts" from a professional smithing Journal---the internet forum of the day. It is easily found and I strongly suggest you read it cover to cover to get a handle on the tech of that period---dates to 1889, 1890, 1891.
Note too that factories were common at that period so what a bladesmith in Sheffield/Solingen/Thiers/... commonly did might very quite a bit from what a local rural smith in Arkansas would do.
We really need to know something about the item to help---colour case hardening was used on guns but not on knives or door hinges...
To get a handle on what was available; take a look at the 1897 Sears Roebuck catalog on the net or in a reprint. Not much call for a smith for anything available in it...
damascus contrast : I totally forgot that for jewelry work you don't have to heat treat it for contrast, just gun blue it. Hot or cold. It will darken the 15n20 a bit (pure nickel sheet not so much), but since the carbon steel parts will be etched a little deeper than the nickel steel parts you can just hit it with a high-grit sandpaper on a hard backing and it'll shine up the high spots.
Good call, Thomas! I totally forgot about those books as well.
Metal Coloring : I became a smith as the result of trying to find out how fancy color case hardening was done on shotgun receivers in order to make jewelry. It took thirty years to find it . . . Today I would not use the process on steel, but I have a piece of titanium jewelry with a heat rainbow (a Star Trek badge). I would like to try the fancy marbling system on Ti but not sure how to adopt the process. It would be very pretty. . .
On titanium they usually use anodizing. You can get some pretty spectacular rainbows and spots! And no, I don't know how to do it either...
Titantium Temper Color Art :
Raw titanium colors brilliantly just from heat. I first saw it in Long Island, NY at the Kayne's where Steve Kayne had picked up a piece of scrap sheet metal for a forge hood that turned out to be titanium from the local aerospace industry. Fantastic colors rising up the hood from about a foot above the forge for several feet.
The next time I saw it was in a Design News article about an artist who produced "paintings" on titanium using a combination of heat and chemicals. This was not anodizing. The chemicals were used like paint in controlled areas to produce colors more opaque than the simple temper colors and colors that are not in the common rainbow such as earth colors.
Then there is the only piece of jewelry I own. It was a gift from my Daughter. Its a Star Trek V shaped uniform badge that is golden yellow at the bottom fading to pink, then purple then green gold and pink again.
Fancy marbled tempering is done by quenching a case hardened part in a water bath filled with air bubbles. The air runs across the surface of the part as the temperature changes producing different colors in swirling marbled patterns. The case hardening is not required, only heating the part so that oxygen does not get to it until it is in the quenching medium. It might be possible to do the same with titanium but would take experimentation, perhaps heating the part with an inert gas cover and then getting it into the air/water bath quickly. Hmmmmm induction heating under water. . . .
In the Jewelry class a friend teaches at the local Community College they use a custom anodizer to do all their Ti (and Niobium and Tantalum IIRC) colouring. Lots of ways to manipulate the fluid, brush and electricity!
I used simple temper colouring on my TI camp eating set.
Thomas P - 1890s artefact : Thanks Thomas. I will get hold of that book. The item in question is an orchestral triangle similar to this one: https://www.mattnolancustomcymbals.com/shoppics/concertgebouw1.jpg
So, it is a case of replicating every little kink and detail of the shape, getting the closest material match and the appropriate hardening and tempering so that it sounds the same as the original when struck in various different places - in timbre and dynamic response, not just in basic fundamental pitch. A good quality triangle is very complex in sound quality, as humble and basic of an instrument as it may seem.
Triangles Musical :
I've made hundreds of these and made dozens of R&D test triangles of different proportions. The one I settled on was closer to a tuning fork than a triangle as it had three bends and two equal sides. The ends of the sides faced each other at the middle with about a 1/4" gap. 1/2" hot roll steel 30" long was used and the sides were 5,10,10,5". I called it my "Best Ringer Ever" as it rang loud and clear despite its small size. The fact that it had equal sides that acted like a tuning fork increased its sustain.
Decorative forged ends (hooks, loops, balls, leaves. . .) all dull the tone of the triangle and are not recommended if you are looking for clear tones with sustain.
The harder a bell or chime the higher the pitch. Howeveņ╝^ardened steel in this case is brittle and can break. The sharper the corner bends the clearer the tone and the more sustain. But too sharp of corner bends stretch and tear the metal. Having the arms of the triangle planar (all on the same plane) is also important.
I heated the corners with a torch making a narrow heat that resulted in a relatively sharp bend. The whole was quenched after making the three bends but I do not think the steel was at a hardenable temperature.
At one time I had a full octave set of triangles. I've also made large heavy triangles (1" round and square) but was not happy with their ring.
Where a triangle is struck can make a large difference in the tone. Striking the corner results in a higher pitch and striking the middle of the sides a lower pitch.
Musical triangles : Thank you Guru! Triangles are fun, aren't they? I too have made hundreds from various different alloys of Brass, Bronze, Steel, Aluminium and Titanium, in many different shapes and sizes, with and without decorative forged ends, and including a few variations with 3 (or more) bends. Each metal needs its own particular heat treatment process to get the best from it. My triangles can be found in many of the top symphony and opera orchestras all around the world. Besides the regular lines that I produce, I get commissioned to develop replicas or recreations of period instruments - mediaeval, baroque, turn of the century...
I figured out and agree with many of the things that you also found in my development of these instruments over the years. For orchestral triangles, however, most players and conductors are after something that does not present a clear tone or pitch - something where the overtones are many and more apparent than the fundamental tone, and yet the triangle still retains enough focus and articulation for rapid rhythmic passages, so that the sound does not blur into one. To achieve this, you're kinda fighting against the physics of the thing or, at least, trying to find sweet spots within the vast plane of possibilities.
This particular triangle is the prized possession of a famous orchestra in Europe. They don't really know its provenance except that it has been with the orchestra for many many decades. It is part of "their sound" and they worry that one day it will get lost, damaged or "played out". So they'd like a back-up. I have already made a pretty close copy from Silver Steel, after a few iterations and just working remotely. It is about 95% there sonically.
I recently took a trip to study the instrument in person and so now we're hoping to get that last 5% nailed. I have a much more accurate rendition of the geometry now to work from, plus actual sound recordings as a reference. We are into such minute subtleties now that getting the alloy and temper more like the original are becoming important. I am even thinking that some kind of artificial, accelerated aging might help. Perhaps tumbling for a few days with the right kind of media would simulate years of being played. Both the original and all my replicas and sustain for a long time, but mine sustain much longer. One variation that I had oil quenched and tempered around 450 degrees F was actually less sustaining. None of the others were hardened, just stress relieved.
We'll see how I get on. Next up will be some comparative tests of a few different medium and high carbon steels, each with a few different tempers. A bit of a science project really!
Have you tried it where you only harden and temper the corners?
Hardening corners only : Thomas - that is an interesting idea. What is your thinking behind that? To make up for the softening caused by hot bending them? Or to produce some inhomogeneity to add richness to the sound? Or something else?
Musical Triangles :
I spent a couple years researching musical instruments for a book project that did not come to fruition. One thing I worked on was the mathematics of simple vibrators and tuning forks. Tuning forks are simple until you try to get the joint into the equation. With some minor fudge factors the math worked well enough to predict the shapes of borrowed tuning forks of both the square and round bar types in steel and aluminium. I was working on that when I gave up on the book. . . that was over 20 years ago so don't ask for the formulae.
However, the pertinent variables were density (for mass), Modulus of Elasticity (for springyness) and dimensions down to +/- .0005". Hardness did not seem to have an affect. The fudge factors came in when determining where the bars stopped and the joint began. It was not at the end of the straight section NOR at the end of the or center of the corner. I suspect that today some engineer could make an engineering solid model to make this determination.
Luckily for you there is no difference in density or modulus of elasticity for steels until you get into very high alloy steels such as stainless. I suspect hardness changes the speed at which sound waves travel in the steel. . . just a guess. Your biggest variable would be dimensional which as I noted with tuning forks must be very accurate down to measuring with micrometers and vernier calipers.
My thought on corner quenching would only be that it may be possible that it is what the original maker did. It is what I did.
Part of my research into simple vibrators included measuring the bars of a glockenspiel and comparing them to the theoretical. I found that the bars that met the theoretical dimensions exactly did not have tuning (grinding) marks. Those that did have tuning marks could have the amount of removed material applied to the dimensions and would meet the theoretical.
Musical triangles, forks and bars : Thanks guru. I can imagine that tuning forks are a bit of a pain to model precisely as the tines will behave neither as a free-free bar nor as a fixed-free bar, but some kind of combination (very close to but not the same as the fixed-free theoretical case). The joint isn't exactly a nodal point as it is moving up and down as the tines move in and out. The nodal points on each tine will be somewhere on the corners between the end of the straight sections and the joint as you found.
I use the basic equations pretty regularly with density, Young's modulus and physical dimensions to predict fundamental frequencies of bars, chimes and bell plates. They do indeed correlate pretty well if things are uniform and homogeneous. You are right that hardness barely plays any significant role in this as it is related to plastic deformation properties, not elastic. What it does affect is damping, and especially of higher frequencies and overtones. So, it will affect sustain of the fundamental tone and overtones.
The speed of sound in metal idiophones is a curious beast. Mostly in these bar and plate cases we are dealing with transverse shear waves. So, in fact, the speed of those sound waves is different at different frequencies (proportional to the square root of frequency) and different at different thicknesses of material (proportional to thickness). This is not so intuitive based on what we are mostly used to in our daily lives - vibrations in the air or in more easy to analyse sound generators like tensioned thin strings.
I did get a micrometer on that original triangle. The diameter of the rod is not so uniform - up to 0.0015" variation in general along the length, but there is some more extreme thinning at the bends - like 20x more variation.
I'll see if I can get a pair of identical dimension / material / sounding triangles and harden the corners on one but not the other to hear what difference it makes.
The Munktells Museum in Eskilstuna, Sweden has an interesting "triangle." It's just a piece of heavy bar with a 120 (or so) degree bend. It was used as the factory bell (to ring at the end of the shift, I think). I have a picture somewhere, if anyone's interested.
Machinerys Handbook question : As a task for a newbie y'all say ..... "Get a copy of Machinery's Handbook .......... and read it! The older the better" .....
I can find editions all the way back to the 40's. Is there something in those older editions that is not in the newer?
Thanks in advance
Machinerys Handbook :
Mike, see our Machinery's Handbook Review. It has a table of articles that have been dropped over time. The 15th Edition (1956) had the most "blacksmithy" content.
Attention Guru! : Guru, can you send me your mailing address to Quenchcrack at hot mail dot com? I want to send you something.
Anvil Brand History : I have a Green marked 160 pound anvil. Number 6 on a foot and weight markings of 1-1-20. I can't find the maker by the name of Green. Any history?
QC - mail sent, if not received check spam box. If lost address is at bottom of home page.
GREEN Brand Anvil :
According to AIA GREENs were an old English anvil made in the 1850's. Postman guesses that they MAY have been made in Greenwick England with no other evidence than that there was an anvil manufacturer there.
Vents on Propane Tanks : I had an odd (for me) incident while doing a blacksmithing demonstration at the church craft fair the other weekend. I had the little Whisper Baby gas forge going, and since I didn't want to run out of fuel, I had a spare BBQ-size tank sitting about 15' away in reserve as we demonstrated using the partly-used tank. Suddenly, the spare tank started to vent rather vigorously through the relief vent. I quickly grabbed it, and hustled it further downwind, as I checked the valve. No apparent cause to the venting (thank goodness I had put it down-wind, and not upwind of the forge); but it had been sitting in direct sunlight. On the other claw, it was a relatively cool day (in the 50s f.) and there was a cooling breeze.
Now, I suspect that everything functioned properly, and the emergency valve might have been reacting to an over-filled tank and a warmish day, and did what it was designed to do; but I'm surprised that it would be that sensitive. Makes me glad that I keep my spare tanks in a shady, well-ventilated corn crib, far from "fire or flame" or sparks or other ignition sources. Anybody else have a similar experience?
It's not supposed to be possible to overfill the current tanks (and I don't think anyone will refill the old style ones anymore). I remember a 100# tank venting at ABANA (in Seattle, so it wasn't particularly hot either). But perhaps the spring on your relief valve is a little weak.
Propane Venting :
The first time I had my 30 pound bottles filled up I had them in the back of my pickup truck. It was a bright sunny day. I made a stop and a moment later pifffffff. . . both were venting. After a minute of so it stopped. I was glad they were in a pickup bed.
I recently had these old style bottle refilled. 100 pound bottles have the same type fitting but are legal to refill. The fellow that filled my 30 pounders said he wasn't going to be able to refill them in the future. . . but that is what he said 8 years ago.
propane tank valves : Some propane suppliers can replace old-style valves with new ones. I've had it done.
Propane venting : This is why they tell you never to transport propane tanks inside a car:
https://www.cincinnati.com/story/news/local/cincinnati/2018/09/24/cincinnati-possible-propane-tank-explosion-car-fire-evanston/1411637002/
Could be MUCH worse :
My girlfriend likes picking up stuff set out for road side pickup for welding projects. Recently she brought home a small acetylene cylinder to weld on! I have not checked to see if it still has its acetone charge but it is heavy like it does. . . Could have been a terrible surprise.
Equally important, why was a welding cylinder set out for the trash pickup? Could have been a disaster in a compactor truck as well.
Alan L- Wow! News Article : That certainly illustrates what goes wrong with propane in a closed vehicle. I keep mine in milk crates and lash them to the pickup truck's tailgate; but that picture of the car certainly reinforces my caution.
I remember reading that when R-12 became unobtainable, some places were selling auto A/C refill kits that used propane. Apparently it works great -- except that A/C systems need refilling because they leak, and that dome light switch in the door jamb makes a neat little spark . . . .
Fuel Cylinder Disasters :
If you hang around or frequent almost any welding supply house for any length of time you will see examples of these disasters. Most often it is reprints of news articles but occasionally it is the remains of a welding cylinder. For a long time my supplier had an acetylene cylinder that had been in a fire. One side had an explosive hole the diameter of the cylinder and the whole had a bend to it. . The brass valve was also melted out. Pretty graphic.
High pressure gas cylinders (inert gas and oxygen) are also very dangerous. This is one place the movie folks get ALMOST right. Chop off the valve (or tip it over and break it) and the 3000 PSI gas will launch the cylinder like a missile. The problem is, they don't just take off in a straight line. Usually the valve only breaks part way off and the thrust is angular sending the heavy cylinder spinning and smashing into everything in a 10 foot circle or larger. Eventually the valve breaks all the way off and the cylinder takes off in a semi-straight line. At this point it can still have enough energy to blast through a masonry wall.
KNOW and follow the safety rules. Chain those cylinders to a rack, wall or post before removing the safety cap. NEVER use them lying on the ground!
I found an even more impressive picture of what happens when a 20lb propane tank explodes in a minivan, but it was more of a Darwin Award scenario. A couple in Florida (of course) was driving home with a leaking gas grill in the back. The passenger apparently didn't notice the smell of methyl mercaptan (the stink they put in propane) and attempted to light a cigarette. The minivan was reshaped into a perfect sphere...
I made a rack to hold my propane and oxy/acetylene upright in the back of the open truck bed.
Artists and found objects : I know a sculptor who does that. A few years ago he picked up a brake booster off a semi. This is one of those big cans you see hanging on the rear axles on the trailer. He though it would make a good body for something if only he cut it in half. When he got up off the floor half an hour later he made the important discovery that there is a very large, very compressed coil spring in those. Luckily it caught him a glancing blow to the top of the forehead. A direct hit between the eyes could have killed him.
Its nice when things stay the same :
In 1972 (that's 47 years ago) I purchased a Miller buzz box (Thunderbolt 225), a standard welding helmet and a combination chipping brush. I think the three pieces were part of a package deal at our local welding supplier.
The Miller buzz box still works, the rotted old cables having been replaced. The helmet has a 1" crack in the hood and the chipping brush has had the handle hastily replaced with a piece of flat bar and brushes replaced several times. . . They are all still in use.
Recently I noticed the brush was about worn out so I looked on McMaster-Carr to see if they had a replacement. They did AND they had the identical Atlas brand chipping brush! I ordered two replacement brushes and a new chipping brush since it is one of those tools like a tape measure of center punch that you are always looking for. . .
The tool is identical as the nearly 50 year old original. I love it when I can get replacements that are the same as I bought decades ago.
But times DO change. I'VE changed. I found I cannot weld with reading glasses under my helmet. Too many layers of glass cause refracted images and I see THREE arcs! So I bought a magnifying insert to fit my old helmet. . . I'll test it soon. Hopefully it works.
Making/Hardening an anvil. : Hello, I'm a machinist/tool and die maker by trade. Looking to get into blacksmithing. I understand how to harden steels, but don't know what would be best for makeshift anvil. I'm thinking of using about a 100 lb piece of 4140, A2, or S7 as I have access to them. Would I harden it all the way through or just a bit. If a bit, then how much. Also give your preference on which steel I should use and if I should temper it. Thanks!
Anvils and Hardness. : Caleb,
Most of the old anvils were just basic carbon steel faced. This was often steel that varied from 40 to 60 carbon with a maximum hardness of 60 HRc (too hard). Heat treating consisted of quenching under a flood of cold water from a mill sluice to make as hard as possible. The result was that anvils in the 100 pound range hard corners too hard that chipped like glass and larger anvils that the plate did not quite harden all the way through. These being wrought iron wrought/steel scrap bodied anvils the body was dead soft.
Modern anvils are generally hardened and tempered to 52-55HRc which many consider a little too soft. A target of 55HRc in the middle of the face with the edges tempered to 48 to prevent chipping would be a good goal.
A piece of SAE 1050 would be fine. Back when you could get huge chunks of plate from J.T. Ryerson and Sons at reasonable prices I recommend SAE 4140.
The problem with all steel anvils is the ring is deafening (literally) and is worse (higher pitched) the harder the anvil. While the old wrought bodied English and European anvils ring, a combination of their shape and the mixed materials reduce the ring considerably while providing a very hard work surface.
Peddinghaus scan-induction hardens their anvils. If I were going to harden an anvil I would build a flame hardening rig to scan flame harden . This is a special oxy-fuel heating nozzle with a trailing water quench on an adjustable speed motion. One of those tools that require a bit of R&D on every new project.
Propane forge : Hi all, an old fart here from Australia, next to no experience with smithing or forges, but many years in steel fabrication and related works. I have just completed a forge made from a 20lb gas bottle, 3" ceramic fibre all around the inside and 2" lining the "porch" with a fire brick floor, the burner is 3/4" pipe with a 1" reducer as flare inside the forge, the plumbing is a bit of everyones ideas to work with stuff I had on hand, basically it is a 1/4"nipple brazed into a 3/4" pipe cap, with a mig tip screwed in the end about 3"down the 3/4"" pipe, directly below the cap is a pipe socket drilled with 12, 8mm holes acting as a venturi inlet/ choke, after firing it up with a .6mm tip, [at that time the venturi holes were only 5mm], I had a flame which popped and fluttered, and a lot of yellow coming out the opening, I then opened up the venturi holes to 8mm each, which improved it a lot, but still a bit of dragons breath, I then tries a 1.2 mm tip which threw so much flame out of the opening you couldn't get close, next I tried a .8 mm mig tip, this was much better, and although I couldn't get very good tuning with regulator pressure adjustments , by nearly closing the ball valve I had what looked very much like an oxy-acetylene neutral flame, only larger, a blue cone 1-1 1/2" from the flare. I think I am somewhere in the ball park now, but I am not getting a very loud roar as some sites suggest I should, you can certainly hear it, but it wouldn't drown out conversation, my main query is, are there other tweaks I need to do, or should I just carry on for the time being with what I have? Thanks for taking the time to read this, sorry it is so long, but I wanted to describe it best I could.
Darryl,
Your "flare" is a waste of hardware and is just going to melt off. Pipe burner ends just need to terminate inside the forge lining about 1". See our Black Beauty Burner page and the purchasing link for the installation instructions under documentation. A slight taper (12 degrees) to the refractory is all you need. Our burner also shows how simple a burner can be if designed properly.
The size of the burner and the volume fired must match fairly close. Burners are limited by their operating range or turn-down ratio. If the gas pressure is too low the fuel/air mix will move slower than the flame front velocity and the flame will enter the burner and burn it up.
It sounds like your MIG tip may be too far into the burner. Burners need some length for the gas/air to mix properly. However, if you are getting a blue flame in a cold forge you may be OK now.
A gas forge also takes some time to heat up. Even lightweight refractories require heat up time. Give your forge 5 to 15 minutes to get up to heat. It should reach a white heat by then. At that point you generally cannot see a flame in the forge as the gas is igniting from the radiant heat and the glare hides the flame.
Most forges have clear "dragons breath" extending a foot to two feet in front of the forge depending on the opening size. If it is yellow then you are wasting fuel.
Generally it is fan blown forges that really roar. The big forge I built weighed 500 pounds and would walk across the floor if left adjusted at the peak noise. . . Single venturi burner forges make a slight roar and as size increases and burners are added the noise increases.
80lb anvil Trenton : Found an old looking anvil in an old garage . It has Trenton printed on it. A lawyered hole and a small hole on top. hole at the top. I have no knowledge on this and was wondering if it could be worth anything?
Old Anvil :
I don't understand lawyered. . . but old anvils in decent condition are worth as much as new and much more than the discount store imports. Even in bad condition an old "brand name" anvil is worth more than a shiney new Chinese import.
Send me a photo OR have someone that knows blacksmithing look at it.
Missing a couple Lead tacks holding entire bellows leather in position :
Know where I can get any? They appear that they could be the original tacks. The leather is cracking & falling apart now. It has large lead tacks attaching the leather in place along the edges of the bellows 2 halves Top w/intake holes and bottom one solid.The tack heads are 1+ in dia and the pointy tack maybe an inch long.It appears to be a complete bellows. It worked fairly well in the 60s. I dont have the measurements with me,but it is similar in size to the 3 bellows I saw on your site. It tends to be the more elongated one than the 2 heart-like shaped ones . I know you need pics and measurements and I will try and get them in the next couple days.
Bellows Nails or Tacks :
Bellows nails were such specialty items that they were made by the bellows maker or a sub contractor for the bellows maker. If you need replacements you will need to have them custom made.
The only instructions I've seen for making these were using an elongated iron washer that was added under the head when the nail was being made. When I built my bellows I used roofing nails with a brazed brass head over strips of reinforcing leather.
Note that if you decide to re-leather your bellows that the old leather shrinks by half to two thirds in the opening direction. When old leather is used as a template to re-leather a bellows the result is a short stroked bellows that does not work properly. I've seen this is a number of museum shop settings. . . All it takes is one pull to know the error - AND that you do not want to work with the improperly repaired bellows.
Bellows : when I built mine I used a strip of pallet strapping the appropriate width and punched undersized holes in it at the proper intervals; Lasted over 20 years with the tarpaulin canvas I used for the "leathers".
If you are trying to restore it I'd make your own: tacks, roves, lead dip.
East German Anvil : I purchased an anvil and the story is it came from East Germany after the Berlin Wall came down. Is there anyway to tell who made the anvil? Only thing I can find on it is 196 on the side of the anvil and 197 on the upsetting block and just below the 196. It weighs 440 lbs.
Thanks for any help.
Cleveland Columbian leg vise : Hello Guru, i have a Cleveland Columbian leg vise that i restored. Under the securing plate there is an X on the top portion and a 2 on the bottom. I was hoping that would help date the vise but i cannot find anything. was hoping you might know the codes?
Cleveland Columbian leg vise : Hello Guru, i have a Cleveland Columbian leg vise that i restored. Under the securing plate there is an X on the top portion and a 2 on the bottom. I was hoping that would help date the vise but i cannot find anything. was hoping you might know the codes?
Zenbone : Asked and Answered on the Hammer-In
German Anvil : Without a logo or brand marking there is a very low probability of identifying the maker. S&H anvils are identifiable by shape plus the face that they are machined on a planer as well as where they were marked. Note that S&H was the shape trendsetter for forged German anvils so many other anvils are the same shape. They had a small circular logo that was put on the upsetting block or the lower off side. Traces of the logo would be distinct. See our Anvil gallery, Greenwood collection.
Of course, 197 KG is quite close to 440# (and 196 isn't far off, either). So one or even both of the numbers could simply represent weights.
Haybudden Anvil : I have a Haybudden Anvil weight 102 pounds> I cant make out the serial number on the front but it is in decent shape. I wonder if you could help me get the approximate value. I will be glad to send you a photo. Thanks for your help. Steve
Hay-Budden : Steve, click on my name and it should launch your email or provide my address.
Stamping on anvil : Yes sir a friend got an anvil and asked for identifying it by stamping. Number on back is LS 59 number on front right is 360 number on front left is 80992. Any help on age and manufacturer should be great. Thanks for your time. Email me if you need pics
Steve; the price is also rather location specific; this is the world wide web after all. For instance I work in Mexico; would a price in Pesos help?
Pulp hook : Any of you fellas ever sharpen or repoinT a pulp hook? A friend asked me to sharpen a few. One is old Snow and Neealy and the others are Canadian I think.
Pulp Hook :
Stan, I had to look up "pulp hook" so I was hoping someone else would chime in on this one.
From what I see you just need to heat 2 or 3" of the point and draw it out. I would quench in oil and then temper to 600ۧF (a soft spring temper IF the steel has a higher carbon content than mild steel). You could do a spark test to check the type of steel. If its not a lot higher carbon than mild steel I would just forge it and call it call job.
150 Trenton anvil : Trying to find out the age of my new to me Trenton anvil and maybe some history on Trenton anvils. I know it is a Trenton 150#, serial# A75985. Thanks in advance!
Andrew, according to Anvils In America, 1908, a banner year for American made anvils.
They were made by Columbus Forge and Iron Company of Columbus, OH. Columbus made forged leg vises and cast vises for industry as well as anvils. Trenton is one of the premium old American made anvils.
TESTING :
Testing forums using HTTPS (secure connection).
I have a post vise that the threads in the box are almost completely gone. The thread on the screw are not too bad. Are these parts weldable?? Can the the box be welded??
I have an old post vise that the threads in the box are almost gone. Can this part be welded on or is it iron??
VISE box repair :
Roger, Weldable, yes and no. Early boxes are built up from many pieces forge brazed together (clean well and look for copper in the seams). The internal threads in these were made by coiling a square bar around the screw so that it sprung out into the box tube where it was brazed into place. With all that brazing of small pieces welding is problematic. Later "solid boxes" are wrought iron OR mild steel and weldable. Note however that wrought iron does not arc weld very well the silica inclusions melting and running out as fast as you can melt in filler rod. But it CAN be welded.
The early screws are also not very standard threads and even the later ones can be rather odd. THIS is all before they wear out.
My recommendation to repairing these is to purchase a length of acme threaded rod (from McMaster-Carr) and a matching "coupling nut". These nuts are several inches long. Cut off the old screw and weld on the new. If arc welding I would make a long angular prep no different than a forge welding scarf then weld from the center out. Luckily there is several inches of un-threaded screw in this area. Then I would do something similar to the box. IF it is an old brazed box you might consider building a new one. Be sure it is hollow for the extra screw length that passes beyond the nut threads. It can be made from pipe and various forged rings (like the brazed version) and arc welded together. I would try to make it look as much like the original as possible.
While these old vises are currently selling far below their shop value they are still worth repairing. When the market finally catches up with the true value of these old vises your $100 vise will be selling for $1,000. I'm sure it will happen in our lifetime (and I only have a few decades left at best. . .).
VISE box repair II :
Alternately you can make your own threaded parts on a lathe if you have one. A min-lathe will probably not do since the threads are too coarse, 6 to 8 TPI and square and fairly long. The Acme thread is recommended above because that is what is commonly available. Generally 15° Acme threads are considered a better thread form than square but square is (was) still used on vises and clamps.
The screw COULD be built up and remachined but if it is wrought iron the differences in metal might make it very difficult. If wrought you should machine or grind off all the threads plus a bit then do the weld buildup. Then when machining the threads they would all be on one metal.
Often the threads will look like a buttress thread (square on the front and sloped on the back) but this is due to wear. I've machined such odd threads to fit worn or distorted devices.
In the case of a vise with a long screw it is best to completely repair both parts so they fit. Vise threads tend to wear out in the middle so a nut that fits the end will be loose where most of the work is done.
PLEASE do not replace the screw and nut with V threaded parts. No matter how coarse they are not the right type thread and will wear rapidly.
Vise box repair : Hi Roger.
If the threads in the box are brazed the way the guru describes I would try heating it and removing the old threads. Then making new threads as described by wrapping square rod around the screw. Unlikely you'll be lucky enough that it is a standard size so you might have to forge the rod to the right rectangular cross section. yes, rectangular versus square as you'll want it to stick a little proud of the rest of the threads on the screw. You should only need 7 to 8 wraps, not enough for the whole length of the screw box. The threads, or worm, you just wrapped should be just a hair larger in diameter than the inside diameter of the screw box so that when you heat the screw box it expands just enough to let you insert the screw and worm into it. When it cools it should contract and grab on to the worm letting you back the screw out of it. Then you can forge braze the new worm into place. You will have to be careful not to overheat other parts of the screw box and destroy the brazing on them.
This assumes you are comfortable to forge brazing. If you are more comfortable with arc welding the gurus method is probably the way to go.
You can click my name and email me if you have more questions on brazing in a new worm.
Forge Brazing AKA Penny Weld : Bill Epps recommends copper wire for forge brazing which is most commonly called a "penny weld". This is from the fact that chips off a penny were often used for the brazing material. Today copper wire is best as pennys are now copper clad zinc. Borax is used for flux.
All the parts to be brazed in this fashion were carefully filed smooth to remove scale and to make tight fits. The worm should be a springy fit into the tube.
For a clean concentrated heat in a coal forge a "forge tube" is used. These are a 6 to 8" tube about 8 to 10" tall. Once the fire is going good the tube is filled with coke from the fire (or fresh charcoal if burning charcoal). This is then blown very gently. Above the tube the clean hot gases can be use for delicate work be it forging, welding or brazing.
While penny welding the threads was the original method I did not recommend it as it is likely to fail without practice and experienced input.
Spelter : This is one term for the powder/chips used to make a penny weld. It is also the term used for cast zinc sculptures. Another one of those words with more than one meaning (See our Glossary.
Spelter can be copper, brass or bronze chips/powder.
Hello, I found a knife in my fathers things with what looks like a touchmark of a heart and golf club or hockey stick etched into it. I cannot find anything on that,just curious if it's a known touchmark?
Hello, I found a knife in my fathers belongings with what looks like a heart and golf club/hockey stick touchmark? Seemed strange, but wanted to ask someone. I couldn't find anything on it online.
Margaret, I'm afraid I cannot help you with this one. You might try some of the knife forums.
Coal hazards : Guru: I love smithing with coal, only use gas when I must. Love the high heat and control. But I find myself wondering: how safe is it to handle coal? Specifically, what about the dust it sheds when you move it, shovel it, pour it into a coal bin, etc? I am generally careful to avoid inhaling dust when I am slinging around large quantities of the stuff, but what about normal handling, like pouring some onto the forge hearth, shoveling some into the fire, etc? (In point of fact, one very respected YouTube smith, Torbjorn Ahman, has taken to wearing a respirator during all forging operations in his shop. I do NOT want to do so!)
Kind of reluctant to even ask the question, since the answer may be one I do not like! I just wonder if smiths during the coal era were as prone to respiratory disorders as the miners who dug up the fuel.
Handling Coal :
Yes, Coal dust is bad for . . . coal miners who breathe the dust all day for years. If the dust bothers you then wet it down. I used a lot of coal over the years and never had black buggers from handling it. But then I never shoveled it by the ton. However, a lot of smiths get a snoot full of smoke. But THAT is an engineering problem that can be solved. But then dust can be considered an engineering problem as well.
I would worry more about handling the ash which is a concentrated form of all the impurities in the coal including lead, chrome and sulfur compounds.
Among chimney sweeps in England testicular cancer was common from the coal soot and ash. But this was as much a hygiene problem as an exposure problem. A daily bath and laundered clothes would have probably prevented it.
NOTE: Today, coal miners are exposed to high levels of silica dust due to all the drilling into hard rock to clear it while getting to the coal. Instead of black lung they now suffer from silicosis. . . same results.
ANY dust, smoke or fumes in the shop that you inhale is bad for you to some degree. Grinding dust, fine scale, wood dust, plastic dust, welding smoke, carbon monoxide, paint solvents. . . But all modern life has risks. Construction materials in modern homes gas off formaldehyde and plasticizers. Then there are cleaning chemicals. . .
Wearing a Respirator also has health risks. The filters and valves restrict air flow putting stress on the respiratory system and cardio vascular system. This also greatly increases heat stress. Wearers should have a medical checkup for this purpose. Respirators are also a source of fumes from the rubber itself. . . and constant wearing may result in contact dermatitis (skin rash).
Also note that respirators are not one size fits all. You need the right size (that fits snugly and seals all along its edges) AND you must be clean shaven. Some folks need to shave twice a day if they are required to wear a respirator.
Health and Carcinogens : IF you follow any of the diet/health doctors that recommend vegan diets they claim that animal protein (any type) is the most powerful and common carcinogen in human populations. While this used to be considered extremist it is rapidly gaining support as more studies are proving this as a fact.
See Dr. Joel Fuhrman at the Longevity Conference
Fuhrman claims that human populations have been exposed to many carcinogens since becoming civilized. . . but the difference in cancer rates is directly proportional to the change in diet, as meat becomes more common so does cancer. A large scale study of modern populations with all the modern pollutants has shown that those who are primarily vegetarian have little or no cancer.
Now. . there are vegetarian diets and vegetarian diets. . As one commercial points out beer and French fries are vegetarian but they are not a healthy diet. Generally processed foods are bad for you. Anything made from wheat is particularly bad. Dr. Fuhrman claims that a cancer resistant diet must contain a high level of vitamins, micro-nutrients and antioxidants.
To help eat right Dr. Fuhrman has a foods list that scores food based on nutrition per calorie. The 0 to 1000 list has kale and arugula at the top with scores of 800 to 1000 and sugar at the bottom at 0.
Personal life choices, not smoking, not doing drugs or drinking excessively and eating right, probably all have more to do with our health than normal environmental toxins.
Anvil Identification : I bought an anvil at a yard sale but can't find any identifying marks on it. It doesn't have a horn, and has "195" on the side. The base has 4 holes which appear to be to nail the anvil into a work place.
Hornless Anvil Identification : Josh, Click on my name and send a photo or two and I'll see if I can help you.
There are several types of hornless anvil. Antique forging anvils, saw blade tuning anvils and some cutler's anvils. However, cutlers anvils usually have large rectangular grooves for holding "stidies" (specialized tooling). And then there are old anvils with broken off horns. Due to the flat butt weld where the failure occurs these often look like they were made without horns.
Info on a fisher anvil : I just got this old anvil out of a near by family shop. It says fisher on it and has the eagle. It also says 50 on one of the legs , it also appears to have a B on one leg. I had to load it with my fork lift so I know it's a beast.anything you could tell me would he great.
Fisher-Norris Eagle Anvil : Chad,
Fisher anvils are cast iron with a steel plate welded on during the casting process. The 50 means it weighs 500 pounds +/- 1% more or less. They are a desirable anvil due to being quiet when struck with a hammer. This is due to the deadening of the cast iron.
See Fisher-Norris Eagle Anvils
IDing a anvil : I just purchased an anvil and cannot find and info on it. I was told to check with you.
From your site I found out it is 124lbs. 1 0 14 is stamped on it.
cast on it
ETER
??ighi
atent
1 0 14
If you can point me in the right direction. I have pictures and dimensions if needed.
Thank You
Roy Rodgers
Roy, My hero! ;)
As you know its an English anvil. Sounds like it may be a Peter Wright. Click on my name and send photos. Whole anvil images are better than too close.
abana forge : Some time ago i built a recuperative gas forge from plans I purchased from ABANA.,my question is do you know of any mods to the jet hole size as one side burns much more fiercely than the other,the side closest to the inlet is the honest, and the forge needs much more pressure.
Peter, Your issue sounds like a difference in the hand drilled orifice sizes OR possibly burs or debris disturbing the gas flow.
Today most folks build their burners using MIG tips for the orifice. This provides a smooth fuel path and very uniform hole size (thus equal gas flow.
Another fix for your forge is to put a needle valve in the line going to the more aggressive burner then adjusting it to match the less aggressive. . . . I cannot remember if the ABANA forge has a single manifold pipe with dual orifices OR if it uses separate plumbing to each burner. To use a balancing valve you would need individual piping.
See Building Gas Forges for one type of burner using a MIG tip as orifice.
RR 1 0 14 would be 126# in the CWT system 1 x 112 + 0 x 28 + 14
Now many anvils weigh a few pounds different from their stamped weights for various reasons so your anvil might be 124# even if it was stamped for 126#.
Old Anvil Weights : Anvils that were weighed, were weighed to within the nearest pound. So you are +/- 1 pound or half a pound to start. Then when someone weighs an anvil it may not be on a scale accurate to within a pound OR calibrated properly. Most bathroom scales are not that accurate. On many you can lean back and forth and change the reading as much as 5 pounds.
I have a number of old platform scales in my shop and have found them all to be very accurate even though old and well used. Often these old scales need simple zeroing to give correct results. After that the additional weights (the poise) need to be checked to be sure they are the ones designed for the scale and accurate. One of my scales came with a collection of weights that included a workout weight! Luckily all the Fairbanks scales I have use 1 pound increment weights except for the old silk scale which uses ounce increment weights down to a little 2oz that translates into 2 pounds on the beam.
In any case, all the anvils I've weighed were within a pound of their markings except those with obvious missing parts (missing horns, chunks of the face).
I have seen some REALLY heavily rusted anvils. Those that looked like they had been partially buried for a long time. It is possible that these lost as much as a pound to rust. However, such heavily rusted anvils rarely have legible markings.
Identity : Can I attach a photo here? The anvil in question has a crest with a crown on top. It had 1931 stamped on it and 220 lbs also. Any idea? Regards, Declan.
Anvil with Crown :
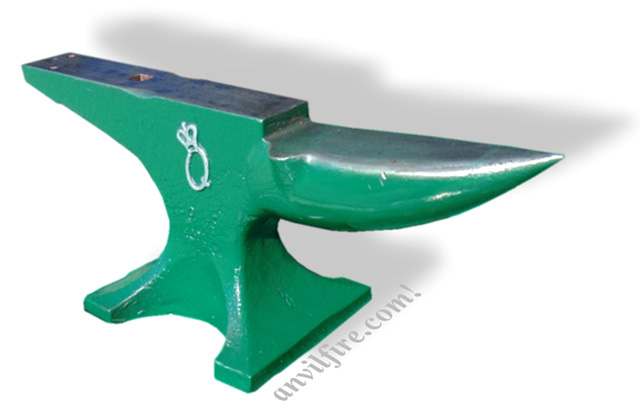
You may click my name and send photos direct to me.
anvil ID : OOPS Think I just cleared my own post. Im trying to identify an anvil I've had for years. The scale weight is 120# but the numbers on the side indicate 125 (1-0-13?) The opposite side has a stamping that ends in ENT and begins with maybe a D or P and then the words "solid anvil" below. it has a square and round hole in the top and the top 1/2" or so seems to be forged to the rest of the anvi. I have photos I could send as well. Thanks --John
The "Solid Anvil", a strange phrase gives this one away as a Wilkinson anvil. They were one of the major anvil makers but sold few in the US. Most are found in Australia.
Anvil with a crown: one of the Swedish ones as they had the crown, weight stamp in pounds and date IIRC.
Kohlswa used a crown in their business logo and I THINK on some of their anvils.
Marking steel : 29 y/o newbie smith/knifemaker, Georgia USA, making my first anvil, a vertical railroad rail anvil. I've drilled a 3/4 inch pritchel and ground a hardy onto the track web and a tiny little "horn" onto one foot. I also made a Hardy hole in a piece of plate steel mounted on my stump, did that with a power drill, mini hacksaw, and hand files (complete nightmare, will never attempt again). One problem I've encountered through all this is finding a good method of marking steel so that my grinds/cuts are good and precise. I've tried crayon (total failure), pencil (too hard to see), liquid paper, and chalk (both with mixed results). What do real pros/experienced metalworkers use for this purpose?
Thanks.
marking steel : There are three or four "usual" methods, depending on the state of the steel. For rusty steel, a welder's soapstone can be sharpened to a fine edge and used like a crayon, but that doesn't give a fine line and it wears off fairly fast, although not as fast as chalk. Soapstone marks also withstand heat up to a low red, which is handy for marking work hot, which brings me to chisels/punches: Once you have the lines laid out with fine soapstone (or whatever you use), trace the lines with a sharp cold chisel. This will leave a line that does not go away until you grind/cut/file it out, which is great unless you screw up the layout, because it can't be erased.
Then there's the silver pencil, which gives a finer line than soapstone.
For a shiny surface, the pros use what's called layout dye. The most common brand is Dykem blue. This is a soluble deep blue dye that can be wiped off with a little alcohol or acetone. To use this, you paint the whole area to be marked, then use a scriber (sharp steel or tungsten point) to scratch your lines in. The bright lines really stand out against the dark blue dye. This is by far the most precise way, but doesn't handle serious heat.
You can use a Sharpie pen as the dye as well, a scribed line in Sharpie ink stands out well. It's not as durable as the real stuff, but most of us have Sharpies on hand. The scriber is the key. You can make one from a concrete nail, but you can buy one with a fine tungsten point at your local Ace Hardware (or True Value, etc.) for around $5. The fine scratch they leave can be sanded out with a little effort if you screw up, unlike using a chisel or center punch.
You can even get all fancy if you have access to a laser printer. Just print your layout in reverse on plain paper, then tape the paper to the shiny steel and rub it hard with a rag or paper towel soaked in acetone. Wait until the acetone evaporates from the paper and peel it off. This will leave the pattern printed on the steel. Not particularly durable, but as precise as your printer can make it.
When I'm laying out a pattern to engrave I do a combination method: Print the pattern, put a thin coat of white watercolor paint on the steel, then tape the pattern to the steel with a sheet of graphite paper (very fine carbon paper from the art supply section of Hobby Lobby/Michael's/whatever) between the pattern and the steel. Trace the pattern with a fine hard pencil, and remove the paper and graphite paper. You now have a decent set of lines to follow. Not at all durable, but for engraving you really don't want any scratches, plus you generally freehand the details anyway.
layout : For shiny steel a red pencil, cousin to the silver pencil works well. Scripto used to make a double ended mechanical pencil that came with silver and red leads.Tool makers where I spent 21 years all had one in their shirt pocket. You can buy a "White Charcoal" pencil at an art or hobby store and their leave a yellow mark even above red heat.
Steel Layout :
Everything depends on the starting condition of the steel. The more accurate you need the layout the cleaner and smoother the surface.
On clean descaled steel (but not too bright - flat gray) many metal workers use Sharpies. This is only suitable for general cutting such as on sheet metal that is going to be shaped by hammering and free hand forming. But they are fast, efficient and permanent.
On the same material if you want an accurate layout you can use a scriber on the bare metal OR with Dykem layout blue. This comes in brush on or spray.
For mechanical layout you should be using a combination square, good dividers and a carbide scriber.
On dark rusted metal with a relatively rough surface (such as you are probably using) you can use flat white paint or a light grey primer. This can be drawn on with markers or pencil and is easy to see.
Using true scale prints from a CAD drawing as Alan noted is very accurate on MOST printers. Even old dot matrix printers were accurate to +/- a dot over multiple pages. I routinely check prints from my HP Laser printers using dial and vernier calipers and they are as accurate as you can measure. However, paper shrinks and expands from moisture. If kept dry and glued on with spray rubber cement the overall dimensions are as accurate as the drawing. I also use label paper for this purpose.
Marking steel : Wow, thanks for the tips and info. I'll be making a trip to Ace this week for marking materials.
Printer Paper Templates :
I've used this technique a number of times. It saves a LOT of measuring, transferring and layout. Create a suitable CAD drawing to scale, print full size and glue to the parts.
The first time I used this method was to build a musical instrument. A number of the parts had locations to drill various sized holes to produce internal radii that other lines blended into. Having the original layout centers made it very easy to drill these holes. Then a saw was used to cut out the spaces in between resulting in nice clean accurate parts.
While CAD was used for these drawings the lines were sophisticated organic curves that blended together seamlessly. Not everything in CAD is square or rectangular.
De-Waxing and Gun Blue : I've had too many irons in the fire, of late. The good news is that some of our crew are going to the World Science Fiction Convention in Dublin this month, and they will be taking some of my ironwork for the Art Show. Cephalopod bowl lamps, snake trivets, Arachnid bowl lamps, tire iron snake candle sticks,&c. (Our theme is "Bringing the Serpents Back to Ireland.")
I will be sending some of my "Slightly Crooked Wrought Iron Dice" as well. So, as I've punched the pips (or numerals on the smaller ones) I've been using candle wax as a lubricant for the punching. Since I intend to use commercial gun blue to blacken them, what do you suggest I use to "de-wax" them so I don't get a patchy finish?
Burn them clean!
Yep! Pop 'em in the Baby Balrog for a few minutes, no more wax!
A fellow down this way sells "blacksmith loaded dice" they always roll a 7 Easy to make as one die is all 3 pips and the other die is all 4 pips. Seller does not assume liability for health risks of using them....amazing how long it takes some people to notice the pip differences!
Peter Wright anvil : I have a Peter Wright anvil with the markings : Peter Wright Patent England , Solid Wrought , 119 weight . Any idea on the age of this
and what it is worth ?
Info on long time family owned anvil : We have a Hadfield
And
Sandfield
Sheffield
1. 0. 26
My great grandfather had it in 1839 or so. Any I do would be awesome as to history and value.
Peter Wright Anvil Age and Value :
These anvils were made from early 1800's until about the great depression. Their hey-day was in the late 1800's into the early 1900's as were most of the old anvil makers.
Peter Wrights are a sought after anvil. However, condition, location and other variables greatly affect price. It could be worth as little as $1/lb up to over $10/lb (if in near perfect condition).
Sway tends to be an issue with Peter Wrights. They advertised using the best NEW wrought iron for the bodies of their anvils. The problem is that the scrap bodied anvils they were dismissing as poor quality were actually better due to their steel content and random direction grain. The directional grain of the nice new wrought iron used by PW was very soft and would distort easier under the hammer blow. . .
All good quality anvils have issues with chipping due to the hardness of the face. Repairs also greatly reduce the value of PW's as it is common to machine the face making it too thin for use. . .
A PW with a semi-flat face and gently worn corners would sell for around $5/lb in the US with the price being higher the farther west you go. But find a crack in the face weld and its worth 50 cents a pound. . .
English anvil weights :
Markings on old English anvils are in hundred weights, quarter hundred weights and pounds. 1.1.9 = 149 pounds 1.0.26 = 138 pounds. See Hundredweight Calculator
Hadfield and Sanderson :
These are an old English anvil from one of the smaller manufacturers. They were made in the early 1800's possibly the late 1700's. They are a steel faced wrought iron bodied anvil.
IF this anvil is the age you say it is, it MAY only have one hole in the face, the square hardy hole. The smaller round pritchell holes came later.
Due to age and rarity this anvil has some collector's value. See the ranges in the PW post above and the note on weights.
This example of a hinge was at an ethnic museum in Bucharest, Romania. It was part of a farm gate that was collected in 1935 as part of an effort to preserve Romanian village construction and transitions. I was recently there and admired the iron work as well as the woodwork on the gate.
/Users/davidlawrence/Desktop/Hinge.jpg
Example Romanian Hinge : This is a hinge on a farm gate that was relocated from the countryside to Bucharest in 1935 as an attempt to preserve Romanian cultural villages. The museum contains approx 200 village buildings from 1700 to early 1900. The wood work is also amazing, and there is much more as iron is expensive /Users/davidlawrence/Desktop/Hinge.jpg
David, images cannot be posted here. If you mail me the image I may post it.
Morning Sirs, Im new to the forum so please excuse any errors. I have recently bought an Anvil as I would like to do some basic blacksmithing as a hobby. I have no real knowledge of anvils just what I have gleaned from the net. Its English as it is marked in hundred weights and is in the London pattern. Other than that I have no idea what make date or any other info about it. I think it has a steel face wrought iron bottom. I think I can make out the word SOLID in a half circle above the weight numbers - this looks like the SOLID WROUGHT that is on some Peter Wright anvils. There is a C or G marked low down near to the stand under the weight numbers - I have some photos.
Kind regards and thanks in advance,
Dan
anvil identificatiion : Hi IM Dan from the UK ŌĆō I stumbled across your site and thought you may be able to help. Im new to the forum so please excuse any errors.
I have recently bought an anvil as I would like to get into blacksmithing. I paid ┬Ż150.00 for an English anvil. It is marked in hundred weights at 3.2.5 It is in apparent good condition. I know it was used in a coal mining fabrication shop near to Leicestershire in the UK. I think itŌĆÖs a steel face with wrought base. I think I can make out the word SOLID in a half circle like is found on peter wrights of the time ŌĆ£SOLID WROUGHTŌĆØ It has a C or G marked low down on the base. I can also see a 2 just under the solid lettering not to do with the weight. Can anyone help me identify or date or let me know any more about the origin of this anvil. It appears to have a steel plate welded on the base maybe? I have photos if that would help.
Kind regards,
Dan
Wilkinson Queens Dudley : Hello Gurus,
My father-in-law has gifted me an old anvil that has been passed down through their family. After quite a bit of cleaning I can clearly see the Wilkinson Queen's Dudley marking and the 2--25 marking on the other side. I've ordered Anvils in America so that I can get more information on Wilkinson. The problem with the anvil is that the horn has been broken off. The anvil still has a good bounce and ping to it. Because it is an actual family item from my wife's family I would like to put a new horn on it that would be useable. I'm not going to become a farrier or anything, but I was to be able to use the horn to bend some hot steel without fear of it breaking off. If it was a forged steel anvil then I think I could do this on my own, but I think its some kind of wrought iron or cast steel. Do you have any insight or advice on how I can go about accomplishing the monumental task of putting a new horn on it? More specifically, what material should the new horn be made of? Can it be welded on? Should the anvil be tempered and rehardened after attaching a new horn? I really want to restore this for my wife's family.
Replacing Horn on Anvil :
A horn is a convenience, not a necessity. Scrolls, bends of all types including large radius can be easily made over the corner of the anvil. In fact many are made free floating in the air. . . Up until the 1700's it used to be common to have a hornless anvil for forging and a bickern for scrolls, hooks and so on. Then as iron shod horses became the primary transportation and shoeing the primary work of a majority of smiths all common anvils were outfitted with horns.
Horns are generally soft iron (can be mild steel). It is possible to make one and weld it on. Welding to the wrought iron anvil body is not quite the same as welding mild steel. You will need a full penetration weld but making the horn will be the hard part. When arc welding to wrought the slag in the metal melts and runs out thus requiring about 3 to 3 times the needed filler rod to make the weld.
There are several ways to make a horn. But the fact that a cone or pyramid uses 1/3 of a regular polygon or cylinder. Turning one on a lathe wasted a LOT of metal. In can also be flame cut square then octagon section then ground round. Also a material waster. In our anvil making series there are designs for built up horns that are welded on layer at a time resulting in that needed full penetration weld.
Anvil ID : Dan, Yes, your anvil is probably a Peter Wright. Some other makers used SOLID WROUGHT but only PW used it in a circle as far as I know.
The weight translates to 305 pounds. Even if in poor condition you got a great deal on this size anvil by US prices.
One fairly distinctive feature of PW's is there is a clamping flat or ledge on the top of the feet under the horn and heel. Otherwise the shape of a PW is that of a very classic modern made anvil with a fairly narrow waist.
You are welcome to send me photos (click my name - if your mail is setup properly and your system works with javascript my email address will be shown). But it sounds like a PW to me.
I am restoring my Grandfather's Cheney Anvil Vice,Pat Nov 18, 1879. No 30, Fulton Iron & Engine Work Detroit Mich. Cleaning it up I notice the Original Paint appears to be this Bluish Green paint. Would anyone know this paint color code and manufacturer and where it can be found? THank you in advance.
I am restoring my grandfathers Cheney Anvil Vice pat Nov 18, 1879 No30. It appears to,have this Bluish Green paint that appears to be original to the Vice. ANyone know where I can get this paint? THank you in advance.
I am restoring my grandfathers Cheney Anvil Vice Pat Nov 18, 1879. NO30
Folton Iron & Engine Work Detroit Mich. The paint color is a green, appears to be original. Where can I get this paint color? Thank you in advance.
I am restoring my grandfathers Cheney Anvil Vice Pat Nov 18, 1879. NO30
Folton Iron & Engine Work Detroit Mich. The paint color is a green, appears to be original. Where can I get this paint color? Thank you in advance.
Anvil paint :
Anvil paint jobs rarely hold up more than a few years in the shop/garage or barn used or unused. The cold mass of the anvil attracts condensation and the paint, usually applied over scale, rapidly deteriorates. While it is possible you have some original paint I rather doubt it.
Records of OEM colors from this era are non-existent. If you want that color any paint store should be able to able to match it. I use various types of paint but if brushing I use machinery enamel (similar to floor and porch enamel).
Cast Iron Fun!: The bottom fell out of the old portable "pan" coal forge at the last demo. (It was old when a friend gave it to me, so I can't complain. I kept it under cover in the barn, so mostly old age and previous abuse.)
I had an old piece of cast iron (Possibly part of tractor wheel weights or tree surrounds; big, thin donuts) that would do nicely as a new lay-in bottom BUT this stuff is unworkable. Generally, I've avoided working with cast iron (it being unforgeable; and not early medieval [except, perhaps, in a Chinese context]) but I was taken aback at how stubborn the stuff was. Hack saws, chisels, drills, saber saws; nothing seems to work in any sort of an efficient manner. Is this typical (I've done little in the past with any of it except to s-l-o-w-l-y drill holes in it), or did I just happen to run into something from the "Adamantium Cast Iron Company"?
Cast Iron Fun :
Cast Iron comes in many grades including "unknown" - just junky melted scrap. When old steel is used to make cast iron you can get what is known as white cast iron which is VERY hard and brittle. It will wreck tools. But it is cheap if you don't need to machine it. Perfect for wheel weights with cast in holes.
White cast iron is the opposite of relatively common (modern) ductile iron in the softer grades which is easier to machine than mild steel and can be welded by common methods. . . This is often mistaken for common grey iron and thus all the misinformation about welding cast iron. When I took welding we had a ton of castings that we practiced brazing and welding. It was EASY. . . turns out they were ALL high grade automotive ductile iron castings. I figured this out when I tried to break up a raw pulley casting with a sledge hammer and could not. . . It would bend, chip a little, but not break. I cornered our instructor on this and HE made some phone calls. . . Turns out a foundry employee donating the castings from the foundry's junk pile did not know what his place of employment produced. . .
I'd find a piece of steel plate for the bottom of the forge. Rusts more than cast but is easier to work/repair.
I believe I've perfected an oil forge design and I want to know if like a coal forge there is a possibility of it adding carbon to steel or mild steel or if it likely burns it off?
John, Forges can add a small bit of carbon to the surface of steel OR burn out a bit. Decarbonization is more a problem and is serious in gas forges. Coal and oil forges can be run rich at high temperatures which makes them better for forge welding.
Large Anvil question : Is there some way to post pictures of my Anvil with some questions about it. IŌĆÖm thinking it a hay burden from what I have researched I have the book Anvil in America but it becomes a little confusing on hay buddens
David, you can send me images but cannot post th\EI`ere.
Trenton Anvil : I just bought a Trenton Anvil. I'm hoping you can tell me the year of manufacture. On the end is stamped Z 85 which I am sure means it is a 85LBS then the serial number appears to be 48219. Thanks George
Trenton Anvil : I just bought a Trenton Anvil. I'm hoping you can tell me the year of manufacture. On the end is stamped Z 85 which I am sure means it is a 85LBS then the serial number appears to be 48219. Thanks George
George, That's a 1904.
Forging Press : Hi All! Another Newbie to the ranks of Metal Mashers! ;-) I am building myself a Forging Press. I plan to use an air over hydraulic Bottle Jack. What would you recommend for tonnage? Should I go with a 50 or 30 or 20? or something else. I have also seen some Air/Hyd foot operated power packs. If I go that route do I still have to get an Air over jack or will a plain one work?
Hi All! Another Newbie so correct me as needed. I am getting things together to build a Forging Press. For the "heart" I want to use an Air/Hydraulic bottle jack. What would you recommend for the tonnage? I have also found some Air/Hyd foot operated power packs. If I grab one of those power packs do I still need to buy an Air over jack or will it work with a regular bottle jack? Thanks
forging press : Ken Robinson, I am sorry to inform you that the air over oil bottle jack will be far too slow to be of much if any use as a forging press. A forging press must be fast enough to move the hot metal faster then the dies suck out the heat. A bottle jack even air over oil will not achieve that speed. You will also need a very big air compressor and tank to maintain the air pressure at the high volume usage. May I commend to you a review of the CoalIron hydraulic forging presses found by searching for CoalIron forging presses as they will show you what is needed.
forging press : Ken, those air over hydraulic ones you see are made by knifemakers who are using them for the sole purpose of setting the welds on small billets of pattern-welded (Damascus) steel. They can do that easily enough, but they really are not general purpose forging presses. Here's an example of several versions of those: https://www.bladesmithsforum.com/index.php?/topic/9932-my-mini-hydraulic-press/
For real forging you need a real press. Ptree pointed you in a good direction.
Manual Hydraulic Presses :
Manual and air assist presses (which are not much faster than manual) have uses in the shop other than forging. A 20 Ton press will bend 1/2 x 2" (13mm x 50mm) easily. It can also cold punch holes within its capacity. I punched hundreds of 2.5" diameter x 16ga steel candle cup blanks in an afternoon. However this requires a die set OR precision guides to accurately hold the punch and die. See: Four DIY Presses and the commercial press tooling link at the bottom of the article.
When I built my big orange press I had ONE job in mind and did not think much of range and flexibility of use. The span should have been wider (about double but no more), the height so that the full range of the cylinder could be used and IF I could have afforded it, a larger cylinder. Back when I built that press the cylinder cost over $100 (which is like $1000 today) and heavier cylinders were MUCH more expensive. If I was building such a press today I would try to get a 50 Ton cylinder.
Forging Presses for general uses need to be much faster. Almost all the demos posted on YouTube are forging heavy stock which holds its heat. But try to press a piece of 1/4" plate between dies and you will find the plate rapidly cooling as the dies close relatively slow. . . One eighth inch (3.2mm) plate such as used for heavy candle cups and outdoor repousse' cools very fast to the point its had to get into the dies while hot much less wait for slow moving dies.
The faster you need a press to move the more Horse Power it requires. Thus most hydraulic forging presses are relatively high HP.
In the toolmaking and engineering world everything is a compromise within physical and financial constraints.
Hydraulic Presses :
Other than just a drive by look I have not investigated this but I saw a 40 Ton hydraulic log spliter at a Farm store selling for just under $2000. This is a gasoline powered machine with a convertible operating direction (vertical to horizontal).
While gasoline powered is not optimal for the shop it has more power than most folks have in their electric service. . . and its portable, roll it out the door (OR into the door). If you want to run it in the shop add an exhaust extension. I THINK it is plenty fast enough for forging. Add die holders and off you go.
Log splitter as a press : First a used similar splitter in my area runs in the $400-800 range. Second these are somewhat speedy when running both stages of the 2 stage pump. As soon as pressure rises to say about 500psi the high flow low pressure stage is by passed and the pressure rises but at a very small flow. A typical 2 stage will be say 7.3 gpm for both stages but only 1.1 at the high pressure mode. as for hp, the rule of thumb is an electrically driven pump will need about 1Hp per gpm @ 1500psi. A useful 3 gpm at 3000psi takes 6.18 electrical Hp and say 40% more in a gas engine due to power pulsing. 6Hp running is right at 20 amps on 220V. Now you say ok I have 20 amps of 120V. Then you can run a 16 ton press at 1.5 inches per second, a useful speed. That would be a 4" bore at 3000Psi.See CoalIron for their 16ton to see that it can be done and well done. A log splitter cum press will squish metal, but slowly.
Log Splitter :
The one at Tractor Supply I was looking at is 16HP gasoline, easily equivalent to a 5HP electric. Runs some 30gpm at top speed. . . Yes, it is NOT designed as a forging press but at 1/3 the cost (40ton vs 25ton new). But then it IS Chinese. . . Some of the other lower capacity splitters sell in that $800 range new.
The max tonnage is what jumped out at me. . .
Old Iron vises : I just watched a fellow on youtube (Fireball Tool) Testing vises to destruction. A bunch of modern Chinese vises were included as well as some smallish old iron and a European mostly steel vise.
The vises that held up the best. . . an old Prentice that had been broken twice and repaired and a shop built all steel vise. The ancient Prentice out performed several new Wilton vises as well as the rest of the bunch. The European steel vise held up until it started to get spaghetti shaped. . but I also thought it was a bit small in comparison to the others. The weak link in most of the vises was the swivel base and the cross drilled screws. . . The steel arm vises tended to bend then break. The weak link in the Prentise was the nut (which could be repaird). The weak link in the shop built was questionable but seemed to be the screw or bearings. However, its fail point was many times higher than all the rest.
Made me happy that I've given away newer Chinese iron and collected good old American Iron. . .
If a good heavy smithing leg vise was put in this test regimen I can tell you that the frames would bend to failure if the screw was in good condition. But this failure can be repaired in a press in most cases.
I always thought I would love to be able to afford to do this kind of destructive comparison testing but while watching this I realized I love tools too much to deal out this kind of abusive punishment. . .
Could use any help/info : I have come across a very thick very heavy hook with ring on it. They are both hand forged. The hook is kind of shaped in an octigan shape around instead of circular and the ring Is made to look solid but can see where it was forged into itself. The hook also doesn't have a solid ring on top part of the hook it is bent around the ring and all the way around and touches itself to hold the ring on it. The ring is probably about as thick as a 1/2 or more piece of cold Rolled steel currently made. The hook is about 2.5" +/- in girth. It weighs as much as,more or close go same as a newer model 7.5 ton crane hook I got thats sid steel. How or who or where could I send pictures of it to help me find age and value estimate ? Any help or Assistance i will be very appreciated and grateful for .
Hand Forged Rigging :
Kyle there is not much value in this sort of stuff as there are few collectors. A few farm museums may be interested in this sort of thing but that is about it. The octagon look is generally a long chain hook for grabbing links in chain. The size is typical of a logging chain but the unwelded eye is a low strength hook. . .
I have a 110lb Belknap anvil. I couldn't find a ton of information on them and I'm just trying to figure out roughly what year it was manufactured and any additional interesting information. The only mark on the anvil is
I have pictures of the Belknap Anvil, with the manufacturers mark. I can email them to whoever responds.
Belknap Anvil :
Belknap was a huge hardware distributor that carried everything you would find in a hardware store to auto parts. See Belknap Catalog Pages, Vise Gallery Belknap went out of business in 1986 among all the corporate raider buyouts. A sad time.
Belknap bought anvils from various manufacturers and had some sold under their brand. Columbus Anvil and Forgong Co. made their premium wrought anvils. They closed in 1955 so the anvil is no newer than that. IF its a Columbus anvil it MAY have a serial number on it that will narrow down the date.
Serial number on Belknap anvil : Carolyn, if it is by Columbus Forge and Iron, the serial number will be on the right front foot if you are looking directly down the horn. The weight and the smith's initials will be on the left. CFI is one of the few makers that you can find that much about. Just last week I helped a fellow figure out when his was made (1899) and the name of the anvilsmith at CFI who forged it.
Shields anvil vise 1914 : Hi, one of these by Keegan Aprahimi... 256 West 54th St NY has turned up in Packard Motor Museum, New Zealand.
I can find the 1914 vise patented 1,111,103 but no mention of the above company...
I will have another look tomorrow and get a better photo.
Any knowledge?
Shields anvil vise : Dave, I found one on line identified as being marked A.C. Shields. Here is a photo from our anvil gallery.
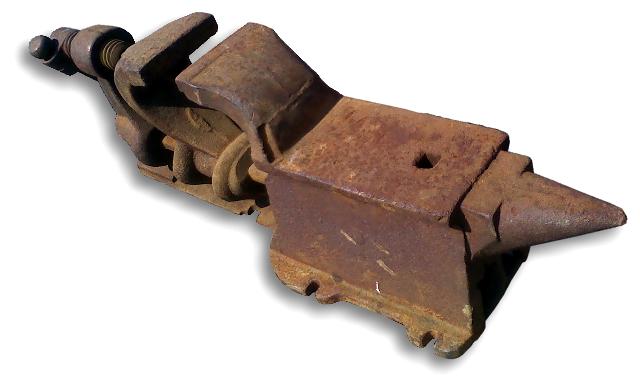
Most of these types of tools were the product of odd-ball inventors who thought they could build a better mouse trap. This was at a time when every town in the US of any decent size and a foundry or an ironworks capable of making these products. There was many of them and most had a short market life.
Hi,
thanks for info. I had another look with a wire brush today,
Keegan Aprahamian & Co Inc 256 West 54th St New York USA
Farmers Handy Tool Patented Sept 22, 1914 RK or AK
Nothing on that company, except... mentioned as exporters and manufacturers agents for auto supplies 1921
Ours has lost the handle for the drill stock.
Pictures if anyone wants them.
cheers Dave Nevin
Forge find : Hi. Newbie alert. I recently found a forge at the dump ( 3 of 4 legs broke off ) this is repairable . The body is cast iron . What would be the best to line the fire area , so as not to crack the cast ? I was thinking fire bricks - first , sand or clinkers , and lastly dirt . The body is sound , have taped it gently with hammer , sounds good . Thank you
Swedish anvil : My dad has a 167 lbs SISCo I'm trying to find out when it was made and what it's worth.
SISco Anvil : Their hey-day was around WWI and up to WWII more or less.
Anvil prices are determined by a bunch of factors. Condition is number one. Maker is almost as important. SISCo is known as a good anvil but are not highly popular. THEN the is where you are located in the world as wll as the region of the US. In some areas there are lots of anvils so lower demand and pickier buyers and in other areas there are very few so all anvils go for more. This can make over a two to one difference in price.
Today good anvils are selling for anywhere from $3/lb. for OK anvils to as much as $15/lb. or more for highly collectable old anvils in very good condition. THEN there is how soon you want the money. Those high prices usually take marketing and patience.
Current prices are really putting a hurting on folks that just want a decent anvil for their hobby. . . HOWEVER, old beat up anvils that the face is not too marked up or that can be dressed with LIGHT grinding are much better than shiny new imported cast iron or soft iron anvils. These often still sell for the 1970's $1/lb. . .
Forge Find : Doug, See Claying Forges (anvilfire FAQs)
resiczz Anvil : Have you ever heard of a Resiczz anvil, church window style?
Nope. . sorry.
Carron swage anvil id : IŌĆÖd like to have my old swage block identified. It looks very like the picture of a Carron shipyard swage in your swage gallery.
Carron swage : Marie, The only company I know of that made ANYTHING close to the Carron blocks was Carron.
You may click on my name and send me photos of your block and I'll take a look.
Apprenticeship wanted : Hello,
I am currently at college pursuing an enginneering degree. I have realized recently that I don't want to be an enginneer, I want to be a blacksmith. I have decent amount of experience. I know my way around most shop equipment and I am good with drafting, tolerancing, and measurments. I have learned to MIG weld and do some harder woodworking. I have done several blacksmithing projects with my own equipment. This includes a railroad spike knife, leaf-spring letter opener, gladius sword, and a few decrative things. I live in Michigan I would like an apperenticeship near there, however I am also open to going anywhere in the world. Now I know there is no such thing as a true apprenticeship in this day in age. Although I wish I could have a traditional apprenticeship I know that is not possible. I am looking for someone whom I can work under and learn. I would only ask for room and board. I would possibly stay and work with/for after I am no long deemed "apprentice". Or I may wish to leave and start my own shop. I would love the opprotuity to work somewhere that isn't urban or suburban but I am open to anything. If you have an opprotuity at your shop or know of one I would appreciate the information.
Thank you
-Matt
Apprenticeship :
Matt, I highly recommend you finish your engineering degree or change your major to something you can complete. While the world is changing a lot in this regard most places want someone with that sheepskin - even if it doesn't apply to the specific job. Art is a good major for someone going into artist-blacksmithing.
From your described skill set I expect you could do well training yourself. There are dozens of books on the subject that did not exist when I was learning as well as reprints of many that were out of print.
BIG CHANGESDue to lack of traffic the V.HammerIn is no more. We are also dropping the Links page for the time being. Over time links become dated, sites dissapear. . . a maintenance headache on a 21 year old web site. The NEWS is also being de-linked due to lack of updates. It will still exist in the bacground due to the many links to the articles. THE BIG ONE - We have also had to shut down our classy Magento store. . . It takes a developer to setup and like other things it was due for maintenance (security upgrades). It also cost us a lot for the various services it connected to. So we are building a new store using PayPal. . . In the next 24 hours the DNS changes will take place. I am fully expecting MANY things to not work due to being hosted on updated versions of Apache and Php. I hate updates. . . But my option was to try to rebuild anvilfire from scratch. . . The change is done AND as expected. . . a LOT is broken |
test : test
BIG CHANGES. . . . : Well. . . I've fixed a few hundred pages and re-upped them. I'm sure I will be finding more over the next months. . . But everything that is automated is broken. Those are:
AnvilCAM II
Slack-Tub Pub II
eBooks
iForge (any of the new format - the old ones still work)
Members login. . .
A few stats. anvilfire consists of 48,000 files taking up some 26Gb. It took roughly 6 hours to download a clean copy via FTP and 30 hours to upload it. I've spent 12 hours today fixing things like ALL the Anvil and Vise Gallery pages.
The flag system was partially broken and now its ALL broken. . . Our old page counter system (on almost every page and integrated into the Flags system is probably done for. . .
The GOOD news is we made our FIRST sale from our PayPal powered store.
Well... its 3am. . . I've fixed AnvilCAM, eBooks, iForge and May's tool sale (I missed it in the list above). The pub and login are database issues that will have to wait a while.
BIG CHANGES. . . . : Another day passes. . .
I've fixed a bunch of small things. Our spam proof contact form that was broken several years ago by another server move now works. . . Closing down our high cost store has one happy benefit - robot spammers were having a field day with the Magento form that you cannot turn off. . . My spam level will be halfed. . .
I also got the web-ring system working. It needs a ton of work but it is operating as it should now. Had lots of reconfiguration and minor code issues.
The server folks got the Slack-Tub Pub database issue fixed but not the log-in system. I'll have to see if I broke it while "de-bugging".
You may not have noticed but I am removing the google adsense ads as fast as I find them. . . When we first signed up with them they covered our fixed costs (about $600/month). Then they tapered off until their recent "adpocolypse" when the volume and variety of adds they had to serve plummeted. I also blame the low revenues on their serving mostly non-relevant ads.
The flag system is dead unless I make it static.. . (use old counter data). The counters are gone unless the server folk get real helpful - which I do not think they will on our much smaller account.
SO, What does all this have to do with blacksmithing???? Beats me. I'm doing a LOT of keyboard hammering. . . I want to get in the shop and build forges. But I have a new on-line store to build. . .
Ah. . just found a broken button on the Comics page. . . (fixed).
Fixes : Jock: Keep up the good work; it's much appreciated!
Carron Swage Block : Is this the same Scottish foundry where they invented the carronade for use aboard His Majesty's warships? After casting cannon, I suppose swage blocks would be no big deal.
anvil weight calculator : I used to have an anvil weight calculator on my desktop that was here in anvilfire.com. Can't find it any more. Where did it go?
HUNDREDWEIGHT : Chris,
Click on FAQ's, scroll down into Anvils, HUNDREDWEIGHT CALCULATOR.
Currently if you bookmark it the page rolls over to our home page. . . one of many things that need fixing.
Weird. . . Bruce logged in and I can't. . . My own site hates me. . . ;)
Bruce, maybe. There is a note on the Swageblocks.com Carron page. The quote was sent to me, I do not have the book.
The Carron Company was an ironworks established in 1759 near Falkirk, in Stirlingshire, Scotland on the banks of the River Carron. They were one of the early operations that used coke rather than charcoal to make iron. Besides swage blocks they produced cast iron products ranging from steam engine parts for James Watt and cannons for the Royal Navy to mail boxes and ships. It makes sense that a company such as this that made ships would also make tools for ship building.
The Carron Company was the largest ironworks in Europe by 1814. The business faultered in the 20th Century and was bankrupt in 1982. Small parts of the company still operate but not as the great ironworks they once were.
------------------------------------
See: Where Iron Runs Like Water! A new history of Carron Iron Works 1759-1982, Brian Watters, John Donald, 1998.
Hmm, just noted the server is on UTC. . . screws up the comics and daily tips. . .
Just fixed the Tailgate system. Lots of little bits on it were broken. Need to finish the system. . .
Pulled another all-nighter, then slept a few hours. Finally figured out why our "Visitor from" Flag system was broken. More "newer" server version issues.
I still haven't fixed the conglomerate Flags page. That was integrated into the counter system which is not supported on the new server situation.
The last serious thing to fix is the user login. Good thing we are public access or even *I* couldn't get to the site. . .
These are the kind of things that KILL many web-sites. One day they are there and the next they are gone and never recover. I'm fixing code that Kiwi wrote for us 20 years ago and worked until now. . . I wrote the Tailgate and Flags system. They have both required repair with each (recent) server move due to being written in php. This is our SEVENTH server. Four of those hosts went out of business forcing our moves.
Anvil Weight Calculator : For the past couple of months, I've had link on my desktop to your Anvil Weight Calculator. Then all of a sudden, the link just takes me to the home page. What happened to the Calculator?
Chris, answered several posts up
XšS`erver move : . . well, I've been building the new store for a couple days.
This evening I went to setup some links to descriptive articles and found a hundred or so that were still broken. . . Our error logs are so gigantic they are useless at this point. Bedtime. . Its 1:30pm (yeah the server time is screwed up as well. . .)
Blacksmith Wanted :
HELP WANTEDContact Frank Turley |
On-line Store : Well. . . "only" a week's hard work and long hours and the new store is complete and running. That's a lot of work for a store that doesn't have integrated shipping. Almost all our product is listed. I just finished the boilerplate and setup redirects from our old "secure.anvilfire.com" to the /sales/ folder on anvilfire.
rolling mill : do you know how i could obtain a mcdonald or blu crusher rolling mill for a home shop .
Rolling Mill :
William,
The Blue Crusher was only manufactured for about a year and was not a very good version of the machine. Otherwise all McDonald mills are DIY projects. We sell the plans as a digital download. See our store, the reviews and the video we host.
Rank amateur : I have a desire to make VERY SIMPLE iron objects such as windchimes or patio art. I have ZERO experience. I live in Tucson AZ and have tried to search on the web for places to buy thin iron. I think I don't know the right term as I find nothing in my searches. Can you give me a term that might be used in a search for thing, round, black iron that is bendable with an acetylene torch? I don't know where to begin my search because I don't know the term I am really looking for. Thank you
Need Steel : Jan, You want to ask for "hot roll flat bar". Generally you can get 1/8 and 1/4" thick up to about 6" wide. Beyond that you will need to have plate sheared for you at a steel service center.
See Steel Forms
Where to Buy Steel
Your best help would be other smiths in the area.
Need Steel :
Jan, I reread your post and I am not sure how "thin" you are talking about. If you want sheet metal (plate) up to 16ga (.070") you need to go to a HVAC or sheet metal shop. These folks typically work galvanized steel in the 24ga range but often carry some 16ga or heavier sheet stock. This can be sheared or cut by plasma and LASER to any shape you want.
16ga is the thinnest plate that most Steel Service Centers carry.
Also note that I left out 3/16" in the flat bar I mentioned.
Old anvil : I have an anvil stamped 1926. It is easily 100 pounds. Not in mint condition, but still very functionable. There is some other stamping in it that doesn't make sense to me, as well as a logo in the
center (hard to make out). Where can I go to find the value of this?
Broken Power Hammer : I'm a retired engineer, an expat Brit now living on Vancouver Island & have done quite a bit of metalwork in my time but I'm only a wannabe blacksmith and have done only a little forging, despite being fascinated by the craft. One of these days (years?), I will have my forge and anvil set up and be able to have a go myself instead of just admiring other people's work. Anyway, for now, I'm writing to tell you the sad story of a power hammer that was donated to our antique machinery & heritage club, years before I joined. I believe it came from a logging camp originally although I don't know it's full history. Apparently, the person donating the hammer turned up at the Club's yard with it in a dump truck and proceeded to just tip it out onto the ground. It's a type with the anvil sticking up through a hole in the base, prevented from being removed by the anvil cap being still in place. It didn't help that the hammer landed on a large rock and that and the weight of the anvil broke the side off the base. Years later, it's still lying there and now the Club has decided to dispose of it. It went in the Club's annual auction and I acquired it for very little as there was no competition. I'd now like to know more about it, especially the weight, and this seems like the best place to do it. I'll be emailing some photos to the Guru but I can tell you a bit more about it here. It would stand about 8'6" tall, without the ribs under the base, and it looks remarkably like a picture I've seen on the Net of a Niles Bement 1000lb hammer, except it's a lot smaller. It has no name on it that I can find but does have a serial number, 2493. The anvil assembly is a simple structure and I have calculated its weight to be around 2100lb. If the 15:1 rule I've read about holds here, that would make this machine to be about a 140lb hammer.
The first thing I want to do is to get a friend with a crane truck to shift it to our front yard and then I propose to reattach the broken part of the base. If I can drive out the wedge that holds the anvil cap onto the stem, that will make life easier as I can then assemble the base without having to have the anvil in position. I'll then decide whether to keep the hammer just as a static exhibit or, if it's not too far gone after lying on the ground in all weather for years, to restore it to running order.
I will be grateful for any information anyone can give me on this machine. Who knows, I might eventually be interested in setup information, such as foundation details!
Mikes anvil : Mike, it's fairly rare for an anvil to have a date stamped in it, only a few brands did this. That said, is it stamped in, or are they raised numerals? The same question goes for the other markings. For instance, is there a raised two-digit number on the right front foot as you look at it from the end of the horn? If so, put a zero on the end and that's the weight in pounds. I suspect it is a Fisher, a steel-faced cast iron anvil.
Regardless, 1926 is just a baby in anvil terms, so forget about antique value. It's a working tool, which is where the value is. That value can vary by quite a bit depending on condition, maker, your location, and your desire to sell/anyone else's desire to buy. Anywhere from $1 to $4/lb is the going rate to a working smith, slightly higher for rarities and sales to the desperate. Send the guru a picture (click on his name in the post above yours and it should open a mailing window) and he can tell you more about it.
Broken Power Hammer : I tried to send a note with photos to the Guru by clicking on the name but I got back a DSN(Failure) notice. What am I doing wrong?
Tales of Woe - Broken Hammer : Jack, I'm not sure why the error. We've moved servers and there have been tons of problems. Among other things I cannot log into my own forum (database issues). However the decrypt mail works for me so I will send you mail. Note that google hates me. . and it will be in your spam box.
MOVING DAMAGE is the most common destroyer of machinery of all types. I have an ancient flat belt drive 13" South Bend lathe that was in mint condition until someone tipped it over. . . then did a poor repair job and ran it with miss meshed gears. I had to make replacements for castings and have custom gears cut. Another larger lathe was in fair condition when I bought it then the guy delivering it snagged the carriage hand wheel with a chain and bent it and the shaft AND broke some gears in the apron. . . I've got the shaft straightened and the longitudinal feed working but the internal feed gears require taking apart the carriage. . . and there are flat head screws that will have to be drilled out. . not looking forward to that. So much for MY problems. . .
The ribs under the base make it probably a Niles. They had no name cast into them. There are marks scribed into the ram noting the travel limits (very important). Niles dies also had sweeping curved sides that were sort of distinct.
The capacity (weight) is best calculated by measuring the ram (its rectangular 0 easy math), and the die and the drive rod (estimating the length). The total of these is the size or "capacity".
Niles generally did not use the 15:1 ratio, more like 8:1. The way to tell is the shape of the anvil. The standard duty anvil has wings on the base that are just sufficient to support it. A heavy duty 20:1 anvil has a deep rectangular base (maybe a foot deep on this size hammer).
The base of your hammer is fairly non-critical. A lot of preheat and many pounds of brazing rod should do the trick. Often a mechanical repair is made (drilling taping through parts) and then maybe brazing OVER that. Personally I would be inclined to have a fairly expensive repair plate made from 1" steel plate (or heavier) cut to the shape of the base or a bit larger to clear those ribs then bolted to the base and the broken part. Lots of magnetic base drill press work.
The anvil is a loose fit in the base and when the hammer is set the anvil is carefully leveled, then the hammer lowered over it, dies assembled and the frame shimmed to level and bolted down. Then wood wedges are driven in around the anvil filling the space to hold everything in place securely. Those making a neat job of it cut the tops of the wedges of level and fit a sheet metal shroud over them to prevent scale from setting them on fire and working into the fits.
WARNING: The setting of the two determines the bottom of the hammer's travel. It MUST be no longer than the marks on the ram and frame indicate. Otherwise the piston will bottom out in the bore and come off OR brak something. It only take ONE test stroke. . . Find the marks, do the math, tripple check and NEVER run without both dies installed.
Wedge removal is a beast of a job. The last one we pulled was done using a back hoe curling its bucket on a block welded to the end of the wedge. When the wedge came out a chain snapped and there was a shower of sparks. . . serious stuff.
Wedges tend to get tightened when the anvil and die are hot, AND scale tends to work into the minuscule gap that is created on each heavy blow of the hammer. Its a microscopic thing that happens on all dovetail hammer die assemblies. NEVER EVER hammer on the small end of the wedge. It will expand and tighten. . .
What I've done/recommend is to make a block that a HEAVY (maybe 8 to 10 pound 1" shaft) slide hammer screws into and weld it securely to the wedge. Then oil everything, heat the outer dovetail part and hammer away. Heating needs to be fairly quick so that it does not have time to soak through all the parts and be useless. . .
Will is run? You have two critical areas to worry about. The main cylinder that is likely rusted inside and the steam valve. This hammer coming from a logging camp most likely ran on steam, not air. Steam is sort of self lubricating. When run on air these machines have oilers on them. There is usually a shelf on the left side of the machine that an oiler would bolt to. A rod attached to the oiler lever and the linkage feed back lever and pumped a little oil with each stroke and more oil on long strokes.
To power one of these takes a BIG air compressor. I had a large gasoline powered construction type (Sulair) that I was going to run my 350. In fact, it was a common setup in factories to have a large engine driven compressor setting near the hammer.
These are great old machines but can be a LOT of work to repair/restore. But they are WONDERFUL forging machines. They can make gentle taps and then devastating blows the next instant.
James Nasmyth :
As a proud Brit you should appreciate the fact that steam hammers were invented by James Nasmyth in 1839. . Many A-frame hammers still in operation world wide are almost identical to his original design.
You will hear a story told by various smiths, often "old timers" about seeing a guy put a pocket watch on the lower die of a huge steam hammer than then give it a gentle tap jut hard enough to make it bounce without damaging it, then a moment later making a piece of metal foil out of it.
Its all a lie. THEY did not see it. But their Grandfathers' MIGHT have. This was James Nasmyth showing off his invention. He did it every time he had a chance and an audience. He was always prepared with old pocket watches he picked up at various flea markets and second hand stores. Then he surprised his audience by apparently destroying his pocket watch.
A demo you WILL see today is folks putting a box of matches on the anvil with one match sticking out about 3/4" then gently taping it into the box without damaging the match box. Few hammers have this kind of control.
Nasmyth also invented the shaper and many of the auto feed devices still found on machine tools today (such as the lathe feed reversing mechanism).
Nasmyth's autobiography can be found on our eBooks page. Its an ancient HTML version that we have hosted for 20 years. . . (and need to fix). Jump to chapter 13 if you want to know about the steam hammer but the whole is a great read and very enlightening about the times and industrial history.
watches on steam hammers. : While the demo's I saw used wrist watches, they were a bet between the hammer-men of experience and newbies. They would get the newbie to place their watch on the lower die, put a swipe of grease on the upper and tap the watch to put a spot of grease on it, betting the newbie they could not do it. the newbie always smashed their watch and lost $ bets. Number one the experienced guys usually had maybe 25 years in, and they knew to put a pretty thick gob of grease right at the right spot. You can imagine what a 25,000# Erie will do to a wrist watch LOL. AND I personaly have seen that maybe 15 times.
Anti-Freeze :
You close your eyes for a moment and the world bites you. . . We needed antifreeze to top off the system in my van so we picked some up at WalMart. We put in most of a gallon. THEN this morning I get a VERY timely call from my son. He asked if I know anything about OAT antifreeze and its incompatibility with ethylene glycol? Sadly, if I had not missed his call yesterday I would have avoided needed to flush and replace the coolant in my van in cold weather. . .
It turns out there is a new type of antifreeze called OAT that is not chemically compatible with ethylene glycol. Not I said CHEMICALLY. On the comtainer it will say it IS compatible because it meets the ASTM spec for use in your car. But if you mix the two they form a gel in your cooling system that clogs it and can wreck your engine. . .
It gets WORSE. They do not say on the container what is in the product! They also do not say in the SDS (MSDS) since the new rules allows manufacturers to say it a "proprietary mixture".
BEWARE! Be sure to buy product that you can identify.
Welding videos dangerous? Is there any danger to the eyes when watching videos of various types of welding?
NO : The brightest that a video monitor OR film projector screen can get is a normal bright white. Like looking at white backgrounds on your monitor.
While it looks intense that is a result of contrast (dark against light) and the rapidly changing exposure levels in the camera.
Good question.
finding a value : Hello I am in new jersey and am looking for a value of a American wrought 74 in great condition. Do you know how I would find that info? Thanks Charly
"Great" condition. . . I've seen folks call an anvil that when the only thing you could say about it was that it had all it's parts. . .
Great or very good condition is with a flat smooth face, straight but not necessarily sharp corners and NO repairs or excessive grinding.
In that case its worth anywhere from $250 to $750 depending on location, who's buying and who's selling and if you are willing to ship. Top dollar prices are only gotten when well advertised with good photos and a willingness to wait until the right person comes along (relisting).
Progress on Server :
While we still have some little problems I am busy finding loose articles and putting them in the new system and listing them on the FAQs/21st Century Blacksmithing alphabetical index. There are 135 articles listed at this point and those do not include our hundreds of gallery pages, power hammer pages and iForge pages.
Peter wright anvil : I am retired and want to do some blade smithing and general blacksmithing. Have been looking around locall (N ID)y for an anvil. Recently I came across a smaller PW anvil and noticed what appears to be "honeycombing" on the waist area. Is this a cause for concern? Other than that it is in decent shape.
Thanks, Michael Evans
Honeycombing on wrought :
Michael, PWs were made of wrought iron with a steel face. Wrought is a mix or pure iron crystals and silica slag from the smelting process. This slag can be dissolved out by corrosion leaving porous metal. Being in the body of the anvil is not an issue. At worst is could be cut out and welded up without damaging the anvil so long as the face does not get heated above 350°F.
The Gopher gofer :
In any shop with more then 3 or 4 workers that do varying non-production work one of the most important people in the shop is the Gopher. Nearly every day in a busy shop things need to be picked up or delivered. Some days the pickups may be at several places (the fastener store, the power transmission supplier, the industrial supplier. . .) and be the better part of a days work. Not only does this require a worker but often a pickup truck or small flat bed (3/4 T). When the Gopher is not running errands they can be used for janitorial work and other minor jobs that small shop generally does not need a full time person for.
A Gopher Story: Back in the early 90's we were doing a big job and one of the companies involved asked if they could help, provide some man-power. At the time I was doing design work which we were behind on AND gophering on an almost daily basis. I told the supposedly superior big business guys "We need a Gopher with a pickup truck." as that is what is slowing me down more than anything. Instead they sent us a machinist with a Corvette (can haul anything in that). The machinist worked out and absolutely refused to gopher (I would have fired him if it was up to me). BUT we still did not have a gopher and I was getting further and further behind on mission critical design. SO, Mr. Big business comes back and says what else can we help you with. I said, "We need a Gopher and a pickup truck". Instead they insisted on doing some of the purchasing for us since they were a "big" business and thought they could do that more efficiently. . I asked, "What could be more efficient than me making a list and calling the guy we got a quote from and saying I'll take it, deliver ASAP." So I made the BIG guys a list. . . They then proceeded to piss off one of our key suppliers who was a sole source and who WE had a good long term relationship with. Our contact, Mr. Hoffman said he would NEVER do business with those SOB's. . . It took me several phone calls to calm him down and get delivery of the needed product in less than 2 years. . . Meanwhile I continued to do the gophering and we got even further behind. My work got shuffled off on another designer as our schedule now required my attention building the electrical panels for the machines. We finished the job on time but the shuffled off work was not really satisfactory or as complete as should have been. . .
The lessons here are #1, a Gopher IS important to a shop. They keep other more highly skilled or key personnel on the job and are generally worth much more than they are paid. #2, Big businesses are NEVER more efficient than a small closely held company.
heat treating 4140 steel : My local machinist made me some icepicks ( 4140 steel, 4" long, 5/8" cylinder tapered in steps to 3/8" and then a point) these will be mounted on the end of a long wooden staff and used to test ice thickness by pounding a small hole in the ice. I would like to harden the piece then temper it so it doesn't shatter with ice impact but not dull too quickly. I have done a small amount of knife making but do not have a forge, I was hoping to harden with a couple of blowtorches then quench in water or oil (your advice here re quench liquid would be great). Would I be OK to get it red hot till it loses magnetism before the quench. Re tempering, I was thinking of heateng my oven heated to 400 - 500 F for an appropriate hardness to suite the intended purpose. Again temp advice would be appreciated. Does all this sound reasonable???
4140 HT : I'm not the Guru, but I am a bladesmith and toolmaker with a bit of HT experience with alloys beyond 1095, so:
4140 is a very tough steel, but that statement of "tapered in steps" bothers me. If there are sharp cornered steps, you're setting yourself up to snap the tip no matter what. It should be a smooth even taper with no sharp transitions.
For the heat treatment: 4140 requires heating to 1570 degrees F to harden properly. This is approximately 150 degrees hotter than non-magnetic, which is why any good heat treat person will tell you that unless you're using only 1095 or W1/W2 a magnet is useless. All magnetic steels go non-magnetic at around 1425 degrees F. Very few alloy steels will harden from that temperature. Instead, watch for what is called "decalescence." This is the actual crystalline phase change that takes place when the steel is hot enough to harden. It appears as a slightly darker line between the part that's hot enough and the part that's almost there, and can appear to be shadows swirling around inside the steel. You need to be in dim light to see this effect. You can use a magnet to tell you you're getting close, of course.
Quench in warm oil. NOT motor oil, it absorbs water and is unreliable in speed. Plain old canola oil at around 130 degrees F (just hot enough you don't want to leave your finger in it) is about perfect for 4140, just as good as a commercial medium-fast quench oil.
For the temper, I would not go higher than 350 degrees F. A thick point like you describe is not going to dull easily. 4140 as-hardened will be around Rc 59 at most. Tempering at 350 for two one-hour sessions will leave it around Rc 55, about the temper of a good anvil face. Strength (i.e. ability to hold a point) will drop off amazingly quickly above 350 degrees. This is also where a smooth taper comes in. Steps will make it snap under any sideways pressure, a smooth taper will act like a stiff spring at that hardness.
All that said, if your local machine shop stocks 4140, do they not have a heat-treater too?
edward brookes anvil : I came across an old ad for this brand, and was wondering if anyone had pics or history on the maker, originally in Sheffield England
4140 HT : Thanks for your helpful responseAlan!
Here is a photo of the ice pick. does this cause you concern?
What about hardening and tempering just the last/small diameter segment and point?
cheers, Paul
IMG_3382.jpg
4140 : Sorry, the forum software won't let you post pics here. That said, given what you want to use it for, you should be able to get away with just doing the point. If you were going to be really fancy, you could drill out the tip and braze or epoxy in a carbide point... See, now you made me think, and that can get dangerous! You could even use the wrong end of an old HSS or cobalt drill bit, that would be plenty tough on ice, no?
Paul, Mail the photo to me and I will post it.
David, I do not know of an Edward Brookes anvil manufacturer. However, Richard Postman, author of Anvils in America has a list of over 250 anvil makes in England not included in his book. Brooks without an E manufactured cast steel anvils which are now sold under the Vaughan line.
forges : I am researching propane forges and am interested in the pros and cons with castable refractory cement and K wool for the linings.
Thanks much, Michael Evans
forges : Ceramic refractory fiber (Kaowool, inswool, etc.) is a great insulator, but not at all tough. Once fired, it gets brittle and is easily shredded by normal forge use. If you get into forge welding, welding flux eats ceramic fiber like boiling water on cotton candy.
Castable (and rammable) refractory cement is hard and tough, but not particularly insulating. This means it takes a lot of time and fuel to bring it up to forging heat, and once it's there the whole forge will radiate high heat for a long time. It's excellent for production work for this reason, not so great for hobby smithing. It's also highly resistant to welding flux. "Cast-o-lite" brand is even a little bit insulating.
So why not do what most people do and use both? One or two layers of ceramic fiber blanket for insulation topped by a layer of castable refractory cement for durability and heat retention is the normal practice with gas forges, and has been for the last twenty years or so.
The popularity of "Forged in Fire" has led to a huge number of felons - excuse me, "entrepreneurs" - selling forge-shaped objects on Ebay. These are often a piece of pipe open on both ends with a single layer of fiber blanket inside (unsecured) and a couple of "burners" of questionable design and function, offering the whole package at only twice what it would cost you to build yourself from better materials.
People like www.hightempttools.com sell the wool by the foot and the refractory by the pound. The guru here can sell you an excellent burner for less than anyone. Two layers of wool with 1/2" to 3/4" of cast-o-lite makes a very good forge lining indeed.
Forges : I prefer a brick floor so it is replaceable and just ITC-100 on the refractory blanket.
See Lightweight Forge Construction
In my old age I've come to appreciate equipment that is both lightweight and efficient. Being able to pick up something without a hoist is convenient.
NOTE: While we no longer sell cut lengths of blanket we do quote and sell full cartons at $98 ea. with quantity discounts.
MOVING PAINS :
We are still finding broken things from our October 20 move. Yesterday I found a dozen book reviews with non-functional detail image routines. AND I just found a broken link to an iForge demo. . . fix fix fix
Meanwhile I've written a new article on forge heat colors and a book review that will post next week.
New Book Review : Locks and Keys Throughout the Ages, Vincent J.M. Eras, 2019 2nd Edition.
Locks and Keys : As a locksmith friend once pointed out- old lock designs are sometimes easy to make, but difficult to pick if you don't know the principle behind them. I still have to finish a duplicate key for a friend's Viking age style lock so he can use it. Just need to find the time... ;^)
I have a Trenton anvil with the numbers A938..can you tell me when it was made?
Annealing 4140 : Hi . Have started anvil build . Face will be 4140 , 2" thick , 5 3/4" wide , 22" approx length . Have confirmed with metal as 4140 with steel test gun , cleaned to their specs ( no steel grinding wheel ) . Have found local pottery Fireing company to do annealing process . Searched inter net , with varying processes of annealing & your forum , that has hardening process but I could not find the annealing process.
Please advise on 4140 annealing process. The basics I have found is heat to 1550 f , hold temp for 2 hrs ( 2" thick ) let cool in furnace to 400 f , then air cool to room temp . Will I need support under steel , for heat circulation & keeping straight.
The annealing is for installing Pritchel & hardy holes & welding 4140 to mild steel base. Thought I was member hear but can't find my password stuff in my password book. Would be under ' retired farmer' . Thanks
Doug, for machining the heat treat process is fairly complicated. My Heat Treater's manual lists 4 methods all similar. Most require a furnace controlled cooling rate of either 25°F/hr or 10°F/hr.
Where did you get the metal? This material is often delivered ready to machine.
Have you considered going to a heat treater? Their rate may be the same or cheaper than the potter.
I'm on deadline on a project so will have to give details later.
Black Beauty Burner : I have been very happy with my burner and have easily forge welded with it and done hundreds of hours of production. I recently had a loss of heat and am guessing the tip is obstructed. Before I mess it up, is there a recommend protocol for replacing the nozzle. Thanks.
Scbon, We have had some reports of the MIG tip loosening (due to flow vibration?) Simply tighten the MIG tip (orifice) with a pair of needle nose pliers. Its a little tedious in the narrow space but it only takes a minute.
Glad you like the burner. Sorry if you have an issue.
Black Beauty Burner : I was definitely not complaining, this is a great burner.
I consider this normal maintenance. I will try to tighten it up. Is this how I would remove if I want to inspect the tip? Thanks for the advice.
Black Beauty Burner : Yes, I put them in through the air port but have never done so on a forge.
NOTE: I was an auto mechanic for a good while and can balance small parts on the tips of my fingers and get them in place in the blind. . .
scbron : Tightened it up and ran a piece of mig wire through it. The flame is running perfectly now. I bet it was just an obstruction in the orifice and the tightening was not really necessary. I am back in business. Thanks for your help.
The most problematic clogger is loose bits of Teflon tape. As it flaps in tubes it creates rumbles, flutters and whistles in burners (not to be confused with back firing in the burner). Metal chips from pipe fittings is next and then insect nests. . .
Mud daubers have ruined thousands of dollars worth of my gas regulators and torches. I even have a MIG trigger switch I need to disassemble and clean due to daubers jamming it up so it wont move! This is all due to decades of not having a fully closed shop. AND I had a truck real axle start leaking oil, and when I had a local mechanic look at it he just reached up and gave the vent cap a couple twists and the mud ran out. . . and that stopped the leaking.
Forge Refractory coating : I am expecting to get my first forge in a week or so. Very excited about it.
Question: the forge comes with Hellcote 3000 for about an 1/8" (1/8").
What would be the pros and cons of putting on another layer?
Merry Christmas to everyone.
This site has been a very valuable resource for somebody like me.
Michael Evans
Mud daubers : Even worse, the Wikipedia entry for 'mud dauber' mentions three aircraft accidents, including two multi-fatality crashes caused by mud daubers plugging pitot tubes for measuring airspeed and a cabin pressurization valve.
Forge Coating :
Michael, What kind of forge, coal, oil, gas? What shape? What kind of lining?
I'm not familiar with the coating you are requiring about. We sell ITC-100HT. It is applied less than 1/16" thick over all suitable refractories.
forge coating : Forge is a round single burner propane. Lined with rigidized k wool (?).
Would extra refractory cement extend the life of the lining?
Also would lightweight insulating bricks work to close off the ends of the forge? I also plan on putting in an idle circuit similar to what Zoeller offers. Economy in operating is a goal...
Floor?
We make ours with split brick floors so there is no wear problem in the bottom.
Light weight OR split bricks either one can be used to shut off the ends of the forge. I prefer a door lined with refractory blanket. No rigidizer as this reduces the insulation quality.
Refractory Bricks : We coat the hot face of bricks with ITC-100HT to increase forge efficiency and durability of the bricks. Do not coat all sides of bricks as they need to be able to release moisture when heated. This comes off as steam and can damage the bricks if sealed in.
The soft refractory blanket surface on doors acts as a seal and absorbs closing shock. We have covered the middle of doors with ITC-100 but it does not hold up well on the constantly flexing surface. This works fine on big doors where the gasket area is separated from the overall surface of the door. But not on small doors.
Idler valve : Does anyone know where I can get an idler valve like Diamondback USED to offer. Seems so much simpler than building an idle circuit
The idler valve looks like it's just a ball valve with an allen screw added as an adjustable stop. Should be easy enough to make (but then so should an idler circuit).
Years ago, someone posted on another site about taking a ball valve apart, filling the hole in the ball with something like JBWeld, and filing a new, narrower opening. The idea was that when the ball first started to open, it would uncover the tip of a narrow sideways vee, rather than a tall shape that increases quickly as the ball continues to open.
If you did that, the idle level would be much easier to set. In fact, you probably wouldn't need the stop screw.
Hardened Steel Pins : One of my neighbors dropped by today to present me with "hardened steel" pins that are used to keep elevator equipment in place. Spark testing indicates maybe a 40 pt. carbon content. So; I was speculating that either they are medium carbon that been heated and quenched or they are relatively low carbon that has been case hardened. Any other thoughts?
He's thinking of making some knives, I told him about the "junkyard steel rules", and there are enough pins that we have plenty to experiment with.
"Nomenclature is the first refuge of pedants." (UAVTBoW)
Steel Pins :
Plain steel pins with a fine finish are usually dowel pins. These are medium carbon steel and case hardened.
Idler circuit valving : One could fill the opening on a ball valve, I have even seen these as a manufactured item . I did flow testing for valves for 21 years for the largest maker of forged steel valves in the world. I will offer that while ball valves are very cheap, they are not easy to disassemble, and then reassemble and still be leak free. And the flow curve will still not be linear. Why bother when an inexpensive brass needle valve will do the job off the shelf every time? A needle valve, even the cheap ones at the big box stores give very linear turns vs flow curve and once set will not easily shift unless you turn the stem.
Steel Pins : Thank you; we can act on this and I'll report the results if/when I can turn my attention to them.
Presently turning my attention to the MarsCon (science fiction convention in Williamsburg, VA) Art Gallery, where I'm introducing my "Retro Rocketship Weather Vane" presently under construction. I hope everyone has a happy New Year. Be careful out there.
Turn of the New Year : One of my practices is to mark most of my finished ironwork with the date in Roman numerals. So glad to see the year change! Now it's MMXX. The worse was MMXVIII and the best year (of course), was MM.
Nol Putnam said that if you use Arabic numerals for your date, be sure to punch in all four. If you punched 98 or 16 or something along those lines, some unscrupulous antique dealer will kick it back a century or more!
"Oh yes, her was active sometime around 1798 to around 1816! A very talented fellow, and his stuff certainly held up well; excellent condition!"
hi there i wanted your help in aging my anvil. it is a Trenton with id numbers 58035 0r possibly 53035 thank you! Jonathan i live in colorado and am 46 years old
hi there i wanted your help in aging my anvil. it is a Trenton the id numbers are 58035
Dates and Roman Numerals :
A dead give away of forgery is modern CNC die cut stamps. Old punches were made in hand machined dies and hand dressed to clear the "background" and sharpen the serifs All common modern hand stamps are rounded sans-serif style and do not have cleared (removed) backgrounds.
Many years ago we had a question asked about a "Peter Wright" vise being sold on ebay. All the sharp freshly stamped ID lettering and date were made with modern stamps. . . Same goes for the many "antique" brass locks padlocks made in India yesterday with historical site names on them from the 1800's. . . Besides the phoney tags they all have two keys. . . Old padlocks are almost NEVER found with and original key much less two!
I have a collection of old hand stamps with serifs but no set is nearly complete.
Roman Numerals : Bruce I've marked my work with roman numerals LXIV for many years, which is my name when spoken. Way back when I turned age 65 it was my age also.
Correction : Make that 64
Jonathans Trenton : Jonathan, that serial number (58035 OR 53035) would put it in 1905-1906. Note that does not mean it's an antique!
Anvils are tools until they hit about 200 years old.
Broken Comics :
Yes, if you are looking for the daily comic, its broken. Something about 2020 and my date adjustment system. . . I THINK. Its always SOMETHING. . .
broken comics : Blame it on Y20K. Y2K came on like a lion, burped and left with a whimper.
forging a box joint : Is there a demo on a box joint?
Box Joint Demo : Sorry, NO. The question has come up before and someone found a demo on youtube but it was not very informative.
The basics are that a hole is punched then drifted to an angle. The hole is then distorted (opened) so that the reins or handles of the mating part will fit through and then the outer part is heated and closed on the inner. Then there is lots of filing and fitting. The hole is drilled last and a countersunk rivet installed. Then more finishing. The trick is to make the inner part thin and keep the outer parts thick so they can take the rivet and not over tighten on the inner part.
Y2K :
The dumb thing about y2K is I am finding all kinds of forms that only accept two digit dates in the 21st century. I tried to fill out a form including the date anvilfire went on-line. . . the system would not accept 1998! AND this was a computer related site!
You've heard the old saw that if you do not learn history it is bound to repeat itself? Yep, they are doing it all over again. 100 years sounds like a LONG time. . . but so did the 50 years that resulted in Y2K issues.
SWORD MYTH : CAN a sword ACTUALLY cut a person in half from top of the head all the way down to the groin where they would split in two perfect halves? this is a serious question I'm doing a graduate study on the strengths of the human body as well as he weaknesses. please help
sword myth : I agree, not possible with normal humans. There is one historically recorded cut to the head from a battle in the 30 years' war in which the head was split to the lower jaw, and that was regarded as superhuman. Ignore anything you hear about Japanese sword testing on criminals, it's all hype based on one single woodcut.
The trouble with a top-to-bottom split is all the bone you'd have to go through. Side-to-side at the waist is possible, with only the spine to catch the blade, and whole limbs being removed with one whack are too common to mention.
Just for fun, try it with a well-sharpened axe on a rack of uncooked pork ribs. Axes are heavier and cut more deeply than swords.
Someone posted as me (above), deleting post and blocking IP.
I've seen a pretty good description of forging a box joint. I think it was in Professional Smithing by Streeter. (Unfortunately I don't own a copy, and my local library no longer has one, so I can't easily check.)
BOX JOINT :
Mike is absolutely right. On pages 42-44 Streeter describes making a box joint for a rush lamp. The directions are a bit hard to follow. I would have to make sketches following the description as I read it.
Streeter recommends cold working the joint up to final assembly. He drills a row of holes in the female part and chisels and files to dress. The male part is sawed and filed. The female part is carefully drifted open hot avoiding stretching the parts then closed on the male part using another heat. A trial hole and rivet is recommended. If everything works after some fitting then the trial rivet is removed and the holes drilled to size and shape (countersinked) for the final assembly. After testing again the whole is filed as an assembly to produce clean flush fits.
Professional Smithing by Donald Streeter, 1980. I cannot believe I have not posted a review of this fine book. Somehow I had overlooked the fine section on locks and keys at the back of the book. . .
A Streeter Gichner story.
Way back in about 1983 I visited "Wild Bill" Gichner at his shop and home in Ocean View, Delaware. I wanted to meet the man and buy some tools. The infamous Bill Gichner was one of those dealers who could size up the exact balance in your bank account or cash on your person at first meeting. I bought a caulking vise and a well worn antique broom makers vise from him.
Bill graciously invited me to stay the night at his beach house and we had an interesting evening. The following day he took me to one of his chicken barn storage buildings to look at more tools. He tried to sell me a large rack of tongs that was a fantastic deal but slightly out of range. Then I noticed a fine 100 pound leg vise. Bill set the price at about triple what such vises were selling for at the time. I shook my head and he said but THIS was Streeter's vise, Its IN THE BOOK! I have no doubt it was but it did not increase the value of it as a tool to me. AND I expect it would not be worth more today if one was trying to sell it with Bill Gichner's second hand word that this was Donald Streeter's vise. . .
I came home with two pieces I thought I wanted. The caulking vise only had one set of jaws and was missing a couple other parts. . . I sold it years later without ever using it. The broom vise was a gift for a friend. Sadly it burned up in a house fire. The best thing I got out of the trip was having met Bill Gichner and this story.
Box Joint : There is a fairly recent video on YouTube with Peter Ross demonstrating the assembly of box joint tongs.
I thought one of the ABANA affiliates had run an article in their newsletter that laid out the steps as seen at a Peter Ross demo. Can't find it now though so maybe I imagined it.
BOX JOINT :
The only "trick" is opening the joint so that the other part will pass through and then closing the joint. The limitation is the size of the part to pass through. However, in most cases the reins or handles will pass through even when the bits are too big. The rest is just picky work where a belt grinder would be very handy. AND lots of NEW warding files.
Watching Peter Ross will make you crazy because he makes everything look SO easy!
Peter Ross Demos : I watched him do a demo on compass/divider joints and he made it look simple. Someone in the audience asked 'so how many of those have you done?' and Peter thought it was 'maybe a couple few dozen at most' and there was a round of harumphs! Peter asked the crowd 'would it make a difference if I'd done hundreds of them?'
At Peter's skill level one or two is practice, the rest are all the same, fast and efficient.
hardening 4140 : Is it possible to harden a 1.25 by 2 by 6 inch piece of annealed (non decarbed) 4140 to 50-55Rc in my home shop? If so how to I go about it?
4140 Heat Treat :
Bryan,
Heat to 150-175 degrees above non-magnetic (1150 - 1600°F)
Oil quench is recommended for this size. That takes a LOT of oil, 5 gals might not be enough, 10 would give you some safety. You will also want a cover for the oil in case it catches fire and it MUST be in a metal container. If you use too little quenchant it will boil and in the case with oil this is a disaster.
When oil quenching you want to quickly thrust the part deep into the oil. Hesitation will result in the hot steel setting fire to the smoke coming off the metal. As in all heat treating agitation (moving the part around) assures a better quench.
Heat Treating FAQ
Heat Treating 4140 Hammer Dies
Colors of the Forge Temperature by Color
Temper Color Chart with Hardness Applies to plain color steel but can be used with alloy steels if the second band of colors is observed (test).
Oil Fires :
These happen both in the shop AND in the kitchen. If you don't panic or do the wrong thing they are not a problem.
Remove heat and simply cover the fire with a lid, pan, cover or sheet of metal. In a few seconds the fire will be out and all is well. Let the oil cool before uncovering. Ventilate the building then reset the fire alarms.
If the fire doesn't go out in just a few moments then get out a fire extinquisher AND/OR call the fire department.
Remember DON'T PANIC!
NEVER use water on an oil fire. The steam will cause the oil to splatter, burning you AND spreading the flames. Then panic ensues and its time to call the fire department to put out the embers of your shop or home. . .
If you do not have a cover to put on the fire use a dry powder fire extinguisher. If not that then Baking Soda (sodium bicarbonate) works but it takes a large container and you need to work quickly. . . In the shop a sand bucket is a handy way to handle oil and chemical fires AND it is cheap and low maintenance.
Never oil quench in a shop with a low ceiling. Most smiths oil quench outdoors where the inevitable flames cannot reach something above and set it on fire. Also be sure the ground is clear of debris (leaves, dry grass).
Box joint : Thanks Guru, Mike and Martin for the thoughts on a box joint. I'll go over Peters work and the Streeter book and practice more. With practice, perhaps I can build a good one. Endeavor to persevere right!
4140 HT : The ASM Heat-Treater's guide says to heat slowly to 1570 degrees F. 1600 is fine, but try not to get hotter, and definitely don't quench from less than 1550. Hold at heat for a minute or two, then quench. A 350-degree F temper (two one-hour cycles in the oven) will give you ~55 Rc. As-quenched hardness is around Rc 59 at most.
The Guru is right about the oil. If you don't have commercial quench oil (never use motor oil, it's too unpredictable) get a five-gallon jug of canola oil, aka turkey fryer oil. Put it in a large metal tank (it will expand and boil when you quench, so a five-gallon bucket is out) and preheat to just hot enough you don't want to leave your finger in it. This will give the equivalent of a medium-speed oil like Parks AAA or Texaco AA, and is actually slightly faster than the AAA.
My big quench tank is five feet of 8" steel pipe with one end welded shut. It's for swords, though, and they cool off quickly. That big hunk of 4140 would cause problems in that narrow tank, I'd want to have it on a wire so I could pull it up and down. If it stayed still it wouldn't cool fast enough, I suspect.
I started creating this post but it vanished. Apologies if I am repeating myself!
I am trying to identify an old anvil brought to Australia from England when we emigrated in 1989. It has the appearance of a "Peter Wright" but I suspect it is a copy. It is stamped with weight marks: "1 0 12". It weighs approx 55 Kg.There is an anchor "punched" into the front foot but no other marks I can detect. I have a number of photographs but cannot work out how to send or attach them?? I have no expertise in this area being a retired IT bod of some 72 years! Any help would be much appreciated.
Kind regards.
MikeF
Anvil ID :
Mike, Most Peter Wrights are clearly OR not so distinctly marked but they ARE marked. Usually with a "solid wrought" in the logo.
The weight marks are English Hundred weight (100's, quaters or two stones and pounds. In this case 112 + 0 + 12 = 124 lbs. or 56kg.
The anchor is a forging team or inspector's mark.
Posting images is not allowed here. You can send photos to me by clicking my name. You should be right in tune with this forum, it runs on the oldest forum/questbook software on the web (with a few tweeks).
Anvil Name : I purchased an anvil today with the following inscriptions on it and would like to know the history of it 4CWT SB" and underneath that the letters "JB" - I have the book "Anvils in America" but could not find it - can it be a John Brooks anvil? I am 61 years old, a knifemaker from Pretoria, South Africa - appreciate your help in this matter
ZA Anvil : Wicus,
Globally the British Empire was divided by exporters with most Peter Wrights and Mousehole anvils going to the US and others to the rest of the world. The market was such that in the US there was a lot of advertising in catalogs and trade magazines the result being that we know a lot about the brands sold here and little about others.
I do know that late cast steel Brooks anvils were marked with the letters "cwt" and rounded fractional weights (whole numbers and fractions 1/2 and 1/4).
1-1/4 CWT Brooks anvil
Avil Name : Thank you ZA Anvil for your reply - I still don't know the name of my anvil - I do know the weight that must be around 448lbs. or as it commonly named a 500 pounder but still can't figure out the manufacturer
Zicus, ZA is the country code for South Africa ;)
Its probably a Brooks, especially if its cast. If it has raised lettering like the example I linked to (not stamped in) then it is cast rather than forged. However, I believe there was an early Brooks that was forged.
England had several hundred anvil manufacturers at one time and we only know about a few of them. So without clear markings of a known manufacturer it is difficult to say.
O-1 Steel and Fire Strikers : One of my friends came by to work on some fire strikers. He had previously made one with O-1 steel, which worked very well; so he brought some O-1 in an unopened, labeled package: "O-1 Drill Rod"
After he had forged "round to square" and let the first piece cool under the forge, I suggested that I punch the piece for measuring where we wanted to draw out the ends; and decided to do it cold for accuracy. So; I lined up the center punch, struck it with a three pound hammer and... "tink!" The end snapped off at the punch mark. Grain on the end was visible, but fine.
So, we shrunk the piece a little (missing 1 1/2" now) and reforged it; and started a second one. When finished, we let them both slowly cool atop a bed of ashes to further regularize the steel. Then we tried it out. No sparks.
"Okay" says I "we should carefully harden them; one in oil (being as they are made with O-1) and one in water. However, my friend wasn't feeling lucky, and we decided to do both in oil. We laid them on the front shelf of the gas forge, ran them up to a bright red, checked critical temperature with a magnet, carefully quenched them in (ambient 40 degree) oil; let them cool down, cleaned them up... and hardly a spark.
His earlier one sparks just fine; but these two seem to be really resistant to striking enough sparks to have any hope of starting a fire.
Next step for these particular pieces is case hardening; but is O-1 problematical for fire steels? Did he get a mislabeled package? (We saved the package.) Should we water quench, despite the one piece that snapped after regularizing under the forge?
I'm always using (mostly) scrap springs and such, and thought that this should be easier. Never tried O-1 before. Frozen Vikings need their fire strikers to spark! ;^)
O-1 : First, try grinding off the scale and the possibly decarbonized surface and then try making sparks. Does the shape have corners (forged square)?
A small piece of O-1 will probably air harden. I would not water quench.
0-1 is a 90 point carbon steel and thus should spark nicely and is rated as an easy to harden steel.
Personally I prefer a ferrocerium firestick.
Ferrocerium Firestick :
It always amazes me how many youtube survivalists, preppers and "backwoodsmen" can't use a firestick properly striking and hacking at it like an idiot with a big knife the sparks (if any) haphazardly missing the target.
The right way (as I was taught by Steve Kayne who I think got it from the Ferrorod instructions). While holding the rod close to the tinder or on the surface the tinder is lying on, gently scrape a small pile of the ferrocerium alloy into your tinder using a knife or piece of steel (a pocket knife works fine). Use slow strokes to avoid sparking. Then use a little more pressure and one fast stroke to make sparks setting the small pile of ferrocerium dust on fire. This makes a hot puff of sparks that will almost always set any dry tinder on fire the first time.
No random striking, no missing the tinder, no wasting the firestick, no looking inept. . .
0-1 for fire steel : I'd think decarb as well, but one thing people don't often think about fire steels is that you actually WANT large grain. Large grain is easier to dislodge as a spark of steel. In other words, overheat it and hold for a while to grow the grain.
Second, non-magnetic is 150 degrees too cold to harden 0-1. If you only went to just barely nonmagnetic it may not have hardened at all.
In other words, to use 0-1 as a firesteel, treat it exactly the opposite way you would for a knife blade or other tool. Overheat it and quench from what looks like too high a heat. That ought to do it.
I can't watch the wanna-be backwoodsmen. I'm allergic to idiots.
Can you identify my anvil : Unsure how to attach a photo. Anvil has a zero stamped on it and what I believe to be 99998 or 99C93 . Very difficult to see. I will send pictures via email if you respond thanks
Anvil ID : James, just click on my name (only works with javascript turned on).
Note that it can be impossible to identify an anvil's manufacturer if its not clearly marked. On forged anvils with stamped markings it helps to clean the marked surfaces with a wire brush.
lp forge burnes : Does any one know of a metal that can be used on ends of 3/4" pipe forge burners that will not consumer with use or is slow consuming. Or should a person just use stainless steel pipe, making it for easy replacement?
thank you central time usa 11am
Burning Burners : Murphy, Unless you can afford exotic alloys stainless is the best. OR stainless coated with ITC-213. Note that IF you are having trouble with burner ends burning up then your forge design is incorrect.
A properly setup burner is set back in the refractory which acts as a nozzle (no flare needed). At the burner to refractory interface there should be a step (change in diameters). This is normally the thickness of the burner tube but some add a bushing at this point. At the step there is turbulence and a slowing of the fuel-air mixture. This point becomes a "flame holder". The flame should NEVER be IN the burner and the raw fuel-air mix should cool the burner tube.
IF flame is moving up into the tube the burner is too large for the forge/furnace and is turned down too low.
See our burner page, burner sales page and burner installation docs.
Anvil Identification : Hello, I am trying to trace the origin of a 168 lb. London Pattern anvil. Other than the weight all that can be read is Best - Scrap - Warranted. Other than Griffith & Son, and Carey or Corey - Dudley Wood, do you know of other anvil makers who advertized this property on their anvils? Thanks in advance. Brad
Best - Scrap - Warranted : Brad, Mousehole Forge used this designation in their advertising and probably on some of their anvils.
Anvil Identification : OK. Thank you for that information.
Here we go AGAIN :
Last October we moved anvilfire and all our associated web sites to a new server situation. It was a painful move as we lost a lot of features due to software updates on the server and other new limitations.
NOW, that host is going out of business! We had not yet fixed or worked around all the various issues and now we are moving AGAIN!
I am currently in the process of setting up 49 web domains and copying their files to the new server. The big issue is anvilfire. It is so large and there are so many files that even when copying one folder at a time they take hours and often stall. In total it takes 3 to 4 days to load anvilfire to a server then a couple days to debug the obvious and then weeks of watching for errors. . .
Moving : Well, we certainly appreciate all of the work you do in keeping this valuable resource going. I refer people to it constantly.
Hot forged : I work for a company that use 700 ton press in hot forge process, but we always have sticking problem with dies , we have tried all types of lubricants and buff dies but the problem continues, any suggestions? Thanks
Hot Forged Parts Sticking to Dies : Efrain, We sell Forge Ease 3512 for this purpose.
Forge Ease 3512 sales
Forge Ease Instructions PDF
In many industrial forge shops they dilute it from 8 to 15 to 1 and use automated spray systems to put a light mist on the hot dies between parts. This helps cool the dies and prevents sticking.
IF sticking continues with this lubricant then your dies may not have enough draft (side angle). Extractor pins or pressurized vacuum release vents may need to be considered.
Sticking can also be a problem when parts shrink from cooling around shapes in the dies (such as a central hub). In this case the shapes require a much steeper angle than common draft. It must be a steeper angle than that required by the coefficient of friction (greater than 15° for steel on steel) so that it is not a sticking angle (like a tapered drill shank or Morse taper).
Sticking can be a process problem where the press needs to be properly cycled, shaping the part in stages. However, this is way beyond my level of expertise.
Forge Ease 3512 testing :
Recently the folks at Coal Iron Works did blacksmith scale forge lube tests and Forge Ease came out #1. The comparisons were to some common small shop lubricants and some proprietary lubricants.
YouTube Video - Testing Forge Lubes
The key indicator that the lube was working well is the amount of suck-in around the holes. The hole punched with the Fuchs water mix had a sharp corner where all the other lubes had rounded edges from friction such in.
Note the the lube sold by Coal Iron is pre-diluted and in a can to fit their machine. We sell the concentrate.
NEW SERVER VIII :
Well. . . we are on anvilfire server VIII as of about Midnight on the 2nd of March. A bunch of things were broken on first launch a couple hours ago but I got most things fixed I think. . . There will be lots of individual broken pages, mostly Not Found errors.
However, the SlackTub Pub II will need a database install which means reading the install instructions. . . I'll get to it in a day or so.
SERVER VIII :
Posts moved to Whats New.
Changes . . . :
I've been checking links and links to outside pages. . . Our page on Borax had two outside links. One to Dial Corp who owned 20 Mule Team Borax and Kickwheel Pottery Supply. . . Dial had been bought out and their web site gone and Kickwheel's parent company had gone out of business. . . I've found a copy of the kickwheel page and have posted it.
Every single YouTube link was also broken. Dirty business practices. . . offer embedding links to build your brand then take them away. Many companies offering affilate links have done the same. We helped build On-Line metals with our affilate links and then they ended the program. . . leaving us with hundreds of links for no pay.
This is one reason I've been gradually removing all off-site links. They disappear or sites are changed without proper redirection and then you have a dead link. . . frustration for the user AND for me.
I've been re-writing and moving a lot of anvilfire's pages. But I've setup redirects so that search engines still find the pages and if I miss a local link those find the page as well. Its picky work that few webmasters do.
Meanwhile I am checking all the pages (again) from our second move in less than 6 months. . .
Hammer Rebound : I have read here many times that a good Steel anvil will return the hammer better than a dead, soft anvil. By experience, I found this to be true. However, young smiths are saying that when hitting soft hot iron, the soft iron absorbs all of the hammer energy and the hardness of the anvil is irrelevant . Is this the new gospel? Or is there a better rebuttal?
Hammer Rebound :
Those who make this claim only want or dream that their cheap imported junk anvil or soft home made anvil to be considered as good as the REAL thing - a heat treated steel anvil.
Hammer rebound is a measure of the hardness AND efficiency of the anvil. Hardness is important to resist wear and misshaping of the working surface. Wear can result in a rough surface and rough work. Wear can also result in corners that are much more rounded than needed.
One example of my personal experience is that I will occasionally forge a torch heated piece on the corner of my welding bench. The top of this bench is 1" thick plate weighing 300 pounds supported on 3/8" x 4 angle iron frame and legs setting on a concrete floor. This SEEMS to be a very solid surface but the combination of the soft plate and joint between the plate and frame. However, it requires at least double the effort to move a small amount of hot steel a given amount. You can feel the wasted energy with the dull thud of every blow.
I've also forged on the corner of heavy (5,000 pound - 2.2 Tonne) cast iron weld platens. Another dead surface that sucks up the smiths energy and does little to the hot iron. . . When a massive anvil this size is dead and energy sucking you KNOW anything smaller made of the same substance is worthless as an anvil.
That said, you CAN forge on a mild steel anvil. It wastes a great deal of energy (and your time) but it works. . . The only advantage is that you can make weld repairs, grind it smooth and then tear it up again over and over (more wasted time).
Rebound is also important for the smith to keep a consistent cadence or rhythm. The hammer is bounced off the anvil on resting beats while looking at the work and planning the next blow. The rebound lets the smiths arm rest rather than requiring the smtih to raise the hammer. Consider the difference at the end of the day when the hammer raising itself hundreds of times compared to the smith raising the hammer those hundreds of times. . .
The rebound is also behind that hot work putting the energy of the blow back into the work. While this is hard to define, smiths who have worked with very large anvils (500 pounds and up) can tell that the higher resistance to the force is reflected in not being as fatigued at the end of the day.
I'm pretty sure QC did not post that question eh BF?
I can certainly tell the difference hammering on hot high alloy steels vs hot extremely mild steels; so if they are both absorbing all the energy why does one bounce the hammer up more on a stroke?
Sounds like something from a sketchy 'tube video...
rebound : Yep, that's just sour grapes from someone who can't afford a hardened steel anvil and/or has no experience with what a "real" anvil feels like.
I've forged on 12" H-beam, cast iron swage blocks, the dreaded 55lb ASO from Harbor Freight, 90-lb rail, a 300-lb die block from a drop hammer, a few different types of post anvil (hardened steel) and a wide variety of "real" anvils. There is a difference.
Ouweeee :
Just thinking about forging on a springy piece of I-Beam (or H/W section) gives me a chill. . . I've seen a lot of these as "farm anvils" or welding shop anvils and have had to use one on occasion. . . . Its like forging on a big hot gob of chewing gum, the hammer almost sticking to the work!
Yup, I've forged on everything from rocks to cast steel swedish anvils and I have noticed a difference too.
Seeing I beam ASOs sold on craigs list for over US$100 makes me upset too---especially when they are claiming that they are "professional grade anvils" One reason I generally have several chunks of steel to had as "loaner anvils" for new folks.
Apples vs Apples : Consider two blocks of steel 4" wide, 24" long, and 12" tall used as an anvil. One mild steel and one with a hardened face. Both mounted firmly to a solid stand bolted to the shop floor.
Both will be pretty good as an anvil. The performance difference is minimal. If we did some kind of repeatable drop forge test, we'd see a bit more work done by the hardened one, but I'd be stunned if it was more than 5% different. You'll like the one with the hardened face better. It will not dent as easily.
1/2" or less of hardened face makes a difference, but not a world of difference.
Both have a very similar Young's modulus. So, you can expect the same amount of deformation from the same force. Yield point is different, hence the denting if you mis-strike on the mild steel. There may be a bit of hysteresis difference, which would explain some energy absorption.
Cast iron is a very different beast and will be horrible compared to either one. Not fair to class the mild steel with cast iron. Cast iron might still be better than a granite rock.
I/H-beams or other entirely inappropriate geometries will be horrible too. Again, that's not the fault of the alloy.
Apples and Oranges - Machines vs. The Human :
Here is the issue. A little 1/3 HP motor can outwork the most fit human you can find and do so ALL DAY LONG for a fraction of what it costs to fuel the competing human. When working by hand the most expensive thing in the work is the human labor, the animal energy. Being the most costly item any inefficiency is multiplied by that cost.
When building a machine you can be VERY inefficient and still be VERY profitable. But when doing something by hand small inefficiencies can reduce your profit to zero or make your expenditure of biological energy worthless. . .
The rebound of a hard anvil returns 10 to 20% of a smiths labor on the bouncing blows alone. That is the amount of energy the worker does NOT have to expend lifting the hammer. OR it is that much longer the worker is productive in a day.
There is no equality comparing a machine anvil to a hand work anvil. One is considered efficient at a mass ratio of 10 to 20 to one while the other must have a hammer to anvil ratio of 50 to 1 OR greater (2 pound hammer vs. 100 pound anvil). This is by mass alone before hardness is considered. Hardness is of little importance in the forging machine (other than to resist wear) compared to the handwork anvil where it increases the amount of work that can be done in any given day by a considerable amount (that aforementioned 10 to 20%).
The difference to the hand worker between wrought iron, mild steel and hardened steel IS a great deal.
That 1/2" hard steel face on old anvils? It produces a 40 to 60% rebound over nearly 0 for the base wrought iron. AND it results in a multi-generational tool.
Apples and rotten apples : I totally forgot, I also have worked on the same ca.1990 Peddinghaus 175lb anvil before and after a shop fire (not my shop, thankfully). The owner had the fire department trying to keep that anvil cooled off while they were more concerned with keeping the fire from spreading to the nearby houses, which they did with great success. The anvil was not so lucky. It went from ~90% rebound as guessed by letting a hammer drop on it to ~5% rebound via the same method. With the same hammer, which was not in the shop during the fire. Yes, hardness makes a difference.
I have an old Columbian anvil with no edges with a face hard enough it can't be filed, say Rc60 or above. A missed blow on that will plant the hammer in your forehead before you can duck. I have a new-ish Refflinghaus that can be filed with difficulty, say Rc55. A missed blow on that will dent it a tiny bit and throw the hammer back half as hard as the Columbian. But you won't chip the edges, either.
Hardness and mass are of course different things. Mass makes a huge difference. A hammer blow will transfer a more-or-less fixed amount of momentum into the anvil. But because a heavier anvil moves slower, the same amount of momentum corresponds to less energy (momentum is proportional to velocity; energy is proportional to the square of velocity). Less energy in the anvil means there's more left to shape the work and rebound the hammer. And of course, it's only the effective mass that counts.
Hardness surely makes a difference. But I'm doubtful how much rebound of a hard-faced hammer says about what happens when there's a hot piece of steel in between.
Mass and Hardness :
They work hand in hand in an anvil. Solidarity of the mass is also important. If you pile up a bunch of plates the resulting mass is no better than the top plate. This is due to the disconnected masses.
An anvil is a simple thing but work arounds are complicated.
Masses and motion :
The best way to think about an anvil is it floating in space. OR being a billiard ball on a table. We all have seen that when one ball of equal mass strikes another of sufficient hardness the second ball moves away from the first with all its velocity. IF one ball had twice the mass of the other the two would both move away from each other at proportionately different velocities. As the difference in mass increases the the difference in velocities increases until the "hammer" velocity is most of its original velocity and the "anvil" velocity is nearly undetectable (but it DOES move). Example, a meteor striking the Earth or Moon. There IS motion but it is measured mostly as vibration.
In power hammer engineering when the difference ratio is 20:1 the "efficiency" is rated at 70%. But when that ratio is 50:1 or greater the efficiency is 95% or greater, the "hammer" bouncing back at 95% of its initial velocity. At 100:1 (a smith using a 300 to 500 pound anvil) the efficiency is around 98%.
So, the physics range from equal masses transferring 100% of their energy to unequal masses moving away from each other at a ratio similar to the difference in their masses.
While mass is the defining property in this discussion hardness is still important. Two soft masses (say balls of clay) do not demonstrate the physics the same way. Energy is absorbed by deformation (becoming heat) and is not given back.
https://www.anvilfire.com/power/cburg/anvil_ratio_580.jpg
mass, motion, and hardness : Try this at home: The classic Newton's Cradle desk toy, this thing: https://gph.is/15y3q0Z
uses hardened ball bearings. It's the hardness that allows the transfer of energy. Get some brass balls and anneal them, then try to make a Newton's Cradle. It will just go thunk and stop. The same is true for hammer and anvil. The relative softness of the hot steel between the two does not contribute in a major way. You put energy into it with the hardened hammer, it transfers through into the hardened anvil, the softer hot steel squishes more. With a cast iron ASO, you put energy into the system with a hardened hammer on hot steel. That energy passes through the soft hot steel into the ASO and stops dead. There is no return to help squish the steel. This is simple physics, folks. Wishful thinking is not going to help you.
Not simple physics : Physics is really only simple when energy is conserved. Your bouncing hardened ball bearings approximate that fairly well as does bouncing a hammer. As Guru pointed out with his clay examples above, forging is all about NOT conserving energy. So, these models are a poor match and do not answer a particularly relevant question. Wishful thinking will not answer the questions ;-).
If we think of it this way, energy is lost into elastic deformation of the hammer, rebound of the hammer, overcoming the yield point of the work, in-elastically deforming the work and elastic deformation of the anvil. (Assuming neither the anvil nor the hammer is hit hard enough to exceed the yield point and dent.)
Note also that, ideally, you want *NO* rebound from the hammer (i.e. return no energy into the hammer as potential energy from elevation). Well, I may want some, but that's human frailty not efficiency.
With this in mind, what % of the energy do you think is lost into each component I outlined? I suspect the % lost into a large anvil is fairly small. Double that is still fairly small. And, as elastic deformation is fairly well modeled by the Young's Modulus (nearly identical for almost all steels regardless of hardness), double is probably ridiculously overestimated on a hardened tool steel vs mild steel comparison.
Given the question: what % of energy is devoted deformation of the work. My proposed "drop forge" test would give a quantifiable result for that, tho it would only be valid for a particular geometry of "hammer" and a particular geometry and alloy of work.
This is also supported by how people talk about this. They talk about second-order effects like fatigue after working all day. Not, I get a 1/2" deformation vs 1/4" deformation.
As others have pointed out, all steels have about the same Young's modulus. That's why, as we've discussed before, a soft steel makes just as good a spring as a hard steel, up to the point it deforms plastically (bends). But perhaps that's not really true. Maybe even though the soft steel deflects the same amount under the same load, it's absorbing more energy internally. Given that hard and soft steels have internal structures, that seems possible. My gut says it can't be that big a difference, but my gut could be wrong.
Turning to the anvil, a ball bearing or domed hammer face initially contacts the anvil at a single point. Even a moderate force applied over an infinitesimally small area would create an infinite local pressure. Obviously what happens is that the hammer and anvil both deform, enlarging the contact patch and spreading the load. It seems possible that a soft anvil face would deform plastically near the initial point of contact, while a hard face would never be brought above its yield point. That by itself could explain the difference in the bounce test.
If there's a hot piece of steel between hammer and anvil, it will deform first, spreading the load over a much larger area on the anvil. That should mean that the anvil face deflects less. Even a soft anvil would be less likely to see plastic deformation. And even if plastic deformation was not a factor, it seems wrong to assume that what happens on the bounce test says much about what happens in actual forging (though it does say how hard the face is, which is important for a number of reasons).
It seems like it would be hard to test this objectively. Too many variables. But what about this idea: Find an anvil that's been through a fire, and an identical anvil that hasn't. Sand the faces, and if necessary paint the bodies so they look the same. Or get two big chunks of something like 4340 and harden one and normalize other. Ask ten smiths to forge on both anvils and say which one is harder. Any who strikes the anvil directly (or even taps on it) is disqualified. You'd find out pretty quickly whether there's a real difference in forging effort.
Once, during an emergency situation---my only anvil was stolen right before a Museum demo; I worked on a 220#, 100kg, cast iron ASO. I found that it was denting UNDER red hot spring steel. Efficiency was WAY down as energy was going into deforming the anvil face and not just into deforming the workpiece.
This ASO was large enough that size was not an important factor. (My lost anvil was 199 pounds so about 90% the weight of the ASO.)
I've worked on rocks that were better to forge on than the ASO.
If anyone's calculations do not support this --- then they are missing a factor that is important.
It is what it is!
More going on :
The Modulus of Elasticity or Young's Modulus (the measure of springyness) is absolutely the same for all carbon steel and very close to the same for alloy steels. But does not apply equally to wrought iron (no carbon) or cast iron.
In hand forging there is definitely more going on than just mass and hardness. You absolutely need both. If not, when bulk mild steel became available in the 1800's then mild steel anvils would have become hugely popular due to their low cost verses hardened steel anvils (real anvils).
Sadly the sales of cast iron ASO's is huge today. This, like the flood of other pooly made tools, means that the used market will have mostly poor quality anvils (as well as other basic tools) and future hobbiests and newbies will find nothing but junk . . .
Bad Links - Book Reviews :
I'm still finding dozens of bad links to existing pages due to typos and technical issues. This week I've fixed over a dozen articles on the Power Hammer Page and just fixed as many on our book reviews. . . Sorry for the errors folks. I fix them as I find them.
Gresham's law for anvils!
Mild steel pseudo anvils : I suspect the biggest difference between mild steel and real anvils is not the very small difference in forging effort, but rather the fact that mild steel blocks get dented and notched really fast because of the low yield point. That in itself is enough to make them a poor choice as an anvil.
Anvil Restoration : Hello, I inherited a nice Vulcan 30 lb. Anvil and it has a coating of surface rust. Should I bead blast and clear coat it for display or should I leave it "as is" with its natural patina?
Rude Surprise : So; I decided to use the old early 20th/late 19th century metal wheel from my Great AuntŌĆÖs wooden lawn cart (which served us for many years before the other wheel broke multiple metal spokes under a load of bricks) at a rotating tong rack for when I do demonstrations at the County Fair and Craft Shows at church. As part of the build, I pressed some schedule 40 galvanized water pipe, salvaged from the old house when the new owner did a rebuild, for part of the vertical stand. (Other parts include a brake disc and the original axle from the lawn cart.)
I used an angle grinder to help cut the bottom 4ŌĆØ into thirds to match half the holes in the brake disc, and then ground off all of the galvanizing from the outside for the next foot up the pipe. Above the 1ŌĆÖ4ŌĆØ mark I wrapped a rag around it so that heat would net transmit beyond the ground part, into the galvanizing.
So, today I popped it into the gas forge, and, you guessed it, it was galvanized on the inside too. I plugged up the cold end, which was smoking like an old Meerschaum; and started the electric vent fan and opened all the windows and hatches. I was able to spread the bottom quickly into three legs without much trouble, and it seems to work fairly well cold, now that the hard bends are made.
Probably much ado about nothing, but after Paw PawŌĆÖs untimely demise, and with the ŌĆ£Plague of CancellationsŌĆØ going around, I donŌĆÖt want to abuse my lungs if I can avoid it.
YŌĆÖall be careful out there. IŌĆÖm still forging away on the banks of the lower Potomac.
Rude Surprise :
Years ago I was disassembling some threaded plumbing and needed to heat it to break free some of the rusted pipes. As I was heating the parts the bushing I thought was galvanized suddenly slumped into liquid and the remains where I was heating burst into white flames and smoke! It was solid zinc!
The bushing was probably an electrical part used in the plumbing. While these do not normally seal as tapered pipe should the part was between two other tapered iron/steel fittings that probably forced it into a shape that worked. . .
Years ago some Mexican scrappers stole a heavy machine off a loading dock and took it home to disassemble. Turns out it was a radiation therapy machine with a cobalt 60 source in a nice stainless container. The act was not discovered until a truckload of fast food restaurant parts passing a US nuclear power plant set off the plant's radiation alarms (from miles away). . . In Mexico they discovered a pickup truck with the source broken open and children playing in the granulated highly radioactive metal AND a completely contaminated village. . . Initially Mexico blamed the US for dumping nuclear scrap there. . until it was discovered that the multi-million dollar machine (including protected source) had been donated to a Mexican hospital where it was stolen by the scrappers.
Junkyard rules apply. Be smart, be safe!
Anvil Restoration :
Homer, Vulcans are not so old they are considered antiques in the anvil field.
If for display only or a photo shoot, I would clean it, lightly polish the face and horn with a belt sander, put clear lacquer on the face and horn then paint the body black. This is more or less how they came from the factory if not painted black all over.
If for display as an antique I would lightly clean it and then oil it OR coat with clear lacquer.
NOTE: Due to their mass anvils attract condensation and paint jobs do not hold up long unless stored indoors in a climate controlled environment.
IIRC, the tip off for the radioactive steel was when a truck carrying rebar for construction went in an "out gate" at Los Alamos National Labs here in NM. The "out gates" all have radiation detectors on them "just in case"
Ah yes: The following information is taken from the NRC Inspection Manual, Manual Chapter 1302 Action Levels for Radiation Exposures and Contamination Associated with Materials Events Involving Members of the Public:
"On January 17, 1984, Region IV was informed that Los Alamos National Laboratory (LANL) had detected some radioactive reinforcing bars (rebar) in a shipment mistakenly delivered to LANL. The rebar was determined to have been inadvertently contaminated with cobalt-60 (Co-60) and that the shipment had come from a supplier in Mexico through a broker in Phoenix, Arizona."
Anvil identification : Hi Guys
Im in Australia and am trying to identify a anvil i brought. Can't find where to post this or how to attach pictures. Any help would be greatly appreciated. Thx Tom
Anvil identification :
Tom, First thing is to clean the anvil sides with a wire brush (hand or power) to expose any markings. Then read the marking the best you can. DO NOT extrapolate letters. It is too easy to get the marking wrong.
IF the anvil has no markings then it is practically impossible to identify it with a few exceptions.
Photos should include the whole anvil and include normal 3/4 views AND a bottom view. Click on my name and send photos to me.
IF the anvil has two square holes in the waist under the heal and horn AND a square hole in the bottom then it is most likely an old English (or possibly European) anvil. There were hundreds of English manufacturers and many exported to OZ.
Radioactive Steel :
At the time this event occurred I was working as a contractor in a nuclear power plant and my version came "through the grapevine". The parts about the events in Mexico were from news reports.
Do you remember back when you could buy Titanium alloy pry bars from HF for a few dollars? Supposedly made from scrapped Russian submarines. . .
Sheltering in Place :
Here in North Carolina we will officially be restricted from movement EXCEPT. . . there are more exceptions than not. You can buy liquor, go to church, weddings and funerals. . . shop for groceries and deliver food to family as well as travel between homes (if you have more than one). But until Monday night life will be as-usual. . . Not soon enough for me.
Yeah, lets get drunk and go to church. . . or vise versa. . .
We live in a rural area outside a small town and don't need to get out if we don't want to. There are no local reported flu cases but we are not far from the major Interstate highways and the larger cities that are becoming hot spots. . I'm sure its around us to some degree. UPS and USPS is our biggest contact with the outside world.
We are stocked up on supplies and could survive a lengthy shut down. My biggest problem is that business is way off even though we are an on-line business and cash flow is the key problem.
Fire brick in a rivet forge : Hi Guru, do I need fire brick lining my rivet forge. I would think it makes it very shallow. I'm a 60 year old wannabe smith. Just getting started. I think your website is great. Keep up the good work it's not going unnoticed. Paul
Fire brick in a rivet forge : Paul,
Yes, bricks are much too thick and heavy unless you use split (half thick) bricks and even then they are a bit thick.
Generally you want a layer of sand or ash in a small forge. If you want something more permanent you apply about 1/2 to 3/4" of refractory clay and let it dry.
See our FAQs page, Claying Forges.
Fire brick : Thank you Sir.
Stay well
Paul
25 lb Little Giant Repair : I have a 25 # little giant hammer that fell over during a recent move and broke the cast iron neck. Is there a recommended method for repair. Would nickle 55 welding rod be the best repair. Are there other repair methods? Thanks, Dan W.
25 lb Little Giant Repair :
Dan, That is really sad. . . I often warn people that the majority of damage to ALL kinds of machines is moving damage.
I've had nothing but bad luck welding CI. Others do it all the time. A friend of mine welds it using massive preheat, cast iron rods and a cutting torch for welding. . .
All the large repairs of this type that I have seen on old machines has been brazing. Takes a LOT of rod.
The power hammers I've seen with repaired frames were mechanically repaired with straps or plates bolting through the casting. The ones with straps were being used in a production shop and you could see oil squishing in and out of the joint with every stroke. . . Note that most of the load on the frame is on the up stroke as the ram travel is stopped from going UP.
Bolting can be done numerous ways but I would tip the machine on its side and use a magnetic base drill press to drill the holes. First step would be to fit the plates (1/2" thick) to the surface, grinding off high spots. Then I would clamp the whole together and drill through for bolts of a minimum of 1/2" diameter. You do not want to tap threads into the CI as this will add places to propagate more cracks. Drill one on-size hole for a body bound bolt, install the bolt and then drill the next and so on. I would use 8-10 bolts on each side of the crack.
The above assumes the frame is broken somewhere in the middle, not at the bearing locations.
Good luck!
Sheltering in Place II :
So far. . we stay home more than we used to, no fast food, eating out or extended shopping. I've tried to buy more groceries on-line but there is almost nothing available except very odd things.
We are lucky, working from home. A roommate had been looking for a job and has stopped for the duration and is spending the time on desperately needed yard work. However, sales are off as one would expect.
The rest of the world seems to be ignoring the stay at home orders in small town NC. The nearby Interstate highway has no less traffic then usual. Across the street a home construction project is going full tilt.
Delivery folks, UPS, USPS, FedEx. . are all working overtime and we are getting deliveries on Saturdays and Sundays at no extra cost.
Paypal is waiving instant money transfer fees. Nice of them but I can generally wait. . . but some folks may have been hit harder than us.
I've recently ordered some industrial supplies with no problem. Some parts of the economy are still moving along. Perhaps our economy is not going to get clobbered as bad as folks think. . . I hope so.
CONTRASTS: We went to Dan Boone's Pasture Party Feb 29 and luckily came back healthy. Meanwhile in a small Georgia town folks went to a funeral and many got sick making the town the state hot spot. . . and people are dying.
Arm and Hammer Anvil : I inherited from my father in law, a arm and hammer anvil serial # 30314 marked wrought iron and stamped 191 pounds. Just wondering if you could tell me anything about it. Thanks in advance! Jerry
Anvil Dating : I inherited an anvil from my father in law several years ago and have been making knives on it for years, We live in the state of Oregon USA. It is an Arm and Hammer with the logo still visible, stamped Wrought Iron and 191 pounds. Serial number is 30314. I know that he and his father used it on their dairy farm for many years. Just curious to know approximately how old it is? Thanks for whatever help you can give. Jerry
Anvil age by Serial Number :
Jerry, your anvil was made sometime in 1917-1918. There are three groups of numbers for these years when the more anvils were made in sold in the US than at any other time.
Being forged makes it a unique product that will never be duplicated.
African Anvil ID : Hi guys, wondering if you could help me out. I live in Mozambique, east Africa. We traded a old car for three anvils about 20 years ago and I am only now really starting to us them. Mozambique has a Portuguese colonial history so I was wondering if the anvils could hike from there. They have certainly been in Africa for many decades. Wondering if I could send you some pics and get your opinion? Thanks
Hi guys, wondering if you could help me out. I live in Mozambique, east Africa. We traded a old car for three anvils about 20 years ago and I am only now really starting to us them. Mozambique has a Portuguese colonial history so I was wondering if the anvils could hike from there. They have certainly been in Africa for many decades. Wondering if I could send you some pics and get your opinion? Thanks
Alex, Click on my name and my email SHOULD pop up if you are using a standard browser.
I could not tell you if an anvil was made in Portugal unless it had lettering in Portuguese. I can probably tell you if they are English Spanish or French.
Iron Kiss maintenance info : I sure hope you or someone else on this forum can point me in the direction of maintenance and repair info concerning Iron KISS air hammers. I purchased a used 75 pound model but it did not come with ant info.
Thanks, Gary
Got the "birth certificate" for my new to me 25# LG triphammer: Dec 28 1915, F.W. Kaiser of Merino Colorado.
The Rices at Little Giant are very nice and helpful and definitely will be getting some of my business as I get this hammer back in good pounding condition!
Little Giant : So is that a "standard" LG or a so-called "transitional" with the heavy cast guide system?
This was an unusual test design made only in the 25 pound and 250 pound hammers. I had one of the 250's but never had it running in my shop. In these hammers the guides are a heavy cast surround system similar to the Fairbanks that was probably too expensive in machining for LG as they only made them for a very short while. After that they made the dovetail type guides that have a problem wearing curved. . .
Thomas, if you have a way to play VHS send me your mailing address.
Iron Kiss hammers : Gary, they are just a Kinyon style air hammer, but by far the best built. John Larson of Baltimore, MD made them. I don't know if he's still at it, I haven't seen him or heard from him in ten years or so. There should be a drier on the air line going in, and an oiler is nice but not required.
Iron Kiss hammers :
A chronic problem with these hammers was the flexible coupling between the air cylinder and the ram. The good thing is that all the major technical parts are off the shelf items.
The need for an air drier increases greatly with the amount of use. In humid locations (anywhere not VERY arid) an air hammer run all day in production may need nearly a gallon of water removed from the air.
My hammer is an old style with neither the heavy guide or the rear "gibbed" guide. Guide looks in good shape with still a shim to go.
I've got to go over a quote from LG and decide what I can do myself or locally and what I'll need to have the experts do---and what I can afford. As I don't know how much the electric CoOp is going to charge to get power to my shop, my repair/replace budget is in the air.
Bent Plate Wrap around Guides :
I actually like those guides as long as they are not worn out.
LG HP Needs:
I've run a 50# LG with a 1HP 120V motor on a light extension cord. . . It ran surprisingly well. My later 50# hammer had the OEM 2HP 3PH motor on it and was a bit perkier but it all depends on what you want to do.
I'll bet a 25# LG would run fine on 3/4HP. On the other hand, many in the bladesmithing community have "hopped up" their 25's running higher HP than speced and much faster as well. . .
Our 120 lb. X1's were designed to run on 1.5HP but we ended up with 2HP as it was the cheapest way to get a motor with a 7/8" shaft. These run great on that HP.
Iron Kiss hammers : John Larsen shut down Iron Kiss a couple years ago. He was a daily poster on facebook about his hotrod projects until April last year when there a total stop. I suspect the worst.
My local scrapyard has had an influx of HVAC equipment with very nice motors: Baldor and Dayton; 1.5 hp, TEFC still attached to the equipment. I try to pick up one every Saturday when I go make my isolated visit. US$10 a piece. I need to look for a lower power one for our swamp cooler rather than the junk sold for them.
Full rated speed for a 25# LG is fine by me; I don't need to "hot rod" it. I may have a person coming out this weekend to look over the stuff I want to sell from the trove I picked up as part of the hammer deal. Selling off what I didn't need was supposed to pay for the deal and for refurbishment of the triphammer. However about the time I got it all to my shop the lockdown went into effect. I'm getting tired of tripping over the 248# PW anvil; too big for traveling to teach and too small to want to keep it as a large anvil for the shop...
Fire proofing walls : I'm going to set up my forge in an old pig house. 10 x 13. Very old wood structure. What do you recommend putting on the walls behind the gas and coal forges. It has a concrete floor.
Fire Proofing :
Paul, Step one in old wood buildings is to clean, clean, clean. Collections of various debris from insects and rodents as well as rotting wood, sawdust, animal feed, leaves. . . Attic spaces, hollows in walls, old insulation. . are all places that organic debris collects. These are critical because your number one fire hazard is sparks from grinding, welding and the forge. I worry about flying grinding sparks more than any other fire source.
Next, I would suggest saturating the exposed wood with a solution of water and borax. This is the same thing used to make cellulose insulation fire resistant. You can mix it in buckets and apply with a weed sprayer.
The most cost effective heat shield is 5/8" sheet rock applied directly over the wood. IF your forge needs to be close to the wall (which is likely in this size shop) I would put a sheet metal "heat shield" over the sheet rock. This wants to be spaced about 1 to 2" away from the wall and have the top and bottom open to allow air to move through the gap. Standoffs can be made from small pipe or metal tube cut to equal lengths, the screws attaching the sheet metal passing through them. With the forge hood a few inches away from the heat shield you have two air spaces to dissipate heat. Behind a gas forge I would make a two layer heat shield. Gas forges often have vents (or leaks) that hot gases pass through.
If you wanted to get expensive you could use refractory board on the wall but the sheet rock (gypsum board) is almost as good. If you want to be double safe, double the thickness. The 4 foot width is about all you need behind the typical forge. If you have exposed framing you can also fill the voids with fibreglass insulation. In house construction this retards the spread of flames in a wall.
Old window sills or horizontal framing may want to be covered with sheet metal to reduce the likelihood of sparks igniting the old wood.
Alternate fire proofing :
In a wood frame building built on a concrete slab you can put up a brick wall in front of the framing. In this case it would be best to use sheet rock, then a veneer (single) layer of brick anchored to the wall. It would look nice and be very fire resistant. Small lots of "extra" bricks can often be gotten from brick masons for much less than new cost. This is especially true if you do not mind mismatching.
Plan for wiring and plumbing first.
Fire in an old wood building :
Years ago a visitor to my shop in an old grist mill flicked a cigarette ash out a doorway. It wasn't just ash and it blew back into the rotted framing under the doorway.
When I returned to my shop after the guest had left I found a thin column of smoke coming out of the floor under the doorway. I immediately got some water and doused the smouldering fire. If I had been a few minutes later there would have been no putting the fire out. . . Later I cleaned out the old dirt, debris and rotted wood. It was perfect fire starter.
This was not my forge or welding shop. It was my machine shop with lathe, drill press, saw, benches. . .
I've used used metal roofing before; but you need to plug any screw holes in it---hopefully by reusing them to fasten it to the wall.
Fire proofing : Thanks for the info. I'll get to work on it tomorrow.
Paul
Fires : Many years ago My brother-in-law did floors.He told me about using a drum sander to refinish hardwood floors. More than once he left at lunchtime and came back to find the bag gone and the sawdust from the sanding in a pile on the floor. What happened was he had hit a nail or two and the sparks smoldered in the bag, finally bursting into flame and consuming the cloth bag and leaving the sawdust with no support or containment..
coal supplier : I recently had email contact with the Penn keystone coal company http://www.penncoal.com
they quoted 15 $ per 50# bag for a 50 bag order.shipped to Calais Maine
Wayne, If you buy some let us know how it is. But something doesn't seem right. Shipping should be that much or more unless going by some kind of freight other than UPS.
Fires : A friend used his grinder with dust collection system to grind both wood and metal on the same day. . . In the middle of the night his shop burned down. . . All his machinery was a loss.
Grinders with dust collection systems should be dedicated to either wood and plastic OR metal. Note however that the dust from metal will also burn (especially aluminum OR fine iron dust). Note also that rust and aluminum dust are the ingredients for Thermite. Luckily iron dust usually rusts into a solid mass and is not flammable. However, it IS something to think about if grinding mixed metals.
If grinding knife handles ON the knife and shaping the tang, do so on a grinder without a dust collection system.
The closest I've come to a house fire was creosote fires in a wood stove stack. We had it happen several times and it scared me enough that we got rid of the wood stove. It was too much stove in a relatively small room with poor circulation to the rest of the house. So it could not be run hot enough to prevent large buildups of creosote.
Our neighbor at the time had a fireplace insert and a had a chimney fire. . . She called me as she was leaving for work and asked if I could look at her wood stove as it was making a strange noise. . . Then she hung up and took off. I grabbed a small kitchen fire extinguisher and slogged through the unusually deep snow. . . When I got there the noise was unmistakable. I discharged the the (old) fire extinguisher. It was nearly a dud. I closed the loose fitting vents on the stove and slogged back down to the house and got two more fire extinguishers. . . They worked a little better and the combination of closing the vents and the extinguisher powder got things under control.
Fire Proofing : When I built my ground-up shop (which had to be wood for cost and my own, limited, abilities) I coated all of the wood at the "hot work" end with sodium silicate (also known as waterglass). This is an old theater trick, from the gaslight era. In the immediate area of the forges I put in galvanized roofing over the waterglass on the walls as an extra layer of protection (as Thomas Powers suggests). The floor in the hot work end is sand over gravel. The other half of the forge building is a "cold work" end with pavers for the floor and without the extra treatments on the wood. This is for drilling and cutting and such.
All of my woodworking stock and tools are exiled to a separate building. (A wood lathe in a small, crowded blacksmith shop? What could go wrong?) SO FAR nothing has caught fire; but keep an eye out for mouse nests and accumulated flammable clutter, even in the cold work areas. We generate a lot of sparks with our saws and wire wheels and grinders, &c., just looking for a nice bit of fuel to ignite.
Re Coal shipping: 50 bag minimum order, that's a ton+ I don't think they were shipping UPS.
coal supplier : Im sorry I didnt specify that this was shipping by truck. they tell me they are planning to do up 40 # bags that can be shipped ups.I guess you could Google their web site for more info and a contact email address.
Thermite : Actually Jock Thermite is not iron and aluminum. it is rust and aluminum. Look it up.
Shop Fire Danger : A few years back I had a close call in my shop. Wood top work bench with a couple of T-shirt rags used to wipe waxed iron work too close to my chop saw which I'd been using. I returned to the shop after being away for about 30 minutes and smelled the burning as I entered. Lucky for me the rags were 100% cotton and were just smoldering, did make a burn spot in the wood. I have been planning to cover the bench with sheet steel so maybe this discussion will get me off my butt and get it done. And I do believe beleive Jock did say Thermite ingredients are rust and aluminum dust
Thermite : My point was that the iron dust would rust and then a mix of aluminum and iron dist would be aluminum and rust. . But in this case the rust should be a compact mass and not dust. . .
Rags and fire :
Rags in the shop are most often soaked with various oils, solvents, waxes and paint. I've had rags that were used for a year or more for wiping off machinery. The worst are those with boiled linseed oil which dries by natural oxidizing. This produces heat and is probably the only true source of spontaneous combustion.
I believe fire regs and OSHA reguire a steel trash bin with a steel lid for disposing of such rags.
Spontaneous Combustion : A friend and fellow NMABA menber here in NM had a hazardous material abatement business but now retired. He said they came close to burning down a building in which they were working with rags soaked with one of the orange derivative solvents
I know a smith that used to be a painting contractor and were refinishing a gym floor with BLO. They had a fire from their pile of rags!
I have also med knifemakers that have had the grinding dust crud in their dust collectors burn.
One of the goals in blacksmithing is to only have the fire where you WANT it!
Many epoxies also heat up as they cure. I set a paper cup on fire unintentionally this way. Brownell's Accraglas is a fine two-part epoxy for filling voids like, say, the core of a cane handle made from elk antler. Turns out if you mix a big batch in a paper cup and end up not needing it all, about 1.5 fluid ounces of the stuff will get hot enough to ignite paper in about five minutes. Luckily I was holding said cup and noticed it getting really hot, and was able to put it down on concrete outside before it went up.
The cane handle got warm, but not enough to do any damage.
Epoxy Heat :
Back in the 1960's my Dad and his crew made the world's largest epoxy casting. During the first test they set the label of a 5 gallon pail on fire. . . The epozy manufacturers said the parts could not be cast. . . they were wrong.
The molds for the part were water cooled aluminium and used Zerc grease fittings to sepetate the mold from the parts. When they broke free they said is sounded like a cannon going off. The parts were mock ups of a type of nuclear reactor core that used big semi cylindrical parts that engaged each other to adjust the nuclear reaction. As far as I know the experimenta design was never built. But a full size mock up of the reactor and reactor building was built.
Fire in the Blacksmith Shop :
We've all know a lot of venues that panic over the "open flame" of a blacksmiths forge. But the forge is probably the safest fire in the shop.
Thermite : Jock I know that for a fact rust in a clump does not prevent a Goldsmith's reaction, IE thermite. I saw a 70' long 13' wide by 20' tall car bottom stress relieve furnace consume it self. We had steel fin tubes welded into headers of our boilers stacked on the car bottom. The furnace went to temp about 1600F and then began to rise. the burners were shut off and the temp continued rising, and the thermocouples burnt away at about 3000F. A few days later once the furnace cooled down enough we used a crawler trackhoe with a hoe ram to start breaking up the melted refractory and aluminum oxide puddled on top of the steel puddles.Seems the fin tubes had rusted a bit and the fins had been observed to be packed hard with rust in a couple of locations. These lit the reaction since the steel was aluminum killed and the aluminum content was at the top of the spec. That then caused the entire lot to start reacting and destroyed the pile of fin tubes and the furnace.
Cotton buffing wheels make great tinder. And starting the machine to blow it out does not improve things (grin).
I've cleaned out old aggregated piles of aluminum, steel, brass fines from under machine tools. . . ticking time bombs? They were not in my shop - I sweep once in a while.
To make things worse buffing compound is made with wax.
Ignition Story : Because of our humidity, and keeping the forge well ventilated with rain or snow blowing in under the roof vent or eaves from time to time, I usually have the anvil faces covered with a plank or a light metal plate, and horns and bickerns and mandrel cones with an old stretched out sock when I'm away. Since I sometimes lightly oil the faces and tools, sometimes the various socks and rags pick up a little oil. Just a little, mind you.
This was not a problem until one day, in a hurry to prep the shop for an event, I and the fellow helping me laid all of the rags and socks on one of the planks, and then piled the rest of the planks and plates on top. When the weekend was over, and I went to replace the "anti-condensation gear" I was surprised to find the rags had a big hole burned through the middle of the flattened pile. Scorch marks are still on one of the planks. I made a note not to do THAT again!
Hopefully I am at the last disassembly step on working on my 25# Little Giant power hammer---disassembling the clutch. Then I can start repairing it and putting stuff back on. It will be a race to see if I get power to the shop before needing it for the powerhammer.
Is your hammer a center clutch or rear clutch (behind the frame)?
anvil weight : is there a trick to estimating the weight of an anvil, without using a scale?
Anvil Weight Estimation :
Most of us that deal with a lot of anvils can tell you the weight of a small anvil in the portability range (100 to 200 pounds) to withing +/- 50 lbs. . That is about as accurate as questimations get. Above that +/- 100 pounds is typical.
I spent most of my engineering career calculating the the weight of large and small machine parts (up to 50 tons) then several years writing a computer program to do a range of shape calculations in different materials. That said, I can tell you there is no quick easy way (or any way that works on more than one anvil at all). Too many shape variables to have any reasonable accuracy. See FAQs, Mathematics, Mass3J.
About half of all anvils have the weight marked on them in British Hundredweight, pounds or kilograms. Old European pre WWII anvils are often marked in local units such as pfunds.
Otherwise you will need to weigh it. If it weighs more than a bathroom scale will accept then use two with a board between them. Due to geometric inaccuracy the two will not read the same but if total them the amount will be right.
OR you can take it to a merchant that has a platform scale. I have one good for 1,000 pounds (500kg). There will be a fee if we have to use the fork lift to move the anvil. . . :)
Guru; my 25# Little Giant has a center metal on metal clutch. It's old style.
Spent hours over the weekend in 93 degF heat cleaning ancient grease and light surface rust off the top end parts manually---they won't come see about power to the shop till the lockdown is lifted.
Anvil Weight Calculation :
Iron/Steel weighs 7.845 g/cm3, .2835 lbs/cuin or 490 lbs/cuft. with some small variations depending on being wrought or steel.
Old English anvils and many European are made by starting with a rectangular slab the thickness of the anvil's face width, the length of the anvils height and the width of the waist (prior to anvils becoming wasp waisted). In many cases this slab is thinner at the face and thicker at the base. In this case use the average of the two.
Starting with that slab the horn, heel and feet are added. These are roughly 65% of the anvils weight.
So, start by measuring the starting slab. Calculate the volume (L x W x H) and then weight, V * Density. Multiply this by 1.65 and you will be within about 20% of the anvil's weight. The true multiplier could be as low as 1.4 or as high as 1.8. Thus the calculation is only as good as an eye ball questimation.
To set more accurate you have to determine the masses of parts outside the core slab. The horn may be conical OR rhino horn shape. If conical it is 1/3 of a cylindrical section the diameter of the root of the horn and its length. If a Rhino horn then more, use a multiplier of 0.40 instead of 0.333. Pretend a sharp point ignoring the flat. Then between the horn and the core there will be a transition. Measure it roughly as a rectangle.
The heel of the anvil also varies. It is roughly a triangular section supporting a slab. The triangular section may be a true triangle OR have a curved lower surface. IF curved you can use estimation principals and measure it as a triangle by creating an average line above and below the curve. Be sure to reduce the top slab accordingly if using this method. Then the volume of the triangular section is half of an equavalent rectangle (L x W x H / 2).
The feet will have to be broken down into many rectangular slabs and fillets. I would use pats equal to the thickness of the inner core and those outside it. In this case you have two core pieces and four foot pieces. You only need to calculate each once then multiply. This takes the greatest estimation skills.
When finished with the general masses you can subtract the hardy hole (about 1 pound and the handling holes (another pound more or less).
Some anvils have optional parts (clip horns, side horns, upsetting blocks).
I would expect to have an accuracy of +/- 5% using this method and careful measurement with a ruler or tape measure. The trick is visualizing each part as a geometric section, mostly rectangles, then doing the work in an organized manner.
You have to REALLY want to know the weight of something to use this method on a sculptural shape like an anvil. When I was doing it for machinery the results were used to determine centers of gravity and masses to be rotated upside down and the amount of torque necessary to do so. I calculated chamfers, fillets conical sections, hollow truncated cones and more. . . On one 17,000 pound machined casting I was within 5 pounds (0.0003%) - better than the accuracy of scales at that weight. Centers of gravity on such large parts were determined to less than 1/4". This required using all the basic geometric pieces of a whole to find its cg. After doing this by hand once I wrote a program to do it. . .
Little Giants : Thomas, Sorry to hear about your power delay. . . Locally it is hit or miss as to which businesses are open.
The center clutch is more compact. While installing and machining a new bushing and conical contact section is a bit of a pain it is cheaper than doing a rear mount clutch which came with all versions with a factory motor. The rear clutch/pulley was quite large (over 24" on the 50 pound LG I had). That means needing a machine capable of handling that size work. The only difference between early and late on the rear mount was the change to V belts on later models. All center clutch models assumed an overhead line shaft.
When it comes to setting up the drive its a toss up between a hammer mounted motor and a short overhead jack shaft (single purpose line shaft). While not the way the machine was designed I prefer machine mounted motors so that they are a unit that can be moved as one piece.
Wish we were closer together. . . I've got a Clipper belt splicer and magnetic based drill press. Both come in real handy doing this kind of machine setup.
Thanks; I'm supposed to call the LG folks and talk about the clutch. They have been very helpful. I like the center mount system myself as it looks like loads are better positioned---between two bearings rather than cantilevered. I have a next door neighbor who works at an implement dealership. I'd bet they have a lacer there. Lots of old farm equipment out here.
My biggest problem is not being able to sell off stuff to fund the repairs due to the lock down. I'm stubborn that folks need to actually see the stuff in person as it's old used smithing stuff and so may be worn. Oh well my wife hasn't started docking my allowance to payoff the money I borrowed from savings---yet.
Flat belting :
If you use flat belting DO NOT USE 100% or laminated leather belting. The new sources are low quality stuff that varies in width and thickness and stretches miserably then becomes stiff and "old" in a short time. . . The last I bought had splices every foot or less. . . Its NOT the belting our fathers and grandfathers used.
Today you want the nylon core leather surfaced belting. Its friction is that of leather and has the strength of the nylon. Its only drawback is that it shrinks in cold weather and can become too tight on fixed center step drives. Otherwise it outperforms the best leather.
Note that flat belts should be narrower than the pulley by a good margin. A good inch or more on an LG center pulley.
Flat belts track to the high point of the crown on a pulley. BUT if they run off the edge it acts like the high point. Flat belts with tensioners often have pulleys with side guides so they do not fall off when loose. The belt must track a safe distance from the side when tensioned or it will climb up the side and off.
On belt grinders all the pulleys have crown EXCEPT those at the top and bottom of a platen OR on contact wheels. This is why grinders have adjustable tracking.
Glass to Steel Fusion - Chemistry : Hi,
I live down in Perth Western Australia and I have recently been playing with adding glass into some of my ironwork. As the glass and iron are fused together in the furnace I have noticed where the two fuse there are bubble and burning in the glass. Wondering if any other artists have had this added texture and if there is a way to control,(reduce/eliminate) the effect at all.
GLASS :
I know little about glass, but here is what I do know.
1) Liquid glass is the most universal solvent exceeding water. Glass can double its density by dissolving metals such as lead. If there are oxides on your metal the glass will dissolve them. If the oxides break down, that would be your bubbles.
2) Glass has a different coefficient of expansion than steel. It is about 1/2 to 1/3 that of steel. So steel welded to glass is bound to crack or break with temperature change. I recommend minimizing the weld area.
Otherwise I generally avoid glass in the blacksmith shop. Glass and heavy metal things just don't go together. This is from someone who has built some of the most sophisticated high density lead glass windows (ports) that you can imagine (heavy steel, thick lead glass, multiple layers, stepped tooling ports, rubber, Lexan covers. . .).
Glass : Thanks for your information. I am currently attempting another firing using a slip or wash over the steel to minimise the oxygen. It's looking good at this point at 1050C with no signs of the glass burning where it is in contact with the steel. The wash is from bullseye glass formulated to stop glass from welding itself to moulds.
Glass : I have seen once, long ago, the work of a smith who set glass marbles in slit-and-drifted holes in steel. I asked him how he did it, and said by sizing the holes just a hair smaller than the marble, set the marble in the hole, and gently heat the whole thing with a rosebud on a reducing flame until it got just hot enough for the glass to be slightly gummy. He'd then use a hot steel bar to gently nudge the marble into the hole. The steel stayed hot long enough to sort of anneal the glass, so the marbles stayed mostly intact and the swirl pattern was still visible. He had some crazing around the edges, but it looked pretty good. This was at a show in Louisville, KY in around 2000.
Glass and Iron : A number of years back (1995 - 1998) I tried using crushed glass in a pierced ornamental hole through a 1" bar on a candlestick for my nephew. A miserable failure, several times. I might consult with one of my recent padawans who has had some luck at beadmaking, if I undertake another experiment. I think I first saw it in Bealer.
Glass : Well I have had three tests so far and each has had a success on its own. I have used a 5mm round bar, welded into a 50mm ring and brightened on the wire wheel. Applied two coats of ceramic wash to the steel and several to the shelf the iron was to be placed whilst in the furnace. Once everything was dry, I placed the ring on the shelf, around 1/4 cup of glass crushed to a fine powder. Ramp up to 1100C in the furnace in the first half hour, did a soak at 1100C for twenty min. then ramped down to 650 over an hour, and then another soak at 600-590 range to destress. Worked pretty perfectly. the atmosphere in the kiln is now a question as the glass took on a opaque colour which was unexpected.
Glass to Iron : I have had some success in melting glass into small split cross centers. I always vigorously wire wheel the scale off the still hot forging, add the slightly bigger glass blob onto the front of the hole. I place in my gas forge, on a 1/2" square bar bent into U shape. I watch hard and as the red glass heats it goes thru several color changes. It goes black then clear. At about black it will begin to sag through the hole a bit. I bring it out at mostly clear and using a pointed steel tool shove the glass into the tight corners of the hole. Then back in to let the glass begin to sag more towards the back of the hole and then I pull the cross and place it face up on my anvil for long enough to raise the dome of glass a little proud on the iron and also to chill it. Then lift for a couple of moments and then back onto the anvil face up till cool. The iridescent red/gold blobs of glass intended for use in vases to hold flowers go to black then clear as they heat. Once fully cooled there is usually a face of the glass touching the anvil that has spalled off. The red is far more intense after 2 cooling cycles. I have not had any to crack if they make it to totally cooled. I have had a couple fail in the cooling. Done in a coal forge is possible but I always get bits of fly ash in the glass and it does not look as good. I have tried blue and a light blue glass finishes to almost black it has so darkened after a couple of heats.
grader blades : I was hopeing someone can tell me what type of steel grader blades are .thanks john
Grader Blades : John, It varies and the edge piece is different than the main body. i THINK AR-500 (Abrasion Resistant) is commonly used. This is a hard tough steel but not the kind of hardness you are looking for in most tools and blades. It is very hard to cut (drill, saw, machine OR grind) but does not have the kind of hardness you want in an edge tool.
Grader blade uses : I have forged bending forks from grader blade and they work very well. Have seen cut off hardies forged from grader blade but don't know how well they hold up
grader blades : Thank you gentlemen . I think I,m going to let it sift its way down to the bottom of the pile
AR-500 : John AR-500 is most often used for metal targets since it resist penetration
AR-500 : Hmmm; now maybe I'll fiddle with that piece of snow plow/grader blade my boss helped me salvage. It was laying in one of our downtown DC parks after a snowstorm (and subsequent snow plows) had bee through; and rather than call our work crew, we just dragged it back to the office, and I hauled it down to the farm the next time I had my pickup truck in town. I could use some swinging targets. Do you think it could be good for some small Viking axe heads?
AR-500 : While not up to modern tool standards it would be better than most of the steel available to the Vikings.
AR-500 : Given the composition of C-.30%, Si-.70%, Mn-1.70%, Cr-1.00%, Ni-.80%, Mo-.50% and B-.004%, particularly the highish chromium, a fairly aggressive flux would probably be a good idea when forge welding.
black beauty Burner : Hello, I have built my forge using one of the black beauty burners and it seems to work very well (I only say seems as I am very new to this and it is my first forge).
Forge is 2-1" layers of wool, 1/4" refracory and a wash of itc100. has a volume off about 210 cu inches
I have a question about tuning. Once the forge is up to a bright yellow heat, the dragons breath turns quite green. As I under stand that is excess fuel being burnt out side the forge. Is there a way to increase the air intake draw of the burner for a more complete fuel combustion in the forge?
If i turn down the psi the forge slow drops temp to a mid orange color in the forge and i find that 3/4 round bar only reaches mid-high orange as opposed to yellow.
Thanks in advance
Gord
Green Flames :
First, it seems your forge volume is a little small. We rate these burners for 300 to 500 cuin.
Green flames indicate copper (or brass/bronze) burning somewhere. Generally this is not good as the only copper in the forge should be the MIG tips in the burners. If the MIG tips are getting this hot then you have fire in the burner tube where it is NOT supposed to be. This is often indicated by a throaty growl in the burner.
Forges need be be enclosed with only a sufficient opening for venting (usually a minimum of 7 times the cross section of the burners). This venting is generally in a door so that pieces than larger the vent or irregularly shaped can be put in the forge. You often see cylindrical forges with a fully open end but these have multiple burners.
As an economy burner ours have no adjustments other than incoming pressure. To reduce the air intake you could use a hose clamp to block part of the opening but reducing the burner output generally results in reduced fuel/air velocity and flash back into the burner tube. This can result in melting or burning out the burner tube and/or the MIG tip.
Green Flames : I this when you're wearing didymium or other shaded safety glasses? I have to remember to put them on and off for some observations, or switch to clear safety glasses, depending upon circumstances.
Anvil ID : I was hoping for some help. I just bought a larger anvil and am not 100% sure what I bought. It looks like a Trenton to me but it is not marked as such that I can see. It weighs just shy of 150 lbs and is 28.5" long. I have pictures of it and the markings on it. I will send them to your email address if I can find it
.
Green Flames : Thank you for the information
The mig tip is barely warm after running the forge for a couple of hours, i can still handle with bare hands the top of the burner.
I had some spare tips lying around so i took one, shortened it a little and filed it to a steep point (as a trial adjustment to increase air intake). it has reduced the green in the dragons breath and now looks more blue/green.
I am assuming the issue is as you say that the forge is under sized for the burner and there is not enough volume in the forge for full combustion at higher psi's. i think this is resulting in unburned fuel. the flame from the burner is really nice and neutral and the green in the dragons breath only appears when the forge gets into the high yellow range.
For now i'll roll with it and when the forge needs relining i'll make a bigger one ;)
Thank you
Gord
Green Flames : Bruce:
Oh and as to the shaded glasses, i only wear clear glasses while forging
good thought though, do those kinda things all the time
Chambersburg Document : Jock, when you and Grant Sarver were designing your versions of the first junk yard hammers (early 98?), you posted the following...
**********
The 15 to 1 ratio isn't written in stone but it IS written in steel!
According to Chambersburg literature a 15:1 ratio is only 50% efficient and 40:1 is only 95%. For their really heavy hammers they recomend 20:1 which is 70% efficient.
*************
Later in the discussions, Grant referenced a Chambersburg chart that supposedly identified efficiency for ram to anvil ratios when he was deciding how heavy his ram and anvil might be.
I am very interested in seeing an image of that chart. Is it something that you can email me? Thanks in advance....
Steven, any numbers on the front of the foot under the horn? Also what does the bottom of the anvil look like?
DIY Anvils : Stock Prep And Mazak Fixture For 14 Lb Anvil
https://www.youtube.com/watch?v=NqW3ij2uMDo
Machining Of The 14 Lb Anvils
https://www.youtube.com/watch?v=SIfU4x0Lw9g
Anvil : I just inherited a 200 lb anvil that I'm trying to figure out the history of. The markings are hard to make out. Is it possible to send you photos?
Power Hammer Anvils :
Dave, See https://www.anvilfire.com/power/power-hammer-building.php
Power Hammers, Junk Yard Hammers, Notes on Building
From this chart I derived the fact that an average blacksmith's hammer and anvil ratio is 50:1 or greater. This is 96 to 98% efficient for a 2 pound hammer and 100 pound anvil or 4 pound anvil and 200 pound anvil. When expending human energy you need the greatest efficiency. AND many smiths report feeling the difference at higher ratios (400 to 600 pound anvils).
MY connection. . .PCs :
My main desktop tower PC has died or is dying. It will boot and run a few minutes then reboots itself. . . I've always used my small laptop as a backup BUT I found that I cannot get drivers for it to use my current printer. . . which makes it difficult to to do business.
I'm locked into WinXP due to the thousands of dollars worth of software that I use that will not work on later OS's and much of which does not have upgrade paths. In fact my very usable CAD program that I am still using for many drawings and illustrations you see on anvilfire as well as for cutting templates is completely orphaned. . .
A new pricey special built "retro" PC is on the way. . . Hopefully I can just slip the HD into it and be in operation. Meanwhile, everything I do on-line is slow and painfull. . .
Damascus : I see Damascus all over the place, including your site. Damascus is an ancient city, not a pattern welded steel. Why don't I see anything about wootz crucible steel here?
Damascus Steel :
Mark, this is not primarily a bladesmiths' site and I have sort of avoided this definition issue because I suspect that it is going to be a contentious one.
Starting about the time of the Crusades Europeans discovered that much of the Wootz steel that was imported from the Middle East with no specific name was from Damascus (or came through Damascus) and it was the primary weapon steel of the Muslims of the area (the enemy of the Crusaders). The blades and "Damascus Steel" became famous and the name stuck.
An alternate name origin is from Damask cloth which has a rippling sheen like the metal. Or Damask came from the steel. . .
From that time onward European smiths tried to duplicate the pattern in Damascus (Wootz) by layering dissimilar iron and steels. The process used was similar to the existing process used to refine blister steel. The Europeans thus developed what is properly known as "pattern welded steel" but was erroneously called Damascus then and continues to be so to this day.
The knowledge of Wootz has been slowly documented since the 1800's and the true process (to the best of metallurgical knowledge) duplicated in recent years.
SO, if you want to be accurate "Damascus" should only be used for historical examples of Wootz OR steel reproduced by the same crucible methods and modern steels all called "laminated or pattern welded steels". . . But it will never happen.
Where I differ with most of the bladesmithing community is on the use of "x layers of steel". This is a completely worthless definition. If I make a billet with 100 layers and make a hammer from it there are 100 layers. . . if I reduce the thickness to that of a blade then it has 100 layers. A proper correct modern definition would be layers per unit thickness (layers per inch or layers per centimeter).
In my 100 layer example above the hammer billet if 2" thick would be 50 LPI (Layers per inch) and the 3/16" thick blade 1066 LPI. No sloppy BS terms.
Well I will disagree; the height of using pattern welding steel in medieval Europe was several centuries before the crusades; so it was NOT due to exposure to wootz. Blacksmiths can be forward looking people but several centuries??? (There were revivals of using it in 18th, 19th and 20th centuries; often for decorative purposes and nationalism---as a folk craft.)
Also the term "Damascus" has been used for both pattern welding and wootz steels longer than the United States of America has been around. Do we stop using USA and go back to the NA Colonies as well? I consider Damascus Steel to be the general term and pattern welded and wootz the specific terms.
It is interesting to note that every culture that used the bloomery process of making real wrought iron---which includes multiple steps of stacking and welding to get good material from bloom has come up with pattern welding as well.
I strongly agree that layers per unit of length is the only proper descriptive for pattern welded steel layer counts.
As for why few mentions of wootz here; not many people are working with it. We tend to discuss stuff we are actively doing here.
To make it even more fun, I am a moderator on a bladesmithing forum, and we seem to have settled on calling the European multi-bar pattern-welding style from ca. 100 AD - 1100 AD "pattern-weld," the more modern versions "damascus, mosaic damascus, powder damascus, etc," and we differentiate crucible steel from Wootz by chemistry and area of origin, so there. We don't get uptight about it unless someone uses a very specific term incorrectly. "Damascus" is not a very specific term.
Damascus : Like many old over used terms in blacksmithing "Damascus" is basically a trash term with many meanings like "forge" (both adjective for a place and thing and a verb), "wrought iron" (a material and, to the public, ANY decorative metal work including that made from aluminum), "iron" meaning any ferrous material, guns and the verb "to iron" cloths.
More Damascus : I would prefer all modern laminated steel to be called laminated steel or pattern welded steel and Damascus left to the general public. The powder product not being truely laminated can be called by whatever the manufacturer wants (powder Damascus. . .) as long as it is not called laminated.
The other term that is poorly used in referenced to laminated steels is "folding". To get a good controlled layering the billet is cut and restacked. In many cases a thin hinge is left when cut and the stack folded on these hinges. If the billet is actually folded it generates a lot of waste at the ends where the layers are vertical and muddled as well as there being incomplete welds.
In the late 1990's one of the first bladesmiths on-line was "heavenly steel" (not real name). Their sales pitch was that the smith's energy went into the steel and made it stronger therefore the more it was "folded" the stronger/better it was. . . As more smiths got on-line they were publicly called on their line of BS and shortly disappeared. This BS is still occasionally heard in movie dialog (folded thousands of times. . .).
All good laminated steel is only layered to the point that produces the best results for the purpose. Too many layers and the product becomes nearly homogenous and no longer shows a pattern. However, it is interesting to note that weld surfaces exposed to the forge atmosphere are often decarburized (a bad thing) and can become a visible layer themselves.
flashback in the burner : I am getting flashback (really burning back) meaning flame visible in the air inlet hole of my black beauty burner in a two burner forge. This problem only occurs on my one two burner forges. They work great on my other single burner forges. I had a Reil Type Venturi burner previously and would get the same problem with the same forge in the same hole. It is a kaowool forge top, folded and tied in place with ss wire. So I have successfully used this forge top on 3 forges fired with the same burners. So I don't think it is the design of the forge top or the burner.
The two burners are located the same depth in the kaowool, with about 1" of space from the end of the burner and the interior surface of the forge. The problematic burner is in the rear placement of the two burner forge. They are separated by 4.75".
What I cannot confirm is whether there is some space around the burner and maybe creating a chimney effect pulling heat up the outside of the burner and reaching the ignition point. I am considering stuffing the burner hole with more kaowool and then redrilling the hole.
Any thoughts? Thanks hope you are well.
Flash Back in BBB :
Steven, I am glad to hear you are using our flat panel design.
We have had reports of MIG tips coming loose in some of our first batch of burners. Fuel leakage at this point COULD cause a problem. Since this report I have made sure all MIG tips are tight in the new batches of burners.
While it is tight the tips can be tighten using common needle nosed pliers.
Otherwise flashback is usually a result of trying to turn down the burners too much. This reduces the fuel/air mix to less than the flame front velocity and thus fire can run up into the burner tube. A difference in back pressure could also be a cause.
Are you using individual valves or an "idle circuit" on the forge? This could result in reduced pressure/flow. The may also be debris (Teflon tape?) in the fuel line. Did you change out the MIG tip? You might check the TIP size, it should be 030.
I would not try to remake the burner hole. I would use a wire (like 1/8" welding rod) to pack some blanket around the burner if you think the hole is loose.
Since this was a problem with another burner I would look at back pressure issues (doors, the shape of the hole beyond the burner end - I form it like a nozzle).
I had a problem with my NC Whisper Baby when the back door is propped open with hot gas being sucked into the burner causing a fluttering and occasionally a flash back. To fix it I put a piece of sheet metal above the rear door to guide the hot exhaust gas away from the burner intake. I've seen similar problems on other forges when there was a breeze of draft blowing the gasses across the burner intakes.
Boy; I haven't thought of that "Heavenly Steel" guy in a decade or so. Most unpleasant for a heavenly guy...As I recall he firmly believed that hype and personal beliefs trumped clear repeatable science experiments.
I'll have to take a billet up the hill and talk with the people at EMRTC and see if they would try explosively welding it. I do have one that was made using thin strips of various steels and metal glass film and then heated in an inert atmosphere to get a solid state weld. Two types of lamination that are not forge welding.
I knew someone would remember him. He as definitely fluent in BS.
Then there is my LaGrange-Hoho-Damascus for someone to try. . .
Oh, he's still out there causing problems. A few years ago he was thermo-cycling S-7 to get massive alloy banding and calling it "techno-wootz."
Techno Wootz : sounds like the name of a bad rock band or type of music akin to a car crash. That's a terrible thing to do to S-7. Big Blu COLD forges texture into hundreds of feet of bar on their S-7 dies. A real testament to the steel when properly heat treated.
In the late 60's I got out of fine art because it was dominated by BS artists - those who sold their work based on if you did not understand it you were stupid, did not understand art. I understood it was BS and those buying it really did not understand art OR BS. Even museum buyers fell for the BS.
I did not expect to find it (sales based on BS) in blacksmithing but I did, and it still goes on.
Flashback in Burner : The flat panels on top of the forge are really easy to work with. I don't use it for my sidewalls because I am pretty rough on my forges.
The burners and tips were just fine. I just played with the arrangement of bricks and think that was creating some kind of eddy that pushed hot air up the burners. It seems to be running better. Crazy that such a subtle movement of the bricks can make all the difference. That is the downside of me just using loose bricks for my sidewalls. Thanks.
Techno Wootz: not a bad rock band; just a progression from Kraftwerk.
Now Alloy Banding sounds like a bad cover band...
There are still some great artists out there; but hard to find amidst the cruft. Sturgeon's law in the strict formulation definitely holds for ART.
Artists in Steel : I am shocked- SHOCKED that the Emperor-Artists had no clothes. We in the Oakley Forge Collective participated the Art Show at a rather pleasant Science-Fiction convention in the mountains of Virginia last winter. (Before the "Plague of Cancellations.") They kept trying to put us in the dealers room. After the show, we were told not to bother applying again. If you can't hang it on a wall, I guess it isn't "art." (This despite the fact that we participated in the Art Shows of three of the last four World Science Fiction Conventions, and numerous regional Cons.)
Not that I'm RESENTFUL, you understand... ;^)
Art and BS : I am single-handed responsible for the wall-mounted-art-only rule at the Duncan Hines Open art competition in Bowling Green, KY. I submitted a rather large gothic revival floor candelabra in 2000, got a blue ribbon, and in the next years' call for submissions a paragraph had been added that read "No floor-standing sculptures, art must be wall-hanging only. Weight limit 35 pounds." I'm rather proud of that one.
As for the techno-wootz guy, in the bladesmithing world we refer to him as "Fluffy." He gets very lawsuit-happy if you mention his name, his website name, or his techniques. He actually got a patent on the alloy banding thing somehow, and aggressively threatened to sue a few of us who pointed out it was merely a physical phenomenon most steel mills try hard to avoid, not a new technique at all. He backed down eventually.
Then there was the time the Cold Steel corporation trademarked the term "San-Mai" and then sent cease-and-desist letters to every bladesmith who was advertising their three-layer laminated blades as san mai. That one actually went to arbitration, where it was determined that since the term itself has existed for several hundred years, all Cold Steel's trademark applied to was the typeface they used for the term.
The moral of the story? Always call BS when it appears, and have the proof to back it up. Otherwise the BS artists win. But it doesn't help if the "expert" is an idiot.
I thought about that a couple weeks ago when I saw an episode of Antiques Roadshow in which they had a pair of "sculptures" that were human figures made from welded-up old tools and metal parts. We've all seen those, they've been around since before the arc welder was invented. Well, this appraiser apparently had never seen one and estimated them at $12,000- $25,000 for the pair. I told my wife if he wanted to pay that for them, I'd be happy to go fire up the ol' stick welder and make as many as he wanted!
Flashback. . . glad to hear it was not our burners.
Art BS: I was judged not suitable for the Virginia Crafts guild with the excuse that my work was "too clean". This was from a smith who always seemed to have a patron supporting him and used a 50 pound LG to put obviously faux texture marks (with open spaces between) on everything he made. . .
Rule Changes: That just shows you were on the cutting edge, like the guy with the first catamaran in the Americas Cup. Back in my Soap Box Derby days we took every advantage of the rules every year and when they were changed we adapted again (jut like motor car racing). However, the last change, removal of the "added weight" rule killed my best chance at a win the last year. . .
Copyright/Trademarks: I've been waiting for years for someone to take the Olympics to court over their claim to ownership of the ancient common word olympics.
You may have a few more Olympiads to wait on that one . . . the work "Olympic" and related words and symbols are directly protected by statute (36 U.S.C. ┬¦ 220506), so the normal rules don't apply.
Flashback - my design fault : Guru, I was trying to be clear that I never thought it was the burner that was causing the flashback. I had the same problem with a different burner in the same forge, so I knew the only likely culprit was my forge design. My problem was you I didn't know where to look and you sent me in the right direction. Thanks. I am slowly swapping out all of my Reil Style Burners for your Black Beauties. I really like their low profile and they burn hot. Thanks again.
Forge Construction Issues. : Steven, Thanks, I often tend to over generalize my answers. We had one case of loose MIG tipe and recently a forge that was too small (I think). When we made our "bent" burner with a 90 degree turn it needed a larger orifice (I don't know why). In another case (different type burner) I tried a standard pipe 90 and could not make it work at all. AND I've had Teflon tape issues a couple times including on a brand new from the factory oxygen regulator!
It doesn't hurt to check everything.
I'm glad you like my burners.
We are getting ready to build a two burner forge with burners on opposite sides blowing up at a 45 degree angle. I've wondered if this is going to cause a turbulence problem as the gas steams are blowing at each other. Only a test will tell.
Tennis Elbow : I donŌĆÖt play tennis, of course, but this is a common problem for blacksmiths. The tendon that runs through the outboard side of the elbow gets sore. Usually, some rest for about a week will make it go away, but this time itŌĆÖs more persistent. IŌĆÖve contemplated by avoiding any heavy hammering, using the trip hammer (ŌĆ£ThumperŌĆØ) when needed, and using lighter hammers and sticking to mostly smaller projects for now. Trying to ŌĆ£work smartŌĆØ instead of bashing stuff into submission, and being a little more careful. It doesnŌĆÖt help that I occasionally bash the sore elbow into doorframes and beams around the house and barn as I go about my business. That brings a lot of pain.
So; what do you all recommend? There are various suggestions on the ŌĆ£interwebsŌĆØ but a lot of what I see there is worth the paper itŌĆÖs printed on. I figure this is a pretty common problem, so my blacksmithing friends may know best.
Pains : Not your problem but. . . I am right handed. . and my left elbow has started giving me problems. . . I figure its age related arthritis. I suggest Asprin. I've been taking it occasionally for my back. Only occasionally. I'm not a big believer in meds. .
Many years ago an artist friend had trouble with her shoulders and could not raise her arm above level. As a painter of large canvases this was a disaster for her. She had been to the doctor's several times and had shots (also painful) to relieve the pain and stiffness. Then at about age 70 she started to do yoga stretching exercises. She freed up her shoulders and claimed to be much better than what the doc's did for her She was still painting at over 90.
All I can recommend is a light grip on the hammer, raise it high and let physics do more of the work. I worked for years with a little 2.25 pound hammer. However, due to doing a lot of necessarily cold plate work I am currently using much heavier hammers for dishing. . . but seriously looking at some power hammer dies for that.
I went to a tennis shop and bought a velcro band that goes around my forearm just below the elbow. Supposedly it holds the tendon closer to the bone, making a better angle where it meets the joint. It does seem to help if I wear it when I use a hammer.
Stretching before, icing after, REST! Forearm band---a good one and not a cheap version. When I had a really bad case I ended up forging only CP 1&2 Titanium as I could use such a small hammer that my elbow didn't notice I was forging! Soft as warm butter at forging heat.
This is definitely a pain that you do NOT "work through" as that just makes it worse. Unfortunately the "rest" time may be months if you let it get bad.
We have a front moving in; I can tell as my fingers are hurting.
Elbow Option : Learn to hammer off handed (left if you are right handed, right if you are left handed). Practice a light grip, no thumbs on the back of the hammer and raising the hammer high when striking hard. NO pushing or "driving" the hammer.
While this sounds difficult most of us craftfolk are semi ambidextrous at the least. I've told folks for years that when using a hammer and chisel the off hand guides the tool, the striking hand protects the guiding hand. Try striking a chisel behind your back - your hands always know where the other is. . . This said, get some practice before using that off hand for striking a hand held tool.
Also, take care of your grip on tongs. Especially when using the power hammer or a striker. Heavy blows send vibrations and jerking motions up the reins into the wrist and elbow. While I've never been keen on tong rings, they allow a loose grip and thus less transmitted forces. In industrial shops shoulder injuries were common due to the heavy tongs being jerked down OR forced up if the work was not true to the dies.
When using a power hammer I hold the work with my dominate right hand most of the time, only occasionally with the left and often with both. It is good practice to use two pairs of tongs, one holding the work, a second at a right angle to firmly control the angle of the.
I read a report years ago on handedness that said folks are born either right handed or NONE and adopt one hand or the other as the dominant hand. My wife and I are right handed so you would think our children would be the same. Both (fraternal twins) ended up lefties. I blame this from our sitting across from them in their highchairs showing them how to use table implements. This made them mirror images of us. However, when I taught my son to forge I said, "stand here, hold the steel like this and hit it like this". Being older he did not fall into the mirror image trap and mimicked me exactly using his right hand to hammer. He has used a hammer right handed ever since but is primarily left handed and claims to be ambidextrous. His sister is still a full time lefty even though she grew up using tools almost as much as her brother.
Anvil help : I recently purchased Amy first Anvil an been wanting to learn the history of it and more about it. I THIN K it maybe an Arm and Hammer from my research and was hoping someone could help me figure out if I was correct. I took a bunch of photos and would love to post them for review
Any help you could provide would be great, Thank you
Scott, click on my name, my email should pop-up. Send photos to me and I will try to help.
Another Site Error. . . Mass3j :
Ever since our October 2019 move to a new server with later OS version I have been finding errors and fixing them. . . The most recent was our Mass3j calculation program. It had both form calling errors and variable passing errors and did not work at all. . . Most of you may not have noticed since it was found primarily on the right hand drop down menu which has been removed from most pages unless I have overlooked it. . .
Mass3j is now found on our FAQs page (now 21st Century Blacksmithing) our new general index under development. Mass3j is found under "M", Mathematics. We used to have it in the top menu of the store but it was removed as one attempt to make the page narrower for mobile devices and to make #*#$@# google happy. .
Among other things Mass3j will calculate properties of regular polygons given the number of sides AND major circle (corners) OR minor circle (flats) OR width of flat, OR area. . . returning the unknown properties then giving the engineering properties and mass in 31 materials.
I had planned on adding more shapes (from Mass2) which included cones (solid and hollow and truncated), spheres (and parts of), pyramids, ovoids, barrels, tori, fillets and polyhedrons. . .AND our structurals database with deflection calculator! But I had more pressing programming projects. It was also difficult to convert my old Pro-Basic code to the combination of HTML, Javascript and Php used on the web. My Mass2 code was a bit convoluted as well accepting mixwd units from millimeters to miles and output in units from grams to tons with a thousand materials database. Mass3j is a pale comparison. . .
Elbows Masses : Thank you all for the advice on the elbow. I shall be putting it into practice. It used to go away with rest; but persistent pain gets my attention. ;^)
Mass3j looks really useful for telling solid shot ("cannon balls") from shell. That might even save a few lives from folks who collect old relics off of battlefields.
A bright, sunny day on the banks of the lower Potomac. Firing up the coal forge and Thumper this afternoon to straighten a "circus tent" size tent stake.
Mass and elbows : Odd you mention that, Bruce, I was once called by a frantic elementary school principal when a student brought in a "cannonball" she found on the family farm for show and tell (an occupational hazard when you live in the midst of old battlefields). It had no obvious fuse or plug, but we really wanted to make sure it would not need the bomb squad to come calling. I thought for a minute, and then asked them to weight it on the triple beam balance in the science classroom. While I was waiting to hear back, I did the math to determine just what a solid cast iron sphere of that diameter, a hair over two inches, would weigh. Turns out it was 6.1 pounds, which made perfect sense for solid shot for a 6-lber cannon.
I use the tennis elbow strap from time to time as well, but rest and thoughtful work habits are really the only way to fix it. To avoid it completely, those of you who haven't done it yet, do not wear a glove on your hammer hand, don't grip the hammer handle tighter than you need to, and let the hammer do the work. Your grip should be just tight enough that someone could easily snatch the hammer out of your hand on the upstroke. I also find modern factory handles to be too fat. And I have average sized hands for a six foot tall guy. A too-fat handle and the newbie death grip will blow out an elbow in a single work session. In my case I was using a heavy hammer and was working tired, trying to get a big job done in one day. Working tired makes you sloppy, and I ended up gripping too hard to try and keep control of the big hammer when I should have just left it until the next day. The next day, I discovered I couldn't even hold the hammer without pain. One blow too many, couldn't forge for twelve weeks or more.
Handle size :
I recently resized a standard MOB 1000g German hammer handle for my student/apprentice. Her hands are the same size as mine (small). When I got it feeling good in my hand I asked her to try it and she was happy.
Funny thing about that handle, the finished size was the same as stock American made handles for 2.5 to 3 pound (1150 to 1400g) hammers. . . These handles are identical to the OEM Channel Lock handles when I bought them. . Which were also dressed and ready to use unlike the German hammers which assume you know how to dress a hammer. . . AND apparently the handle as well.
Those manufacturers USED to know these things.
I have blade I made out of tool steel. it's been heat treated, but was welded on
after heat treating. to stop it from shattering from the welding, I'd like to normalize
it. but I don't know what kind of tool steel it is (I acquired it some 50 yrs ago). can I normalize it as you say in your instructable by heating it above the magnetic attraction temp?
Welded Blade : Heat treating tool steels can be generalized but sometimes (depending on the steel) is VERY specific.
Then there is the question of what filler rod and method of welding was used.
Normally you anneal or normalize before welding and then do so by carefully preheating the steel. Then heat and peen to stress relieve and do the finish heat treat last.
Various things can happen at the weld due to material introduction but this is beyond my skill level to say even IF I had enough information. I would at least re-heat treat.
You might get away with just retempering which should not affect the blade edge if you do not exceed it's prior tempering temperature.
However welding may have caused cracking in the HAZ and if so nothing is going to fix that very well.
Anvil Make and age : Curious if anyone can tell me the age and possibly make of an anvil I have. If you send me an email I'll share a picture. Thanks
My Fisher Anvil : Hi there, I'm glad I found this website.
I just got an old Fisher anvil but after looking online at some others I'm suspicious about mine. Can someone out there help me authenticate it?
It is marked with a 10 on the side of the right front foot.
It has the eagle on the right side and the bolt down hole front and back.
But the Fisher stamped bottom front right door is missing the F and there is no date forged on the back like most others.
Mine only has the number 3 where the date should be and under that, left of the rear bolt hole is a square shaped U and I ...
Did I buy a fake Fisher anvil?
No Fake :
Just sloppy workmanship. The "F" is often missing on smaller Fishers as there was no space (or due to misalignment).
Milo, click on my name if you want to send a photo. Photos need to show the entire anvil.
Hay-budden alloy : I recently got ahold of a beautiful 304lb anvil Hay budden anvil and found it to be only rebounding a ball Bering at about 65-70 percent and seems to be rather soft. I'm afraid it was in a fire at some point but donŌĆÖt know. Regardless I was intending to try and have it heat treated but have no idea what alloy to tell the heat treat vendors it is. The serial number starts with an A58 so it seems to be one of the latest ones made. Any help would be greatly appreciated!!
Ethen, The larger the anvil the softer the face. This is due to a combination of difficulty to quench and self tempering from residual core heat.
These old anvils were plain carbon steel the faces in the 50 to 60 point carbon range (similar to SAE 1050 or 1060).
If you do not do the rebound test carefully (using a ruler, 10" drop and accurate observation on repeat tests - see our Testing Rebound page) it is easy to misread. Anvil manufacturing and heat treating were a specialty. Attempting to "fix" it is lible to do more damage than good.
Its plenty hard, use it, enjoy it.
Also larger anvils were generally used with a or several strikers using sledge hammers and so mis-strikes would be more common and a slightly softer anvil was less likely to send out shrapnel; so a flaw in a smaller anvil becomes a feature in a larger one.
Striker Side :
My big 300 lb. Kohlswa tests very hard but it also has a lot of chipping on the off side. While this is the edge the smith works on primarily I believe the majority of chipping found on anvils is due to strikers missing the work. Being too hard results in damage to the anvil and endangers workers and bystanders when shards of metal go flying.
Anvil : Greetings. I was gifted a Hay-Budden anvil that a friend found in an old shed - very nice after cleaning, but has a uneven bottom surface, almost like it was twisted or warped. I started grinding until I realized one of the corners was 1/4 in. high. I suppose I could router a stump to make it fit, but don't know how to make it exact. I also wonder about making an epoxy bed and mounting it in that. My question: Is there a recommended way to handle this. I'm a fairly experienced hobbyist. Thanks.
Uneven Anvil Base :
Dan, There are several approaches to this. As you noted you could fit a wooden base to fit. A fabricated stand would be easier than carving the end grain of a stump. (See our iForge page demo on stands). An option would be to saw thin wedges and glue them to the wooden stand. Much easier than carving an impression.
Another option would be to weld a couple tabs to the base of the anvil at the feet to level it up. I would use bar/plate about 2" square at the needed locations. This assumes you have access to various thicknesses of steel.
There are a number of materials that the anvil could be bedded into. A common modern material is silicon caulk (Bathtub caulk). This is often done to prevent ringing and will stop rocking. It is more permanent than you would think so be aware. You could also use something like auto body putty. If using this I would grease the bottom of the anvil OR cover it with plastic kitchen wrap and set the anvil into a thick layer. This would be the same as hand inletting the would but without all the chiseling.
On big old cast iron anvil stands smiths have poured lead around and under the anvil to anchor it. This also reduces ringing.
Great old anvil. take care of it and enjoy it.
Don't forget the smiths whose anvil stands are a big box of sand and they set the anvil into the sand slightly and true it up as needed.
Uneven Anvil Base : Guru and Thomas Powers: Thanks. That's very helpful. FWIW, I donate a lot of stuff - fundraising auctions, community projects, etc. So your voluntary support helps more voluntary support.
Anvil base : Dan, what Thomas said, anvil in a sand box is a good option. I did just that with a 150# anvil a few years back and it worked very well. Did tend to sink at the horn end with heavy hammering but could easily be shifted back level. Also easy to adjust the height. Bit of humor, when I emptied the sand box to pass the anvil to a new owner I
found a long lost cut off hardie and 2 punches. LXIV,
Alex; I've been warned to rake the sand/gravel floor of my shop at least yearly to find buried treasure.
Burried Treaseure :
A friend of mine who had a very busy shop in the 1970's had a gravel floor in his shop surrounding the central bench, a huge weld platten. After about a decade he moved to a larger shop on an industrial property he had purchased. Getting stuff out of his basement shop was a bear of a job with a lot of dragging heavy things across the gravel floor, plowing it up.
After getting the equipment out (4 ton platten, 2 power hammers, saw, drill press. . . .) his helpers noticed a lot of tools in the gravel. SO, they started raking the gravel to find lost tools. When done they had hundreds of pounds of tongs, punches, drifts, anvil tools, drill bits, chuck keys. . . . The load filled a small pickup truck bed. There was at least $4,000 worth of small tools.
I was not surprised. As both a back yard and professional mechanic I knew that if you dropped hardware or small tools (sockets) in a gravel drive or parking lot you had very little chance of finding them short of a sweeping magnet.
Where I am located now I've moved stuff in and out of the shop and its easy for the weeds and honeysuckle to hide valuable items that had been moved outside "temporarily". I lost all of my digging and lawn tools to such a move. When found all the handles were rotted off. I found that most of them could be replaced for what new handles cost. . . :(
Interesting story about your friend Jock. I had a similar experience but on a smaller scale. Had a dirt floor in my shop for a few years until I got tired of dirty legs clear to my setter from all of the dust. When I cleared the equipment out to concrete the floor I found a number of lost tools. On another note I do a good bit contract work with electric utilities in high voltage stations and am finishing a salvage project on a 44 MVA auto transformer with a contractor today. The core steel is thin laminations of high grade grain oriented steel with light varnish coating. I'm taking a couple of sheets to try working some in a pattern weld billet,think it would by neat to say that some part of the billet came from inside a transformer. LXIV,
Transformer Steel :
That transformer steel is ultra low carbon (silicon killed I think) steel. It is the next best thing to wrought when it comes to ductility.
The reason for the supper low carbon is lack of hardness and the inability to become magnetized. Magnetic yes, magnetized no. Otherwise the steel would cause high resistance in the transformer.
Electrical steel has a significant amount of silicon added to reduce conductivity and thus eddy currents (beyond just killing the steel). Wikipedia says the silicon makes it more brittle when cold worked. Not sure what effect the silicon might have on hot working or welding.
Jock and Mike you are right on with your comments on the core steel, I didn't want to bore anyone to much info. Core steel is very thin with the varnish coating that insulates the layers to reduce eddy currents. Of course there is some heating associated with the iron core, thinner layers, less eddy current, less heating in the core. Picture what would happen if the core was solid iron, heating would be out of control. Don't know how it will stick when forging but I will try it anyway after removing the varnish. LXIV,
In pattern welded billets I think the major issue would be the very low carbon content if you were wanting to do a blade from it. You can of course make up for this by interspersing it with a very high carbon material or larger higher carbon layers. Let me know how it goes Alex; I have some transformer core steel waiting for my shop to get wired and my power hammer(s) to come online finally!
Note that the silica in Wrought Iron is in the slag component s it's qa composite material and the silica in transformer core is part of the alloy. So I expect they will work differently.
Core Steel : Thomas, I had in mind a small cowboy hat, you might have guessed since I'm not much on blades and have been known to forge a hat. I'll let you know how it turns out. Note the website the August meet with Rob Gunter and Pep Gomez. No NM state fair this year, sucks. LXIV,
Transformer core steel : I believe I read that the last commercially made wrought iron was in the early 60's and was made in Sweden for transformer magnet steel.
Other Uses Core SteeL :
This special low carbon steel is also used for solenoid cores (and possibly relay cores). Auto starter solenoid cores and door bell chime plungers are made of this steel. So if you need a fairly chunky piece, look into old auto starters.
I did a gracious plenty of Cowboy hats from pre 1982 pennies---made earrings for a cowboy dance our church put on. Got pretty good after the first forty or so...I'll have to find the tooling I used and try a small core hat!
I was wondering about the status of the August meeting; being in a high risk group.
Stuff : Thomas, just got word today that the August will probably be canceled and shoot for September.
Jock, Thanks I hadn't thought of what might be other uses for the steel. but I especially want to work core steel from the power transformer. Had workings with it for many years before retirement from the utility company. I worked a life extension project on it 5 years ago with a contractor where we did total re-gaskating, replaced all bushings, new cooling fans, replaced all protective devices on it, added onboard fault gas monitoring and it was given a new paint job. All of the electrical test and oil analysis as well as the extensive internal inspection showed that the transformer was pretty much as good as new but a decision was made to replace the insulating oil at the time anyway. I hated to see it junked but can't fault the decision since it just turned 60. LXIV,
Thanks; I saw where the State Fair was cancelled. I was hoping to forge there this year since I;m in the neighborhood (for NM definitions of "close") again.
This Holiday weekend I hope to finish off a set of tongs made from lug wrenches---the L shaped ones not the + ones. Good steel; won't be quenching them any!
Wrench Tongs : The socket ends could be split to make nice fitting wrap around jaws. . .
Definitely tough steel. I've used pipe cheater bars on them.
Roloff manufacturing anvils : Came across a Roloff anvil for sale. Says it is a 28 lb. Any information on theses would be helpful.
Thank you
Roloff anvils : These are gray cast iron anvil-shaped objects. They are not suitable for forge work, especially one as small as 28 lbs. They were made as hobby anvils for guys who occasionally needed to whack something with a hammer that was harder than the bench top. On the plus side, they are made in USA, on the minus side, they're just cast iron, not steel.
The U.S. Semiquincentennial (also called Sestercentennial - 250th anniversary) six years from now.
Are you ready for 2026? Will it be as big as the 1976 Bicentennial? Do you remember the Bicentennial? That was the year I went into blacksmithing. It was a little late as making reproduction Colonial era ironwork made a lot of blacksmiths' careers. I made a little of it but the demand faded quickly.
So, you might start planning your product lines now. There will be a TON of competition. I'm working on it. . . Hopefully I will still be around. I'll be 75 years old in 2026.
Happy Independence Day! Lets make America great again. Don't let the Coyotes get you.
Lets make Made in America great again!
I'll second that and add an Amen.
Replacement for recalled jack stand has been recalled. : I'm posting this here because so many of our friends are "tool users." (...and, uh, "thrifty.")
https://boingboing.net/2020/07/07/harbor-fright-retailer-recall.html
Be careful out there.
Jack Stands : Years ago I had some really cheepo jack stands. I think someone had given them to me. Nothing more than a large thin wall tube slit and bent to make three legs and another piece that fit (loosely) inside and then a cross pin. Seemed to work great but I always kept the jack or jacks under the vehicle as well as the jack stands. The only possible failure point on these was crushing the column OR possibly a weld failure of the stretchers that went between the legs. However, the material was so light the welds were all 100% penetration.
The other tool that is dangerous is those little light duty 2ton chain hoists. They have a little 4" clutch disk that hold the weight from falling. In comparison my 2ton Yale has a 9" clutch disk. The problem with the small hoists is that when lowering a load the undersized clutch overheats and starts slipping. . As soon as it starts to slip it heats more rapidly until it does nothing at all and the load drops. . These little "2 ton" hoists should really be rated 500 or 1000 pounds MAX. The big problem, you don't find out its overloaded until you have a load suspended in the air. . . like we did.
Coal : I live in Northeast Wisconsin and can't find any coal for my son's forge. Does anybody know of a source near me for some coal?
Andrew, Look for your nearest blacksmithing organization or ABANA chapter. These folks often ship in good coal by the truck load and resell to members.
Otherwise you may need to buy bag coal and pay shipping. An alternative is lump charcoal (NOT briquettes). This is often available for resturant or discerning grillers.
Need help identifying anvil : My wife and I bought an old house next to ours and cleaned out the garage in which we found a couple old anvils. One I would call a true full-sized anvil and the other a "toy" sized. No markings on either that we can see. They are both fairly aged. The full-sized has the look and shape of a Peter Wright anvil and weighs ~160lbs. My wife is selling what she can to raise money to turn the property into an animal sanctuary. Neither of us have any clue about a good asking price for either anvil. I have pictures of the anvils I can send along with any particulars you feel would be helpful in guiding us on what to do with them if you are able.
Thanks
Anvil Values :
Johnnie, Anvils vary greatly in quality and condition. The best old anvils are forged iron and steel, the worst are cast iron. It is often difficult for the untrained eye to tell the difference.
Markings are often faint and require cleaning to read. Known makes sell the best. However, there are many unmarked anvils that can occasionally be identified at least by country of origin.
The larger anvil, IF its a good make and in fairly good condition could sell for up to $500 or more. The smaller anvil might go for nearly that much OR as little as $50 unless it is cast iron. The way to get the best price is to sell on ebay and relist as many times as it takes to get your price (assuming you ask the right price). You could also list on our Tailgate page.
You can send photos to me (click my name). Photos should be of the complete anvil and there should be one of the bottom as there are some identifying features there on some anvils.
sword blade rolling machine : I am looking for a roller machine to roll out medieval sword blades, any information that can be provided will be highly appreciated. I understand the Wilkinson Sword company of England used to have a machine like that.
Anvil Manufacturer / Information : I found my grandpa's old anvil recently. It has been sitting on the ground in a barn in Tennessee for about 30 years. I know that he used it with an old coal forge to make tools and plow implements on the farm he lived on, but had stopped that long before I was old enough to remember so I never saw it in use. I don't know anything about forging / metal working so any information you could give me would be much appreciated.
Not sure how to attach photos here. If you email me, I can send pics.
Rolling out sword blades: Look for a rolling mill and get custom dies made for it.
Anvil: any stampings on the side(s) or on the front of the foot underneath the horn? Is there a depression on the base of the anvil and if so how is it shaped? How many and the location of any handling holes on the anvil?
Adam sent me mail. It is a nice old 122 pound Peter Wright in fair condition.
Rolling Mill :
We sell plans for a DIY rolling mill that can do billet preprocessing. It could also have profilled rollers for forming a double taper or double taper with center relief. However, form rolling is a process that can take much R&D. If interested, I can design/build a machine with interchangable rollers (design in process).
See video at: AnvilCAM-II, Video Reviews, McDonald Rolling Mill
There are also commercial heavy duty Jewlers' mills of similar torque and horsepower that could probably do the job.
Neither of the above would be suitable for high levels of production due to rollers needing to cool between parts. In production rolling the rolls are water cooled (internally OR externally). External colling requires design that collects the coolant runoff and recycles it.
Broken Links :
I cannot believe I am still finding broken links and some in the most obvious places such as the menu on this page and a few others. This is fallout from our server move last October and some of the reorganization. :(
I've been moving the bulk of the FAQs, standing and new articles under 21st Century Blacksmithing. (currently the FAQs link). Many articles have been moved and the format standardized then listed in the alphabetical index (which always needs improving).
Buffalo model 611 post drill : I was given a buffalo 611 drill, only missing the crank handle and the lever that turns the cogs on the feed threads. One problem, the shaft that turns the drill bit is off the feed threads, so wonŌĆÖt raise or lower. IŌĆÖm trying to figure out how to get it pushed up to try to get it started back on the threads, I canŌĆÖt do it by hand. Would using a hydraulic jack work? Or are there any other tricks to it?
Buffalo Drill : First, Between Buffalo, Champion, Canady Otto and Sears Roebuck there are at least 1000 models of post drill spread across dozens of catalogs. You will need to do a better job of identifying the size and problem.
Second, hydraulic jacks and "bigger hammers" have been the demise of millions of tools and machines. Patience! And penetrating oil such as WD-40 are highly suggested.
Third, all these machines that I have delt with will not travel far enough to come off the feed screw unless something is missing, forced or broken.
Lay the machine on its back or side. IF the spindle does not slide easily then there is a problem. It is either rusted or something is broken and jammed up. Oil it, tap it gently with a wooden or soft plactic mallet. Small motions of parts help work oil into rusted joints and become larger motions. Patience!
Take your time until you undrestand what is going on.
NOTE: I've used a number of these machine in my shop, repaired them, retrofitted modern thrust bearings (you can't get the old ones) and oilers to keep grit and bugs out of the oil ports. I've fitted Jacobs chucks to all that I've used as well as for others. I've also made repacement parts. These are great old machines but they ARE old and primitive.
OLD MACHINERY :
I love old machinery. Actually, I love all tools and machines that are made well. I have enough flat belt drive machinery that my shop looks a lot like a machine shop from 1900.
I'm currently getting my old 1920's South Bend back up and running. Its a 13" with a 7ft bed. When I bought it the drive on it was a cobbled up mess using an old truck transmission. But it DID have the original 4 step cone pulley. I'm setting this up with an overhead drive on a heavy bracket attached to the lathe. I did a similar thing on the old 14.5" circa 1900 Porter I have.
Both machines have advantages and disadvantages. These early machine were only rated at 1 and 1-1/2 HP. A modern lathe this size may be up to 5HP. This is necessary to run carbide tooling efficiently.
The Porter has the typical broken back gears and needs the compound rest and tailstock rebuilt. It is a change gear lathe. But it has a great 4 jaw combination chuck (works independently and on ascroll). This means it is great for repeat square and rectangular work. For only having 3/4" more swing than the South Bend it is much heavier and better for rough and heavy work. But it also has a taper attachment that I need to explore and get working (missing a tie rod).
The South Bend Lathe is one of their earliest models with a quick-change gear box. This is infinitely handier than change gears. Everything on it works - it has good back gears so the speed range is from 900 down to 30 RPM. When I bought it many years ago I paid a lot for it considering its age and condition but it came with a full set of attachements and tool holders. This included two sizes of face plate, a four jaw and three jaw chuck, steady and follower rests, Jacobes drill chuck, A Royal interchangable point live center set (in the wooden OEM box), a milling attachment and the full range of tool holders. It also came with a taper attachemnt but I do not think it was for this lathe. . .
When I bought the South Bend it had moving damage (been tipped over). This broke the feed change assembly which the owner tried to repair by brazing and ended up with gears running out of true and wearing like old tires. I used the lathe itself with manual feeds to make a replacment part from a weldment. I sketched up the gears and had a local machine shop make the three gears I needed.
The South Bend has not been in operation since I took the cobbled up drive off of it many years ago and started building a new one. Hopefully by the end of the month I will have it up and running again.
The South Bend will need two more "accessories". The first is a chip pan. These old lathes did not come with them. Aftermarket pans were mad that just slipped under the lathe and had heavy legs similar to those on the lathe. The second is a cross slide stop. This is a fairly rare tool that makes it MUCH easier to chase threads. Since one of my first jobs will be to make a chuck adaptor bushing and a chuck back plate, the cross slide stop will pay for itself (in time and peace of mind).
The chuck adaptor bushing is not the normal route for fitting a chuck to a lathe. Usually you make an all new back plate. But in this case the chuck is a 6 jaw Buck chuck with adjustable truing. The previous lathe it was on had a much larger spindle nose so an adapter seems to be the best route to go. Yes, it means chasing both an internal thread and and external one. . .
The six jaw chuck is a great tool. It has very narrow jaws and grips work like a collet, tightly but not marring the work. It also works great on tubing and thin wall parts.
Earthquake At 806 AM Boonville NC :
We had an earthquate severe enough to feel furniture bouncing up and down and to cause chandeliers to rock back and forth!
Earthquake : Not as bad here in Johnson City, TN, but it sure rattled the windows. Epicenter just south of Sparta, NC, magnitude 5.1 at a depth of 9KM. Freaked out the cat!
Google Failed me :
I googled this several times and all I got was a lot of OLD MSN reports. Finally this morning someone had a report with a USGS screen shot. SO I went to the USGS site. Google is supposed to be focusing on "expert" data but lists old news rather than a government site. . .
The nearest similar quake was in Mineral VA in 2011. I happened to be on a bridge at the time stopped in traffic. The bridge bounced about two inches causing my van to bounce about 4 or so. I looked for a passing truck but none. . . It was the earthquake.
I was is an old masonry building in DC when the 2011 quake hit. I went running out of the building and stood on the sidewalk. Turned out the only real structural damage was to a stone balustrade six stories up from the point where I was standing (it stayed intact, but apparently it was a pretty close thing). My boss went under her desk -- I guess there was a reason she was the boss.
The spires on the National Cathedral still need to be rebuilt.
We Humans have a bad tendency to mix up "rare" with "never" when we go to making building codes.
Fiber Panel Forge : I have been very happy using your fiber panel design for my forge tops and am finally replacing my soft brick sides. I understand why the u-fold and stainless wire for the tops, is there any reason not to just stack and pack rectangular pieces into the side frames, since gravity will not be working for you. Thanks.
Fiber Panels :
On side walls I would say it is dependent on how high they are. In a typical low forge with walls of one foot or less I think the blanket would do fine if stacked and then compresseed slightly to hold it in place. If using the expanded metal system I show, you could simply stack the strips in the C shape then compress the stack and work a piece or two into the stack. A thin board or piece of sheet metal works well to compress the blanket and then slides out once the added piece is inserted.
In this arrangement, if you are not sure the material is going to stay put force a couple thin rods from top to bottom near the back (cold face).
I use stainless wire because iron oxide and kaolin blanket do not mix. Rust OR scale tend to eat blanket. Not as bad as flux but they do degrade the blanket. This is a good reason to coat the blanket with ITC-100 or your preferred coating. But IN the blanket SS wire or anchors is best.
When the blanket is captured in expanded metal (steel) it should be painted with high temp paint first to prevent rust and reacting with the blanket.
P.W. anvil mark : I have a 308 lb Peter Wright anvil. On the base on the horn side there is a stamped mark sort of like an "8". I've always wanted to know what the significance of this is. Do you have any info?
Probably an inspection mark or work group mark.
unusual vulcan anvil : I found an unusual vulcan anvil, and can find nothing about it in the usual manner(web search) it has the word "Vulcan" stamped into the right side, the front foot has a rather large "M" stamped on the left, an "A" on the right, followed by five obscure numbers. I dont have pics "yet".... Thanks for any info at all.
unusual vulcan anvil : I found a vulcan, of unknown weight and dimensions, but the name "vulcan" is STAMPED into the right side. it is a wrought base with 3/8 hard plate on top. I find no logo, or it is obscured. it has an "M" on the right front foot, and an "A" followed by some digits I cant make out yet. I would like to know who made the GOOD vulcan anvils. this one rings like a bell and has at least 85% rebound. thanks.
Vulcan Anvil : Jon, Vulcan anvils are cast iron body with tool steel top. I've never seen one that rings, quality is said by most in the smithing community to be poor. Vulcan anvils have a raised arm and hammer in a circle cast in the side of the body. High quality forged body Arm and Hammer brand anvils not to be confused with Vulcan anvils also have an arm with hammer stamped on the side of the body and definitely a ring. Maybe a photo sent to Jock will help solve your mystery. My first anvil was a vulcan and it served me well. LXIV,
Jon's Anvil : Is the "Vulcan" obviously done with hand stamps? The markings on the feet along with the wrought body/steel face suggest it's actually made by Columbus Forge and Ironworks, who made Trentons and Arm and Hammer anvils, among others for assorted wholesalers. These wholesalers often had their own stamps added. For instance, "Lakeside" anvils are Hay-Buddens sold through Montgomery Ward. Since Vulcan was a trademark of Illinois Iron and Bolt, I suspect someone just stamped it on there, thinking it needed a name?
So it might be a vulcanized anvil?
Vulcan Anvil questions : I will get pictures, but I do not know how to post the pictures on this particular forum. yet. Thankyou for all your input. the pictures will tell all. or most..... :-)
Sending photos : Jon, you can't post photos here but you can send them to Jock's e-mail, just click on his name and it will pop up. LXIV,
Cold Quench vs. Warm Quench : On another bulletin board, I suggested a cold quench for 40 pt. steel. Another member replied: "Warm water is a faster quench than cold water." Before I counter or question the statement, does this hold true? Sort of runs contrary to what I (think I) know.
General laws of thermodynamics. . . heat dissapates to cold.
In some cases (large heavy parts) ice water quenches are used.
Cool vs. warm : That works with oil quenches, since warm oil is less viscous and thus can go through the nucleate boiling phase faster, thus cooling the part faster. Up to a point.
Water doesn't work that way.
In fact with water there is a major problem with the Leidenfrost effect, which is why anvils were quenched under a flume to blast through the steam jacket.
Internet Outage : This morning for 3 to 4 hours we were inacceassable from much of the country. This was the result of a CenturyLink operation previously called Level 3 that provides IP and many other services in the US, Central and South America, Europe and parts of Asia.
This caused problems with CloudFlare and iCloud. In an era when many systems rely on software served from an Internet connection (the stupidest thing EVER) it caused everything from gaming systems and security systems such as ADT to fail.
This is a critical infrastructure issue as well as a bad software issue. The software issue is due to greed, software companies wanting to have minute to minute control over their products globally. This is the primary reason I am still using an outdated system (according to Microsoft and Google) that has nothing but software I purchased and that does not rely on an Internet connection. I will maintain this system and the software until the end of my life. . .
The only such software I've tried is the interactive math on the digital version of Machinery's handbook. I installed the system on my laptop expecting to be able to use it in the shop and in the field where there is no Internet. BUT, without a good fast connection and up to date licensing to the sub-contractor's system it does not work. Then when it does work it is buggy. This was a lazy out for the publisher. The exact same interactive math could have been written in Javascript on the local system and been fast, efficient and dependable. It would have worked like one expects software to operate.
Among security systems that depend on a complicated integrated system is the US government and others (including all the airlines), email backup system. IF the backup system fails, all communications stop. In an emergency this could be disasterous. This is insecurity via security.
IF you have any kind of security system that relies on an internet connection then reconsider it. IF you have a security system that relies on WiFi instead of hard wire, reconsider it. One does not work when the network is down and the other can be blocked by WiFi jammers (currently used by common thieves and looters). Think about it.
Repairing anvil face : I have a colonial anvil that has a lot of small gouges from misuse. I understand the process for repairing with Stoody rod. However, my goal here is to fill the cracks so that they don't add imprecfections into the face of hot steel. I am looking for a cosmetic repair and was considering just welding with my Mig Welder. I understand they will be soft which will not be an issue for me. Will I be endangering the face with potentially worse problems. Thanks
Welding anvil faces :
These old anvils have faces made of folded and welded steel (blister steel) that varies in carbon content.
If you are going to do any type of welding on any anvil face treat it as tool steel. Preheat to 300-350F. Weld, then peen each weld.
I prefer to grind out such marks or soften them at the least.
Anvil Repair : An anvil restoration process was developer Robb Gunter and Karl Schuler while working at at Sandia National Labs in Albuquerque a number of years back that works very well. You can find it by googling Robb Gunter anvil repair and then find it as printed in an issue of Anvil Magazine from 1968. LXIV,
SOFA, the ABANA Affiliate that puts on Quad-State, has used the Gunther-Schuler anvil repair process extensively and the anvils repaired have stood up to a lot of heavy use for decades.
Some of the ABANA Affiliates have sponsored anvil repair days you might check around and see if there are any possibilities in your area. (I've been to ones in Ohio and New Mexico so far.)
Anvil Repair : What Thomas said. Oops I missed on the year for the article, it was 1998. I have a 150# Hay-Budden shoeing anvil with clip shelf that was restored beautifully by Robb and it's as good as new. Wish I had taken before photos. LXIV,
Buying a Vulcan Anvil : A friend has a Vulcan Anvil #6 for sale. They had the top re-surfaced to take out all the chips so they could do jewelry on it. There is still some small rust spots. I need an anvil for making small knives. Is this anvil worth anything? Thank you
Buying a Vulcan Anvil :
Kerry, The #6 means it weighs approximately 60 pounds.
The "resurfacing" is dependant on "how" or how much. These anvils have a steel plate welded to the cast iron body in the casting process. This weld cannot be repaired if it becomes loose. The steel face is not very thick on Vulcans and if machined or ground heavily the thickness reduction can ruin the anvil. Welding on these is also tricky due to the irrepairable steel to cast iron weld.
When new these were one of the lesser expensive anvils. Today a lot of people prize the Fisher and Vulcan anvils because they are a "quiet" anvil.
While you do not want a rough anvil that marks your work a few rust spots generally do not hurt and will polish out from use. Something else to remeber is that an anvil IS NOT a precision flat of reference flat surface. If they were you would not be pounding on them. . . A little sway or gentle waves in the surface do not hurt your work and slight sway is actually better for straightening than a perfectly flat surface.
Due to not needing a lot of the features of a general purpose anvil many bladesmiths use lengths of heavy shafting on end or heavy blocks of steel.
As a recognized brand of anvil the Vulcan is probably worth more than it should be. Up to $5 to $10/lb. But a lot depends on the repairs.
Vulcan anvils : The steel face on the later Vulcans is around 5/16" thick. Compare that to a Fisher at 5/8" to 3/4", and remember it's not hard all the way through.
I've always seen Vulcans as the low end of "real" anvils, but they are fine as long as the face isn't badly chipped.
But as the guru notes, if a machine shop decided to level it out by taking 3/16" off, the face is not going to be hard anymore. Let the buyer beware, and for a 60lb Vulcan in mint condition I'd say $3/lb is way too much.
Vulcans were sort of the "Ford Escorts" of the blacksmithing world. Cheap, lower in quality; but a lot of miles have been put on them! Here in the USA a lot of the middle schools metal shop classes used Vulcans. I used to see a lot of them in the VoTech class sell off in Central Ohio. I do not prefer them, but they are much better than a cast iron ASO!
Vulcan anvils and low bids : Many of the Army Reserve vehicle maintenance shops I have been to also have Vulcans. When "lowest bidder" typically wins the day they can be found.
9/11 Never Again :
Remember.
Anvil identification : Hello GuruŌĆÖs! I would greatly appreciate some help in identifying an old anvil that was in my family. I really donŌĆÖt know anything about blacksmithing and IŌĆÖm curious as to what brand/maker and approximate value? I know that it is about 80lbs. It has 375G4 stamped on the base. There are some other markings that I canŌĆÖt quite make out but looks as it it starts with BE. The bottom is hollowed out in an hourglass shape. IŌĆÖve been told it is possibly a Hay Budden? Thank you for any help!
P.s. also I am in Kentucky
Anvil Shape : My husband and I were watching a car fabricating show and there was an anvil in the shape of an 'X'. Is this shape unique to the owner (or homemade?). If it is a standard shape could you direct me to where I can make a purchase? My husband builds houses and cars and I would like to answer his statement, "I would like one of those!"
X shape anvil :
Not sure I know what you mean. Perhaps you are talking about a farrier's (horseshoer's) anvil.
See American Farrier's Anvil
Farrier's anvils of this type are a rather extreame shape designed to be portable and for shaping more than forging. They are very springy and not of much use in true blacksmithing. Farrier's anvils are still made but few are as artistic as the one in the above link.
Anvil : I have bought an anvil recently it is a woodruff can anyone tell me about it
Never heard of it. See your email.
Photos showed a cast iron ASO in fair condition cast from a Fisher pattern (pattern theft). "Woodruff" was in large raised CAPS. Probably the name of the foundry.
Woodruff anvil : Searching on the web, all pictures are of thoroughly beat up cast iron ASOs. I hope you didn't pay much for it.
Trenton anvil year of manufacture : I recently came into possession of a 100-pound Trenton anvil. As much as my son and I admire and would love to take up blacksmithing / bladesmithing, I have to be honest and acknowledge the fact that I lack the time, money, and work space to do so. Therefore this anvil will be sold.
I want to be as accurate as possible when I sell it, therefore researched it as much as I could. Because of the logo style I believe it was made after 1930, and I think Trenton ceased operations in 1953, so that gives me a rough idea. However, I have no way of knowing for sure the exact year of manufacture, and am hoping that one of you experts could narrow it down for me. It has the 100-pound weight stamped on the base, with a serial number that appears to be 2T3277. The Trenton logo is inside a diamond, in the odd bent style that makes the N look like an X.
I would describe its condition as very good. The only ding worth mentioning is at the tip of the horn. Otherwise it is in fine shape, with a nice patina, flat face, sharp edges, no chips, and crisp logo. Based on this, what are your thoughts on its current worth per pound? IŌĆÖm located in SE Louisiana.
I have good pictures available, and truly appreciate any and all insight you can provide. Thank you.
Trenton Date : Hi Greg,
If the rest of your serial number is correct that "T" has to either be a 1 or 2. Most likely a 1. According to the Great Book of Anvils (aka Anvils in America) serial number 213277 would have been made between 1943 and April of 1945. Serial number 223277 would have been made between December 1948 and October 1949.
I don't know what the anvil market looks like down in Louisiana. Up here in Minnesota for a good brand in decent shape I see people asking for from $3 a pound (those move fast) to up to $15 a pound (guess how fast those move). Most seem to be in the $6-$8 a pound range.
It might be my imagination but things might have slowed down a bit. I am wondering if the Forged in Fire Effect might be ebbing paired with enough of a hit to people's personal economy that the anvil market might be cooling off.
Tren Date : Martin - Thank you SO much! The 2nd digit is definitely not a 2. The top looks like a T, but is really narrow, so what I suspect is that itŌĆÖs the serif (bottom) of a 1 which was accidentally struck upside down. From the spacing and alignment of these numbers, IŌĆÖm pretty sure they were done individually, by hand, and it would be very easy to invert the numeral 1.
I put the pics in a Google gallery so you can see for yourself: https://photos.app.goo.gl/NJBXmFVK3tgT35LPA
Again, my most sincere thanks.
I recently, (yesterday), sold a 248# PW anvil for US$4 a pound with typical heavy use wear, looks to have been used at the mines. When everyone asked me if the price was firm; I'd tell them: "No I'd be happy to increase it to $5 a pound to be more in line with current prices out here in NM." I threw in a hardy and two picks from the tongs and misc tools buckets. Paid off the last of my loan to buy the great hoard of smithing tools and the excess went to the shop electrification fund so I can use the power hammer I kept from the hoard.
Hinge / gate hanging : I find that when hanging gates with weld-on hinges, the gates drop a little bit lower, I think because of the space between the pin diameter and the insides of the hinge barrels. I am trying for a more precise result. I have to hang a couple of 200 lb gates as precisely as possible. I would like to know how to improve my precision. More precise hinges: get some
Trenton 100 : The Trenton anvil looks to be in excellent condition. Anvil horns were sometimes blunted or modified to prevent "walking into" accidents. A good size; heavy enough for standard shop use, still light enough to travel.
Brian; how much are you allotting for sag/rack already?
Hinge / gate hanging :
Brian, All materials are flexible to a degree and sag under load. Your hinges probably have nothing to do with the sag.
In our shop I have a saying, "Steel is like rubber except when opposed to flesh". In other words ALL steel parts sag or flex to a degree.
Have you ever used a bending beam torque wrench?. They measure torque by the bending of the round bar that is pulled by hand. Even a very large one will indicate flex with just a slight pull by hand. NO? Then clamp a piece of 1/2" steel bar about 3 feet long in a vise and pull on the end. . . It will move a LOT.
The other thing to remember is that ALL steel (mild, high carbon, spring, tool. . .) has the same modulus of elasticity (flexes the exact same under the same load).
Gate sag varies a great deal according to the design. If there are no diagonal members they will sag a LOT. Solid panels tend to sag very little. A triangular (flag shaped) gate panel will sag the least. Gates built with structural steel members or tubing also sag less than decorative gates.
The ammount of sag CAN BE calculated but can be very complicated to do so depending on the design of the gate. The simplest thing to do is design with consideration for sag THEN build it and measure it.
IF you want a perfectly horizontal gate then it will need to be canted UPWARD at the end so that when hanging it is level.
Note that weight has less to do with sang than overhang. Given a short gate with X sag, a gate twice as long of the same weight will have X sag cubed (X x X x X).
SO, build it, mock up the installation, then measure it. If you don't like the sag, then bend or adjust the gate to remove the sag.
NOTE: Never correct SAG at the hinges. Hinges out of vertical will cause the gate/door to open OR close on its own (depending on the direction out of plumb).
Antique Anvil : Inherited old anvil from grandfatherŌĆÖs farm. It is a double horn stake anvil dated 1814 with letters S & T. I can provide photos if you like. I would like to know a little more about anvil if anyone knows. This anvil was on my grandfathers farm in Ridgeway, Wi. Great grandparents were miners in Mineral Point, Wi and came from Cornwall England area.
Hinge Gate Hanging : @Bruce
@Guru
Thank you. Bruce, I shim them up 1/8ŌĆØ or so.
Guru, I understand what you are saying about sag. Went through it big time with a 4ŌĆÖ by 4ŌĆÖ firescreen a little while ago laser cut out of 10 gauge mild steel. Sagged amazingly more than I had anticipated, I managed to lighten/stiffen things with some ŌĆ£broken fieldŌĆØ running and got the situation barely under control.
This time I have two gates across from each other and they are also laser cut, but out of 1/4ŌĆØ steel surrounded with 1/2ŌĆØ x 2ŌĆØ frame, so much much stiffer only about 30 wide each. I was relieved to hear that it was sag rather than slop in the hinges. I got three hinges 7ŌĆØ weld-one for each door hoping maybe to control hinge slop by some kind of luck, but maybe I can get by with two on each gate then.
What I do is align the two receiver barrels by taking the grease fitting out of the bottoms of them so that I can drop a thread with a little weight tied to it down through both barrels. I wrap the top thread around a toothpick and gauge by eye when it is centered on the top barrel. Then I hold the barrel so that the thread by eye passes thru the center of the grease fitting hole and tack it minimally. If it is off I adjust it ( cut or heat the tack and bend etc. I keep tacking cautiously on opposite sides to ŌĆ£pull ŌĆ£ it to keep it straight until there are enough tacks that it is staying where I want it. Then I continue carefully welding it in small increments. Then I align the bottom receiver barrel the same way, so the thread is passing as perfectly as possible thru the lower barrel below so that the two bottom halves of the hinges are very well aligned over each other. Then I prop the gate in position, shim one side up to compensate for sag. Then I hold the gate steady and place the pin of the top hinge in place and tack it, then repeat on the second hinge. When it is tacked enough that I can dare to release it I turn it loose to check it. I let it cool before trying to test the swing as I have had heat-expanded hinges fracture when they are hot. Usually I get perfect results from this method.
Hinges/gate hanging : @Bruce usually about 1/8ŌĆØ I shim up.
@ guru thank you that is a relief that it is sag rather than my ŌĆ£hinge slopŌĆØ theory! These gates are very stiff structurally and only 30ŌĆØ or so wide.
Acme thread 1"-5 thread/inch : I welded some 1" acme thread nuts into the frame of a gate so that I could use acme threaded rod for a hidden cane bolt. I was careful to weld it very slowly, letting it cool between tacks but I still have more resistance than I would like rotating the rods. How to free them up more?
Are taps available to clean the threads?
Put some valve grinding compound up in there?
Bathe with acid to try to take a bit of material off the surfaces?
Welded Nuts :
McMaster-Carr has 1-5 Acme taps but you won't like the price. It would be cheaper to cut out the nut and replace it. . .
Welding on nuts distorts them. The heavier the weld the worse the distortion. I've had nuts open up so much that the male part almost fell through the nut. My solution was small welds.
To use grinding compound I would cut grooves in a piece of the threaded material (like a tap) to reduce the possibility seizing. Then use it to hone the thread. It will be slow but should work.
The other option is to reduce the size of the male part (turn in a lathe, file it in a drill while rotating or such. . )
More Nuts :
It is also common for nuts to be captured in a containment rather than welding the parts. This has two advantages, One, it does not distort the nut. Two, the nut can self align to the threaded part.
Just thinking about this (probably too late anyway), but peening the snot out of the weld with a pick-like hammer or blunted center punch might spread it out circumferentially and let the the nut expand back toward its normal size. I guess it's also possible that this would push the inner part of the weld closer to the center of the nut and make things worse. But usually when you expand the material around the outside of a hole, the hole gets bigger.
Acme threading : @guru @mikebr
Thanks so much! In retrospect I should not have tried to weld it so much but I got a little obsessive about water being able to get in there. My helper just suggested I should have just pinned that nut in there by welding some trapping material around it, echoing your suggestion. I got valve grinding compound yesterday so I will try that maybe combin with some filing-reducing the rod. I was very conservative welding them a tiny bit and letting them cool between tacks so I was able to put them in afterwards, I just want to have the turn very easily. Another problem is, I got some gears 3ŌĆØ diameter 1ŌĆØ shaft holes with fine teeth. I wanted to slice thin discs off them and weld to the acme1-5 rods that form the cane bolts so that they can be grasped and rotated to make the acme ŌĆ£cane boltŌĆØ go up and down. ( they stick out 1/2ŌĆØ beyond the 2ŌĆØ door frame on the front and back of the door.)I managed to saw off a couple of them but trashed my portaband blade because the gear was hardened. So I have to make two more. I could grind them with a thin wheel but I am hoping to saw them so I put the gear in the forge and got it yellow and let it slowly cool in hopes that would soften the gear. Will it?
Threads and Gears :
Acme threads have a lot of surface area and grit can make them seem tight. Clean and lube to test.
Steel spur gears are generally 4145 and not too difficult to anneal. As always the cooling time (at the high end) is critical. They should anneal OK. For this application I would have drawn up the parts and had them laser cut from mild steel. . .
Acme threading fit : Got the acme rods reduced with gentle shaving with a Dremel cut-off wheel. Started with valve grinding compound which seemed to be working but got impatient to take steel off faster and it seemed to work pretty well.
Spur gear slicing : I considered fabricating some kind of kooky wheels for the cane-bolt turners. I saw the spur gears in a bin at a large hardware/mechanical boneyard when I was looking for the acme threaded rod and nuts and bought them on impulse because they looked kinda cool- sort of a ŌĆ£spur of the momentŌĆØ buy...
Niles Bement hammer : Hi Guru, do you happen to have better resolution images, or links to some, than the ones currently on the Niles Bement hammer page here? Can't find anything by Googling... I have a 250 lb Niles coming into the shop and am trying to gather what info I can, to be prepared for puttin it into service.
Acquired an Anvil : I acquired an old Anvil from a friend recently and I would first like to know, if possible, who made it and approximately when. It's 29 in long and 12 in tall and I have good pictures. I can barely make out the information on the side of it. I want to start learning how to use it. Thanks!
Acquired an Anvil : A friend recently gave me an old anvil and need to identify it. I want to start learning basic skills on the unit, and I want to clean it up and care for it properly. I have several pictures, where can I post them? The anvil is 29in long and 12 in tall. thanks
Hercules : Hello, I am new to black smithing, and want to get started as a hobby blacksmith. In looking for an anvil, I have run across a Hercules. I'm wondering if Hercules is the manufacturer, or if it is made by another 'parent' company. I can't find anything on line for Hercules anvils. Thanks for you help, I'm enjoying reading through everything on your site. -Randall (Rndllpearson@yahoo.com)
Anvils : Randall, if it's one of these: https://www.proxibid.com/Farm-Machinery-Implements/Tractors/200LB-HERCULES-ANVIL/lotInformation/50606423 it's a modern cast steel anvil of maybe okay quality? I've never seen one, but it looks better than the usual Chinese junk.
Kelly: click on the Guru's name and it should link to his email. Send him pics. Or at least tell us what you think you see on the side.
Hercules : Alan-L, thanks for the info. That is exactly it... and it is at an auction. I didn't want to get taken for a ride if I decided to make a bid on it. Thanks, again!
Mig "brazing" : Guru, I have a roll of silicon bronze in the mig and using pure argon for shielding because I was welding bronze. Now I want to attach the bronze part I made to some 3/8ŌĆØ round steel bar as part of a gate handle. Can I weld it onto the steel bar and except it to be strong against repeated tugging/handling stresses?
Brian, I don't have a clue but it seems it could work given very clean steel. I would make a test joint and then test the joint.
I have made brass brazing rod handles and brazed them to steel shanks. I would point the shank, then chisel barbs into the tapered end. The braze joint would bring the shank back up to size. Seems MIG brazing might work as well.
I've torch and TIG brazed with silicon bronze with good results. With MIG, it seems like the arc might melt some of the base metal, causing alloying. But from what I can find online, it's supposed to work.
Forgeease : Jock is anvilfire still offering the Fuchs Forge ease lubricant? Have folks ask.
Forge Ease :
Yes, We have the undiluted concentrate in stock in all size containers (Gallon, 1/2g, Quart and Pints).
Ships with instructions (as well as those on the container) and a self stick label for your working container.
WHOOI had a number of broken links that were supposed to be redirected. . . Its been a year since I moved servers and I am still finding broken links. . .
Forge Chimney Building : I live north of Philadelphia, PA in a suburban community, and want to build my new forge in a new steel garage I'm having put in. The problem is the coal forge itself, mainly the chimney. I was thinking o use a 10 inch pipe with a super-sucker hood, but I don't know who to ask about putting in the chimney or where to find legal requirements on having a forge in a free-standing garage. All my town (Lower Gwynedd) tells me is, "Submit your plans; we'll give it a go or no-go." The 2 fire-place installers I've talked to don't do pipe bigger than 4 inches, and no one will talk about steel buildings. Have you guys got any suggestions? Thanks!
Forge Chimney in Steel Building :
The problem with building inspectors in general is all they want to do is check off the things on their list and not be forced to think about anything. Often you can do what the code book says and they will still say you are wrong. They will also not risk making any kind of decision on their own. .
EXAMPLE: The electrical code lists three different ground types by effectiveness the first (UFFER or foundation ground bar system) being the most effective. I installed one of these (a continuous ring of welded rebar) in my Virginia shop and the inspector insisted on a ground rod (the second most effective system). I bonded the two together. . .
The trick to steel buildings is the whole is considered an "engineered" product. Any changes to it (such as a roof penetration) must be approved by the building engineer. . .
In your case there are rules for wood stove stacks that you could apply to the forge. These are general and may not be the same as your local code. Rule #1 is that all pipe runs must be 30" from wall surfaces (assumed to be flammable). #2 is you must use a triple wall thimble or roof penetration. #3 is that the top of all stacks must be 2 feet higher than any part of the roof within 10 feet. #4 is that all components must be UL approved.
#4 is the killer. The forge and the Super Sucker are not UL approved devices. AND you may need to have a custom penetration thimble made for the large pipe size. The code allows for the inspector to approve these if he chooses. Most will not.
NOTE that there are zero clearance fireplace installations with 10" ID triple wall pipe that meet all your requirements. These are designed for a steel fireplace insert and a wood framed "chimney".
In industry the whole plant is considered to be the responsibility of the plant engineer and architect. As licensed professional engineers their stamp and signature makes anything under it "legal". IF you had a PE sign off on your design then the inspector should accept it. However this is not cheap.
An alternative MIGHT be to go to a sheet metal shop and ask them to design and build your system. Tell them you need drawings to get the building inspector's approval before construction. This MIGHT fly and be the most economical approach.
Most folks just have their building put up and finished, then when the inspections are complete install their modifications. Note however that fire insurance inspectors also look into these things and may have something to say about it. However, since you have already broached the subject of a forge it will probably not go away.
Forge Chimney in Steel Building :
Last note: Have it ALL made from stainless steel. Coal smoke and ash are highly corrosive and will make short work of your hood, stack and penetration.
Anvil ID : I'm trying to identify an anvil the only markings on it are AMERICAN and 155 and ideas?
Mark, are they stamped in or projecting out?
Solomons Flue : Hi Solomon.
I just got done putting one in my shop. Local codes appear to vary. Ours was for double-walled ceiling, roof penetration, and pipe though the pipe had an insulation barrier. Even with that it was a 2" standoff to combustibles (wood, etc.) After the penetration in the shop ceiling we could use single wall stove pipe but it had to be 18" from combustibles.
There are a couple companies that make the necessary parts. We got ours from Selkirk though I looked into Duravent as well. A local HVAC guy was able to order it for us and make the flashing (Selkirk didn't offer flashing for a 12/12 pitch, only from 0-7/12).
Good luck!
Flue clarification : I re-read after posting and saw the possibility of confusion. The single walled pipe is what we could use from forge -up to- the ceiling penetration, after that initial penetration we were locked into double-walled through the attic space, through the roof, and outside.
Forge Chimney Building : Roof vs. Wall - It was suggested that I bend the pipe and have it exit through the wall, as there may not be as much inspection required. It would still need to go the distance above the roof peak. Does that sound unwise?
I worry both about reduced draw and cleaning. (Or don't bituminous burning forges need a sweep from time to time?)
forge chimneys : I ran a through-the-wall pipe chimney for three years. The vertical runs do not need sweeping, as the soot from good forge coal is pretty solid powder and either goes out the chimney or falls back to the hood. The horizontal runs need cleaning once a month if you run the forge a few hours a week, the soot will build up on the bottom side, attract moisture, and rust out the pipe in a few months assuming you don't use stainless. Stainless might last long enough for the flue to clog, I don't know...
My setup at that time was a large overhead hood feeding a 90-degree elbow of 8-inch pipe, then a six foot horizontal run, another 90 degree elbow to vertical, then six feet vertical with a low-loss stack cap (see the design page on this site for that, they're great!) The low-loss cap acts like a venturi once it heats up, increasing draft a good bit.
Trenton 145 anvil : Hello, I just purchased my first anvil and have started removing the years of paint. It is a Trenton 145 lb serial number A150898. Can anyone tell me the year it was made? Thank you in advance.
Trenton date : Most likely 1917.
Thank you Alan for the response.
Mig Brazing : Guru, I went ahead and made a test braze and tested it. Snapped the bronze rod but the joint was fine. So went ahead on the real thing and it looks very strong. Thank you for the advice. Pics on Instagram under ŌĆ£thefreedomofcraft.ŌĆØ
Black Patina on steel : Guru, I have a situation of an outdoor gate finish, mild California climate conditions. For indoor work I use VanŌĆÖs Gun Blue and lately Black Magic by Sculpt Noveau, followed by hot-applied mix of equal parts of boiled linseed oil, beeswax, and carnival wax. The customer wants this look but outdoors, which I will have to improvise. Thinking of blueing and then going over with Sculpt NoveauŌĆÖs matte clear two part product for us resistant outdoor applications. Wondering if nothing truly adhered to a blued surface and therefore the strategy is coat it on all sides so the object is ŌĆ£wrappedŌĆØ in the dried finish so the finish stays on because of that fact and the strength of the ŌĆ£skinŌĆØ itself rather than the ŌĆ£stickinessŌĆØ of the coating to the blued surface?
Finishing for Outdoors :
Brian, I always recommend the same finish for all outdoor work.
1) Galzanizing OR cold galvanizing paint.
2) Primer
3) Top Coat(s) of your choice, preferably automotive finishes*.
* The top coats can vary and the BEST high VOC types (acrylic lacquers) are no longer available (unless you luck into some old stock). Automotive finishes are UV resistant and generally long lasting. However, some of the modern clear coats such as those used by Chrystler do not hold up as well as the old finishes. In general an automotive finish is good for 20 years or more.
These finishes can also be augmented with Baroque Art Gilders Paste if you need a hand rubbed look.
As to what the results look like that is up to you. My usual comment is that if movie prop departments can make wood and plaster look like, brick, stone, metal or glass then a blacksmith should be able to make metal look like metal. . . I recently discussed replacing a rust finish (that was destroying the work) with a faux rust finish in paint including fine sand for texture.
Finish and Color : I also like to point out to customers that ironwork doesn't have to be black. I've done barn-size hinges and plant hangers and other outdoor work in greens and gray and even blue. Sometimes black looks "right" but there's a whole palate out there of interesting possibilities that folks may appreciate. Anything I use an oil and wax finish on, I tag as "indoor or sheltered use only." Some things hold up pretty well under a porch roof; but it depends on local climate. (Tidewater has heat, humidity, AND salt water, as well as salt crystals, blowing in the breeze.)
Smelting : Hi, I'm relatively new to smithing, and I've been working on a project involving melting down Brass Bullet shells and casting them into blanks. I have a Forge made of reclaimed brick and I'm using wood and homemade charcoal that can reach the needed temperature, I've done some testing and succeeded in melting a couple bullets into some lumps of brass. My question is how can I do this reliably? I can't seem to find much on this site regarding smelting, and can't seem to find much that would help me elsewhere. I live in an area where I have Natural red clay, and was curious if I could build a Clay Smelting Forge and Crucible that would be able to reliably get up to the required 900 Celsius without crumbling. I am currently working on this project on a tiny budget, and can't afford to spend anything on this. Thank you for your time!
Galvanizing : Thank you Guru and Bruce Blackstone. I generally like to galvanize outdoor work, it has a lot of strengths going for it. I think I will try that followed as you say by a primer and then some kind of faux strategy that gives a facsimile Gun-blued effect.
One hurdle is that galvanizing by my local sources comes back with a lot of little zinc chunks. I have asked before why a galvanized bucket from the manufacturer is smooth. They told me that there is some catalyst that gets poured on the molten zinc that can prevent the zinc lumps but they wonŌĆÖt do it for me even if I try to pay extra for it. Big chunks I heat with a torch to reliquify the zinc and flip it off with a piece of old mig wire. So I guess I will work with it that way unless you have another idea.
One thing is there are some threaded holes I donŌĆÖt want to galvanize. I guess I can paint them and pack the with silicone caulk to keep them from getting too gunked up? Yesterday I made a couple of tests with zinc blackening patinas, one from Surfin in LA and the other BlackMagic from Sculpt Noveau. Thinking I might get the same kind of ŌĆ£watercolor washŌĆØ I get from Gun blue where it bites a little different at each point on the surface so it comes out like scrambled clouds of different blacks. Then, if that worked I was going to final cover with matte clear stuff Sculpt Noveau sells. But you say better to use some automotive grade paint product with as high a voc content as I can find? I did notice that the patina flaked easily before applying the two-part clear urethane acrylic, so It looked like the ŌĆ£holdingŌĆØ was going to have to be done by the final urethane step if I tried that approach.
Hot Dip Galvanized Holes :
Unless these are your Acme threads I would just plan on running a tap through the holes to clean them up. Industrially they make oversized taps for hot dipped galvanized parts. However, these are usually for fairly large holes.
Brass Casting :
Mark, "Smelting" is the reduction of metal from its ore. You are doing simple melting.
Rule #1, use a good industrial crucible (no steel or cast iron pots). The constituents of brass and bronze have an affinity for iron. They dissolve steel pots the iron going into the brass resulting in poor quality brass. Use a good graphite or silicon carbide crucible. YES these are expensive. NO, you generally cannot make your own non-metallic crucibles.
When melting brass you want to put a small amount of borax (flux) on the melt. This helps clean up the oxides and forms a slag that can be skimmed off.
Anything from a forge to stacked brick furnace can be used to melt brass (in a crucible). You just need fuel and air. I prefer to use a small propane melting furnace but oil, coal, coke and charcoal all work.
When the metal is melted be careful not to overheat. Those white flames coming off brass is the zinc burning out. The flux coating helps reduce this. Just before pouring skim off the slag with a steel poker, purpose made skimmer OR spoon.
Pours should be made smooth and continuously.
As this is a blacksmithing (forging site) we do not focus heavily on casting. The following are a few links to the subject on anvilfire.
Pewter Casting
Lost wax and links
TONGS w/ Crucibles and Tongs (images).
Masking galvanizing : Unfortunately I am talking the acme threads. The taps in McMaster did not look like they could do a blind hole, They looked like they needed room to run all the way through the hole and they, as you warned are about 200 bucks so I need another strategy. I have had some luck filling spaces with silicone caulk. It is pretty heat resistant for the process 850 degree F zinc bath. Maybe stuff the holes with caulk and cap with a tacked on steel sheet piece?
Casting : Hmm, Thank you sir for your quick response. It's a bit disappointing that I can not make an old fashioned clay crucible. I understand this site is more focused on forging, I appreciate you taking the time to still answer my question. I guess I'll just have to convince my lady to get me a crucible for Christmas or something. It's hard enough fitting a $10 Ball-peen Hammer into my budget. Thank you, Love the site.
Masking Galvanizing : Have you asked your Galvanizer?
Making Crucibles : I've been told that even in the earliest industrial era that the clay for crucibles was so important that they were made in only one place in Europe and exported great distances. You can make your own but would need to buy high grade porceline clay.
The least expensive small crucibles are little ceramic melting bowls used by jewelers. These are pretty much considered a throw away item so that one melt does not contaminate another. They will only hold a few ounces of metal.
Bullet Shell Brass : Just a word of caution- I pick up (with a little help from my friends) a lot of brass from my small range and my neighbor's more popular target range, to cast into sword pommels and similar modest-sized items. When you use spent cartridges, PLEASE sort them carefully; I have often found a few unfired .22 rounds hiding among, or even inside, the larger caliber cartridges. An unexpected discharge, even from a .22, could ruin your whole casting session, and a lot more than that!
Bullet Shell Brass : Indeed, yes, what with gunpowder involved that is something to be careful about, as well as the primers might not be fully spent, so make sure to pop them out just in case. I am getting mine from a person who does a large amount of reloading bullets, and he gives me the odd shells and damaged shells that he has no use for. But always use caution dealing with ammunition.
Forging mig-welded coupons : Good morning,
My name is Erron and I am in Kansas.
I am learning the art of Blacksmithing and have set up my own outdoor shop in my backyard with a forge that I built (the stand, not the fire pot). I am also a welding student and I have a collection of Mig welded mild-steel coupons and a couple of 3/16 X 4 inch plates stacked with about an inch thick of practice weld beads that I would like to use in the forge to make cutting tools.
Is this a good idea?
Forging MIG, TIG and SMAW welds :
Good welds in steel will forge.
Using (presumably) mild steel and weld material to make cutting tools is NOT a good idea. In general the steel will be to soft and not heat treatable.
If you want to make cutting tools your best junk yard steel choice is springs.
See our FAQs/21st Century page article on Junk Yard Steel
Help Identifying this Anvil : I would really appreciate any help on identifying this anvil. I was given this photo by a family friend and I am trying to find out who made it. They would like to know because it belonged to a family members who has passed. I donŌĆÖt know how to post a picture here but I can try and describe it. It has the shape of a Swedish anvil and the upswept horn. The weight is in lbs. What is strange is the appears to be an 11 on the opposite side. This number is raised.
Is forging the gears a suitable method : I'm in the design of an ATV project. For some mechanical parts I,m in need of mechanical gears. Can anyone tell me the most likely manufacturing process used to make the gears for a transmission? I want to modify the engine, and I wish to do it myself. To complete the transmission, I need two more custom rings. I think high-pressure die casting may be suitable, but the setup is costly. My friend recommended forging the gear out of high carbon steel, and he also suggested an industrial forging company(https://www.goodison.com/). Is forging the gears a suitable method? Are there any other cheap methods to make the gears?
Gear Manufacturing :
First, Commercially rolled alloy steel bar stock or plate used for making gears is very near forged in structure AND made in a very metallurgicaly controlled manner. Unless you need very large ring gears forging is not cost effective OR beneficial. Large custom ring gears would probably start as flame or LASER cut blanks.
There are NO cheap methods for making custom gears. However, most custom gear shops come very close to the same price as stock (off the shelf) gears.
The MOST important task in you project will be the specifications for the gears (tolerance class, alloy, heat treating. . .). Remember that tight tolerances increase durability AND cost. Changing one precision class might only increase life 10 to 15 percent but double the cost AND limit who can make your gears.
NOTE: Many years ago I designed and built feed transmissions and gearing for large machines as well as repair gears for old machines. It is not a simple task and in your case one should be done in close cooperation with the gear manufacturer.
See my bio and Tools for the Nuclear Industry. One of these machines has two 5 pitch ring gears five feet in diameter. The detail below is part of the feed transmission that drove these gears in a planetary gear train.
The cheap way to make custom gears is to redesign to use commercially available gears.
Stock Gears and Repairing Machines :
A Tale of Four and a Half Old Machines.
 My Royersford Excelsior 20" drill press had typical broken back gears when I got it (Shop Gorilla damage). I bought stock change gears as replacements. Cost about $450 in 1984 for 4 gears. I have yet to fix the machine. Its currently waiting for me to get my 13" South Bend running. The repair will require converting the stock gears to flanged piloted ring gears and machining the old gears off their hubs and attaching the new parts by drilling and tapping multiple holes. A major job on top of the gear costs. . . Since back gear is rarely needed on this machine it has not been a priority.
My 25" Buffalo drill press (very similar to the Royersford) has good back gears but they were used until the floating cone pulley's bearings wore out and it rattles. This happens occasionally on back gear machines as the lubrication point is a screw that must be removed in the pulley working surface. The fix for this will be replacing the cone pulley with one off an older J.T Ryerson and Sons machine I am repurposing. YES, all three drill presses from different manufacturers have interchangeable parts.
When I bought my 1920's 13" South Bend lathe it had a broken feed reversing mechanism that was poorly repaired and wore the gears to a rounded tire looking shape. I used manual feeds on the lathe to make a new reversing lever from a weldment. I speced the gears including a hand press fit on the spindle gear and had a local machine shop make the three gears. They fit perfectly.
I paid a lot for that old machine because it had ALL the optional attachments. I used it for a short while but it had a really bad home built drive using a truck gear box. You often hear this recommended but the ratios for an internal combustion engine drive train are completely wrong for a machine tool and end up with only ONE ratio being usable. Currently we are building a new overhead drive that will use all four steps on the cone pulley. I can't wait to be using this machine again.
My other large lathe is a 14" Porter from the same mid 20's era. We built a drive for it during our 13th anniversary hammer-in. It's best features are its a long bed lathe and it has a 4 jaw universal scroll chuck. Otherwise it has change gears, broken back gears and broken cross feed gears in the apron and a tail stock needing rebuild. . . The drive we built used the J.T. Ryerson & Son bottom cone pulley!
J.T. Ryerson & Son drill press was completely worn out when I got it but I made thousands of dollars with it drilling holes. It had been used for decades in an old Iron Works / Foundry and was missing all the power feed parts and back gears. I called its table "The Craters of the Moon table". The base T-slots had filled with chips and sand and been painted over so many times it did not appear to have T-slots! The lower cone pulley bearings were worn but worked. Then serendipitously I found a bottom cone pulley bracket and pulley loose from a machine in a junk yard. I took a gamble on it fitting and paid $25 for it. Perfect fit with good bearings. . Those parts are now on the Porter lathe! Its spindle thrust bearings are on the Buffalo and eventually its top cone pulley will be on the Buffalo as well.
I decided to scrap this old machine because I had two other similar machines in better shape and this one also needed a replacement motor. A surprising number of parts have gone into other machines. The frame is to be cut in two and the column and table used as a heavy duty adjustable vise support. . . OR stand for our Beverly Shear. Maybe both.
Outline for New Padawan : So; I have a new padawan showing up at the forge, and after a couple of sessions, she seems interested in developing her skills further. I've prepared the bare outline, below, to discuss multiple skills, and situations that I have encountered, so that she has a clue and I don't miss anything important. This leads to the question: Did I miss anything important?
I'm not sure how the document will transfer to this format, but here goes...
Outline: Blacksmithing Contemplations
Safety & Procedures
Types of Welding
MIG, TIG, Stick, Oxy Acetylene
Forge Welds- Faggot, Drop tongs, Butt, ???
Gifts/Bribes
Mother, Father, Housemate, Friends & Neighbors, Weddings & Major Occasions
Skills
Draw, Upset, Weld, Dish, Bend, Rivet, Twists, Cut, Pierce
Finishes
Surface: Hammer, Rust, Blued, Wire brush, File, Polished
Indoor Finishes
Outdoor Finishes
Tools
When to make, buy and/or modify.
Books
Techniques, history, and areas of interest.
[The never-ending listŌĆ”]
Outline for New Padawan :
Bruce,
I've send an email with two documents. Both customized for my situations but that you might find helpful. Please do not distribute.
One is the Appalachian Blacksmiths Association Journeyman Skills list. I've added some things to my copy such as learning drawing skills and showing proficiency in shop math. It ends with the following from me.
"YES, There will be a test, life is the test and THIS is it. Learning the periodic table is something you should have learned as a teenager in public school. Learning sufficient geometry and the minimum algebra is also something you SHOULD have learned at that time. However, unlike the famous line in the movie Peggy Sue Got Married where she says in geometry class, "I know for a fact that I will never need to know this stuff". . . when you chose this technical path you made all those things important in your life. If you have forgotten these things, dig out a math book (or Machinery's Handbook) and hang a copy of the periodic table in your room and study."
Outline : Thank you.
Also, I ought to add "Sequence is vital!" to my outline.
Keep a weather eye out for Zeta today; headed our way from the Gulf.
Skills for aspiring smiths : Hi Bruce,
For a list of basic skills with some excellent illustrations one could do worse than ABANAs Controlled Hand Forging lessons. Free to print up and gives the Padawan something to go back and look at if you aren't around to demonstrate.
https://abana.org/education/controlled-hand-forging/
Email :
Gmail consistently puts my mails into the spam folder. . .
They assume that if you have your own server and email that you are a spammer. . .
The Nanny State :
Where the politics meet the road.
I was shopping for chemicals to make an old fashioned chemistry set for my grand children and I noticed and interesting fact. On their chemical list McMaster-Carr has the states listed that certain chemicals cannot be shipped to. Those places are ALL "blue states" on the election map (new England, California. . .).
Something to think about. . .
Can I save it : Just picked an Anvil up. I canŌĆÖt figure out who made it. Pretty sure it is cast.
Cast Anvil :
Chief, You can click on my name and sent photos to me to try to ID your anvil. However, most anvils without a name on them cannot be identified.
Note that there are good cast anvils and bad cast anvils. Those of cast-iron are junk, those of ductile iron AND heat treated are OK to good and those of cast steel are generally good depending on the quality of the casting.
Then their are the hybrid anvils. Cast iron with a steel face welded on IN THE MOLD. Those with a decent thick plate like Fishers (the inventor of the process) are good anvils BUT those with thin faces such as Star anvils are junk.
Most decent cast anvils have the maker's name or logo cast into them. The exception is that very late Fishers were made without and had a paper label glued onto them. . . The many junk cast iron anvils coming in from China and Eastern Europe often have metal plates riveted to them such as the "Central Forge" line sold by Harbor Freight. Central Forge is not a manufacturer, they are a house brand.
James at Outlook.com :
Your email repeatedly bounces as a bad address.
RE: Anvil ID from photos.
Without markings it is difficult to tell who made it. There have been over 250 English anvil manufacturers and many produced VERY similar anvils. As you noted it IS and English anvil, probably made in the mid 19th Century.
Marking on these anvils wer made by hand stamping with large stamps. The marking are often faint with gaps due to the irregular hand forged surface. To see them you often have to clean the anvil with a power wire brush and even then you may need to take a rubbing of the surface. The markings will be on the large flat sides of the anvil.
Beginner blacksmith setup : Hello, I am new to blacksmithing and need some advice on a purchase of a forge, tools and anvil. the following is available on FB market place and was wondering if it was worth purchasing? her is the link. https://www.facebook.com/marketplace/item/2504681856506720/
thanks Larry
Beginners Blacksmithing Kit : Is this kit a good starter kit? it is the closest thing to my location. what would be a fair offer? thanks
https://www.facebook.com/marketplace/item/2504681856506720/
Beginners Blacksmithing Kit :
For that money you couldn't get the anvil in many locations.
While the tongs are OK they are a bit heavy/cludgy for a beginner. The forge is great but you may find yourself looking for a gas forge is fuel is hard or expensive to get.
Even that dodgy looking bench is worth a lot if you had to buy the steel and it IS a steel bench.
Jump on it before a dealer buys it all and then resells it for double!
Beginning Blacksmithing :
Good REAL tools are expensive and all those tools above are the real deal (no Chinese junk or homemade junk). You COULD get started for less but it would take a LOT of searching to find an anvil that nice. All those tools, even if they are not right for you are good for trading, swapping, selling. . . But give them a good chance first.
Beginning Blacksmithing : : Thanks for sharing. I appreciate it.
Anvil Identification : Hi, I have an anvil that I purchased used about 35 years ago, it came from a local school metal shop that was decommissioned. The dimensions are 18x9x4.5 the lettering on the side looks like "Original" and below the a is a capitol "P" I was wondering make and if it may have any value. It is in fantastic condition, sharp edges and clean. Has one square hole in the face. Thank you.
Tim
Tim was this school in South Africa or Australia?
Whats the value : Hi. Newbie here and looking at an anvil. I do have a line on an old Soderfors anvil with the following markings: Markings have the seal and from top down ŌĆ£Soderfors,ŌĆØ ŌĆ£Dannemoira,ŌĆØ ŌĆ£Sweden,ŌĆØ 132Kg, and the n umber ŌĆ£5ŌĆØ.
It is in decent shape but rumored to have been resurfaced at some point but edges are good. They seem a little sharp for the age of the piece. Any idea of what i might want to pay
Hi. I am new to this and looking at getting some tools. I have a line on a Soderfor Anvil. Markings have the seal and from top down ŌĆ£Soderfors,ŌĆØ ŌĆ£Dannemoira,ŌĆØ ŌĆ£Sweden,ŌĆØ 132Kg, and then the number ŌĆ£5ŌĆØ.
It is in decent shape but rumored to have been resurfaced at some point. The edges seem pretty sharp and clean for an anvil of that age. Any idea of what i might want to pay for that?
Value, Repaired anvils :
For my own use I value repaired anvils at 0.
Yes sharp corners are usually a sign of a "reconditioned" or repaired anvil.
There are two methods and two problems.
One, is machining. Machining the face removes the hardest portion of the face and leaves a generally softer than original. In the case of steel faced wrought anvils this is a disaster as the face is now too thin to support normal use.
The second is welding. Welding often leaves a very brittle HAZ betwwen bead and base. Unless the entire face was carefully heat treated this brittle corners WILL break off leaving thins worse than they were before repairs. Unless an anvil is severely chipped the corners can be gently ground and rounded so that they stop chipping and provide a good working edge. There is almost alway a short section of good edge to work on IF you need a sharp edge but this is generally bad forging practice.
Many people resurface anvils because they have a little sway. The problem is that a little sway is GOOD (for straightening) AND an anvil is NOT a reference flat. You DO NOT hammer on reference flats! That would get you fired in most machine shops.
Soderfors is a good anvil. At 291 pounds that is a lot of anvil. Market prices will start at $5/pound. You will have to decide if you want to gamble on a repaired anvil.
Repaired Anvil : I would agree with Jock about repaired anvils, be careful when purchasing a repaired anvil. I would have no problem with an anvil that has been properly repaired by someone with a reputation for doing good repairs. My 150# hay budden shoeing anvil was repaired by Robb Gunter who's repairs I believe are second to none. Robb and Karl Schuler came up with the process while working at Sandia National Labs. and it was first published in Anvil Magazine in 1978, google it and it will come up. I would guess that there are anvils out there that were repaired by short cutting the short cutting process so beware. That being said I would say only do repairs if you have to.
On a sad note we lost A great friend and mentor to many in the blacksmithing community, Frank Turley who passed away on the 14th, his obituary is on the ABANA website under social. LXIV,
Frank Turley : I actually had a chance to visit his forge in Santa Fe during one of my NPS projects. We have lost a fine gentleman.
Anvil face : Hello, I am a 15 year old. I have a 110 lb. Russian anvil, the one from harbor freight, and the face is full of dents and dings from the previous user. They are minor, but annoying. Would it be a bad idea to mill about 1/8-1/16 of an inch off of the surface to remove these? If not, is there a good way?
Young Kid: I would consider the best way would be to take a good sized hammer and plannish the face to be smoother and then use it till it polishes out. (Scale is an abrasive compound.)
Repaired anvils: Try the ball bearing test on the face to check it's hardness.
Alex; sad news about Frank; I made a point to be there when he received the Heritage award and treasure the memory when he came down to the Festival of the Cranes Demo and shared my forge with me.
Frank Turley :
Seems like I am always the last to find out these things (even though I maintain his website) . .
Frank was a great blacksmith, a wonderful man, a story teller and an old friend. . . Frank passed Saturday November 14, of Covid at age 84.
It was little known but Frank had been suffering from Parkinson's since his diagnosis June 2015 and was no longer teaching. He had guest instructors and he would visit when he could.
Steel Prices going UP in big jump :
A friend has been told by his sheet steel suppliers that he will see a 15 to 20% increase over the weekend!
This is a HUGH jump in steel prices. Has anyone else seen or heard this??
Steel Prices : I don't buy much steel anymore since I am retired. I did buy 100ft. of small flat bar a few days ago and the price was only about 20% more than I was paying in the 90s. Back in 2007-8 I was an estimator in the structural and miscellaneous steel business in Washington state. Scrap prices were at $700 per ton, junk cars in peoples yards were disappearing at a rapid rate, and all the scrap was being shipped to Turkey, made into rebar and shipped to Dubai. Steel quotes were good when quoted ONLY. Suppliers would not even hold prices for 24 hours. For years I was able to bid a job using material costs and adding 15-20% markup to cover retention and scrap, I found myself just plugging in $1 per pound and hoping it would cover the cost.
Steel Prices Addendum : This website shows the construction in Dubai in 2007.
https://sites.google.com/site/dubaiisnuts/
The 25% tariff on steel imports can't have reduced prices any. But that's been in effect for a couple of years now.
Sorry to hear about Frank. He was one of the greats. I never met him, but he was always helpful.
And yeah, the tariffs aren't helping anything.
kalgroolie power hammer : greetings! I am purchasing a kalgroolie power hammer and can't find any plans for the base. Do you have any advice? Thanks
Pat what size? I note that the 2cwt one looks to be patterned off a Nazel; perhaps looking for plans for a similar weight Nazel would work. They are a more common brand and so more info is probably out there.
Feedback New Anvil Stand : Last June I wrote about inheriting a Hay-Budden anvil with a warped base. This post is feedback that your advice solved the problem.
First, I made a stand based on Steve BarringerŌĆÖs design. I used carpenterŌĆÖs glue and nails as I laid the 2 x 12s together, then inserted four long rods with threaded, bolted ends to hold it all together. The higher end pieces of the 2 x 12s fit the anvil perfectly. I added ┬Š in. square wood strips on the sides to create a basin for the silicone caulk.
The anvil base was warped about 3/8 in. off level and I read somewhere to be generous with the silicone caulk, so I used nearly three tubes of it. That worked fine, but created gobs of caulk on the sides of anvil that I eventually scooped out because it wasnŌĆÖt drying. Because of the thickness, I waited four days before using the anvil.
I thought the whiteness of the caulk looked a little odd, but within a week it became gray and isnŌĆÖt noticeable. I secured the anvil to the stand with pipe hanging strap and added a small rack for the tools I most commonly use. On the back side I added holders for hardy tools.
The footprint of this stand is smaller than the stump I was using, so it freed up space in my very small shop. Most importantly, the anvil is now very stable, exactly level, and absorbs much of the noise. So thanks.
I thought I could post photos, but it doesn't look like it. I'd be happy to share.
Happy Thanksgiving to all.
Thanksgiving :
My Daughter's family is visiting today with my three grand children.
I've been collecting home chemistry lab chemicals and equipment for their home schooling which may last who knows how long. . . Sort of an early Christmas present.
I spent all night binding a 1960's children's chemistry experiments book I had printed from a PDF. The book and several others came from a CD I had bought several years ago from some folks who were manufacturing "heirloom chemistry sets" in beautiful hand made wood boxes. The folks that produced it seems to have gone out of business so I was glad I had gotten the CD and information about their chemistry sets.
Back in the 60's I had one of the smaller Gilbert chemistry sets. Had a lot of fun. Spent years trying to make gunpowder and such. I would have been dangerous if I could have gotten hold of some Potassium Nitrate (now sold as "stump killer"). Among the oddities of the time I had the Boy Scout Atomic Energy merit badge book (still have it). I spent a lot of time trying to build a mini cloud chamber. Never could get it to work quite right.
Back then we did all kinds of things that would horrify people today. We made soap using Red Devil Lye, and I built a Mercury barometer for a science project. I tried to weld together thin wall glass lab tubing to make it. The problem was that the the tubing wasn't strong enough to support the mercury and I ended up breaking a lot of tubing and spilling a lot of mercury. Finally my Dad had a sign shop make the tube from high strength neon light tubing. I filled the tube, used one of the bottles and cork stopper from my chemistry set for the reservoir and put the whole on a stand with a tape measure scale. Worked great. Still have it. . .
If I knew then some of what I know now---I probably wouldn't be here now!
I was interested in building the linear accelerator described in "The Scientific American Book of Projects for the Amateur Scientist" of course it used something like 40 pounds of mercury for the mercury diffusion pump to get a strong enough vacuum and Van de Graph generators to get the high voltage to accelerate. It also warned you not to use anything with an atomic number above Fe as a target---I had some uranium ore I wanted to try out...
Van de Graph Generator :
I built one of these for my 7th grade science fair (1st place). I used two hemispherical aluminum mixing bowls taped together for the collector ball. Rollers and pulleys were made on our little 6 inch Craftsman lathe which I still have. The belt was custom made by a local power transmission supplier. The motor was a slow speed open frame type that came off an old adding machine. . . It worked well enough in dry weather to make your hair stand up and jump a spark about 6 inches. It was completely friction powered (no high voltage source to charge it) so it was a "safe" toy.
Due to working best in cool dry weather we pulled it out to play with at Christmas for many years. Tinsel was a great play thing on it. I don't know what happened to it. Lost or broken in a move. Maybe cannibalized to make something else since I have the motor. . . Hmmmm I renumber using the motor in a rotating shutter type "strobe light". More party fun.
My 10 year old grandson is already dangerous. We talked about Avogadro's number and balancing chemical equations. . .
Van de Graph Generator : The Science Museum in Boston has the worlds largest air insulated Van de Graph Generator and it's amazing. If you are are ever in Boston the Museum is a must see. LXIV,
Van de Graph Generator : The Science Museum in Boston has the worlds largest air insulated Van de Graph Generator and it's amazing. If you are are ever in Boston the Museum is a must see. LXIV,
Modern Times : Today if you asked most teenagers what Avogadro's number was, the answer would be how many Avogadro's it takes to make guacamole.
Modern times : Welllll. . . I went into High School chemistry knowing much of the periodic table, many chemical formulas and common reactions. . . the math (IE Moles and Avogadro's number) went right over my head at the time. That is why I am stressing the math and reasons for measuring chemicals with my grand children. IF they understand these concepts they will be far ahead of where I was many decades ago. . AND they can have fun with the items I provided.
Meanwhile I am learning about standard (normal) solutions and titration.
Touchmark Registration : Are you [anvilfire.com] still doing this? Is the link/prices up to date? Is there now a WW registry that took over from you?
Fires : Hello,
I'm interested in blacksmithing/forging and was wondering how well would a smokeless fuel work to produce a fire and would it be suitable to use in a garage/large shed with the doors open?
https://www.forged-ironmongery.co.uk/product/smokeless-fuel-for-blacksmiths/ this is a suggestion of what I found that could be used. Thank you
Anvil id : My dad gave me his 129 lbs anvil to care for and beat on. Like to know maker and year. Maker mark is circular, but can't read it. Has interesting supported section off cutoff table. I have pics. Can you help?
Touchmarks : Court, If you send me the information I'll set it up no-charge.
There have been other registrys that have come and gone. Ours has been rather neglected but its still up and will be there as long as anvilfire exists.
Smokeless Fuels :
There are two smokeless solid fuels for forges.
1) Real wood charcoal (some is smokeless, other less so)
2) Coke, (coal that has had the volitiles cooked out of it (much like charcoal).
Both have semi clear exhaust fumes that are almost as bad to breathe as the smokey versions (bituminous coal and dry wood). Less ventilation is needed but it IS NEEDED. High ceilings are the best help but smoke tends to like to hover head high in closed spaces. A hood or stack is recommended for all solid fuels.
Smokeless Fuels :
The cleanest fuels are gas. Propane is very good and natural gas (methane) is even cleaner. Both are often run without stacks but still need ventilation due to the likelihood of carbon monoxide as well as plain old carbon dioxide. The exhaust gases being hotter than solid fuel smoke tend to rise to the ceiling.
Membership info : How do I become a member? thanks
Kelly Caudle
S3 is this makers mark cast proud of the surface or stamped into the surface? If it's cast proud and there is only a slight drop from face to cutting step then it may be a Vulcan. The projection may mean it's a farriers pattern anvil.
Smoke and Ventilation : I don't know your geographic location, but here, below the Mason-Dixon line (and between the swamp and the river), good ventilation not only carries off the smoke, but keeps things tolerable during the summer months. I have a roof ridge vent and open screened eaves for upper air circulation, plus openable hatches and windows; and floor level vents for the gas and coal forge intakes. A couple of electric fans keeps thing tolerable in the summer.
That said, when I initially fire up the coal forge, I usually need to run a squirrel cage vent fan in the upper gable to move out some of the smoke that misses the stack intake until the coal cokes down and behaves itself. I will note that my logbook shows a distinct drop-off in activity during most Augusts.
Jacobs smokeless forge fuel : It's just coke, but ┬Ż8.50 for a 25Kg bag is about normal, cost-wise. I'd buy that if I could get it!
You do need a high ceiling with a large ridge vent or a chimney. I know one smith in an urban area who uses both gas and coke forges in a large warehouse-type space with no hood or chimney, and he has no problems. But, he has 30-foot ceilings and 4-foot diameter turbine vents in the roof. Plus he lives in an area where it doesn't really get too hot or too cold, so he doesn't have to worry about heat loss from the shop.
I have 10' walls and around a 14' peak with open eaves---screened with chicken wire after the blasted collared doves tried nesting in the trusses. Not much rain blows in as we don't get much rain...
My first shop was in a shed with around a 16' roof peak. I put a 14" turbine vent at the peak, and even with the 10' x 12' bay door open, green coal smoke would fill the space down to about 5' off the ground. Once it was coked there was no problem.
Open Shop Ventilation :
You cannot always just depend on the shop being large and open. Jim Wilson died as a result of breathing too much zinc oxide smoke from a gas forge where he was burning the zinc off a bunch of pipe. The shop (mine now) is 50 x 70, 10 foot to the turn of the roof and 14 feet at the peaks. It has a truck sized garage door opening on one end and the entire back is wide open. Most of the time it is like a wind tunnel. . . BUT on the day Jim did that stupid thing it was a hot breezless summer day. The thick white smoke hung in the air at head height and built up in the area of the forge. Jim rightly sent everyone out of the shop. . . but then he stupidly insisted in going in and turning off the forge. He should have waited with the others and just let the zinc burn off and the air clear itself.
Some sort of forced ventilation is best. In my last shop I had a 3x3 foot exhaust fan over the forge area. I will do something similar here when we close in the back wall. I also plan ducts and vent fans from both of the enclosed shop spaces since you never know what you are going to do. Even drilling holes or machining with cutting oil can make a lot of smoke.
Membership : We used to have a member system. Then they wanted a non-profit. We set that up and it failed. Largely my fault. But the non-profit wanted more from me rather than less (I needed money AND help - they wanted more development before seeking funds). Now I am in the position of another popular web site (that closed many years ago), my Social Security is keeping things going. . .
I maintained the old member login system until recently when we had to change servers. The new server had updated software that did not like our database system. The result killed our login system AND the new chat I had recently installed.
Luckily I had abandoned the shopping cart which also used the same database system. Everyone pushes to use database driven systems but they often result in the complete demise of a web site when it cannot be be easily moved or code rewritten for a new server (we are on our 5th server - and not by choice). . . That is why I have used my own home-brew text/html systems for 23 years.
Everything on anvilfire is accessible to the public, no membership needed.
Anvil I.D. : I recently acquired a badly used and abused anvil. I find some markings:
1. What appears to be crossed links like paper clips.
2. Letters above, W,I,L, and an S.
3. Below the links in a straight line; EEN and below that, EDLEY.
I believe I have a J. wilkerson, Queen Dudley. If so, what is it exactly?
On the side opposite the stampings there is stamped, " 1 0 10". Below the horn, at the bottom is, "X". What do the numbers and ketter mean?
The back half is broken off and missing. I have read to not weld on the anvil but, is there any method of repair?
I don't expect it will ever be a queen but I thini>k it will do for me for a long while.
Thank you for your help.
You have a Wilkinson, Queens Cross Dudley, English anvil, the weight *WAS* 1x112 + 0x28 + 10 == 122 pounds (Old CWT system.)
Beat Wilkinson :
It is not unusual to find these old English anvils broken at the square hardy hole. This is why I emphasize to folks to NEVER use a tapered shank tool in the hardy hole.
These old anvils are made of low quality wrought iron with a steel face about 1/2" to 5/8" thick. All the welding was forge or "fire" welding, heating the entire mass to welding temperature. Wrought welds great this way but is difficult to weld with modern methods. When welded the slag inclusions in the wrought melt and run out about as fast as weld material is laid down.
Due to the heavy loads applied to an anvil major repairs such as this need to be 100% welded (not just a bead around the edge). Look in my anvil making sketchbook for methods of attaching a heel to an anvil.
If it were mine I would just dress the broken surface flat with a grinder and let it go. Even an incomplete anvil such as this is a great tool. Folks with hardyless anvils often make a plate on a stand to hold hardies and punch holes.
Broken Anvil : Jerald, Thomas Powers has an anvil that is broken off at the back end and he has it fitted with a strap on hardy hole of his making. Maybe he will chime in and explain what it looks like. LXIV,
William Foster anvil : I have acquired a William Foster anvil from a recently deceased family member. (She was a jewelry maker and probably used it lightly for that purpose but just as likely it was also for decorative purposes.)
It reads 1850 and has four crowns on one side. On the other is printed 1 1 16 which is apparently for establishing its weight. It is mounted to a 2ŌĆÖ+\-, 20ŌĆØ+\- diameter sycamore stump.
I want to find it a new home where it will be appreciated for its history, integrity, patina etc. IŌĆÖve gotten numerous low ball offers from people in the local area (Northwest Florida). Any help on finding the right new owner for this anvil would be greatly appreciated!
(I have good pictures but canŌĆÖt figure out how to post them on this forum.?)
Thank you
Stevens William Foster : Anvils are not antique until they hit 220 years old, so don't expect a premium for age just yet. That said, William Fosters are more desirable because they are one of the few who put the date of manufacture on the anvil rather than a serial number or other clue, so you can be sure it was made in 1850. It weighs (or did when new) 156 lbs, which is a nice weight.
Depending on condition and location, anvils used to go for $3/lb to $8/lb. Since the advent of Forged in Fire, anvil prices have skyrocketed. The new ordinary is $5/lb to $12/lb. A brand new 150 lb cast steel anvil from a good maker will be in the $1500 range, not including shipping. Depending on the condition your anvil is in, i.e. good edges, no chips or cracks, face not too beat up, face not been welded on or machined flat, some prefer the old wrought iron steel-faced anvils to modern ones.
If it's been welded on or machined flat, it may be worthless. Welding on an anvil of any kind, but especially one of these, tends to cause soft spots and cracks unless done the right way by someone who knows what they are doing. Machining the face flat totally ruins one of these old ones, as the hard part of the face may only extend 1/16" in from the surface.
I'm sure you are overrun with lowball offers, everyone wants a good anvil for cheap.
To send pics, click on the Guru's name and it'll open a java thingy to send him an email.
Lowball anvil offers :
I'm always amazed at the folks who will spend $100 on a dinner date or more money on electronic junk with a very short life time but will not spend good money on a tool that will outlive them AND their grandchildren.
I recently sold a 248# Peter Wright for US$4 a pound using Craigslist. I had a lot of folks asking if that was a hard price and I'd tell them; "no I'd be happy to rise it to $5 a pound" I wasn't interested in selling it to a flipper. It had seen use in the mines and so had some wear. It went to a new smith; after I tried to talk him out of it as a 150# anvil would be a great starter anvil and save some money too.
I don't know what you consider a low ball offer. I've seen a lot of outrageous prices out here; but they were asking prices not selling prices!
Identifying Late Fathers Anvil : Hello, my father recently passed away and I came across and old anvil, it's stamped 1929 but I'm unable to make out any of the other markings to help identify it. Any help would be greatly appreciated! Please use the links below as references to the pictures I took of the anvil.
https://ibb.co/jZcSPBf
https://ibb.co/nfqpMb4
https://ibb.co/Mhb1Z0M
https://ibb.co/WG069dD
https://ibb.co/P5W3xfV
https://ibb.co/zJSqNCF
Brads Anvil : Brad, your anvil is a Fisher Norris, largest maker of anvils ever in the US, made in Newark NJ, 1843 until 1979, the raised number on the base leg indicated the weight (10=100#, 20=200#,25=250# etc you get the idea.)Joshua Kavett obtained drawings and other stuff from the shutdown and has started a Fisher Norris museum. Google Fisher Norris anvils and you can see images and info on anvils and the museum. LXIV,
Chas Parker 79.5 X Vise value : Im selling my Parker. It weighs 193.5 lbs and is in good condition. What is the value? thanks
Vise Prices :
As in anvils, condition is everything.
In recent years machine and chipping vises have seen a spike in prices. Folks finally realized that there will never be vises made again like they were in the US and Europe in the 20th Century. Every manufacture tried to outdo the others in quality and durability. Now most are made in China. . .
IF that vise were being manufactured today it would be selling for more than $12/pound. Used prices have been in the $3 to $10/pound range depending on size, condition and location. Collectors have been paying top prices for the really big vises - THEN rebuilding them to better than new. . .. Stands are a big adder.
Anvil : just recently obtained a 200# Arm & Hammer anvil. ser # 37040 can anyone tell me the manufacture date
Arm Hammer 37020 : Made between 1919 and 1922 according to data in Anvils in America.
Trenton post vise : I have a Trenton post vise with a little over 6/1/2ŌĆØ wide jaws and weighs 128 pounds itŌĆÖs in like new condition I was wondering if anyone might know when it might have been made? I found it several years ago covered with dirt and flash rust but it was cheap and twice the size of my iron city 6ŌĆØ so I bought it but IŌĆÖve never mounted it it just set in the corner of my shop. Just curious when it might have made and any history about Trenton post vises.
Hossfeld Bender Dies : Does anyone have any experience making/fabricating these dies, 20B2 flat faced radius blocks, 51B/52B outer/inner radius blocks for use with inbend and outbend master dies. The costs for these are rather brutal for a small time operator. Thanks from Orygun
Hossfeld Bender Dies :
Tim, You can do this the hard expensive way OR the easier cheaper way. The hard way is to com up with some heavy plate and a machine torch to cut the blanks then drill and machine as necessary. Machining would take a large lathe (about a 24" or a gap bed). Drilling requires a REAL drill press. . .
The easier way is to start with some heavy wall (Sched 40 minimum) or tubing for the part to go on the pin. While DOM tubing seems expensive what you are paying for is that hole. Then using angle, plate and bar stock make the rest and weld it on. 1/2" or thicker bar stock can be easily heated in the forge and bent to the gentle curves. Ribs to support the load can be flame cut and the whole arc welded together. There are only a few dies you need large blocks of steel to make and even these could be fabricated from bar and angle.
Prior to bending the radii you will want to make some wood or sheet metal radii gauges. I've used plywood. It works fine as long as you don't check work that is TOO hot. . .
IF you have access to a CNC plasma table an option to thick plate is multiple pieces cut to shape, stacked and welded together. Thus plate a thin as 1/4" can be used to make 2 and 3" thick dies. They do a similar thing on big press brakes making long dies from hundreds of small laser or plasma cut parts.
See our Bender article (FAQs / Bender). At the bottom is an entire bender made with bolt on interchangeable dies.
Possibly Useful Hint :
The big complaint about Hossfelds is the space they take up in the shop. Consider mounting one vertically. Most of the large diameter bending is dome press fashion in short sections. Put the bending arm pivot in the middle (toward the end) so you can use your weight pushing down.
Metal cleaning : For Mig and Tig welding I usually clean the metal with acetone. Would varsol be appropriate? How about other solvents? Thank you.
For MIG and TIG welding, to clean the metal I usually use acetone. Would varsol also be appropriate? What about other solvents ?
Peter, some solvents react to the intense UV light of the welding arc and produce toxic gasses. Anything you use should be 100% evaporated before welding. You can also use a bleach-water mix to degrease steel. The advantage is that solvents just thin oil and grease spreading them around while the water based cleaning lifts and removes the oils.
Solvents : Chlorinated solvents are particularly prone to producing toxic gases like phosgene (used as a poison gas in WW I) when exposed to UV light in air. Fortunately, they are less used than they used to be, because of their toxicity.
Hossfeld Bender Dies : I recently asked a question about making your own dies, and the Guru has some good thoughts, Thanks for that. My question came from trying to edge bend 1/8 x 3/4 flat bar (Brass and Copper),
I was having fits and saying bad words. I started out using the edge bender master die and some thinner and longer spacer blocks. That worked sorta. Then I tried using the inner and outer radius blocks, holding the work freehand. That also sorta worked, but the work. was twisting, and when I hammered it flat, it changed the size of the circle, imagine that!
Finally (I forgot to mention that I was going after Radiii of 3 to 4 inches) anyway, I mounted some 4" shafting on the center pin and used the edge bending die with spacers of various lengths and was able to get quite close to 3" radius. The work still twists and I still hammer it and change the size, but stepwise refinement got me there. I do not seem to get the ring all on the same plane yet, but work continues.
I mention all this just to blow off steam while dealing with the lockdown, election, cyber sneakiness and life in general. Sorry to smudge up the GD, Perhaps we can all get on in the next year, going at it with hammer and heat eh? Rock on
Hossfeld Bender Dies : Tim, That was a very tight bend in that width stock. Much tighter than Hossfeld would recommend or is generally recommend for cold bends. I would have made a hand bending jig and bent this stock hot. The tricky part of hot working brass and bronze is not overheating it and melting the material. The best thing about hot working brass is you start hot working and can finish with a full anneal from that heat.
Yeah, I'm frustrated with the current state of politics (a 5000 page "bill" !!!!???) I predict lots of future conflict no matter what happens. Enough said.
I feel for folks affected by the lockdowns. They really have not changed our life much as we are pretty much hermits anyway. But my Daughter's family (my 3 wonderful grand children) managed a visit for thanksgiving. Had a traditional dinner and early Christmas.
Solvents :
Acetone is a "natural" solvent as it is found in the human body. It is the primary ingredient in nail polish remover It is miscible in water and used in many chemical processes. As flammable solvents go it is probably one of the safest.
Hossfeld Bender dies : Are these parts that could be laser cut from 1/8" sheet?
Hossfeld Bender dies :
Possible but thicker would be better. Press dies (and other parts) are made by cutting multiple pieces (usually 1/2" thick) then stacking them and pining or welding them together. A two to three inch stack of parts from 1/8" is a lot of parts. Since laser and plasma cutting costs are based on the total length cut more parts means more cost. Of course machines that cut thicker material have higher rates BUT I think are cheaper than having more thin parts cut.
One advantage to the stacking method is that if you want a deep groove you can cut a piece or two in the stack to produce a groove.
I've sketched up some creasing or "rope" power hammer dies made this way that had a replaceable H13 chisel edge insert. The die stack would be bolted together. When the hard inserts wore they could be easily replaced. In this case the question is if the whole will be rigid enough.
I was going to ask about the state of the starter material and if it needed a full anneal before trying to bend it. Some alloys are much easier to work hot than others. Some of them you can even hot forge; other alloys will just crumble on you. I suggest you do a test before committing a lot of expensive material to the furnace!
Merry Christmas!
Merry Christmas and a Happy New Year to all.
A VERY Merry Christmas to everyone!
We had a semi-white Christmas morning here in North Carolina! Will be baking the traditional family crescent rolls (a 100+ year old recipe) today. Nothing like a yeast bread cooking to make a home cozy.
Galvanized Steel and Painting : I thought I had seen something in your FAQ section on this but can't quite find it.
We are reconstructing the 1970s front section (narthex) to our church. The building dates from 1846 and the the church was founded about 1646. This is our third or fourth building, so I want to make sure things hold up.
We have built a new brick porch for the front entrance, and, since we are in a humid, salt water environment, we specified to the company that the new, fabricated railings be galvanized. They were duly sent to Baltimore for treatment, and were installed a couple of weeks ago. They came back a glittery silver. Me; I think they might coordinate well with the soon to be installed aluminum handicapped ramp that will run to one side of the porch (we left a gap); but (as is usual with any group) several people wanted to know if I could paint the railings, and how soon.
It seems to me that we need to let the galvanization weather awhile before we even think of painting them (which should mellow the "glitter effect") and I have also suggested that we should, at least, consider colors other then black if we do paint them. I plan to apply the additional cold galvanized coat, then a primer coat, and then automotive lacquer or other good quality topcoat once we decide a course of action. (Who knows, they may LIKE the weathered, grey zinc railings.) However, I think it's always wise to get a few more informed opinions before claiming the expertise in front of the congregation.
Oh yes, now that we have these nice fabricated railings, I plan to do some applique ornamental ironwork to discretely bolt or rivet on, to add a little class. ;^)
Painting Galvanized Steel :
Yes the zinc needs to age (months), OR be treated with acid to etch OR be painted with etching primer made for zinc.
I would not apply zinc paint on hot dip galvanized as it does not stick as well as the proper primer for galvanized. DO use it where you drill holes for attachments AND on the attachments. Clean the rail with solvent such as acetone to remove hand oils (and lotions) before painting.
Generally the etching primer for zinc is the same as for aluminum.
Color to match trim on the structure is normal. White is almost as common as black. A hand rubbed antique bronze would also be nice and show hand prints less than white. Etching primer is commonly a mustard yellow so the bronze would go over it nicely.
Decisions decisions. . .
Coooold in North Carolina :
It was 15 F (-9.4 C) here this morning. After 4 hours of bright sun it is still only a little above 20 F (-7 C). Normally it doesn't get this cold until some time in January and then only for a day or so. So much for the warm South. . .
symbol on Anvil : I am 75, just starting to learn and educate myself on forging knives. Retired tool & Die machinist. Made 7-8 straight knives via metal removal process. One of my recently acquired anvils is a 200 pound early Fisher Norris model The only identifying marks I can find are the embossed eagle and this odd symbol. Thought it was the numeral 8, but it is not. I do not know how to add the picture here? Ken in Gardner, Ma.
Found 200 pound Fisher Norris with crude embossed eagle and a symbol that looks something like the numeral 8 with part of one loop/arc omitted and another odd shaped symbol added in its place. I do not know how to add the picture here
Yesterday I was out in my open to the elements shop in just a T shirt jeans and boots---it was supposed to be in the low 60's.
Ke, there is a fisher norris museum you might be able to contact them for details, they are at fishernorris.com
off-line for 48hrs - Reason unknown :
What an inauspicious way to start the new year!
Off Line : "We are living in the future, and nothing works!" ;^)
Off Line : Never trust machinery more complicated than a knife and fork.
Glad to see Anvilfire back online
Must have been the bit gremlins---the worstest kind!
Off Line- But New Year! : Well, now for a fresh start. I hope everybody's hearths are warm, forges are bright, and brains and hands are busy. Please be careful out there.
"It's the end of the world as we know it; and it happens every day." (UAVTBoW)
From Great Big Sea's album Play:
It's the end of the world as we know it
It's the end of the world as we know it
It's the end of the world as we know it, and I feel fine.
Congrats on surviving another trip around the sun.
Don
Now as the winds howl and the snow piles up for us folks in the northern North Hemisphere, (Got so cold lately I had to wear a long sleeve shirt in the shop! Down here near the USA's southern border...); anyway now is a good time to deo some reading or research.
I'm reading "The Sword and the Crucible---A history of the Metallurgy of European Swords up to the 16th Century" (ferrous only though) Some of the best modern research published by Dr Alan Williams as a companion to his massive tome "The Knight and the Blast Furnace" dealing with the metallurgy of European armour.
Note these are rather academic works for folks who like looking at photo micrographs and pondering if changes to the microstructure was the result of forging or happend as part of a burial ritual...
Meanwhile. . . :
I'm writing or editing introductory articles for an antique children's chemistry book I printed and I am going to hard bind (second one since Thanksgiving) for my grandchildren. Subjects such as making standard solutions and titration of solutions (to know their strength) and how to keep a lab notebook (pulled from the web).
And then there are the lab ring stands we are building. . . why buy when you can build for more? Actually my costs are less than good HD stands and they are a gift to go with the chemistry set.
Hopefully all this will inspire the grand kids to like science and help their working parents with the government forced home schooling. . .
Anvil question : I have a block of steel that was in family for over 60 years. I was told it was an anvil.
It weighs 80 lb. And is 8x7x7
I can not identify it online.
It also has a S&S stamp on side and numbers 1956 I think.
Can someone please help?
Thanks Alan
Rectangular Anvil :
IF the top surface is hard it is an anvil. This plain shape is a Sawyers' anvil used to tension or "tune" circular saw blades. Those made by anvil manufacturers often had small protruding feet similar to a standard anvil but those made by specialty saw suppliers were often just plain rectangles of steel. It should weigh closer to 110 pounds.
See our main anvil gallery image on the far right side (Prillwitz Collection anvil No.4). AND on the Fisher Norris Eagle anvil page (bottom links on gallery page).
It has a domed top and looks like a die from a large press to me.
Rectangular Anvil : Largish (300 to 500 lb.) power hammers use dies this size. Most have dovetails but not all.
A rectangular die with a domed top would be similar to the shape of a Chinese "bread loaf" anvil. See Anvil Gallery / anvilfire image collection / no. 19 Traditional Chinese anvils.
Hensley anvil : I found an anvil for sale locally. It is labeled Hensley, with 3ME below the name. It is 73 pounds on my scale, and looks like a farrier's anvil. My searches have not turned up anything about the brand or origin. Could someone point me in the right direction?
What country is it in?
Anvil Identification : I have been checking craigslist frequently in my area for a good first anvil, and found one posted with unknown weight and manufacturer. I have a picture taken from the ad and will send it to anyone who thinks they may be able to identify this anvil. Thanks in advance.
Anvil Identification :
Zack, I responded to your e-mail. No better ID can be made from the photos provided. Its American made (not English), forged and in fairly good condition. Weight 100 pounds or less best guess from feet in image.
I am from Modesto, Cal. I have Phoenix Anvil with a diamond shape around it.Total length is 32
How do I change my email?
Name - Email :
Just type in new info before posting. Our ID cookie system has been buggy on many browsers in recent years. I'm looking for a new system. . .
chain on anvils : I see some smiths have wrapped log chains around the base of their anvils. Is there a good reason to do this?
Chain on Anvils :
Robert,
In some cases the chain deadens the ring of the anvil. It is also used as an attachment device to keep the anvil from walking off. And some just like the look.
Anvil Identification Plz : 300 lbs ish standard American looking Anvil, only markings are a stamped R R on the foot under the Horn, each R either side of a square hole. I have pics if I can send em somehow. Thanks
Chains on Anvils : I use straps on my primary anvil, but I'm keeping my eye out for appropriate chains for my "demonstration" anvil. A well weathered chain looks interesting, and adds to the ambiance. Also, as previously stated, it can help deaden the ring. (I have enough hearing loss, thank you.)
Forged Chain : Bruce, you are a blacksmith, forge the chain your self. You can give it that weathered appeal are looking for. LXIV,
Chain :
For an ancient look I like chain made from square bar. Long scarfs can be made that do not need to be welded for low load or no-load chain. Making it goes surprisingly fast. Traditionally heavy chain is made in pieces of three links then those assembled as a last step.
Hearing loss : I got the jump on hearing loss with meningitis at the age of 6. I am deaf in one ear and have about 25% left in the other ear. My first hearing aid was in 1952, before transistors. Took 3 batteries to run it. About 20 years ago I got a new aid from a local guy who had started making his own using standard parts. He asked what I did for a living and put a suppression circuit in it. When I worked at the anvil or power hammer the sound would cut out. Worked great until church choir. When we began to sing I turned stone deaf. A replacement with higher range took care of that. In one of life's little jokes, I was sent to a school for the deaf for 4 years to learn LIP READING! I have a hard time understanding people today. I call our new language Mufflish.
No Horn anvil : I recently came across a 288lb anvil with no horn, just a hardy hole on each side of the face. I could not find any makers mark but could look harder. Any information on this type of anvil? Thanks
Hornless Anvils : William,
These come about for a couple reasons. Some are made with no horn, some have had the horn break off. Those that the horn has broken off generally have a vertical surface where the horn was, and a tapering end with the hardy hole and pritichel (round) hole if the anvil had one. The broken surface where the horn was can be slightly lumpy OR be fairly smooth depending on the original weld joint, how it failed AND whether someone dressed the surface.
There are numerous types of anvils made without horns. Early forging anvils were more or less just rectangular blocks. As the manufacturing industry developed these blocks developed a narrowing waist and feet. Shops that used these anvils were often equipted with bickerns (beak anvils) for curved and bent work.
Other hornless anvils include sawyers' anvils which do not have hardy holes and "double arch" anvils which are the odd industrial "push-me pull-you" of anvils SEE anvil gallery, bottom of page Fisher-Norris Anvils - bottom of that page.
Without a makers mark it is difficult to positively identify anvils as most are quite similar with the biggest differences being the era they were made in.
I could use someones input here. I have a anvil and i literally know nothing about it. When i got it home i put it on a scale and it weighs 100LBS. Ive cleaned it up some with a wire brush and didnt have any luck finding markings anywhere. Not a single one. How can i find some info on this thing?
Help identifying anvil : I came across an old anvil and i know absolutely nothing about it. All i know is i got it home and it weighed 100LBS. I tried cleaning it up with a wire brush and i found nothing. No marking what so ever. If anyone thinks they could point me in the right direction PLEASE DO! Email me and ill send you some pictures of it. Thanks in advance!
Unidentified Anvil : If the anvil is well worn and appears very old, try shining a flashlight across the sides and front and back feet at a low angle in a dark room. Sometimes old marking are very faint.
If it looks new and has sharp corners and such try a "bounce" test with a good hammer. If not much bounce or the hammer hits dead, it may be a modern cast iron cheapie, good only for very light work,like straightening bent nails, or copper and brass work.
Does the anvil have any handling holes? If so how many and where?
Does the anvil have an indention in the base? If so "hourglass" or "caplet"?
Is there a flat on the tops of the front and back feet?
Is the waist thin or thick?
Identifying an anvil : HowŌĆÖs it going. I got this anvil from an old friend. There are no marking on it. I was hoping to get a better idea about it.
Brian... : See comments from the Guru and Thomas, above. Where are you, how big is it, &c. Otherwise it's a: "I have a car; what is it?" question.
Also, look in the Anvilfire "Anvil Gallery" on the left menu bar.
Anvils with no markings :
With a few exceptions anvils are generally unidentifiable unless marked. Otherwise they can be identified as English, German, Italian, American, forged or cast. Modern junk anvils From China and India are the easiest to identify by shape but there have been a few that were cast using old wrought anvils as patterns.
Out here in the Southwest USA; we've seen a number of "cast from old wrought anvils" from Mexico. Often they can be identified from the parting line right down the middle of the face and horn and the lack of stamping and pritchel holes. Some are decent steel---they are cast from whatever is left in the ladle at the end of the day---but they are not fettled or heat treated and are often be sold as "antique anvils" to folks who don't know anvils.
identifying an anvil : i have an anvil im trying to get information on. i cant find any identifying marks but its been in my family for a long time and im trying to start blacksmithing and im trying to find out if its cast iron or if im going to be able to use it.
Unknown Anvils :
All anvils, even junk anvils are usable to a degree. The difference is in efficiency and durability. Good hard anvils have a high degree of rebound. This means a higher percentage of your efforts go into the work and when you take a resting or timing beat on the anvil the hammer is raised to its starting position (height) by physics, not your effort. Hard steel anvils are difficult to mark and require abuse to break. Cheap cast iron anvils mark easily, have little or no rebound and edges crumble if used.
So, cheap cast iron anvils "work" as long as you always work very soft HOT steel and never let the hammer strike the face or edges. Care must be taken using the horn and heel lest they break off. AND any given piece of work will require more effort to complete. AND despite all your care the face IS going to get marked up and require routine dressing. If used to any significant degree a big chunk will eventually break off.
In comparison a "real" anvil is a joy to use.
On old English anvils the markings are stamped in and very shallow at the best. The markings generally cannot be seen if there is much rust or accumulated paint or debris on the sides of the anvil. So cleaning and or good light is required to read them.
As to identification, see our dozens of posts with instructions above.
TYPO FIXED. I had said forge "hard" steel, should have been hot.
Anvil identification : IŌĆÖm old but purchased my first anvil today. It doesnŌĆÖt have a makers mark, just some numbers on the foot. IŌĆÖd love to know what kind of anvil it is.
The bottom left foot says 72. The bottom right isnŌĆÖt completely clear but I can make out maybe 161380 but not completely sure. It weighs dead on 70 lbs. it appears to be wrought iron with a steel plate face. You can see the line between the face and body.
Jim, Check the bottom of the anvil. The surface depressions, or lack there of can help ID your anvil.
Jims Anvil : Jim, based on that description there will be a capsule-shaped depression underneath, and a very faint "Trenton" mark high on the side with the horn to your right. Trentons made by the Columbus Forge and Iron Co. between 1898 and 1950-ish were the only ones with the weight stamped on the left front foot. I don't have the Book handy, but that serial number makes it a fairly early one, say 1904-ish, IIRC. It is a three-piece anvil, with a cast mild steel base, a forged iron or steel top half, and a tool steel faceplate. Enjoy it and don't you dare let it get close to a machine shop!
custom cast iron plaque : Does anybody know who could make a custom cast iron 27 inch diameter plaque for me with custom lettering to be mounted flush in a paved driveway in Asheville, North Carolina? Thanks!
Custom Man Hole Cover OR Plaque : John, This could be fabricated from steel for about what the cost of the custom pattern would be - sans casting. Same could include art if wanted.
Let me know if you are interested in going this route. I could also make the pattern and arrange for the casting.
Identify Post vise help : I recently purchased my first post vise and was trying to figure out the make, and possibly the age of it any help or info would be great, I will post pictures markings that I found was 45 warrant solid
Custom Man Hole Cover or Plaque : Yes, I would be interested in this. Thank you!
Gen X guide to swordmaking : Thank you anvilfire.com for making that topic. It was well informed. I have watched videos of swordsmithing and said to myself, "Too much work plus too much knowledge." The shows are inspiring, but most who watch do not understand the TRUE process and the knowledge behind the process. I appreciate your candor and honesty.
Alvaro A Aspden
I've responded to your mails several times and they have bounced.
Gen X guide :
This needs a good bit of updating. However, the most important part that very few look at is the resources page with links to our many metalworking and blade making book reviews and other articles.
A lot of issues with swordmaking is with the people who say basically: "I don't want to learn how to drive; I just want to win a Formula 1 race my first time behind the wheel!"
A Short Knife Story :
There are stories told in almost every shop that every teller claims they personally witnessed. This is one of those. In this case the teller was my father who claimed to work for the employer in a Cincinnati engineering shop. When Dad told the story he named names but I can no longer verify them since Dad passed away a few years ago. I recommend you document family stories when you have a chance.
A KNIFE STORY
A new machine shop employee is asked into the boss's office on the first day of work. He can't figure out how he screwed up before even starting. . . The boss asked him to sit down then hands him a small gift wrapped box telling him to open it. The fellow opens the box and finds a beautiful new hunting knife in a sheath. A bit shocked he asks, "What have I done to deserve this boss?"
The boss says, "This is so you don't have an excuse to grind up MY files on MY time using MY equipment! Enjoy the knife. Now get back to work."
As told by John D. Dempsey
Anvil : I picked up an Anvil at a garage sale, and itŌĆÖs hard to read the manufacture on the side would someone be able to identify and let me know itŌĆÖs value, and weight? IŌĆÖm located in NY. IMG_2947.JPG IMG_2948.JPG IMG_2949.JPG
brass ruler tip : Have been wondering why there are brass tips on my ruler.
What type ruler? Steel, Hook, Folding wood?
Information on my anvil : I have my grandfathers anvil (who was a blacksmith) and am trying to find information about it. I believe it is a Trenton Farriers Anvil Clip Horn 127 lbs. The stamping of the name on the side is almost non-existent, however there is a remnant of the Trenton stamp and appears as if it was stamped twice. On the left front foot is the number 127, on the right front foot is the number A41081. Any information you can provide about the double stamp or the age would be greatly appreciated. I can provide pictures if you would like to see the stamping and the feet Thankyou in advance.
Respectfully
Double Strike :
The stamps used on these old anvils were large and hand held then hand struck with sledge hammers. The surface of the anvil, also hand forged is not necessarily flat and thus the whole logo which is very shallow often does not mark 100%. Thus often faint as well as double struck. Trenton also had some issue where the N became an X the N being struck backwards over the original. Nobody knows why - perhaps indicating a "second". . .
A Short Knife Story : [A KNIFE STORY
A new machine shop employee is asked into the boss's office on the first day of work. He can't figure out how he screwed up before even starting. . . The boss asked him to sit down then hands him a small gift wrapped box telling him to open it. The fellow opens the box and finds a beautiful new hunting knife in a sheath. A bit shocked he asks, "What have I done to deserve this boss?"
The boss says, "This is so you don't have an excuse to grind up MY files on MY time using MY equipment! Enjoy the knife. Now get back to work."
As told by John D. Dempsey]
I have run into a few half-finished file knives in toolmakers or machinist tool boxes. A familiar scenario. Thanks for the memory.
Knives : My shop and scrap piles are littered with half-finished railroad spike "letter openers" from various weekend guests, starting projects over the years. I think only one out of ten ever completed a usable knife-shaped object and took it home. I just don't have the heart to dispose of the rest, but no idea what to make of them. (Actually, by Viking Age standards, 40 pt. steel is useful stock, but the twisted RR spike handles just don't do for "Viking Age." )
RR spike knives : You could untwist them.
RR spike knives :
I've only made one. It was pretty ugly. It laid around the shop and in various scrap bins for decades. I think someone admired it and I gave it to them OR it finally got scrapped. . . I'm fairly sure it did not make the move to NC.
RR spike things : The first tongs I made were from RR spikes. Ugly pickup type tongs. Used them for odd jobs for many years and then broke them trying to adjust them after a quench . . . yep, I knew better. . .
The next thing I made was a control lever for my junk wheel forge. It may be the only piece of that forge I have left.
At the time I made these things my anvil was an angle bracket made of 3/4" bar about 4" wide and 10" long. . . The worst thing I ever used for an anvil. Not long after this I found my 100 pound Kohlswa.
diy vibratory tumbler : I have 100 3" 16 gauge ss disks that I need to deburr and scratch finish. I used to have access to a vibratory tumbler but not now. I do have a large barrel tumbler that I built that I use for cleaning forged parts. I was thinking of making a box to fit inside the large barrel tumbler and put my disks with media in the barrel tumbler or buy a cheap cement mixer. Any thoughts/suggestions? I need to do this kind of job a couple times a year. I cannot justify $1000 for a used vibratory.
Thanks
diy vibratory tumbler : Steven,
I believe you can go to your closest Harbor Freight and buy a small cement mixer for this type of job for under $200. CHeap way to have a bigger tumbler for these kinds of jobs and NOT a huge investment.
RR Spike things : I've made quite a few bottle openers from RR spikes, They go over big with train enthusiasts. Full size, model, small gauge train fans love them. My first forging project was a cobra from a spike, still have it, still ugly, and I flattened out the head of a spike to make the feet of a little iron gnome. Spikes make better kindling hatchets than knives. Variation of the new knife story. Shop teacher in the late 70's started us on cold chisels in the metal shop. Steps out for a smoke, walks in 11 minutes later to announce "who started on a knife", and half the class sheepishly raised their hands, having already hammered the taper back to the middle of the bar. Metal shop in middle school in the 70's was great!
Finishing Machines :
There are "tumblers" and there are "vibratory finishers". "Vibratory Tumbler" is a mish-mash of terms that is incorrect terminology even if some ignorant importers use this term and have popularized its use in recent years. Nevertheless it is wrong.
There is a significant difference between the two. In a vibratory finisher the parts interact much less and with less force than in a tumbler where the parts often beat against each other. In a tumbler corners are more aggressively worn down than flats. In a vibratory finisher corners are worn almost equally with flats AND interior hollows are nearly equally finished if the media is small enough.
Both machines are noisy. Vibratory finishers are the worst of the two making a mind numbing noise. Both machines come in sizes from desktop to as big as a truck.
Depending on the type and size, both machines can be loaded and unloaded while running. Both machines can be built for continuous loading and auto unloading in production operations.
Media in these varies from soft fine walnut shell and grinding grit, grit embedded plastic and various ceramic shapes like gravel. Heavy punching "bisquits" are also used. Fine grits polish, coarse debur.
I use the coarsest triangular ceramic media I could get from McMmaster-Carr in my small vibratory finisher.
Another finishing machine is a conveyor belt or brush finisher. These are a high production device for flat parts including both non-metallic and metallic parts. These are completely out of the range of the small shop.
My Vibratory FInisher :
Several years ago I purchased a small Chinese rectangular steel tub vibratory finisher. I think it is the smallest machine of its type. I bought it to make our Black Beauty Burners and have run hundreds of them through the machine.
The machine cost me about $800 plus shipping by truck. Then I had to purchase about $200 worth of media AND a water circulation system for another $150. To finish this off I made a special extension cord with a switch and a two outlet GFI (Ground Fault Interupter)circuit breaker. In the end I had about $1300 in the $800 machine.
The GFI is an absolute necessity for wet loading and unloading (reaching into the media while the machine runs). This is necessary as the vibrating media is like reaching into wet concrete mix rather than a relatively solid gravel pile.
After the initial test I found that the lid was useless as it rattled, shook and kept falling closed when trying to load and unload the machine. I bought a heavy piece of rubber conveyor belting for a lid but have not installed it. We just run the machine open as many finishers do.
The recirculating water system is an absolute necessity. The media wears rapidly and if run dry creates a LOT of dust. We clean several inches of media sludge from the bottom of the water bucket each season. This is from maybe only 20 hours of run time a year.
Despite all the worn grit our media is still triangular shaped and relatively sharp.
The machine still sits on its shipping pallet as it is convenient to attach the control panel and support the water system. I plan to build a better more durable version for the same purpose. Sitting on the pallet the whole system can be moved with the fork lift or a pallet jack.
Besides the burner parts we use the finisher for some sheet metal projects and occasional tool derusting. We try to avoid using the machine for ALL the things it would be good for as it was purchased specifically for our burner project and I cannot afford to wear it out on non-profit jobs. Once in a while I will toss in a tool to derust while we are finishing production parts. As we develop products more will be cleaned/debured in the finisher.
While the vibratory finisher does a great job we still do a lot of hand finishing on our burner parts. Some of the acute edges start out too sharp and get battered rather than rounded if not flattened a bit first. For this I use a small "finger grinder" (3/8" x 13" hand held belt grinder). Another really great tool to have in the shop.
Finishing 3 in OD disks. : I would think that one of the larger bench top vibratory bowl finishers would do this job with the right media. While they are not rated for the heavy ceramic media it can be used with the caveat that the bowl is going to wear out.
While the prices on these have gone up a lot I see an 18 pound unit on Amazon for 229. I would contact the seller about spare bowls before buying as I see numerous bad reviews
Seems your barrel tumbler should work. Note that a wooden box will work and the soft surfaces will reduce battering of edges.
DIY Vibratory Finishers :
Before purchasing my Chinese machine I did a lot of research and some design work on building a vibratory finisher. My design was similar to the machine I have with a rectangular "tub". I was going to use rubber vibration mounts rather than springs the way Burr-King does. The biggest problem building this machine is the tub lining. Most tub linings are a dense polyurethane foam. DIY machines often use thick neoprene rubber but attaching it is difficult, there being no clean simple ways to do so.
Several folks have built large vibratory finishers using polyurethane drums split lengthwise. This makes a relatively large finisher that even though these have fairly thick walls it is not thick enough for a large machine. But, it is relatively thick and durable. Cutting one of these off horizontally, maybe at 1/4 or 1/3 length would make a good tub for a bowl type finisher.
The section of the plastic drum would need to be held in a snug fitting frame work. You do not want to bolt the plastic part as holes would be places for cracks to start and leaks to occur. 1/8" or 3/16" x 2 flat bar would be good for this.
Under the bowl a fractional HP motor would be mounted vertically. On the motor shaft and out of balance part creates the vibration. A ball bearing motor would be preferred. The amount of imbalance may want to be adjustable - say an old pulley with a bolt or two in one side.
The whole needs to be mounted on springs OR rubber vibration mounts.
DIY Finishing media :
In some cases the parts themselves are the media. In others punching waste (sharp edged hunks of steel) are used. But in most cases an abrasive media is needed.
Abrasive media ranges from ground walnut shells to special ceramic media. For steel parts you need a relatively aggressive media. A friend of mine bought a large industrial finisher and used limestone and quartz gravel in it. This didn't work on steel parts and he blamed the machine. I tried to explain that the gravel was not hard enough. . .
For a very coarse media old worn (or new) grinding wheels can be broken up into small parts. This will be very aggressive but great for general
work on common steel parts where you want edges rounded and scale removed or welds cleaned.
My father built a tumbler using old tires for drums to finish small aluminium parts. He bought some ceramic media but it was much too aggerssive.
Dad experimented with a number of things and ended up using 3M Wet-or-Dry sand paper cut into small pieces about 1/4" x 1/2". I think he ended up using 320 or 440 grit paper. It worked fairly well. I suspect grinding belt material would also work.
In many cases my Father was much too cheap. Vibratory finishers and tumblers both need a liquid wash to reduce dust and wash away the loose grit and swarf. Dad insisted on using liquid dish washing detergent in waterinstead of the low or non-foaming detergent made for these finishing machines. Short periods of operation produced mountains of foam resulting in loss of water/wash.
SO, I think you can produce your own machine and even your own media. But buy the wash. . .
vibratory finishers. : At Vogt we have 3. all different sizes, and later bought a couple more. These big industrial machines had heavy wall steel tubs, and the were indeed lined with Urethane, but not foam, solid urethane. When they wore out, we had a place to send for re-lining. These used the ceramic pyramids for media and the wash as Jock mentions. I have also seen rotory versions with heavy hard wood planks made into a hexagon or octagon tube and rotating about the long axis. Add a cup of wash close the lib and come back after while to dead clean parts.
Wood lined tumblers :
Years ago I saw a shake-out tumbler, used to remove core sand, built this way. It had a heavy cast (maybe welded) hex or octagon frame ends and the boards had 1" gaps at the corners to let sand out. It was not very big, about 1 foot across and 3 feet long. The boards appeared to be oak and were bolted to the frame with carriage bolts.
This was one of those items at an auction that was going to scrap. I almost picked it up but had way too much to take home from this particular auction.
Relining Vibratory Finishers . . . more :
Yes, I found the company that does this. Hopefully I will not need their services in my lifetime. Besides their cost, you must dismantle your finisher and ship the tub both ways. I suspect the cost for my small machine would be a significant percentage of the machine cost.
I'd like to be able to afford a couple of the bench top bowl finishers for small parts, each with different media. Like many tools one size does not fit all situations.
The first of these I saw running in a shop was a small unit of about one gallon in size. The shop was machining small expensive parts with a complicated shape. Even though it was a small unit it made a horrendous noise. But it did a beautiful job of polishing the small parts that could have been done no other way.
Relining Vibratory Finishers : Local relining possibility: Rhino lining shops or equivalent (treat the tub like a pickup bed). I don't know if they would do this, or how well it would hold up, but it would be worth inquiring.
Truck Bed Lining :
This might work for a small DIY finisher. Could take several coats. My small rectangular tub finisher has 3/4" thick lining over 1/8" steel plate. However, I think this is the same lining used on larger vibratory finishers.
As I recall Jock all of ours were in that 3/4" thick range.
anvil repair : All 17 anvils I have repaired was done by preheating and stick welding with 70-18 rod. Two that I use have lasted 25 years with no problem. I now have purchased a 225 amp Mig welder with gas...argon/co2..... Question has anyone used a mig welder on an anvil ....pro's or con's. Of course preheat first.Use high heat and 70 grade wire?????
E7018 vs. Grade 70 wire :
The metallurgical results should be the same as well as cleaner with less inclusions.
That applies to steel faces only. I am not sure how it will do on wrought bodies of old English anvils. My experience arc welding wrought is that the slag melts out reducing the volume of base metal and increasing the flux/slag significantly. I'm not sure how the wrought slag would react in a MIG weld.
I would recommend finding a really junk, junk anvil or English leg vise (same materials) and testing on it. The old English leg vises have steeled jaws and wrought frames. They are also more likely to be irreparable junk and thus much less valuable (other than their $1+/lb wrought value).
When you repair your anvils do you mark them "repaired". It used to be common practice among tool and machinery rebuilders to mark the items they rebuilt with an R and the date or adding an R to the serial number.
beginner on a budget : hi, i've been fascinated by smithing for a while now and wanted to learn how to make swords. I'm not foolish enough to try and ask for any tips on the obvious high rank stuff like Damascus, especially since I have almost no experience in crafting in general. I want to learn what I can, but here is my issue; I am in debt to my appartment complex as well as the college that I was attending. so I would like to know if there are any low budget projects that I can start with as I learn until I can start buying the proper learning materials. I figure there should be some books out there and YouTube can only take a person so far.
Budget Smithin :
Joe, First see our FAQs page (AKA 21st Century Blacksmithing), "S" toward the bottom, Sword Making. See the Resources page linked from there. It is a list of books and videos that apply to general smithing and then bladesmithing. Most of the titles are linked to our book review page.
Many of the books listed can be found new OR used. A few may be out of print but should be able to be found on the Internet. If you bought them ALL (several hundred dollars) and studied them all, you would have the equivalent of a college education in metalworking. Note that there still are free libraries AND ILL (Inter Library Loan).
In an apartment the biggest problem is a place to work (mostly due to noise and pounding). IF you are a good scrounger or have a bit of cunning the basic tools can be had relatively inexpensively (see our article about how to find an anvil). But a place to work (and store your heavier tools) can be the tough part.
Alternately, if you start small such as jewelry sized items you CAN do most of that in an apartment. Over the winter my girl friend has been making small metal flowers, leaves and insects at the kitchen table. Lots of light sheet metal working and wire work. . . But it all applies to larger heavier work which we will get back to now that the weather is warming up so we can get into the shop.
Our Sword Making article includes some basic projects in wood and cold metal working. ALL of this applies to general metal working as well as specialized metal working. Most of these could be done in an apartment. . .
Good luck! If you have more specific questions we are here to answer them.
How Hot is Dragons Breath? I was describing to a friend how I had annealed some copper in the "dragon's breath" at the front opening of the gas forge (we were discussing the color "green" for St. Patrick's Day, and this was my only green that day, from the flame on the copper) and she asked the logical questions of: "Where did the name come from?" "Is it a common name?" and "How hot is it?"
I know it's a common term with blacksmiths that I hang around with, but I suspect it's not from the reenactor/medievalist community; being limited to gas forges- a pretty non-historical tool. As for how hot it is, I had never thought about it before, except not to put anything into it that I didn't want to gently heat, or catch fire; and to keep hands, face, and other portions of my anatomy out of it.
So; who else is familiar with the term? Also, if the hottest part of the candle flame is just above the incandescent gas that makes light, how hot is the unconfined flame from a propane forge?
One nice thing about a diverse circle of friends- they ask questions you never thought about before. ;^)
Dragons Breath :
I think the use of the term is modern and almost universally used, developing from the popularization of small gas forges and being a convenient term.
The hottest part of a propane/air flame is almost 3600°F but gas forges often run around 2200 to 2500°F. Since dragon's breath is the exhaust from the forge after losing some heat it may be over 2000°F. It will vary greatly depending on the efficiency of the burner and the design of the forge.
When I have my Thermocouple and meter setup I'll take some measurements. . .
Modern. . . . :
I'm talking turn of the 21st century (1990's to now). The Internet era.
Working Anvil dressing : Hi,
Just finished reading two years worth of posts. Whew!
Recently purchased a "farm" anvil the owner said was about 100# and he remembered using it mostly for setting rivets. Price was $150 Located in central North Dakota. Even dirty and rusty and painted Alis Chalmers orange it rang like a church bell and was complete and was WAY better than the cast iron ASO I was currently using. I took it home.
Cleaning the dirt and paint off revealed a Hay-Budden 151# Serial number indicates ~1918. So at a $1/# I think it was a good deal.
Chisel marks on the horn prior to painting. Horn point is mushroomed a bit. Logo side face edge was at one time taper radius-ed and is in fairly decent condition. Face is almost flat with a slight dip in the center area. Rebound is nice but I don't have a proper sized steel ball to do accurate tests. It varies some as you move around the face.
There are several places along the edge of the face where someone got too close with a cutting torch. Little cuts along the edge. One still has the slag stuck to the side of the face. One small divot near the hardy that I originally thought was a chip. Upwards of a 100 small half circle dimples that I assume were made from "rivets".
I can't think of a rivet that would be hard enough to do this but rather think that they were replacing rivets with hard bolts and then peening the threads to keep the nuts on. Running my fingers over the face I can feel slight raised edges along the divots and I know these will leave marks on my work.
I know this is not any special anvil but it is also worth several times what I paid for it.
I would like to use a hand file to remove the torch slag and dress up the radius of the far edge. Also to remove the mushroom on the end of the horn and to dress it back to a rounded point. Then I had the idea of using a hand help power belt sander to lightly touch the face and remove the "ups" but not try to go after the divots. Then clean and oil and put to work.
I am strictly a hobby type owner who would do some knife making, and occasional shaping of odd things both hot or cold if it is soft enough. I didn't buy it to look at, nor to abuse either in use or "restoration".
Please let me know if I am out of line with this plan or any other thoughts you have about this anvil. I can send pictures to anyone interested.
Thank you for your time.
Anvil Dressing :
A lot of folks like to "heal" dips and cuts by working them with a smithing hammer with a slight crown. This pushes the raised material down as well as closing punch and light chisel marks. The result is smoother and harder than it started. After a good working of a few hundred blows then light grinding may be needed.
The torch cut and slag will be extremely hard and will wreck a good file. Light grinding may be required. Welding and farm shops with cutting torches are the bane of anvils. I once saw a nearly pristine 300 pound anvil that someone had used to practice starting torch cuts about every 3/8" along one edge. . . These require grinding out then welding.
The mushroomed horn can simply be ground. Remember that for safety the tip of the horn should have about a 1/2" flat.
Note that knives are not forge finished, they are ground all over. Also not that an anvil is NOT a reference flat.
Tumblers : Stop and think before you unload a tumbler.
I worked in a Swiss Shop, and one of the products we made was ear piercing needles.
Had a New Guy in the Tumbler shop, they forgot to tell him what was in the tumbler.
Reaches in to unload, everybody in the building heard the scream.
He spent the rest of the shift in the ER getting needles plucked out
of his hands and forearms.
He was lucky, no infection and no permanent damage.
They made a "Danger Needles" sign the next day
DANGER NEEDLES!
It would be funny if it wasn't so painfully real. Good story.
Anvil Dressing: : Thanks for the advice. I understand about the face not being a flat reference. My old cast iron ASO taught me how to keep my work straight and how to use the dip to my advantage. It was almost dish shaped in the center. The H-B is not flat but much closer to it.
As for the knives, most will be ground but some people like the hammer marked ones for some reason. I hope to learn how to do both.
For now I think I will just address the nose of the horn and smooth the edges and slag. I'll leave the face alone until I see how it performs after some use.
The torch cuts are small but I was curious if heat had done any structural damage to the face. It certainly wouldn't have helped but it may have been small enough in area to not do too much damage to the heat treat. I guess time will tell.
Would it be a good idea to avoid using the areas close to the cuts in case there are micro-fractures?
Arc welds and torch cuts on carbon steel :
What happens is there is what is known as HAZ (the Heat Affected Zone). In torch cuts this is the small area of the cut and the border between cold metal and that heated above red. These areas are quenched by the surrounding mass and become VERY hard. Even the HAZ of mild steel will damage tools. On hardened steel the HAZ is often surrounded by a softened zone due to being heated above the temper temperature.
There is no cure for the softened zone other than a complete heat treat of the part. But the over hard zone can be heated to a low temper temperature (350 to 450°F For carbon steel). This reduces the brittleness and does not hurt the surrounding metal.
Degalvanizing with Vinagar : I purchased two end-caps for threaded 2" pipe to make a case hardening container for some experimental knives that one of our crew commissioned. All the third (final) hardware store had was one black iron cap, and the others were galvanized. I plan to de-galvanize the galvanized one in a white vinegar bath; but it's been a while. How long should I let it soak? Ambient temperature in the forge has stayed above freezing the last week or so; but we're in for another cold snap, too. Is there a general guide, or rule of thumb for this? Like I said; it's been a while.
Sunny and warm on the banks of the lower Potomac. Spring staggers on!
vibratory tumbler : I am reporting back to say that I bought an Eastwood Vibratory tumbler. It was inexpensive and did a great job. I ran 100 3" ss discs in groups of 12. The plasma slag was ground off and edges softened in 4-6 hours.
Fairbanks Spec Sheet : There used to be an exploded view and spec sheet on the United Forging Website. I had downloaded it and the file was lost. Does anyone have a copy. Is United Forging shut down?
Removing Galvinizing :
Galvanizing on pipe is thick hot-dip galvanizing. It is unlikely that you can remove it with mild acid. Anything that would remove it would most likely dissolve all the steel first.
It could be carefully burned off in an outdoor fire.
Fairbanks, Finishers : Steven, That was one of the sites I ran for Bruce Wallace. I do not remember an exploded view but will mail you what I have.
The little Eastwood type finishers are great for small work. I'd like to have two, each kept with different media for light finishing/rerusting and polishing. Our larger finisher would be difficult to change the 100 pounds or more of media for such jobs. . .
Removing Galvanizing : Zinc is soluble in alkali. If you can find some lye, either pure (unlikely these days) or as a major component of drain cleaner, it should dissolve the galvanizing without damaging the steel/iron in the cap. Or, as the Guru says, you could burn it off.
Lye, Sodium Hydroxide, more :
I recently bought lye and quick lime for a chemistry set . . . The lye came from some odd on-line source (probably an ebay dealer). The quick lime came from a school chemistry supplier where I had to certify that I was a school or business before selling me certain chemicals.
One thing I bought was 98.5% ethanol (Everpure) for an alcohol lamp. You cannot buy the high purity stuff in North Carolina so the first time I purchased it from out of state - no questions asked from a NY store. The replacement I recently purchased came from a different supplier (BVV) who advertised the product as Kosher but required a certification that I wasn't going to drink it (along with a copy of my driver's license). . . So why advertise it as a Kosher product?
I also bought many other chemicals no questions asked. Chemicals used for making fireworks and explosives among other things. Often by the pound rather than the ounces I needed. The U.S. market for such supplies is very strange.
Lye still seems to be readily available, sold as a drain cleaner. It's the only way I've found to remove the grease that builds up on the grout between the tiles on my kitchen floor.
Maybe the Kosher designation is for those who use the alcohol as a food ingredient (or otherwise in food processing). Or maybe the certification isn't required for commercial customers who sell the alcohol in diluted form in beverages?
I hadn't read Jan's post. The label on the jar I have says 100% lye. I bought it a few years ago, but it looks like the same stuff is still available.
Lye in chemistry sets, more :
In basic chemistry lye is used for titration (determining the strength of an acid - or the reverse). A one mole solution is first created then added to the acid until neutralized, the amount used is relative to the strength. In simple cases %A = %B. Having pure lye makes it easy to create the test solution.
Lye is also still used in soap making. There is quite a cottage industry making specialty soaps that probably uses more lye than for drain cleaner.
I think the attestations required to purchase the ethanol had more to do with the seller's liability than anything else. The high concentration stuff is used for making tinctures, perfumes and other processes. I bought it primarily for use in an alcohol lamp but it has other uses where denatured alcohol is not recommended. Those making their own using a reflux still often dilute it and flavor it to taste like popular liquors with commercial flavor packets.
NOTE: In the U.S. distilling any amount of ethanol (moonshining) even for personal use or fuel is illegal without a Federal license.
More Ethanol :
A small but important use for ethanol in the lab is making Phenolphthalein indicator solution (used in the above mentioned titration). The phenolphthalein powder is first dissolved in the alcohol, then an equal amount of water is added.
Fireworks Chemistry :
One last chemistry note.
I'm sure you have all heard whistling fireworks. Ever wonder what makes the whistle? I have and thought it was a cardboard whistle built into the firework. . . Nope, not it. This is a case where the facts are stranger than fiction. You can find details on youtube
The whistle in fireworks is created by "whistle powder" or "whistle fuel". Its a chemical mixture that whistles when it burns. In a long tube the tone changes due to the change in tube length as the powder is consumed.
Sow Block and Die Keys : I have a 50# Fairbanks and I am dealing with a recurring problem that has plagued me over the years.
First, the space for the key is 1/4"-5/16". This small a key is prone to bending and mushrooming so removal later can be quite a challenge. I have other hammers where the dovetails are narrower and allow for keys that are 3/8" - 1/2" which is then much easier to deal with. I have never been brave enough to have the dovetails machined smaller to allow for a larger key. Has anyone done this? And would it be a mistake?
The second challenge is the sow block allows for the key to be removed because the dovetail plane is perpendicular to the plane of the machine. The hammer dies sit on top of the sow block and you can only access the key when installing the die. To remove , you have to first remove the sow block to access the key for the hammer die removal. I have reason to change hammer dies somewhat regularly and wish there was a better solution. I know I could replace the existing sow block with a dovetailed plate and bolt holes so I could use bolt on hammer dies. I have had trouble with this solution because the bolts do not seem to last very long. I hope someone out there has a better way of dealing with this. Thanks.
Fairbanks Hammer Dies :
Steven, I'm going to send you contact information for a friend who has had numerous Fairbanks hammers and rebuilt several.
I expect the dovetail on hammer dies is too hard to be machined accurately.
We have worked on all kinds of bolted die systems. The system used by Big Blu seems to work OK. What seems to be important is precision flat surfaces and high strength bolting. On my X1-A I have a 2" thick sow block held on by two 3/4" SHCS. On this I have a Big Blu die holder that is held down by two 1/2"-20 SHCS. There is room for three bolts - I recommend the max. Big Blu uses 3 set screws on one side of the dovetail instead of a wedge.
The only problem with the Big Blu system is that the die holder is a little springy and tightens from use as scale works into the fits. This also happens with some tapered wedge systems. Big Blu recommends packing grease in the gap and along fits to keep out scale.
If you use bolts on hammer dies they should be in tension, not shear.
The ideal solution to needing multiple die shapes is multiple hammers. . . Yeah, I know, expensive, but very efficient - going from one machine to another in the same heat. . . The only thing more efficient in the forge is an induction heater.
There are many variations on Fairbanks hammers. The one I REALLY wanted was one that came with tapered screw adjustable gibs on an extra heavy guide system that looked like one off a steam hammer. I've only seen one. . . It's like the so called "transitional" 25# LG with the heavy cast guides (like the standard Fairbanks) . . . very rare.
Infographics and preserving knowledge for beginners : I ran across this recently, and it reminded me of old conversations here about how best to introduce new hobby smiths to the scope of skills needed to complete advanced projects.
https://mobile.twitter.com/primitivemethod/status/1379358681234608131?s=21
While narratives work for some brain types, and scrolling through 20+ years of message boards for others, THIS format is an attempt I've not seen before.
And I will not have seen it still---I don't do social media like Twitter or facebook. My degree is in IT and I know too much!
Infographics :
What I saw was a bunch of indecipherable flow charts then several data scatter graphs and a discussion of their math, then more off topic nonsense. Maybe the problem is that I'm not a twit and the system makes no sense to me.
Folks keep pushing me toward facepad and twitty but I refuse to support platforms that censor free speach and block disenting voices.
Here I've pulled the 30 years of old logs and created edited articles covering most of the subjects under an alphabetized index under "FAQs" or "21st Century Blacksmithing". Over time every demo and article will be under this index. Its been an on-going project. Some of it has been delayed due to shop projects and developing products for the store.
Bent axel : I bought an old horse cart that I am fixing up to use. I found that the axel is bent slightly. The wheels are suppose to run at a slight angle but one of the wheels is running at a bigger angle due to the bent axel. I took the axel to my local blacksmith who didn't have a clue how to measure it to bend it straight. I don't know if he made it better or worse.
I believe there is a tool used in years gone by to measure axels to see how far off they are. Obviously I don't have such a tool and my local blacksmith doesn't either and probably wouldn't know how to use it. I guess I need to do this on my own or at least try. It doesn't have to be perfect but needs to be close so it isn't so obvious. Probably a change of 1/4 or 1/2 an inch would be all the change needed.
My idea is to heat a spot on the axel with a torch, stick the axel between 2 beams and bend it a little, put the wheel back on and measure the angle. If there is still to much angle, do it again. If not enough angle, bend it back. Or maybe I should strike it with a hammer when it's hot?
As you can probably tell, I have very little experience with a torch other than heating bolts to loosen them. Any suggestions would be appreciated. Thank you!
M
Bent Axel :
There are many ways to handle this repair. First you need to measure the good unbent side. This can be done by leveling the axel on a flat surface then using a protractor and a small level to measure the good angle. If your flat surface is sufficient then you may also be able to see the bend in the axel if its in the center section. I would start by straightening this first then doing the angle measuring.
The adjustments can be done a variety of ways. The most controllable way to fix minor bends is cold under a hydraulic press. There probably isn't a safe place to use a hammer nor is one controllable enough for this type work. IF the problem bend is near one of the spindle ends then heat will probably be required. This will take a large torch such as an oxy-fuel rosebud.
A straightening press can be made using a steel beam, a hydraulic jack and some chain. Wedges and dunnage (scrap lumber) can also be useful.
Many years ago I straightened two ford tractor front axels. The tractor had gotten away rolling down a hill and striking a tree. The bends were clear and obvious. We dogged the axels onto a large weld platten (heavy cast metal table with holes) and used a heavy 5 foot long pry bar to nudge the axel back to straightness. It only took about 10 minutes and shocked the farmer who said it took him several hours to get the axels off the tractor and was expecting to have to replace them.
Using leverage in this manner is very controllable.
Hope this gives you some ideas as to how to proceed. Sorry someone else botched the job. . . makes it harder to fix.
Identify old anvil : We found this anvil where it had been stored in my shop in Georgia in the USA. Appears to have a crown (or heart or cloverleaf) in the corners; the numbers 1844 and below that, J1. On the other side, there are 3 numbers spaced out across the anvil.
Anvil with crown :
Does it look like this?
Queen City Anvil
Old Anvil :
The other anvil that has a crown logo is another Swedish anvil. . . name escapes me at the moment (Soderfors?).
old anvil : With that description it sounds English, maybe a William Foster? He always stamped the date, most did not.
https://www.invaluable.com/auction-lot/1854-william-foster-99-lb-anvil-with-three-crowns-186-c-faf4fb4a6f
The three numbers spaced across the non-mark side sure sound like English marks to me.
William Foster :
The gallery image I have in the anvilfire gallery is an old low res photo that shows no markings. I also had a borrowed William Foster in the shop a decade ago that I do not remember having crown markings . . but that was along time ago. It had some bad repairs (face machined too thin PLUS several large drilled and plug welded places in the face}.
The 3 spaced numbers near the waist would probably be the original weight using the CWT system: Leftmost x 112, middle x 28 (and only 0-3) rightmost residual pounds and may be a double digit and only 0-27. Add it all up for the original weight and realize that anvils are often off a bit when compared with a modern calibrated scale weight.
Mouse Hole Forge : For $125.00, setting oustide, it's a bit worn and a bit swayed in the center, I found an anvil marked "Mouse Hole Forge". In larger type below the faint name is "2 ._0 .-22" weakly marked. Took three guys to lift it from ground into pickup bed.
Are there other markings to look for? I have my Dad's and his Dad's Champion hand crank forge blower and some of their various tongs, too.
Your help is appreciated.
Bill
Mouse Hole Forge Anvil :
Those numbers are the weight in English Hundredweight.
2 x 112 = 224 + 0 + 22 = 246 pounds.
The middle number is 1 to 3 quarter hundredweights (28 lbs). This system requires a minimum number of weights to weigh heavy objects in pound increments.
Its a great old English anvil by a popular maker that was in business for centurys.
Bills anvil : First off, score!
Second, do not try to get the sway out. That anvil earned that sway, and it will come in handy when straightening things. The hard steel face is only about 1/2" thick, and of that, only the top 1/8" (if that) is hard. Grind that off and you have a dead anvil.
Just clean it off with a wire brush, or a flap wheel on a disk grinder if you must, but just get the loose rust, don't try to remove any sound metal. It will outlast us all if you take care of it, but if you get it anywhere near a machine shop the ghosts of smiths past will haunt you for blasphemy!
What AlanL said
pin in sow block : in the bottom of the sow block of my Fairbanks A, there is a pin that corresponds to holes in some of the bottom dies I have. Some of the bottom dies, that came with this hammer do not have the receiver hole.
What is the function of this pin? I have not seen it in other hammers and I am inclined to grind smooth so all of my dies can fit.....Thoughts? Thanks
Bottom Die Pin :
This loose fitting pin serves several purposes.
1) Holds the die in position while the wedge is driven in
2) Prevents the dies from kicking out while in use and damaging the hammer.
3) Insures that the bottom die is installed in the bottom. . .
Lower die pins are found in many brands of hammers and their lack there of in many of the same brands.
Bottom Die Pin : Thanks Guru, I think I will get it out of the way so more dies can be used. Easier to remove the pin than trying to drill into the hard bottom die.
Key Taper : So this is what keeps me up at night. If the key taper should be 1/8" per foot, if you are using two keys in opposition should each have a 1/8"/ft taper or 1/16" /ft. Thanks.
key taper : fyi
My sowblock dovetail and die dovetail both appear straight...
No 10 Edwards Shear : My son left this in our yard and I would like to sell it. What would be a fair price? Thank you very much
Edwards Shear :
These are a blacksmiths shop classic but have been largely replaced with abrasive saws, cutoff saws or cutting torches.
However, they are in demand by those who want a "classic" shop tool and thus sell for $500 to $800 if complete and in in good condition. Note that unless VERY rusty fro sitting outdoors in a damp environment for a decade or so rust is not an issue. Clean, oil, bolt it down and its ready to go. Note that a #10 had a heavy steel handle about 6 to 8 feet long.
Straight Dovetails :
Decades ago I made a set of dies for a power hammer with straight dovetails. The die was made by clamping it in the shaper vise using the two wedges to hold it at the right angle.
Dual wedges have the advantage that a pair can be stacked and precision ground to make a perfectly matching set. These wedges can be used on the same side OR on opposite sides.
I would not use a taper less than 1/8 per foot on each wedge. 3/16" per foot is also common on these parts.
Straight Dovetails : Thanks Guru, being able to get an answer from someone who has your depth of experience is a gift. I really appreciate it.
Straight Dovetails :
These can be used with tapered dovetails and a wedge or dual wedges and a straight dovetail as noted above. Like puzzles there are many possible arrangements that work equally well.
Help identifying Trenton anvil logo : I believe the anvil I have is a Trenton made around 1916. However, there are some markings on the side that I was wondering about. I can see no identification on the side of the anvil telling me what the anvil is. My anvilŌĆÖs serial number is A 144330. I am not sure if it will help you identify the logo on the side, but I figured it wouldnŌĆÖt hurt. The main thing I am curious about is what the stamp on the side of my anvil is. It looks to be kind of like a parallelogram, with dashed edges. IT is not the TREXTON logo, or at least it doesn't look like all the other ones I have seen. I am wondering if it is some other branding that Columbus Forge and Iron used? I also asked the Anvils in America page, and they referred me to this page. I did not attach pictures because I did not see a place to put them, but if you email me, I will be able to send some pictures.
ACME Anvil : I just got an old ACME anvil. It is in pretty decent shape. i cleaned the grime and rust off and found the ACME marking on the side.
On the front under the horn is 33
On the front foot is 125 (I am guessing 125 lbs)
also the number A147072
Anyone know what any of these mean?
Trentons, Acmes, etc. : Both were made by the Columbus Forge and Iron Co.. Will, CFI made anvils under at least 15 different names/trademarks for various retailers, but the serial numbers are sequential for the whole lot.
Will, your serial # indicates 1916, so you're right!
Jason, yours was made in 1917. Dunno what the 33 is for, but yes, the 125 is the weight. The other number is the serial number.
Acme was a Sears Roebuck brand and were made by several of the good anvil makers in the USA and stamped with ACME for Sears. Trenton and Hay Budden are two that I know of.
Thomas has an excellent point. But, given the location of the weight number and the A-prefixed serial, his Acme is a Trenton. ;-)
I agree; just wanted everyone reading this to know that there were several "subcontractors" for ACME anvils out there!
Jason does your anvil have a "caplet" indentation on the bottom of it?
Nuts and Bolts and Aluminum : We're installing an aluminum handicap ramp (in memory of my wif) at our church; which came with plastic "feet" for the bottoms of the legs One of our folks has lined up the local welding shop to replace them with aluminum substitutes. They're about 8" X 8" and it's going to be pricey' but I've had some bad experiences with "long-chain polymers" and since we just rebuilt the church, parts of which date from 1846 (founded ca. 1645)) I'm looking for durability. My current concern is what metal the bolts should be when we pour the concrete footers. Will stainless steel do? I don't remember seeing any 5/8" aluminum bolts at the hardware store. I'm worried, of course, about galvanic reactions. I suspect plain or galvanized steel bolts just won't do. With the cost of aluminum, right now, I don't want to steer us wrong.
Thanks for any guidance; I want to get it right; and you have a wide range of experiences.
aluminum/stainless corrosion : The word on the web (for example https://www.albanycountyfasteners.com/blog/stainless-steel-and-aluminum/) is that aluminum will corrode more rapidly in contact with stainless than by itself (the aluminum corrodes, protecting the stainless, which is not what you want). Albany county fasteners has 5/8 aluminum bolts listed, as does Bolt depot (www.boltdepot.com). There are probably other sources. Note that I haven't dealt with either of these companies.
stainless/aluminum corrosion : I forgot to mention that this is more important for you since you are near salt water.
Stainless/Aluminum Corrosion : Thank you, Jan; I got your e-mail with the link, too. The salt water is right down the hill from the church (Tomakokin Creek on St. Clement's Bay on the lower Potomac); so that is a definite consideration.
Amy other observations or insights?
aluminum corrosion : My thoughts on your problem Bruce: Consider going to 1/2 or 3/8 bolts and put a nylon sleeve between them along with a nylon washer on top. 5/8 bolts for a handicap ramp seems like overkill. Instead of regular bolts, a variety of expansion bolts are also available.
Identifying marks on anvil : I'm cleaning out the old homestead in Connecticut and found some old blacksmithing equipment. I'm trying to identify a very large anvil and only see these numbers stamped on the base. The numbers are in this sequence 421533. There is also the number 5 under the horn to the left. I see an older thread saying to check under the anvil for more markings. Is it common to have marking underneath? Other items found are two blacksmith leg vises, swage block, Buffalo Forge hand crank blower and various hammers.
Identifying marks on anvil :
Carl,
The shape of depressions on the bottom OR lack of help identify anvils as do the shape of other general features.
Swage blocks are rarely marked as their patterns are often stolen from other foundries or made by unbranded manufacturers to sell through others.
Leg vises used so standard of patterns that they were sold by the pound like a commodity. As such very few makers put any markings on them. Note that jaw width is not a primary measure of leg vise size the weight is.
Is that number on the front of the foot that is under the horn and if so what side is it on?
And "very large" It's over 500 pounds?
Carls anvil : Looking at the side of the anvil with the horn pointing to your right, look very closely for faint stamping up near the face. Most anvils with serial numbers on the foot are American, and most American anvils are very faintly marked. You may need to wire brush it, or do a rubbing with chalk or pencil on paper.
And as Thomas points out, the "normal" range for anvils is 125-250 lbs. Less than 100 lbs and they are tiny, more than 250 but less than 500 and they're "big." They don't get the modifying "very" until they get well over 500 to 600 lbs.
Have family friend with anvil marked with a raised 100 number, no name, code, etc. Likely 100#. Rvcusa60@gmail.com, location MS, my age 68, no experience. 301-875-4782
Rodney; is there a question associated with your post?
O A anvil : I inherited an old O&A anvil that used to be my Dad's and I cannot find anything about it. It is stamped O&A Mouse hole on one side. Any help would be appreciated.
Help tell me my anvil : I have a church window anvil with lots of markings on it not sure what it is please help
Stevens Mousehole anvil : Could the "O" actually be a "C"?
Mousehole Forge was an anvil manufacturing business in Sheffield, U.K. from at least 1635 until 1930. The Armitage family bought into the forge in 1794, and Mousehole Forge anvils made between that date and ca. 1827 are marked "C&A Mousehole" for Cockshutt & Armitage. The later Mousehole anvils (post-1827) marked M&H Armitage are more common. All Mousehole Forge anvils were top quality when they were made. Present value depends almost entirely on condition, primarily a lack of being "fixed" by ignorant but well-meaning folks with welders and machine tools.
Erics anvil : That's not any information at all to go on, sorry. If you click on the name under any post you can email pictures to the poster. The Guru, Thomas Powers, Me, and some others may be able to make an informed guess depending on photo quality. Take pics from all angles!
steel straps for tree stump : I'm mounting my first anvil for light shop use, c.1800 Alsop, on a log I've prepared. Not a smith by any stretch of the imagination! What type of steel do you recommend for strapping around the stump to resist splitting (not for mounting the anvil-to-the-stump). I do not have a forge, so I can't heat-shrink the steel bands. Thanks for any advice.
stump straps : are not necessary, especially if you use a split-resistant stump like elm.
On a composite stump like mine (two lengths of 10-inch by twelve-inch bridge timbers side by side under a 220 lb anvil) I cold-bent a length of 1/4" x 1" mild steel to snugly fit round the corners, with a turned-up ear on each end in which I drilled a 1/2" hole. Fit the band, put a bolt through the ears, tightened the nut. I haven't had to tighten it since, 15 years later. But again, on a plain old stump you don't need anything unless you're on a damp dirt floor and the termites get into it. Had that happen once, ate my oak stump in two years... On concrete or dry dirt that's not a problem.
A-36 is fine. If the stump is not extremely dry expect it to shrink over time. Coating the open grain on the ends prevents cracking more than banding does.
Take some strap steel and bend the ends out and drill a hole in the ends for a bolt to pull it tight---make the gap large enough you can tighten as the stump dries.
Stump Bands :
I've only done this once for a vise stand. The stump was ancient hardwood of unknown variety and I thought very dry . . . I carved a ledge and fitted the band made from old wagon tire tight enough to need shrinking. It fit well for a while then started to loosen. I soaked the stump with anti freeze to no benefit.
This was over 40 years ago. I occasionally think about fixing it. . . but why put in all that effort? The stump has not split, the band has been decorative for almost half a century and will probably be around for a century to come.
The biggest problem I've had with wooden stands of all types is the bottom rotting if used outdoors on damp or wet ground.
Note that all stumps will check (develop shrinkage cracks) as they dry. Almost all large center section pieces oi wood do this. No amount of banding will prevent this from happening.
I make ornamental cleats to go across large cracks---more to show off my skills than to accomplish anything.
Power to Powers : Looks like I'm finally getting power to my smithy! It's only been a handful of decades so far!
Sir Thomas, why change now? LOL
I'm getting old and my minions are getting smarter!
Powers Power : What sort of service? I'm only running part time (less as the weather gets warmer) but last month's bill from the local electric coop was all of $11.; but I have service for my arc welder and the LG trip hammer (Thumper), and a side run to the woodshop. The Longship Company also taps my outside outlets for working on the ship in it's shelter. (We hope to launch around September, plague conditions permitting.)
Power to Powers :
Gee, now you can get a plasma table and a bug zapper! :)
Congrats!
Possible manufacturer and age of my first post vise : I know this seems like a nube or rube topic and question to waste you time with but IŌĆÖve done all the research I can find and the vise fits bits and pieces of descriptions but never anything concrete. I myself am a holder of three different trade tickets (fabricator/fitter, welder, and industrial mechanic) I currently work as a shift mechanic in a coke works at an integrated steel plant, I have a passion for anything and everything metal and metal related. Been dying to get deeper into blacksmithing but have the hardest time finding essential quality tools. CanŌĆÖt find an anvil so had to make one from 150 rail, but was fortunate enough to come across a beautiful 6ŌĆØ post vice with excellent original threads, a tight and parallel jaw for $150. I will never let it go and would love a moment of an experts time to perhaps give me a clearer idea of age and origin. If I had to make an educated guess I would say German from 1900 to 1940 but I could be completely incorrect. Insight would be greatly appreciated! Thank you, josh
Ps I donŌĆÖt know how to post or link a picture or gallery of it but would happily send them in a replied email. My sincerest apologies
Joshs vise : Without a name or trademark stamp it's nearly impossible to guess the make and age of a post vise. That said, German ones are easy to spot because they have an enclosed "box", for want of a better word, around the lower 2/3 of the moveable jaw, usually held on by three or four bolts.
To send pics, click on any poster's name and a popup will appear in your email client.
Electrical service to my show was mandated to be 200 amp panel with it's own meter and transformer. Originally they told me it would be a primary hook up with the transformer right outside the shop. Then they said that rules had changed and it would be a secondary hook up at the shop and the transformer out by the street. (buried lines)
I could only afford about 80% of what I wanted but can add on later: Lights, 50 amp 220 welder plug, several 20 amp circuits. I expect I will be "power poor" going forward; but it will speed up making things to defray the costs.
Post vise: things to look at indicating *old* ones are: mortise and tenon mounting with the spring also fitting on the tenon and wedged in place and a screwbox that was forge brazed out of multiple pieces with the screw thread forge brazed inside it. Wedge on the pivot "bolt" rather than threads.
English vs. German Leg Vices :
There is quite a difference between English and German vices. Then there are American (copies of English) and those from a few other countries.
In the US German vices are very rare. The majority are English followed by American made. As Thomas noted the front leg of German vices are supported by side plates that help reduce twisting of the jaw. They also have simple mounting plates compared to the English/American types. English vices have more hand made parts and many little decorative touches on the lathe turned parts. American vises have smoother drop forged parts and no decoration.
See my article on the vice gallery page and the German vice listed.
Bandsaw Blade Tension : I'm wondering how much to tension the blade on my 10"x16" capacity horizontal bandsaw? It's a 1"x132" blade. How tight should I make it? I once heard to tighten it until it rings when plucked, but I'm afraid I'm putting too much strain on the machine. How do you do it. Thanks,
Bandsaw Blade Tension : (second shorter attempt after browser crash)
The bigger the blade the more tension that is required.
Too loose and the blade wanders and possibly slips or comes off the wheel. Too tight and the blade made fail (break) prematurely OR damage the saw bearings.
The manual for your saw OR ANY other similar saw should have tensioning instructions. Note that some saws have built in tengioning gauges and that hand held meters are available.
The least tension that gives the proper performance is best. Most of us learn this from trial and error.
Generally a low "thung" like a bass string is about right. Anything approaching a low guitar E string is too tight. This based on my very non-musical ear.
Anvil age, value and manufaturer : Hi!!! I have a anvil for about 15years.And i would like to know if you can tell me the age ,manufature and value.the stamp on the body say Brookey.I can send some pictures if needed. Best Regards thank you Martin.
Brookey anvil :
That is most likely a Hay-Budden, Brooklyn, NY.
That is a highly desirable make, last made about 1928.
The weight should be marked on the anvil in pounds.
Value is dependent on make, weight, condition and location. Also how advertised and willingness to ship. Without more information the value could be from scrap to the cost of a nice used car.
NOTE :
I forgot to note that on the front of the foot under the horn there is often a serial number that can help determine the approximate year of manufacture.
Anvil : Have been searching for a church window anvil for more than a minute or two
Anyone with any ideas would be appreciated
Church Window anvils : I'm assuming you are looking to purchase? You could try Aaron Cergol in Wisconsin. In addition to forging items for sale he sells old anvil imported from Europe. He knows what he is selling though so don't expect any bargains.
church window anvils : If you don't mind paying shipping and waiting a year or so, try https://www.blacksmithparadise.com/. He's in Austria, but ships all over as container space comes available. I regularly lust after some of the stuff he has. BIG anvils from Europe. And the vises, oh, my...
Church Window anvils :
Is there a particular reason you want an antique anvil of this type? In the Americas these were old used anvils when brought here over two hundred years ago and few have escaped modern museums or collectors.
Note that "church window" is a very general and sometimes indistinct feature found on many types of antique anvil from various countries. Thus the style can vary greatly.
China URL Scam :
For the past year or more individuals in China claiming to be representatives of the Chinese .CN domain registry have been contacting owners of .COM, .NET and .ORG addresses globally and claiming that someone in China has applied to register their domain as a .CN (China) domain.
Example (anvilfire.cn, anvilfire.com.cn, anvilfire.net.cn, anvilfire.org.cn).
This is a scam threatening piracy of your domain name. It is supported by the CCP by discounting registrations internally and pressuring registries to register as many domains as possible.
These domains do no good to a business that already has a prime .COM domain but they bring cash money into China. Register a million domains and the result is tens of millions of dollars a year. . . AND all that identifying data. . . with virtually no overhead except a couple name servers. . .
If you fall for this, there are about 100 more country domains you can register. . .
Attwood Stourbridge Anvil : Hi Guru, i have recently come across an antique anvil. It is stamped 2126 (280lb?) On one side and on the other there is a feint D then underneath that STOURBRIDGE. Then further under that is a W and I can faintly make out 61 just under, possibly date?┬ĀI would like to try and date the anvil if possible and can't find alot of info on it. I have sent some pics to you via email
I have recently come across an antique anvil. It is stamped 2126 (280lb?) On one side and on the other there is a feint D then underneath that STOURBRIDGE. Then further under that is a W and I can faintly make out 61 just under, possibly date?┬ĀI would like to try confirm the maker and also try and date the anvil. I have also sent you some pics via email to get your opinion on condition. Kind regards, Damien
Damiens Anvil : I looked in "Anvils in America," and Postman only recorded two anvils marked "Stourbridge," neither of which had legible maker's names. Attwood was in Sheffield. Based on the shape of the single Stourbridge anvil pictured there, I'd put it in the 1830-1870 age range. The weight marks on yours indicate 278 pounds.
Finally, it's not an antique as such. Anvils aren't considered antiques, at least by smiths, if they were made after 1800 or so. Non-smiths may not recognize this, of course.
Anvil maker Identification : Looking for information about an anvil I picked up. It weighs about 70 lbs. the makers mark on the side of the body is a small case e inside a triangle. there are numbers in an up and down line on the base, but I can't make them out. Any Idea on who made it, when, where, and value?
Thank you; John
I bought at an auction an anvil to use. It is marked
I bought at an auction an anvil to use. I would like to know the maker, age, where made and is it a good one to use?
Marked "M&H Armitage mouse hole 0 3 18"
Thanks
makume gane : i have watched 40 to 45 videos on youtube making makume gane. some don't turn out very good. why is flux not used. what can be used as a flux? thanks
Dougs anvil : Like it says, it was made by M&H Armitage of Mouse Hole Forge. That's in Sheffield in the English midlands. They used a variety of marks over time, and changed the anvil shape once or twice over the period the M&H marks were used, so the best date range guess is pretty broad. Like, ca. 1830-1930. A picture would help tighten that up. The weight marks mean it weighed 102 pounds when new. If it hasn't been messed with (no machining, no welding, no torch scars, not been through a fire) it's a fine anvil. Mouseholes are at the top of the wrought iron bodied-steel faced English anvil family. If it rings clearly and hasn't been subjected to torture via milling machine it should be a good one.
mokume gane : You can't use flux to make true mokume gane, that's why you don't see it being used. The only trick is to have the metals chemically and mechanically free of oxides when you assemble the stack. Failure is common for a couple of reasons, the two most common of which are that the metals are not clean enough or the temperature is not managed properly. An oxidizing atmosphere in the forge will do it too. Too cold, it doesn't fully fuse, too hot, and it partially melts and alloys.
If you add flux, the layers slide apart, the flux gets trapped, or you end up with intergranular penetration causing cracks during subsequent forging. Same thing if it's not clean enough. A fingerprint can ruin the stack.
Finally, while there are a lot of good how-to videos on YouTube, there are far more that are beyond worthless. Who you watch matters.
Johns Anvil : Hi John. Are you sure it is a "e" and not a "c" in the triangle. A c would make it a Columbian. If so they were supposed to be a good quality cast steel anvil. Too many variable, like condition and location, to offer a guess on value.
mokume gane :
I have not seen or heard it done but I suspect that using stainless foil to protect the metal while heating could be beneficial.
Temperature is extremely critical when making mokume gane. Each alloy has a different melting point the lowest of which must not be achieved. Heating must not melt OR make the metal crumbly (occurs when the lowest melting element in an alloy melts or separates). Welding is done at an elevated temperature below melting. A temperature controlled furnace is highly recommended.
Moving quickly to compress or "set" the stack is also critical as is even pressure.
That said . . . . . . .
It is possible to create mokume gane by capillary action. A stack of high(er) temperature melting metal dipped into a liquid bath of lower temperature metal. In this case a small amount of flux may be used in the melt. Excessive flux will cause voids.
I know the capillary method will work because I've seem it done with steel and cast iron. Daryl Meier demonstrated this method of making "Damascus" at the 2000 ABANA conference. This was once thought to be a mythical method invented by the wishful. The cast iron is introduced as coarse powder piled around the steel plates and the whole heated in a forge. The cast iron having a lower melting point than steel melts and runs between the steel plates. When worked at temp the carbon in the iron migrates into the steel reducing the cast iron to a more steel like state and raising the steel to a higher carbon state.
THEN in all these processes there is the pattern development, rolling or forging, shaping, finishing and coloring.
Back in the early 1980's there was a MatSci Proff at U of AR that was doing work in carbon migration from cast iron into steel spheres to get a uniform alloy.
I had tried an early suggestion of layering cast iron and steel and forge welding it also back in the early 1980's; as I recall trying to forge weld the layerd stack resulted in large molten blobs of CI flying out when I hit it with my hammer at welding temp. It was amusing as the drops would arc out and suddenly bursting in to sparks when the decrb reached the steel burning and it burning!
Trenton anvil serial number : I recently purchased a 128# Trenton anvil with the serial number of A 78577 I'm wondering what the age of the anvil is. Thanks much. Love the site.
Modular Gas Forge : Hi Guru,
I have been happily using your folded kaowool forge tops. I have a need for a larger forger , approx 16" x 25", which will be placed on top of firebricks so the interior volume will be 11" x 20"
Just for simplicity I was thinking about using insboard. I was able to find some for a reasonable price and am wondering what might be the tradeoff. I have 3" of thickness with the folded kaowool top and thought I should use 2 layers of the 1" insboard. Any thoughts?
Also, will the Black Beauties be back in stock. they work great
thanks
Steven
Blacksmiths anvil. : IŌĆÖd like to level off the top plate and square off the edges. The top plate varies approximately 3-4mm.
Nicholas Anvil : If it's an steel-faced wrought anvil, i.e. a pre-1930-ish not cast steel anvil, what you suggest will ruin it. See previous posts above about why this is a terrible and unnecessary idea.
The short version is that the hardened face depth is only about 2mm maximum thickness, and you not only don't need, but don't actually want, a true flat face.
You do know that sharp square edges are BAD for a using anvil, right?
"Practical Blacksmithing";Volume 1, published in 1889; page 110: "For my own part I am satisfied not only that the sharp edges are useless, but that they are also destructive of good work. I cannot account for their existence except as a relic of a time when the principles of forging were but little understood. I want both edges of my anvil rounded, not simply for a part of their length, but for their whole length."
If you need a sharp edge for a particular task; make a tool for the hardy hole that has a sharp edge on it rather than introducing cold shuts into ALL your work done on your anvil.
What Thomas Powers said above.
Identifying Anvil : My husband and sons are learning to forge. We bought this used 200 lb London pattern anvil and would love help identifying it. It clearly has a top that was attached to the separate bottom. The words we can make out are "Warrant", "solid", and "185" I think. I'm not sure how to add pictures here. We are located in central Michigan.
bellows plans : where can i find/buy an easy to follow set of plans/blue print/schematic for a medium sized bellows.
Double lunged or single lunged? How large is "medium"?
bellows : double would be nice.
size really doesn't make too much difference if one knows how to scale up or down.
I based mine on a commercial one that probably was sold in a turn of the last century Sears Roebuck catalog. I had access to one in a museum. There are descriptions on building a single chamber one in "Divers Arts" Theophilus circa 1120 AD and intended to be ised as a pair---no check valve. There is also drawings of bellows in "De Re Metallica" Agricola 1556. I worked a bit backwards on sizing starting with the materials I had access to and laying out the 3 solid and two horseshoe wooden pieces and gluing up the snout from dimensional lumber and drawknifing it to shape.
bellows plan/blueprint/schematic : where can i find/buy a set of plans for a bellows.
Didn't like the one in De Re Metallica?
de re metallica : i don't have a copy
de re metallica : Amazon has various editions.
Bellows : There's also a nice chapter on making bellows in "The Blacksmith: Ironworker and Farrier" by Aldren A. Watson. With dimensions. And directions on how to build a full shop ca. 1880 in the American northeast style. If that's what you want to do, of course.
Joybells anvil : You can't add pics to this forum, but if you click the name under a post it will open a window that lets you send an email to the user in question. The Guru would be a good choice to send to, as would Thomas Powers or ptree above, or, well, me as a last resort. Take pictures from every angle, including under the base, and on the front feet under the horn.
The Blacksmith: Ironworker and Farrier : thank you Mr. Alan L for the real world "useful" information.
just hit the buy button on amazon for a used copy in very good condition for $8.99 including shipping. also as a bonus it has highly rated plans for a brick forge. the reviews are 5*.
thanks again,
jim
Hello again : Well, howdy all you blacksmiths. Not sure anyone remembers me ; IŌĆÖve been gone a long time. I retired 4 years ago and have some surplus books. Jock would you use some old ASM hand books? I think they are the 8th edition.
Quenchcrack : I remember you, but yeah, it's been a while! Hope you're enjoying retirement!
Howdy Quenchcrack; I remember your moniker; I hope to retire at the end of this year myself!
Quenchcrack : Hello old friend!
Wow.... I must have fallen asleep. . . been out of it for a while :
Large spans and refractory board.
Refractory board softens and sags under its own weight when the span is too great. One of the larger commercial blacksmith forges had this problem. The ceiling would sag then burning gas get behind the board and make it much worse. . . I supplied board for one such repair and recommended buried SS anchors about mid span.
BURNERS: I plan to restock burners but have had a cash flow issue and a screw up with the last batch . . . will write to you.
Nicholas' Anvil :
What they said above. . .
The only time anvils should have relatively sharp corners is when then are new before being dressed for use.
Flat anvils - a slight sway is best for straightening work. Anvils are NOT a precision flat surface. If you take a hammer to any precision flat in any shop I know of, you would be banished.
The only time anvils should be repaired is when they are unusable as-is. Even hand grinding can result in irreparable damage.
Bellows plans and old bellows. :
See FAQs - B - Bellows Great.
The above are not plans but are details of bellows I used for many years
that were superior to any others I have used. Board thickness is 1" nominal (3/4" - 19mm actual).
I am not a fan of most old bellows. Board thicknesses are too great resulting in hard to pump bellows. Also when re-leathered they are often shorted. This is due to the old leather that has shrunk to half its original width being used as a pattern.
A much better design that does not need an entire ox-hide to make (or any leather at all) is the oriental box bellows. See
FAQs - F - Forges, Blacksmith - Beyond the pit - mid page and link to Box bellows
Quenchcrack,
Good to hear from you old friend. I am closer to disposing of my library than adding to it. . .
August Slow-Down : I was looking at my August electric bill for the forge and reviewing my logbooks; and August is a really s-l-o-w month at the blacksmith shop. Gosh, I can't imagine why! :wink: At least around here in the tidewater, July is actually hotter, but I think everybody's is just tired of hot weather by August. What's your experience?
My anvil has no logo or brand name! : She's 200 lbs pretty sure solid cast all the way up to the face with steel plate forge welded on. London pattern and I call her Lola. Can I send some pics and will you help me identify my girl?
Anvil Name :
If its cast the face is welded on in the mold as part of the casting process. Only forged (wrought iron bodied) anvils have forge welded faces. Also note that many cast anvils have a faux plate ledge as part of the casting.
Click on my name and you should be able to send me mail.
August Slow-Down :
For the past couple decades my experience dealing with smiths had two slow periods. The first warm weather in spring it seemed everyone was outdoors doing yard work, spring planting. . . Then in June, the usual vacation time when kids get out of school. July and August heat didn't seem to make a difference.
In my own shop if we have work in hot weather we work in the morning then in the evening after dark.
But since Covid all bets are off.
Mild steel springs : Hi folks! It's been awhile. Have a question for the group:
Mild steel springs. I've read on this forum, and in various books written by really competent smiths, that mild steel can be used for low-load, low-travel springs. I've never been able to make it work.
Latest project: I am making a pair of pipe-tongs for an 18th century re-enactor. Also called ember tongs. They are light tongs held closed by a small spring, and you can use them to pick up small coals to light a pipe or cigar.
Google "18th-century pipe tongs", and you will find dozens of great images. The handles usually have a small "springboard" type spring, that flexes just a tiny bit when you open the tongs.
In "Professional Smithing", Donald Streeter (a master with decades of experience making 18th cent hardware) wrote that you could just use 1/8" mild steel for the spring. So, I did. Cut it out, bent it in a vise cold, bolted it in the handle. Flexed the tongs carefully a dozen times or so, the spring yielded to the point where it barely held the bits together. Bent the spring more. Flexed a few times, it relaxed again.
It will not keep its deflection. And I was not super-stressing it, just flexing it as if it were picking up small objects.
Any of you tried mild steel springs? Am I doing something wrong? I'm ready to try using a piece of old saw blade, or something, but I just wonder why I have no luck with mild steel.
Thanks,
Eric Thing
Mild steel springs :
These work great but only to the elastic limit of the alloy.
That brings up the fact that there different varieties of mild steel. Just a few points of carbon and manganese make quite a difference. Then there is the temper of the steel. Even mild steel can be annealed, hardened and tempered as well as work hardened. Generally standard SAE 1018-1020 will work as a spring under many conditions.
Do the reins of your tongs spring in your hand? Springiness.
I generally use normallized steel (air cooled) or oil quenched mild steel in these applications. Cold drawn steel is also quite springy.
Mild steel springs need to be longer than spring steel springs. When lengthened they often need to be slightly thicker.
Hope this helps.
Mild steel springs : Thanks, guru.
Just after I posted, I found an old strip of 1074 in a bin I hadn't touched in 20 years. I'll just give that a try. Do you think it would
be resilient enough without heat treat? Spring would be 3.5" long, about 1/8" thick, deflect 1/4" at unfixed end. Or, may try a quick torch heat and oil quench, temper to blue.
Mild Steel Springs : Hello Everyone!!
Eric T. I made a spring from a small circular saw blade for an application similar to your with good results were very satisfactory. It was just cut out, profiled, drilled and used with the hardness as it was. Don't overheat cutting. If method used makes impossible to stay cool cut some distance from your outline to prevent part from overheating. Then keep dipping in water while profiling. You may give it a try. Good luck!
Bandsaw blade would be my next step up. However if your piece started out annealed then it would bend and take a set with little provocation. I would try it with work hardening the mild first. Plannishing the surface should be sufficient.
Mild steel springs : Follow up. I made a spring out of the 3/4 x 3/16 1074 bar. About 3.5" long. It seemed pretty thick for such a short spring, so I thinned out part of it (the "sprung" end) to about 3/32. Heated it in my small gas forge to red, quenched in oil, drew temper to blue. Works great. I think I just have to work with spring steel more, to not be so afraid of using it. Put tongs together today, pleased with them. Thanks for everyone's input!
Anvil Markings : Hi. Trying to identify old anvil that came from family pass down. It has been painted several times so stampings are hard to read but I don't want to make it worse by sanding away at it. Markings are stamped not raised. Any suggestions for clearing out the stampings?
Thanks
Jeff
Books : Greetings to old friends! Well, Jock, you are about the only person I would give them to. Hope everyone is well. I had some excitement in March. Had to go in for open heart surgery which went pretty good. Three days later I suffered a cardiac arrest. I was lucky to have a group of cardiologists looking over me and they restarted my heart. However I spent 40 days in ICU. I lost 50lbs. Doing well now and preparing to go in for another spinal fusion in November. I am on a mission to bankrupt Medicare by myself!
Hey, leave some for me! I'll be signing up for it next week 3 months before I start it!
Painted markings: wire wheel, paint remover and the flour trick. Of course some brands can be identified by the shape of the underside of the base or undulations under the heel or where numbers are stamped on the front foot, or number and location of handling holes. Best place to start is telling what country it's located in.
painted anvil :
Most anvils came unpainted. Some were oiled and some had a coat of cheap black. All finishes on anvils have a short life, coming off due to use and condensation (weathering) in short order.
When you find tools and machines with multiple coats of paint they are usually from industrial sources where everything in the shop had a quick coat of paint to make it look good for appraisers. The poor quality of the paint jobs would lower the value to machinists but the bank appraisers don't know that.
Stripping the layers of old paint off an anvil will improve its value as well as let you read the markings. A power wire brush or drill powered paint stripper will do the job. If you don't have either, the cost of a low end tool will easily pay for itself on the job. when done a light coat of rattle can black will slow the rust for a year or so.
cleaning up anvil : My second anvil was obtained in a multi-part trade, pulled out of a creek so it was rusted to flakeness, around 100 lb, no visible ID or markings. In another multi-part trade, it was sandblasted. And out of the rust came the maker, "JOSHUA WILKINSON" and mass in the English system. Set it out in the weather for a winter to make it rust some, ground off the mushroomed edges, used a belt sander to clean up the face and grind marks, motor oil to stop the rusting. 100 lb with a stand is portable with a hand truck and so it is trundled out when I fire up the forge.
Have told this story before but it has been some time and newbees might be interested: Most (all?) the anvils that ended up in the California Gold Rush originated in England, loaded as ballast in ships, sent to CA around the Horn and offloaded in SF. The ships took in gold ore as return ballast, went back to England and smelted the ore (better techniques, workers and tooling than the rough California frontier). They actually made a profit doing this. The shipping from the gold fields to SF reportedly cost more than shipping from SF to England. This c.1850 ~100 lb anvil was likely part of that cycle. Where it was found, buried in a creek, it likely came out of Pine Log, a 1849 camp with 1500 miners working a rich gravel bar, prone to floods, though and abandoned by the 1890s. Had a hotel, at least 2 blacksmiths, typical saloons, a river crossing (over a pine log, hence the name). All the pack trails went through Pine Log, before better (less-steep) trails were build around it, which are now roads. Pine Log still sits in the bottom of the canyon, stories of remaining gold greatly exaggerated, stacked up rock foundations and tailings piles suggesting streets, 40 shades of green in the spring.
Bellows : I recently came across a very large set of blacksmith bellows presumably from the 1800s, The type that lay flat and the blacksmith works a wooden lever on a chain, didn't know if anybody ever looked for something like that these days, I've rigged up a pretty nice squirrel cage blower on mine.
You may want to check out the early Sears Roebuck catalogs for examples of that style of bellows from around 1900. I built a set based on a similar one in a local museum and used it for about 20 years in preference to an electric or hand crank blower.
Joinery : Greetings, I have a request to research various forms of joinery of steel, such as for furniture building. I have seen over the years a technique which causes a round bar to be set into a square by forging. The finished product is more a captive situation rather than a forge weld. Can anyone direct me to an article which has information on this subject?
joinery : Oddly enough, it's still called joinery. What you describe is mortice and tenon. Here's a book about it: https://www.amazon.com/Blacksmith-Mastering-Fundamentals-Traditional-Joinery/dp/0981548091
Joinery :
Chikemin, There are many types of joint in steel. Tenons can be round, square or rectangular. The part with the hole can be swollen or not. Joints can also be wedged, riveted or pinned.
Actually I don't think he means a mortise and tenon but when a round rod is trapped by crushing a piece of a square tube around it. I've seen it demonstrated years ago; but can't recall the name they used for it.
Tube joint : Bob Patrick demonstrated the type of joint you are referring to at the fall conference in Minnesota, Thomas. It was maybe 8-10 years ago. I also can't remember what it is called. I might have my notes around somewhere but Chikemin would be best off reaching out to Bob if that is the joint he is looking for.
Hay-Budden : I have a 159# anvil and someone drilled four holes for mounting with bolts: Can it be fixed.
Bobs anvil : You could drive rods into the holes and weld them in, but there's no need to do so. The holes don't hurt anything, and actually make it handy to bolt down tight. It'll work better and ring less loudly if bolted down tight.
Assuming the holes are in the feet, of course. If they're through the face that's a whole other issue!
Bobs Anvil : Bob I agree with Alan as long as the holes look ok and are functional for bolting it down but if they are not pleasing to your eye that's another story. LXIV,
side draft forge hood : I am looking for a side draft forge hood to buy. I do not want the plans but a finished product. I bought one years ago at the SOFA conference but need a new one. Can you help me find one?
Ask at your local ABANA Affiliate if anyone locally is making and selling them?
Power Hammer : I was looking to list my power hammer for sale on anvilfire.com. Can you give me any advice?
Erics hammer : The link to the tailgate sales listing page is this: https://www.anvilfire.com/tailgate/tailgate_page.php?topic=add_listing
Or, just look to your left, click on "tailgate sales," then scroll to the bottom and click "add listing."
Joinery Stuart Hill Joint : Chikemin Forge;
In the "Hammer's Blow" issues for Spring and Summer of 2010 are a two part article on a joint using tubing to bind together bars for grill work. Bob Patrick used this technique to create his "Clayton 2 Grill' for the 2010 ABANA Conference.
The Spring issue's article covers the Patents issued to Stuart Hill (then operating Claydon Forge) and their subsequent lapse.
The Summer issue is a review the joinery process and provides an example of alignment tooling, along with the results of a limited number of test pieces. There are different results dependent upon bar size; and size, shape (round or square), and length of tubing piece.
Cheers;
Don
In heating a blade for hardness (I don't know what kind of steel) I used the magnet. approach.
When the steel wasn't magnetic anymore, I quenched. the steel in oil, Then I tested the hardness with a file, but the file bit into the steel (soft?). A little later I applied pressure to the blade and it snapped easily in half. Is it possible that I unknowingly could have decarburized the surface of the blade.
Thank You
REALLY
Yes you may have decarburized the surface of the blade; people new to the craft often do as they tend to take more heats and leave their metal in the forge too long. It could be other things as well. Old LeafSsprings may contain hidden fatigue cracks that don't show up until late in knifemaking; for instance. We need to know a whole lot more details like Alloy, tempering, heat treating in general, stress concentrators etc. This is a major part of why we don't suggest people work on knives till they have the basics down and can then concentrate on all the fancy factors that go into forging a good blade.
Leroys blade : It is entirely possible (and very likely if you aren't careful!) to get a thick layer of decarburization on a knife blade. Thick enough that you may need to take four or five good strokes with a coarse file to hit hard steel.
Since it's mystery steel, there is also the possibility that it's one of the alloys like 5160 that needs to be much hotter than nonmagnetic to harden fully.
Nonmagnetic occurs at 1390-1410 degrees F for carbon steels and martensitic stainless steels. All of them. Old files are usually an alloy similar to 1095 or W1, and need to be quenched from 1425 F. O-1 tool steel needs to be quenched from 1500 F, and 5160 (the most common alloy for automotive springs) has to be quenched from 1525 F, over a hundred degrees hotter than nonmagnetic.
Since your blade snapped, it did probably harden somewhat, OR you may have overheated it during forging and had grain growth that made it brittle no matter what.
There's a lot going on in steel during the heat treat process. The best advice I can give you is to throw away the magnet and use a piece of steel tube with one end sealed as a sort of muffle in the forge. Toss a chunk of charcoal in the tube and it will scavenge all the oxygen, preventing both scale and decarburization. Heat it in very dim light and watch the blade. As it gets into the low red colors, you'll see what looks like swirling shadows in the steel, and a thin bright line will start moving from the edge towards the thicker parts of the blade. The area behind that line will be a steady glow with no shadows. That indicates the steel has fully transformed its crystal structure and is ready to be quenched. In all cases, this will happen well above the temperature it goes nonmagnetic. This will work for ALL non-stainless hardenable steels. You don't need to know the exact temperature, you just need to watch for the transformation.
If you force the steel back and forth across that transition point a few times, cooling to black in still air each time, you will refine the grain size, which greatly increases toughness. This also relieves stresses from forging or grinding. It's called "normalization."
Then there's quenching. Different alloys need to cool at different rates to harden. 1095 has to get from above 1425 degrees F to below around 1000 degrees F in under one second or it won't harden. With 5160 you have about three seconds to go from 1525 to below 1000 F, and if you do it much faster it's liable to crack. O-1 needs a leisurely nine seconds. It will even harden in air, if it's cold out.
If you are heating the blade in an open fire, coal forge running a shallow fire, electric furnace, or poorly tuned gas forge, you are going to have decarburization issues. If you must use an open forge, make the fuel pile (coal or charcoal) very deep and use a very low air blast. The top bit of the fire will then be in reduction, or "rich," if it was an engine. More fuel present than there is oxygen to burn it all, in other words. That is ideal, since there is no oxygen to take carbon from the steel. Using a one-ended tube in the forge ensures that, no matter the atmosphere in the forge itself. If you're using an oxy-fuel torch, keep it reducing and move fast to prevent scale and decarb.
And ALWAYS temper immediately after hardening. They never show that step (or the other important but boring steps) on Forged in Fire.
Rolling mill plans : Does the anvilfire store still exist cant seem to send and email phone anything ordered the rolling mill plans paypal pulled the money but no response whats up
Identify please : I have an old anvil and I think the names is lainson and it's says queens and a word I think starts with a d underneath I'm trying to figure it out any info would be great
Identify anvil
Calebs anvil : It's a Wilkinson, from Queen's Cross, Dudley. Dudley is a suburb of Birmingham, in the Black Country district of England, a hub of anvilmaking for hundreds of years. Your anvil is wrought iron with a steel face. The hard part of the face is only about 3/32" thick, so don't get any ideas about having it milled flat!
It was made sometime between around 1800 and 1870. There will be three numbers on the waist on the side opposite the name. These will tell you the weight in the Old English hundredweight system. Multiply the first number by 112, multiply the second by 28. Add those together and add the third number as-is, and you'll have the original weight in pounds.
A grace note to Alan-L's post: when working in a solid fuel forge, remember to insert the workpiece HORIZONTALLY into the fire as you want it all to be in the same region of the fire. Too many people have it at a steep angle thus putting the end down in the "burn it up" zone where it's hot and still has free O2 instead of having the whole piece in the neutral or reducing region of the fire.
Also his more recent post: in the CWT system the middle number should only be between 0 and 3 as they represent quarter hundredweights and the rightmost number should only be between 0 and 27 as they represent residual pounds.
Thank you, sir Thomas!
Regarding the Anvilfire store, that's just the guru. I am a little worried, he hasn't posted in a month or so...
Guru in the hospital : Hello everyone,
My name is Amanda and I have been the Guru's apprentice for a few years now and he's asked me to get on here and let everyone know he's been hospitalized since the 11th or so of November. He's got some heart issues but the major problem at the moment is fluid on his lungs which they've still been unable to drain. I will try to update this when i can and also for anyone who has ordered product, we have been trying to work with him to get access to issue refunds, but that has been very challenging to do in his current condition. Im hopeful we can get it all sorted out very soon.
Thank you very much for this update. All my best to Jock!
Guru : Best wishes.
Yes, thank you for the update, Amanda! Tell Jock we're all thinking of him.
Guru : Get well soon
Amanda; thank you for the news and update. Please pass on our best wishes to Jock.
Guru : Thinking of him and his many kindnesses towards my friends and I.
Anvil identification : Could I send some pictures to help identify an anvil it is my first and the stamping is almost gone?
Anvil ID : Ben, send them to me (click on my name to email) and I'll see what I can do. The Guru is in the hospital and not able to look things up at the moment.
Jock Get well soon Thinking of you. : Hugh McDonald. Jock and I are friends and business partners and I have just discovered why I have been unable to contact him. I am the inventor of the small steel rolling mill. I recently lost two computers from lightning strikes and all my email addresses so will try to keep up to date from this Guru page. Best regards from Australia.
Jock : This is worrisome. Hope he's improving!
Mousehole anvil with 7s on each front foot : I recently acquired a beat up 1-0-11 anvil -thinking itŌĆÖs a mousehole - after a little wire brush cleanup notice 1 ŌĆ£7ŌĆØ on front face of each front foot - can anyone tel me anything about the 7s or age? no other markingŌĆÖs whatever thanks!!
Dons anvil : The 7s are just inspector or maker (as in, the guy who did the main welding) marks for internal company ID. Mouseholes are generally well marked on the side opposite the weight stamps. There were LOTS of anvil makers in England who worked to the same basic pattern, and journeyman anvil makers would travel between companies. Someone might learn at Mousehole, then spend years making them at Wilkinson or Foster, and they all look identical except for the marks. Well, Fosters are always dated.
There are slight variations through time that can help with the date range. Things like the length of the horn, presence or absence of the pritchel hole, and shape of the feet. Peter Wrights got the distinctive flat shelf on top of the feet after about 1850. Mousehole kept the sharp ridge-topped feet until the 1870s. Short stubby horn with no pritchel hole is pre-1830-ish. Make the horn a tiny afterthought and it's 1790-ish. If you want, you can send me pictures and I'll see what I can tell. Click on my name below and on most devices a javascript window will automatically pull up your email client with my address ready to go. If it doesn't, tell me here.
Hope this finds you all well (or improving) and ready to face the challenges of the new year. Good luck and be careful out there, and in your shops or ships!
Happy MMXXII !
I hope this finds you all well, or improving and ready to face the challenges of a new year. Be careful out there, and in your shops, or ships.
Broken forge part : Hello, I'm intending to repair a forge I was given, but a piece is broken. It is a lever forge, and the closest image I have found is your lever operated rectangular forge in your gallery. The broken piece on mine is the bow-shaped weighted metal piece that turns the shaft. Would you happen to have more images of how this piece is shaped, or a diagram of some sort? Thank you.
Identifying an anvil : Hello Gentlemen !! I finally scored my first anvil. I am 46 year old jeweler and have always been in envy of he with the largest metal beating block. Well the sun has finally shoned on my ass. I was working with my cousin, since covid had my shop closed down, and in his customers garden she had an anvil welded on a pipe on what look like an old model t rim. I asked her if she would sell it to me to which she said, " No baby, you can have it" So I started to clean and wire brush it. A little torch to get paint off and i can now see some writing but I cannot identify who made it. I am wondering if you guys may be able to help me identify this anvil. Thank you for your time, Desy Quintero New Orleans, Louisiana
forge parts and anvils : Jenny, that would have been a cast iron quadrant gear with teeth that mate with the teeth on the racheting gear on the shaft. Every one is different, but you can probably get one cut from 3/8" plate to fit if you use the forge itself as the pattern.
Desy, the writing is pretty important, without pictures to go by. You can send me an email by clicking on my name below. I'll tell you what I can if you send lots of pics. BTW I love New Orleans, but I'd hate to forge there in the summer!
info help : A friend moved to Sale Creek TN and I am trying to locate anybody in that area that might be interested in helping him get set up and started right.
He is just starting out but has good potential. Has spent time at my forge and asks the right questions. Can anyone help me ?
info help : A friend moved to Sale Creek TN and I am trying to locate anybody in that area that might be interested in helping him get set up and started right.
He is just starting out but has good potential. Has spent time at my forge and asks the right questions. Can anyone help me ?
Anvil : I acquired an old anvil and can make out the letters ...ARRANTEin kind of a bowl shaped arrangement. I think i'm missing the first and maybe last letters of the name. Could you possibly help identify the manufacturer and the age?
Anvil : I acquired an old anvil and can make out the letters ...ARRANTE in kind of a bowl shaped arrangement. I think i'm missing the first and maybe last letters of the name. Could you possibly help identify the manufacturer and the age?
I acquired an old anvil and can make out the letters ...ARRANTE in kind of a bowl shaped arrangement. I think I'm missing the first and maybe last letters of the name. Could you possibly help identify the manufacturer and the age?
I acquired an old anvil and can make out the letters ARRANTE in kind of a bowl shaped arrangement. I think I'm missing the first and maybe last letters of the name. Could you possibly help identify the manufacturer and the age?
I acquired an old anvil and can make out the letters ARRANTE in kind of a bowl shaped arrangement. I think I'm missing the first and maybe last letters of the name. Could you possibly help identify the manufacturer and the age?
kik ijij
I rently acquired an old anvil from a friend and would like to identify it. I can make out letters ARRANTE in kind of a ŌĆ£bowlŌĆØ shape. I think IŌĆÖm missing the first and last few letters of the name. Looking for the manufacturer and age. Thanks!
n n nj kn kk
Info for Bearwalker Forge : He's in luck! That's in the territory of Choo Choo Forge, the Chattanooga guild of the Appalachian Area Chapter of Blacksmiths. They have open forge every Thursday at their shop in the old trainyards. Good bunch of guys and gals. https://www.facebook.com/choo.forge/ or https://aacblacksmiths.org/forge-groups/ and scroll down. They have unfortunately embraced the madness of being on FaceBook only, which rules out 3/4 of their potential readership.
Winston : Calm down, it's not a chat and replies don't turn up immediately with Chrome.
Anyway, that's just "warranted," which appears on a lot of anvils. Not enough info to tell, in other words.
Anvil Identification : Good afternoon sir,
I am looking to identify an old anvil that is marked "Van I&S FNDRY CO Vancouver, Washington" Any idea of when these anvils were made? My Great, Great grandfather owned the W.H McKenzie Blacksmith shop in Stonewall, Oklahoma and the shop was in business from the late 1800's until the 1940's when my great grandfather ran it and retired.
Many of the original blacksmithing tools were passed down from generation to generation and now I have them. I am trying to determine if this was one of the original anvils in the shop that was used. I have pictures of the old blacksmith shop if your interested with my family in them. It's pretty ironic since I am also in the metal fabrication business and have been building off road race trucks and other engineering projects for the past 25 years, so it's kind of a family legacy for all of us working with metal.
Any help would be much appreciated. Thank you sir,
Tom McKenzie
Toms anvil : That one isn't listed in the book, but a lot of west coast (USA) steel foundries made anvils to supply local markets. That company is still in business, you can contact them and ask about it. Looks like they started up in the 1920s.
Thinking about buying an anvil but do not know much about them. There is one for sale a kohslwa Sweden 70lb in really excellent shape. But seems like an outrageous price of 1400 dollars. Am I just under educated or am I right to think that's crazy?
Are those Canadian Dollars or Australian Dollars? That price seems about double or more what you can buy a brand new decent anvil that size from a blacksmith supply company for; maybe not that exact brand.
Now do you need a new London Pattern anvil? The London Pattern anvil has been around about 300 years where the "steel cube" anvil has been in continuous use for 3000 years. I recently taught a blacksmithing class where the anvil I used to do all the demos was an 80 pound "rectangular solid" of steel; cost me US$16 at the scrapyard. With the ridiculous price of london pattern anvils nowadays I will probably make sure it goes to all my classes and demos even though I have 6 London Pattern anvils in my shop.
$20 a Pound! : That is crazy. It used to be $1 a pound for a decent used anvil!
I blame "Flogged in Fire." Now everybody thinks they can "make a sword." Thank you, Hysteria Channel.
Anvil identification : I just bought a 360 lb carriage makers anvil and I have been trying to identify it. I have pictures that I can send if someone reaches out. Would love to have as much information as possible.
Anvil ID : You can send pics to me, or to Thomas Powers two posts above yours, by clicking the name. I've offered this to the last three people to ask about anvils, and only one took me up on it.
Anvil ID, again : I just tried the JAVA-based click thingy, and it appears newer computers don't like it. If you have tried to email me that way, my apologies. Try alongmire 4 AT g mail dot com, and remove all the spaces, replace AT with @ and so forth.
I continue to not be the Guru, but I'll try anvil identifications if you send good photos.
Any word on Jock : Just wondering...
Ive heard from several people that the modern
Froes : Is the blade on a froe double sided like a knife or one-sided like a chisel?
Froes : Mine is double sided; think splitting wedge.
Froes : Both an antique one and a modern commercial one that I have in my woodshop are sharpened like a knife; from both sides. The angles of their edges are relatively obtuse.
Froes, still : There is an old expression in the southern Appalachians, "dull as a froe." This is important. A sharp froe won't split along the grain, it'll dig in and cause tearout. Think butterknife-sharp and you're pretty close. Double-sided bevels, all the way from edge to spine. A short bevel will break thin shingles. Wide (relatively) thin blade is best. No more than 1/4" / 6.5mm at the spine, full flat bevels to edge. At least 2 inches / 50mm wide.
Old Froes tend to be quite a bit thicker. They also tended to be made from real wrought iron which was quite soft and so needed the extra metal to resist bending/twisting in use.
I forged one for my Grandkids 2 Christmases ago; they were old enough to learn to build fires; but not to use a hatchet to make kindling. The froe keeps all the fingers away from the edge when used.
The Guru : I am Jock's son. I just wanted everyone here to know that he passed away in early January after spending several months in the hospital. I cannot comment on the future of this website or the various satellite sites he was managing as I am not responsible for them. I can tell you that he loved this community and I just wanted to thank everyone who supported him over the years.
The Guru : I am Jock's son. I just wanted everyone here to know that he passed away in early January after spending several months in the hospital. I cannot comment on the future of this website or the various satellite sites he was managing as I am not responsible for them. I can tell you that he loved this community and I just wanted to thank everyone who supported him over the years.
The Guru : May he rest in peace. I will ring my anvil for him.
The Guru : Pax vobiscum, Jock. :^( You were always kind to me and interested in our activities. Rest well, my friend.
The Guru : RIP Guru
The Guru : I hate to hear that. RIP, Jock. You were one of a kind.
I remember meeting Jock at a Quad-State many years ago; In pace requiescat!
RIP, Jock.
The discussion board here (like discussion boards in general, I think) hasn't seen a whole lot of use in the last few years. But there's a LOT of useful information on the site -- an iForge demo on froes, as one small example. If there's no one to keep it going, maybe ABANA could take it over, the way it did with Ron Reil's site.
R.I.P. : R.I.P. Jock
Peace to your family.
I recently had a long time member of SWABA/NMABA ask me if we could host the I forge pages on our club's website. I said it was possible but would be better if they were hosted by ABANA. He was worried about so much good information disappearing on the smithing community.
rolling mill plans : Hi
I purchased the rolling mill plans last sunday and still havent recieved download link in email. how long does this normally take?
Rolling Mill Plans : Dane, if you read up a few lines you'll see that the Guru died last month. I have a feeling that there will be no more sales from the Anvilfire store. Unless his apprentice can take over, but I don't know of any contingency plans for that. Or, for that matter, if anyone but Jock has the passwords. You may want to contact Hugh McDonald directly.
Anvilfire Store : To reiterate, please scroll up to Amanda's post of 12/08/2021. That's the last we've heard.
Stolen anvils, a message from ABANA :
Theft of anvils
Recently the Ag Hall of Fame in Bonner Springs, Kansas had been broken into and a number of anvils from their collection were taken. These anvils have a large number welded onto them as with a stick welder, so are pretty distinctive. The numbers were on different spots on the anvils, some on the horns and some on the bodies. Some of them have the names of cities or towns on them indicating where the collector acquired the anvil welded onto the bodies as I recall.
Please be on the lookout for these items in your travels, or on FB or auction sites you frequent, in-person auctions, etc.
If you find one or more of them, contact Ken DeVan, he is the Outreach Coordinator, or anyone from the Ag Hall of Fame. KenŌĆÖs email: Oregon.trail.farm@gmail.com.
The National Agricultural Center and Hall of Fame
630 N. 126th Street
Bonner Springs, KS 66012
Call: 913-721-1075
Email: info@AgHallofFame.com
ADDRESS
ABANA Home Office
PO Box 462, Johnstown PA 15907
GET IN TOUCH
Phone: (814) 254-4817
Email: centraloffice@abana.org
Website Donations Membership Conference Contact
Visit our website
Keep tabs on the conference announcements by visiting the ABANA site regularly
Artist-Blacksmith's Association of North America | PO Box 462, Johnstown, PA 15907
Unsubscribe anvilron50@gmail.com
Update Profile | Constant Contact Data Notice
Sent by centraloffice@abana.org powered by
Try email marketing for free today!
rolling mill plans : still haven't even seen a confirmation email after i bought the plans last sunday
WTF is going on im about to reverse the charge on paypal
Hydrochloric Acid : A friend is planning to use hydrochloric acid to treat mild steel before putting on a paint primer. Anybody have any experience with this? Can it be brushed on and hosed off, or does it need to soak in a tank? It's a long piece of track for a barn door, so not within my normal venue.
Dane- Rolling Mill Plan : Dane, please scroll up. The Guru has died and the fate of the site is in doubt. You probably should contact paypal.
Hydrochloric Acid : : Self Etching primers for steel contain Acid. Typically sulfuric, but some contain other types. I have not seen Hydrochloric Acid in a primer, it may by ok, especially if the metal is cleaned after the etch. He may want to be careful if using an etching primer in case the Acids are not compatible.
Robert Renton anvil : Hi I was hoping that someone on here to give me some information on anvil that I purchased. It's a 150 lb Robert Renton anvil forged in Sheffield
Looking for info on a 150 lb Robert Renton anvil
FUTURE OF ANVILFIRE : This is Dave Baker, Jock's friend and business associate. I have accepted the financial responsibly thru my business - Sheet Metal Work LLC. I will be paying the bills to keep AnvilFire.com running as long as my business is open. The store is no longer a valid area of the website as I cannot operate two businesses. I will be getting a programmer to help disable the store. I will do my very best to preserve all the information stored here, We cannot lose it. I will try to check in as often as possible. The site will be unmonitored. Any veteran Users out there feel free to offer help or corrections to other users. All we have is each other.
FUTURE OF ANVILFIRE : This is Dave Baker, Jock's friend and business associate. I have accepted the financial responsibly thru my business - Sheet Metal Work LLC. I will be paying the bills to keep AnvilFire.com running as long as my business is open. The store is no longer a valid area of the website as I cannot operate two businesses. I will be getting a programmer to help disable the store. I will do my very best to preserve all the information stored here, We cannot lose it. I will try to check in as often as possible. The site will be unmonitored. Any veteran Users out there feel free to offer help or corrections to other users. All we have is each other.
Thank You David!
Robert Renton anvil : No info in "Anvils in America," sorry. There were dozens of anvil makers in Sheffield between ca. 1750-1900, and the product all looks much the same.
Thanks Dave
Yes, thank you, David!
Thank you!
All of you are welcome.
Looking to learn Blacksmithing from a Master : Hey there I'm from Sioux Falls, South Dakota and would like to be an apprentice for someone, I'm a quick learner and have had experience in welding before if anyone can help let me know!
Thank you, Dave, for stepping in and keeping this valuable resource running.
Apprenticeships : Apprenticeships in the traditional sense no longer exist in this country. Follow the apprenticeship links under FAQs on the left.
Ready Reference : I apologize in advance if this isn't the place for asking such a question. I've wondered if you guys have ever given thought to creating a smartphone app for blacksmiths? I'm not taking about something that is in depth and comprehensive but rather something that has perhaps a glossary, color chart, safety section, a selection from your FAQ's, heat treatment guide for common steels, tong types and their use, tips -n- tricks, recipes (linseed oil, turpentine and bees wax blacksmiths goop for example).
Just something that has the type of lists, charts, and information that blacksmiths of whatever skill level could quickly refer to and have the app link back to this site if more was needed.
You may want to tell me to take a flying leap at a rolling doughnut, but I just thought I'd ask.
AIA purchase : I purchased a Anvils in America book from your website via Paypal last night. Am I going to receive an order confirmation? How can you be reached? E-mail?
Ken, since the founder of this site Died earlier this year; I do not believe the store is working. I would cancel the order and try elsewhere.
Kenneth; I don't use a smart phone and don't like to see them in the shop---so far my classes for college students have cracked 3 of them and several students have been asked to leave to use theirs as they are a safety hazard. There is already a great heat treating app out there that is used by a lot of bladesmiths and an actual computer with larger screen is better for researching stuff on. So my opinion is "the game is not worth the candle!"
what kind is this : hey there. so idk wat to do to find out any kind of info on this anvil, but id really like to know maybe how to look up its worth etc.etc. can you all help me out at all?
Any markings on it? What country is it in? What type of anvil, exp London Pattern? Worth depends a lot on LOCATION, Condition and Maker.
If you are in the USA or Canada you can send pictures to me by clicking on my name. Please include a side shot and a bottom shot, (the depression in the base of many anvils is indicative of maker) and a good shot of the face to learn the condition.
Peter wright anvil : Got this from an estate clean out. Beautiful anvil, its markings are: PETER WRIGHT PATENT 0 3 18 B ... thoughts or insight from you gents ?
Liams anvil : If it's got the flats atop the feet, it's the new style PW dating from ca. 1854-1929. The weight marks indicate it was 102 pounds when new. A very desirable maker and size.
Identify my anvil : Hi guys just wondering if someone could help identify a anvil i found. ItŌĆÖs come out of a shed thatŌĆÖs not been used in about 100years. Its located in Western Australia
I have photos but not able to post with this question
Patrick, you can send pics to me or Thomas (three posts up the board) by clicking on our names.
well, you used to be able to... apparently that feature no longer works. I'm at ALongmire4 @ gmail .com, remove the spaces.
Please help identify this anvil : I recently purchased a large old anvil it seems to be welded in three places the base the middle and then the top which is definitely hardened IŌĆÖm not sure about the horn there is a hardy hole and a small round hole behind that it has 250 on one of the legs and Z 70 on the back any help would be greatly appreciated I have pictures
Anvil ID : Rust, look at the post directly above yours.
Bessey clamps; repair : ¤æŗ hi all,
Quick question about F style Bessy clamps:
Anyone know what alloy they are or any heat treatment Temps?
I have a few that are in need of repairs
Thanks!
Someone here might know the answer for sure. But I'd bet on mild steel.
All steel alloys have essentially the same modulus of elasticity, meaning that hardened steel would flex as much as mild under the same load. Hardened steel can flex a lot further without deforming, but a clamp's designed not to flex.
You haven't said what's wrong with the clamps, but if you can straighten them cold, you won't destroy the plating.
Anvil mgf date : Hi guys... I'm a 66 year old retired outside tool rep in California. I've recently inherited my fathers old tool collection that dates back to my great grandfather. One of the tools is an old Hay Budden anvil, serial number 179500. I just spent weeks restoring it and mounting it to a new stump with all the original tools. Would love to send pics. Can anyone tell me the date of mfg on this old anvil?? Thanks in advance
Anvil mgf date : Hi Scott,
Your Hay-Budden Anvil based on the serial number 179500 was made in 1910. Hope this helps. Cheers!
Anvil mgf date : Hi Scott
1910 Cheers!
Anvil date : 1910 is by no means 'old' in anvil years.
Old Anvils Tools : The oldest known anvil in my shop is in a style they stopped making around 1780. I have a bickern that may well predate that one by another century or two, but who knows. My Little Giant trip hammer dates to 1916, and my Colombian vise dates to 1917. Good tools last. My latest tool dates to last week, when I reforged and ground a worn-out chisel into a fuller. I've also pressed rocks into duty; so they tend to be hard to date. :wink:
I have a postvise that Frank Turley believed was pre-1800 and a hammer I dug out of the mud under a scrap pile at an Ironmongers in the UK; steeled WI; but I can't say how old...
Old Disposable Razors : So; I've been stashing them away; figuring there must be SOMETHING to do with their small, stainless steel, high carbon, alloy blades; but having accumulated about two dozen, there's not a lot to work with when you contemplate the metal. Any ideas? Anybody experimented with theses?
Website Sales : Is anyone manning the website and fulfilling orders? I hadn't heard anything a week after I ordered and now I am seeing that it looks like the owner has sadly passed away. I am wondering if my order for two books will be shipped or if I need to submit a request to paypal to try to get refunded?
Disposable Razor Blades : Bruce;
years ago I considered a similar idea using old hacksaw blades for a pattern welded blade. Currently have a moderate collection (filling a quart tin can) and am slowly improving my forge welding skills.
Don
Web store order : I placed an order for Fuchs lube in early May and have not recipe it. Is the web store still up and running?
Anvilfire Store : Guys, Jock (the owner and guru) died in January and the store is not being manned. Dave B. has taken over paying to keep the site up, but not the store. He was going to get someone who knew how to disable it, but I guess that hasn't happened yet.
Submit a cancellation to PayPal or your credit card, tell them that the store is out of business.
Smallest I work with is bandsaw blades and pallet strapping. Razor blades could go in a "scrapmascus" billet.
McDonald Rolling Mill Plans : Greetings! For anyone who has been asking about the McDonald Rolling Mill Plans please head over to www.etsy.com/au/shop/McDonaldRollingMill to buy directly from Hugh (my 90!! year old grandfather)
Saw sharpeners leg vice : Hi, I have a very rare English saw sharpeners leg vice manufactured by Gilpins, stamped at base of leg. Another interesting feature is a short spring as presumably jaws don't need to open far? Jaws are around 14" wide. I noticed the one on your site has smaller jaws. Any further information or interest would be appreciated
Depression Era Fisher Anvil - 1929 : Hello - I have been doing extensive research on Fisher Anvil's and I also spoke to Mr. Kavett (Owner of fishernorris.com) and the Fisher Norris museum. He mentioned out of his entire collection that he has never personally seen the 1929 date on the Fisher anvils. It seems because it was at the peak of the depression era it is a very rare date/anvil. I was wondering if any of the gurus have some additional information on this anvil in particular? I inherited it from my late father and one day I am going to get into the blacksmithing craft when time allows. I recently got out of the Army after a 10 year stint and am busy doing the stay at home dad gig while my wife is back at school so at this time I am fond of the craft - just can't find the time to pick up the hobby right now. Any information would be greatly appreciated!
razor blades : Remember that razor blades are stainless, so you are pretty much limited to canister scrapmascus to get anything to stick.
Rolling mill plans help : Hi,
I bought the rolling mill plans but didn-t receive any link to download.
The contact page doesnt' work and the no answer from the webmaster email.
Bellow, the informations from paypal
Num├®ro de transaction
3HX26587WK101120A
Date de la transaction
16 juin 2022 12:49:43 HAP (├ēUA)
Marchand
DEMPSEYS FORGE
paypal@anvilfire.net
Instructions au marchand
Vous n'avez saisi aucune instruction.
Adresse de livraison
Jean-fran├¦ois MONY
LA PAPILLONNAIE
35460 TREMBLAY
France
Informations sur la livraison
Par d├®faut
Thanks for help
JFM
Rolling mill plans help : Hi,
I bought the rolling mill plans but didn-t receive any link to download.
The contact page doesnt' work and the no answer from the webmaster email.
Bellow, the informations from paypal
Numķro de transaction
3HX26587WK101120A
Date de la transaction
16 juin 2022 12:49:43 HAP (╔UA)
Marchand
DEMPSEYS FORGE
paypal@anvilfire.net
Instructions au marchand
Vous n'avez saisi aucune instruction.
Adresse de livraison
Jean-franńois MONY
LA PAPILLONNAIE
35460 TREMBLAY
France
Informations sur la livraison
Par dķfaut
Thanks for help
JFM
ROLLING MILL PLANS ITALY : McDonalds rolling mill
Ciao! I have purchased rolling mill plans and still waiting for the link. Unfortunately thereŌĆÖs no contact page on the site and I have got no answer from webmaster@anvilfire.com
Looks like I am not the only one in this situation. I am sure this place is no scam, however is it possible for someone here more familiar with the merchant to let him know some friendly european blacksmiths are willing to start their build?
Thank you all for your help!
Simone - Italy - teierina@hotmail.com
ROLLING MILL PLANS ITALY : McDonalds rolling mill
Ciao! I have purchased rolling mill plans and still waiting for the link. Unfortunately thereŌĆÖs no contact page on the site and I have got no answer from webmaster@anvilfire.com
Looks like I am not the only one in this situation. I am sure this place is no scam, however is it possible for someone here more familiar with the merchant to let him know some friendly european blacksmiths are willing to start their build?
Thank you all for your help!
Simone - Italy
ROLLING MILL PLANS : Ciao! I have purchased rolling mill plans and still waiting for the link. Unfortunately thereŌĆÖs no contact page on the site and I have got no answer from webmaster@anvilfire.com
Looks like I am not the only one in this situation. I am sure this place is no scam, however is it possible for someone here more familiar with the merchant to let him know some friendly european blacksmiths are willing to start their build?
Thank you all for your help!
Simone - Italy
Simone, sorry to inform you but the website owner operator has passed away. You will have to go through Paypal to cancel and get a refund.
Above is this note that may help you.
McDonald Rolling Mill Plans : Greetings! For anyone who has been asking about the McDonald Rolling Mill Plans please head over to www.etsy.com/au/shop/McDonaldRollingMill to buy directly from Hugh (my 90!! year old grandfather)
Ciao ptree,
thank you so much for your help! I'm so sorry to hear the owner is not anymore with us, hope he will inspire me from above during the build! I'll move on with Hugh!
GRAZIE!
Simone
Simone, Prego
Depression Era Fisher : Brad, the Great Depression started in August of 1929 so there was over half a year preceding it's start and was NOT the peak by any means. "Black Thursday" October 24 1929 was even later in the year; however a recession had started earlier and in the summer of 1929 factory production had already slowed when compared to stock prices.
Anvil Identification help : Hi can anyone help me figure out information on an anvil? I have pictures but I donŌĆÖt know how to post them...I can send in an email though...thank you!!!
Anvil ID help : Candy, just click on Thomas Power's name in the post above yours, or click on mine. This should open an email link and you can send us the pictures.
Price / value Sure Grip : I would like to sell this Sure Grip Caulking Vise, Butts & Ordway, Boston, I bought 2 want to sell one, I have pictures, I believe It is complete.
If you are not willing to provide free intercontinental shipping; it would help if you list a location of the item---World Wide Web
Wrought iron bear stamp. : I am restoring a large Austrian wrought iron tower clock C1790.
The only marking is a "Bear" (10mm x 7mm)stamped into the wrought iron.It is very clear.I can supply a very good image if required.
Does anyone know of a listing of European blacksmiths that might identify the stamp.Many thanks, Matthew.
Bear Blacksmith stamp. : I am restoring a large Austrian wrought iron tower clock C1790.
The only marking is a "Bear" (10mm x 7mm)stamped into the wrought iron.It is very clear.I can supply a very good image if required.
Does anyone know of a listing of European blacksmiths that might identify the stamp.Many thanks, Matthew.
Hi,
I am a clockmaker in Australia.
I am restoring a large wrought iron tower clock movement.There is only one identification stamp. A bear (10mm long x 7mm high).
The clock I am told was made in Austria around 1760-1800.
I can send a clear picture.
Does anyone have a list of European blacksmith marks so I can identify the stamp?
Many thanks in advance.
Matthew.
Hi,
I am a clockmaker in Australia.
I am restoring a large tower clock movement made from wrought iron. It is Austrian C1760-1800.
There is only one stamp/marking on the frame, a bear. I can send a clear picture.
Would anyone have a list of European blacksmiths that might help me identify the bear stamp.
The stamp measures 10mm long x 7mm high and is very clear.
Many thanks in advance.
Matthew.
I am a clockmaker in Australia and have recently purchased a large wrought Iron Tower clock movement which is 99% complete.
It measures about 1.6 metres long.
It has a "bear" stamped in the main frame. No other markings.
Can anyone out there tell me more about the stamp in the iron? I can send a clear picture.
The provenance is that the clock came from Burgenland in Austria. I was told it is C1670 but have since been assured it would not be that old(perhaps C1760-1800).It was bought to Australia in around 1970.
Many thanks in advance,
Matthew.
Matthew,
I've read a little about historic clockmaking in Sweden (okay, one book and it only touched on tower clocks). But unless you know better, it seems like the frame might have been forged by the clockmaker, subbed out to a smith, or perhaps ordered directly from the ironworks (which would have had triphammers suited to large stock). Just for fun, I found a bear stamp used by Bj├Črneborg in Sweden. It's at digitalmuseum DOT org /021028863022/jarnstampel. Swedish iron was exported mostly to England, and it seems unlikely that custom work (if they did any) would have gone far. But that might give you one idea, anyway.
Trenton Anvil Date : I have a Trenton anvil with A10009 on it. Can anyone help with a manufacture date?
Trenton Anvil Date : I have a Trenton Anvil with A10009 stamped on it. Can anyone help with a manufacture date?
Trenton Anvil Date : I have a Trenton anvil with A10009 on it. Can anyone help with a manufacture date?
Rons anvil : That would be 1899, according to the book.
German Trenton Anvils : So I just bought a German made Trenton anvil. It is 85 pounds and has a stacked solid wrought stamp. What years were they made with the stamps like that? Are they rare? Any information would be greatly appreciated!
German Trenton anvils : I have an 85 pound anvil that is stamped with a stacked solid wrought. Are these German made Trentons rare? Age?
German Trentons : are not that rare, and they date from around 1890-1898 while the Columbus Forge and Iron company was getting set up to make them. There's more in the book, but I don't have it in front of me at the moment. CF&I bought the trademark from an importer, if I recall. I'll try to remember this question next time I'm near the book.
German Trentons, again : Here is the story on those: The Trenton Vise and Tool works of Trenton, New Jersey, made mostly vises, hammers, and pickaxes. They were owned, in whole or in part, by H. Boker, a German immigrant who lived in New York City and specialized in importing tooling from both Germany and England. Apparently the H.D. Kimbark hardware company commissioned him to have the rest of the Boker family in Germany (yes, they're the knife and scissor Bokers) make the then-new Farrier's pattern anvil for them starting in around 1883. Since the Boker family owned the already known "Trenton" trademark, they stamped these and, later on, regular London pattern anvils, with the diamond Trenton logo and, since this was during a time of trade tariffs, H. Boker and Co. Germany. Not until 1892 did the McKinley Tariff Act force all imports to be marked with country of origin, but tools and fine china had been required to be so marked starting around 1876. Anyway, the Trenton Tool and Vise Company seems to have gone out of business in the late 1890s. H. Boker and co. then contracted Columbus Forge and Iron to begin making anvils in the U.S. that would be cheaper than importing them from Germany. Boker owned the Trenton trademark, and it is suggested they asked CF&I to use that rather than to try to get into the market with an unknown name.
The owners of CF&I seem to have bought the trademark by 1899. They also made post vises and forge blowers, among other things. Their own trademark they were using prior to adding Trenton to the anvils was "Indian Chief." You see their post vises from time to time, on which the mounting bracket has the head of a Plains Indian in a war bonnet cast in bold relief.
There's more info, but for that you should buy the book yourself and support Mr. Postman's family!
Anvils in America by Richard Postman. Worth every penny, just don't try to buy it here, the Anvilfire Store, like Jock, is defunct.
Alan L : An excellent summation. I'm sorry that Mr. Postman didn't finish his followup book, tentatively titled "More Anvils" according to some correspondence I had with him. Maybe someone of the "old crew" here (more knowledgeable than I) should undertake the quest.
This remains a great resource, and I thank those who are keeping it going1!
History of anvil : I just recently purchased a Trenton Anvil. IŌĆÖm trying to find the history behind it (year made, where from ETC. ItŌĆÖs stamped. (200 V,H, 198886). Thank you for the help!
I've never seen an Indian Chief cast in bold relief; but I've seen a lot stamped... even owned a couple of Post Vises that way.
Parkers Trenton : All Trentons, except the ones stamped "Made in Germany," as noted above, were made in Columbus, Ohio by the Columbus Forge and Iron Company. The 200 is the weight in pounds. It was made between 1931 and 1935, according to the book mentioned above. Probably closer to 1932. The letters are the initials of the guys who made it. The full company history (well, most of it) is located two posts above yours. They stopped making anvils around 1953.
Thomas, I've seen it both ways, but only raised on a cast bracket for a forged post vise, kind of like the Keen-Kutter ones, and stamped on a forged bracket.
Archives : Jock, does the archives still work, I was here in 98 and wanted to look at some very old post mostly pictures.
Anvil Identification : Hi, am chasing any info on an 1920's era anvil.
More so any history on the maker.
It's in good condition and has TOMCO easily readable on the side in largish lettering. It has 1 1/2 underneath the name. (One and a half hundred weight?)Also in large font the letter 'S' . 8 in the top right hand corner. I am working on getting pics to help but any starting point would be good. It was located in Margaret River West Australia and was reportedly bought by a wheat belt farmer in the 20's. The only google results are of the sold ad from gum tree (a online marketplace) here in Australia. A quick bit about me.. I'm employed in a scrap metal yard and see things such as this come through occasionally and we like to hang on to the older stuff. Mostly we can research ourselves but are drawing a blank on this one.. Any help is appreciated. Thanks in advance.. Jason
Book Ordering Site still up : I tried to order a book and I haven't heard any response but Paypal charged me. I tried to write them through the form but I'm getting lots of webmaster errors. One went through but no response. The phone number on the website footer doesn't work (number out of service). Did I get scammed $100+ ?
I tried to order a book and I haven't heard any response but Paypal charged me. I tried to write them through the form but I'm getting lots of webmaster errors. One went through but no response. The phone number on the website footer doesn't work (number out of service). Did I get scammed $100+ ?
I tried to order a book and I haven't heard any response but Paypal charged me. I tried to write them through the form but I'm getting lots of webmaster errors. One went through but no response. The phone number on the website footer doesn't work (number out of service). Did I get scammed $100+ ?
Book Ordering Site still up : I tried to order a book and I haven't heard any response but Paypal charged me. I tried to write them through the form but I'm getting lots of webmaster errors. One went through but no response. The phone number on the website footer doesn't work (number out of service). Did I get scammed $100+ ?
Bob, Jason. The Guru, Jock Dempsey died last year. For paypal ask them to refund.
Book ordering : Guys, read the forum a bit before you try to order, and then
DO NOT USE THE STORE! The owner is deceased and your order will NOT be filled. Send Paypal a complaint and tell them what happened. They will eventually refund your money, because they won't be getting any answers from here.
Supposedly Dave B. is working on getting it taken down, but he doesn't have all the keys to get under the hood. It's amazing how difficult it is to remove things like that. Especially since Jock custom programmed the whole site, nothing is off the shelf.
Jasons anvil : I've never heard of Tomco, but that doesn't mean much, I haven't heard of a lot of Australian stuff. I suspect they were cast for a regional distributor by a steel foundry down there somewhere, that's the usual story for oddball anvils. And I think you're right about it being 1 1/2 CWT. Put it on a scale and if it weighs 76 Kg / 168 lb / 12 stone, that's it!
Post : I went back through post to see what was happening a am sorry to hear of Jock's passing.
Multiple posts : Sorry about the multiple posts above about the book ordering. It was giving me errors and didnŌĆÖt show my post when I sent it. IŌĆÖve asked for a PayPal refund. I never thought to hunt through a forum to find jout if the store was valid. I wonder how many people are placing orders still.
Is the Anvilfire store still operational? I ordered some punch lubricant a while ago, and nothing has shown up.
No the store is defunct as the owner of this site has died. It is being run for its info only ask Paypal for a refund. Sorry.
Old Hands and Hats : So; how many "old hands" still have one, or more, Anvilfire hats?
Happy Equinox! Cool days and dark nights for forging!
Old Hands and Hats : I never had one to begin with, or I'd still have it. And yay for cool days!
Mc Donald Rolling Mill : Hello, I have just purchased[23/9/2022] the plans for the rolling mill but have not heard back from you yet. Pay pal purchase number 27B12847WY952282M. was not sure if this was the correct way to contact you but every other attempt just bounced back. E-mail is hhhscrotum@hotmail.com
Rolling mill : Scott, tell PayPal to refund your purchase, as the owner died in January and the store no longer exists.
You can still get the plans from the designer's grandson at
www.etsy.com/au/shop/McDonaldRollingMill
Mc Donald Rolling Mill : It has been 6 days since the money for the McDonald Rolling Mill was charged to my Pay Pal account but I have not reieved any plans or online comunication yet. Email hhhscrotum@hotmail.com
Rolling mill : Scott: Look up. One post up, in fact.
Cleaning anvil : Hello! I live in New York State and have a decent anvil that I have only used once in the past 5 or 6 years. I have decided itŌĆÖs time to get back to the forge a bit. I have been keeping my anvil out in a shed and unfortunately forgot to cover my anvil last time I used it. It has a bit of rust on it , no pitting that IŌĆÖve noticed. Just wondering what the best way to clean this surface rust off and maybe prevent it from rusting in the future. Thank you so much for your time! Also, is there a way to search out that question on previous posts? It seemed like a pretty standard question that you most likely have answered before but I didnŌĆÖt see a search bar.
Cleaning anvil : Hello! I live in New York State and have a decent anvil that I have only used once in the past 5 or 6 years. I have decided itŌĆÖs time to get back to the forge a bit. I have been keeping my anvil out in a shed and unfortunately forgot to cover my anvil last time I used it. It has a bit of rust on it , no pitting that IŌĆÖve noticed. Just wondering what the best way to clean this surface rust off and maybe prevent it from rusting in the future. Thank you so much for your time! Also, is there a way to search out that question on previous posts? It seemed like a pretty standard question that you most likely have answered before but I didnŌĆÖt see a search bar.
Cleaning anvil : A wire brush in an angle grinder should do the trick. Prevention (in so far as possible, rust never sleeps): when you are done forging and the anvil is still warm, spray with WD-40 and cover with a tarp. It worked well for me when I had an outside/under cover shop.
Well I claim that the best way to clean an anvil's face is to hammer red hot steel on it! I have a HB that spent 50 years in an unheated shed in a swampy area in Ohio. The face was finely pitted with condensation rust. I just started using it and now the sweet spot is smooth and gleaming while the heel still shows the pitting.
Cleaning Anvils : I live between the swamp and the river in Southern Maryland, and at certain times of year, or weather conditions, the condensation just drips off the anvils when left uncovered! With most of them, I keep a flat board on the face and old socks on the horns/bicks. The more important ones get cloth or canvas draped over them. The only trick is to trim the cloth where it doesn't tempt the mice to nest in the "draperies."
Bruce, can I flat rate ship you a dozen barn cats to help with that?
X1-X2 power hammer plans : Interested in building the X1 power hammer, while reading through the material you mentioned that you have revised plans for X2( if I recall correctly) , but due to complexity you might supply them upon request. I would like to obtain plans for both the X1, and the X2 power hammers and would like some assistance in purchasing them. I am a machinist with a full shop and would like to take a crack at either one of the. I occasionally do side work fabricating dies for blacksmiths and their power hammers.
Russ Faison
13100 Joy rd
Lusby Md 20657
Barn Cats: : Thank you for the generous offer, but they might scare off the snakes. ;-)
Great; I can include a huge box of rattlesnakes as well if you are running low...
What is the study of machines called : This is the only place I know where to post this and get positive results...
The older I get the more intrigued I am as to how our society works. I was never interested in machines when I was younger. I never had a father that tinkered with metal parts, in a machine shop, metal shop etc. I was never raised to understand how tools worked. I was/is never good at math and so here I am 40 years later still trying to figure all of this out. My interests change constantly and that certainly doesn't help any.
Now I could do a simple Google search and type in "What is the study of machinese called" and get many answers but what does it mean really? Is the study of machines called "Mechanics"? Engineering? Physics?
I used to play with Lego's when I was a kid and I was in love with all of the mechanical parts and how they worked but my mind could never wrap around it.
And to add to this, are there any good books that have projects that I can build in my garage that are fun to use, ie; gears, cogs and pulleys?
I'm at a loss of words for what this side of study is called. Sorry for my naivete...
FuchsForge Ease : Will you please check on an order I placed and paid for through Paypal on October 19th 2022?
Rusty Osbourne, the owner/operator of this site passed away, you will have to go to paypal for a refund.
DIY Propane forge : I have a industrial grate for covering man holes. Can I use this as the bottom of my forge where material will sit on. Will it affect my metal IŌĆÖm forging
What is the study of machines : Matt H., there are a lot of books that cover this subject and I found that pinterest is a good source to find books/subject to peruse. Here is a link that shows different mechanisms in motion so you can get a visual.
http://507movements.com/about.html
scroll thru the different items, it is pretty cool
David Baker, X-1plans : Hey Dave I came across the X-1 power hammer and would like to do a build, I see that you and Jock worked together to build the original. Can you contact me and let me know what you need from me to get a set of plans? As I read through the page Jock mentioned that you guys had an upgraded version(X-2) that had modifications/improvements, are they available? Thanks for any information that you can provide.
Jeremy,
Your grate sounds like it's probably cast iron, in which case it could well melt in the bottom of the forge. Even if it didn't, it would suck up a lot of heat every time you lit the forge, and would probably scale away to nothing after not-that-many uses. Most folks use either castable refractory or kiln shelf for forge floors, generally with a layer of kaowool or insulating fire brick underneath.
Russ Faison,
That (507) is exactly the type of website I am looking for, thank you very much!
Matt H. : Very glad to help out, I like looking up similar subjects myself!
Thomas Powers : Thomas had surgery to remove a large very aggressive malignant brain tumor a little over a week ago. I talked with his wife yesterday and she says the road to recovery will be long and difficult. Knowing she has a lot on her plate I only had a short conversation with her. I know some on this form know Thomas or have enjoyed his postings so join me in prayers for Thomas. LXIV,
Thomas powers : Lots of conversation about Thomas on Iforgeiron, I had some trouble accessing it,finally found you have to drill down to prayers.LXIV,
Thomas Powers : Thank you, Alex, for keeping us informed!
Ed Owen : Grasping Vice
You asked if anyone knew what a Grasping Vice was used for to let you know.
In 1977, I moved into a house in Sheffield, UK, about a quarter of a mile from Mousehole Forge.
In a shed in the garden, there was a leg vice. I showed it to my uncle, who was an Apprentice Buffalo Horn Craftsman in the 1920s. Buffalo horn was used in the cutlery trade to make knife handles etc. He described a kind of leg vice that was similar to the Grasping Vice. Buffalo horn was placed between the two long legs and flattened when the vice was closed. I suppose the horn was treated in some to prevent it from cracking.
I hope this helps
Boring' no unplated/painted metal around. I keep asking about the collimater for the Gamma Ray Knife though....saw one once that was SOLID Tungsten Carbide very heavy solid and impressive....
tungsten carbide stuff : There was an item recently on 'How Do They Do It?' about an oil well drill bit that was solid tungsten carbide with diamond inserts. $40k each.
Thomas : Welcome back!
Grasshopper treadle hammer plans : Hi all and happy New year. As per subject line, does anyone know where I can get a set of plans for the grasshopper treadle hammer? All the links I've followed online are either old and inactive or broken. Thanks in advance. K
Shipping a hammer : I have a 100# Chambersburg utility hammer. I was wondering if laying it down in crate for shipping is OK? It will be well supported.
20
20
20
20
20
20
20
20
20
20
20
20
20
20
20
20
20
20
20
20
20
20
20
20
20
20
20
20
20
20
20
20
20
20
20
20
20
20
20
20
20
Acunetix : 555
Acunetix : 555
Acunetix : 555
Acunetix : 555
Acunetix : 555
Acunetix : 555
Acunetix : 555
Acunetix : 555
Acunetix : 555
Acunetix : 555
Acunetix : 555
Acunetix : 555
Acunetix : 555
Acunetix : 555
Acunetix : 555
Acunetix : 555
Acunetix : 555
Acunetix : 555
Acunetix : 555
Acunetix : 555
Acunetix : 555
Acunetix : 555
Acunetix : 555
Acunetix : 555
Acunetix : 555
Acunetix : 555
Acunetix : 555
Acunetix : 555
Acunetix : 555
Acunetix : 555
Acunetix : 555
Acunetix : 555
Acunetix : 555
Acunetix : 555
Acunetix : 555
Acunetix : 555
Acunetix : 555
Acunetix : 555
Acunetix : 555
Acunetix : 555
Acunetix : 555
The spambots have found us. : Oh well, it was nice while it lasted. Dave, if you can close the forum for posting what's left can be saved as an archive.
Spambots: : Don't give up; just ignore them. Looks like temporary gibberish to me; and this can still be a valuable resource.
JK Anvil : A friend has a JK farriers anvil with a swelled, up swept horn. Do anyone have info regarding manufacturer of the JK brand anvils?
JK anvil : I've not seen a JK, but Jim Linzy made some with a JL cast as an interlocked single letter in a little diamond, could that be it? Or maybe JHM? All of the swelled-horn farrier's anvils are cast, and made no earlier than the late 1960s.
Spambots : Looks like they were trying to insert a link or something. Makes me glad Jock was smart enough to write his own code that prevents that sort of thing.
Last anvil maker print : Just saw he passed after ordering. If his family still sees this message, I'd love to help preserve some of the information on here.
Anvil identification : Hello, I am relatively new to blacksmithing and was able to acquire an anvil for a fair price and find it very difficult to positively identify. What I have been able to glean is that it is 112 lbs. give or take by the stamped 1,0,0 on the one side. The side opposite has a boldface capital letter "I" near the top which, and I cannot find the source again to save my life, I think indicates the center. Below that are the letters I L L possibly another I, (IILL) that is very faint and marred. Other than that there are no serial numbers or touch mark to speak of, much less a date. It looks to be an American style forged, not cast, with a close resemblance to Mousehole or William Foster in appearance.
Have you any tips on where to find more about said anvil, other than AIA?
Thanks
Gurus passing : I see I'm a year late, but I haven't visited the site for some years. This site has always been amazing. Thanks to David Baker for keeping it up. Hello Alan, P tree, Atli, and any I forget. Nippelini?
I haven't actually been forging much until now. Involuntarily retired, for the now. I found an old knife blank that I'd made years ago, and heat-treated it. so now I'm back to constant sanding. . ..
Anyway, forge on, survivors!
Anvil ID : DRG, you can send me pictures. click on my name below and it should open an email box.
Hi Dave!
J : J
Hhh : Skkd
Last anvil maker print : If anyone is looking for the prints, contact the artist Nathan Green directly. I was able to get them
20
20
20
20
20
20
20
20
20
20
20
20
20
20
20
20
20
20
20
20
20
20
20
20
20
20
20
20
20
20
20
20
20
20
20
20
20
20
20
20
20
Testing : 555
Testing : 555
Testing : 555
Testing : 555
Testing : 555
Testing : 555
Testing : 555
Testing : 555
Testing : 555
Testing : 555
Testing : 555
Testing : 555
Testing : 555
Testing : 555
Testing : 555
Testing : 555
Testing : 555
Testing : 555
Testing : 555
Testing : 555
Testing : 555
Testing : 555
Testing : 555
Testing : 555
Testing : 555
Testing : 555
Testing : 555
Testing : 555
Testing : 555
Testing : 555
Testing : 555
Testing : 555
Testing : 555
Testing : 555
Testing : 555
Testing : 555
Testing : 555
Testing : 555
Testing : 555
Testing : 555
Testing : 555
20
20
20
20
20
20
20
20
20
20
20
20
20
20
20
Testing : 555
Testing : 555
Testing : 555
Testing : 555
Testing : 555
Testing : 555
Testing : 555
Testing : 555
Testing : 555
Testing : 555
Testing : 555
Testing : 555
Testing : 555
Testing : 555
Testing : 555
Testing : 555
Testing : 555
Testing : 555
Testing : 555
Testing : 555
Testing : 555
Testing : 555
Testing : 555
Testing : 555
Testing : 555
Testing : 555
Testing : 555
Testing : 555
Testing : 555
Testing : 555
Testing : 555
Testing : 555
Testing : 555
Testing : 555
Testing : 555
Testing : 555
Testing : 555
Testing : 555
20
20
20
20
20
20
20
20
20
20
20
20
20
20
20
20
20
20
20
20
20
20
20
20
20
20
20
20
20
20
20
20
20
20
20
20
20
20
20
20
20
Testing : 555
Testing : 555
Testing : 555
Testing : 555
Testing : 555
Testing : 555
Testing : 555
Testing : 555
Testing : 555
Testing : 555
Testing : 555
Testing : 555
Testing : 555
Testing : 555
Testing : 555
Testing : 555
Testing : 555
Testing : 555
Testing : 555
Testing : 555
Testing : 555
Testing : 555
Testing : 555
Testing : 555
Testing : 555
Testing : 555
Testing : 555
Testing : 555
Testing : 555
Testing : 555
Testing : 555
Testing : 555
Testing : 555
Testing : 555
Testing : 555
Testing : 555
Testing : 555
Testing : 555
Testing : 555
Testing : 555
Testing : 555
Pocketknife springs : I am a semi-rookie bladesmith working on my first folding knife, and have had no luck using old files as the source material for the spring. Would mild steel work? If so, how should I heat treat it? If not, what should I use and how should I heat treat it?
pocketknife springs : You can use files, but the spring has to be very thin and you have to temper it properly, which means after you harden it, heat it to around 750 F. Mild steel won't work, it'll just bend.
If you still can't get the file steel to work, try old garage door springs. You can get by tempering those at 450F.
anvil vise combination : I am trying to find some information on anvil/vise combo pat. 1914, like in Mr. Mays collection. interested in where the item was made, main usage, and current value of item in very good condition. Appreciate any information/blacksmith and collector.
anvil-vise combination : These were the cheap Chinese junk multitool of their day. Some are better made than others, but none are useful an anvils. They were made at various foundries around the USA, yours should have something besides just the patent date on it somewhere. They do okay as vises, as long as you don't hit it with a hammer. The "anvil" part is hollow cast iron, also not suited for hitting with a hammer. Depending on the model, it may have been attached to a patent all-in-one blacksmithing kit that included a tiny forge pan and hand crank blower. They were sold to people who didn't know any better through all the major retail catalogs of the day, like Sears, Roebuck and Co. and Montgomery Ward, etc.
The fact that you rarely see them with the forge and blower shows haw quickly those parts tended to break and get tossed. As I said, the vise part is okay as a vise, but usually not as suited to beat on as even a modern vise with "anvil" topped screw box.
In very good condition I see them priced (rather hopefully) in the $150-$300 range, aimed at the same market as the original. They are not particularly collectible without the rest of the forge kit, and I don't know any actual blacksmith who'd give more than $50 - $75 for one, and then just for the novelty of them.
Good luck with it, if you're trying to sell. If you like it as man-cave decor, they're great for that. Good for cracking walnuts and brazil nuts!
Anvil-Vise : I will say that these (and other) small, cast iron "anvils" are handy for copper work and other non-ferrous metals. It will even handle steel strap and such if sufficiently thin. More a general home workshop tool than something for any serious forging. More than a toy, but not to be over-stressed.
Anything frozen by rust... : Old timer solution: Vinegar is an effective rust remover to loosen bolts and anything locked by rust. Need patience and multiple applications. Use gravity to help penetration. Main drawback. Acidity of vinegar will initiate more rust if vinigar is not passivated. Passivation can be done by flushing with water then applying solution water with baking soda. In case of bearing / journal, drying plus heavy oil, STP oil addive, corrosion inhibitor / VCIs.
Old timer solution: Vinegar is an effective rust remover to loosen bolts and anything locked by rust. Need patience and multiple applications. Use gravity to help penetration. Main drawback. Acidity of vinegar will initiate more rust if vinigar is not passivated. Passivation can be done by flushing with water then applying solution water with baking soda. In case of bearing / journal, drying plus heavy oil, STP oil addive, corrosion inhibitor / VCIs.
Verb: bellow blow stoke charge : Surely there is a shorter way for a blacksmith to describe the ancient method of "use the bellows" on a fire? But no verb that I can find. Not turbocharge (turbine). I'd think "to bellow" a fire but no dictionary I've found supports that. ???
I think it's just "blow," in English, anyway.
Hugh McDonalds rolling mill plans : Purchased the rolling mill plans via the store, never received a download link. No of the contact info is working or correct, so I'm trying this as a last ditch effort.
rolling mill plans : The Guru died a year and a half ago; the store is defunct. Apply to Paypal for a refund. The plans are available from the designer's son at
www.etsy.com/au/shop/McDonaldRollingMill
Anvil I D : Recently found Anvil with no visible maker marks but has 225 (weight ?) and A23431 (ser #?) at the base of the anvil. It's
30 " long and 4 1/2 wide. It is also forged with a great ring to it.Any ideas of maker and age? Thank you. I can also send a pic...
Anvil I D question... I have a large anvil with no visible maker marks. Only 225 (weight? and A23431 (serial#?) at the base of the anvil It's 30" long and 4 1/2 wide.Has a very nice ring and the square holes at the base (forged?) can send pics...
Anvil I D question... I have a large anvil with no visible maker marks. Only 225 (weight? and A23431 (serial#?) at the base of the anvil It's 30" long and 4 1/2 wide.Has a very nice ring and the square holes at the base (forged?) can send pics...
Daves anvil : Sounds like a Hay-Budden or a Trenton. Is the 225 stamped on the side or on the front foot? If it's on the side, it's a Hay-Budden, and was made in Brooklyn, NY in 1920 by the serial number. Hay-Budden made anvils under many trademarks, always stamped VERY lightly high on the side near the face if the horn is pointing to your right. It'll have a cast mild steel base forge-welded to a forged tool steel top half at the waist. It will also have an hourglass-shaped depression under the base.
If the 225 is on the front foot, it's a Trenton, made in Columbus, Ohio in 1901. It will have a forged wrought iron body with a tool steel top plate. Trentons were also made for dozens of wholesalers, and may or may not be marked. If the weight is on the foot, and there's a capsule-shaped depression under the base, it is a Trenton.
Without seeing pics, that's a reasonable guess. IT's also possible it could be something else. You can send me pics by clicking my name.
Post Vise Identification/Restoration : Hi there-I was recently gifted an old post vise that appears to be hand forged?-I'm a complete novice so I could be totally wrong. I haven't gotten through the rust yet, but I did manage to disassemble it without breaking anything. I've reviewed your wonderful post on the subject and was hoping I could possibly send some photos and maybe learn a bit more about this vises history. The only info I have is that the house where it was found used to be a corral.
I have read you wonderful post on post/leg vises and it was very informative. I was recently gifted a post vise from someone whose house used to be a corral (he found it near the back of the property). I'm working to restore it, and would love to send/or post photos to get a more experienced eye on it. Is there a way to do this? Thank you very much!
Post vise : Unless there's a name on it, these are almost impossible to attribute or date. Jock's post about them is about all there is, and you can add Frank Turley's observation that if the rectangular parts have heavily chamfered corners, it's probably English, if they're sharp corners, they're American and later. If the spring is mostly boxed in by steel plates it's German.
The Guru died a while back and this site isn't really as helpful a p[lace to ask questions as it used to be. You can check these threads on www.bladesmithsforum.com for a little more info:
https://www.bladesmithsforum.com/index.php?/topic/42052-restoration-rusty-post-leg-vise
https://www.bladesmithsforum.com/index.php?/topic/36755-spring-for-post-vise
https://www.bladesmithsforum.com/index.php?/topic/30125-post-vise-repair-help
https://www.bladesmithsforum.com/index.php?/topic/41963-post-vise-repair-and-stand
Daves anvil : Alan The weight and serial # are on the front foot and it has a large depression under the base. I tried to send pics by clicking your name and it doesn't work for me. Thanks for your help.
Daves anvil : Sounds like a Trenton for sure. Try AL ong mire 4 @ remove the spaces and add gmail.com .
What oil for blower electric motor : I have an old Champion variable speed electric blower. It has oil ports with oil wicks in it. IŌĆÖm trying to figure out what type of oil to use in it. Is there a special type of oil? Does non detergent 30 weight oil or 3-in-1 oil work?
oil for blower motor : Bill, 30W is too heavy and 3-in-1 is too expensive. Find a hardware store that supplies HVAC trades and get some "zoom-spout" oil. They use that to oil electric blower motors in furnaces, so it ought to work for yours.
Daves anvil : it was an early Trenton that had an hourglass-shaped depression. I forgot they did that prior to around 1910.
Oil Weight vs. Blower : When I was first getting started, I read that one of the problems with traditional hand-cranked blowers was that they leaked oil. I decided to put some 90 weight oil, that I had acquired somewhere, into the blower. Big mistake, the blower froze up for a week. Fortunately, this was on a farm forge I only used for demonstrations; but I've been a lot more cautious, ever since.
air quenching steels : I want to forge tools from S7 or H13. I forge the working end andlet it air cool. The struck end I grind a dome end but otherwise leave it annealed. On short tools I worry about heat from the working end migrating back. Can I water quench the struck end as longasit doesn't show color.
I am an old guy and an experienced hobbyist, working alone in Binghamton, NY.
another question: is there a significant difference between S7 and H13 for my tools?
Thomas Powers : Got word that Thomas Powers passed away a few minutes ago. What can I say,he will be missed. LXIV,
Thomas Powers : Sad news to many of us in the blacksmiths community. Thomas Powers passed away today. I will Miss Thomas as I'm sure many of you will as well. LXIV,
Thomas Powers : I am sorry to hear it. Thanks for letting us know, he will indeed be missed.
Lost blacksmiths : Another loss. Nol Putnam died a week and change ago.
Air quenching steels : Sorry, missed the question amidst the shock of losing Thomas.
Yes, you can quench the struck end. I haven't noticed much practical difference in use between S7 and H13 for slitting chisels (the only thing I use them for), but supposedly S7 is tougher, while H13 retains hardness at higher heat. They both do the job.
DEMPSEYS FORGE : This place is not in business any longer? I ordered a copy of AIM and got nothing and it's been a month. No phone number that works either...disappointed for sure.
DEMPSEYS FORGE : This place is not in business any longer? I ordered a copy of AIM and got nothing and it's been a month. No phone number that works either...disappointed for sure.
Dempseys Forge : no longer exists. Ask Paypal for your money back, Jock Dempsey died two years ago and left no provision for anyone to be able to turn off the store. I keep thinking that of PayPal gets enough complaints they'll pull the plug, but you're by far not the first person to find out this way.
VICopper : I was just wondering if anyone remembered when VICopper passed away? I had some good conversations with him and had even thought about visiting him.
VICopper : Seems like it was around 2006? 2008? Been a while, anyway. I was just talking about his ribbon burner forge on another site a couple weeks ago. He was a good 'un.
If the site archives are still up you can probably find it with a little digging.
VICopper : Thanks, Alan!
...and we lost Nol Putnam, too. (Obit forwarded from Fontana Forge; I hope it works, but it should be in today's Washington Post.)
https://www.washingtonpost.com/obituaries/2023/06/22/nol-putnam-virginia-blacksmith-dead/?fbclid=IwAR15XROEFTqlh8waOTp9HGAHz9e7jIP7mGdNR2PoZCTcDmNEiBER2lEh5Mo
Clay Tempering : The katanas I've seen are often clay tempered during the forging process, and from what I've been told, it is to cool the backs so that the edge or part that is heated more and becomes harder and thus can get a finer edge.
My question is can this process be done to a western sword with a Fuller Groove going down the center? Would that make the steel in the groove too soft and make the blade unstable when striking objects? Would it have no change at all? What would it do?
Thank you.
You can certainly clay quench a double-edged blade. Google "double edge hamon" to see examples. To answer your question about how it would affect the performance, it wouldn't. You can only get the hamon effect on a shallow-hardening steel, which means the core of a blade made from a suitably shallow-hardening steel won't be fully hard anyway.
The ability to see the effect is an artifact of polishing. If you polish early medieval blades as you would a katana, a hamon will show.
Anvil ID : I have been beating on an anvil ŌĆ£loanedŌĆØ to me 20 years ago by my boss. I have decided finally to identity the maker but I am at a dead end. Could you suggest where or whom I might go to get assistance. It has been a great anvil but it needs a name. Thank you.
Anvil ID : Take some good pictures of it. Both sides, the front feet, and under the base. Click on my name and it should open a window to email me the pictures. I'll do what I can from there, but I can't promise anything.
anvils : wtf is this
Vulcan anvil history : My friend came up with this Vulcan which is different from any other I have seen. No arm and hammer logo on the side. On top of the front feet marked vul10can.10 being the 100 lb weight. Looks like it potentially has steel face on the horn as well as face. Almost Looks seamed at the waist and a 2 on the front of the feet. Have pictures but not sure how to get them on here.
Vulcan anvils : Sounds like an early one. I've never seen one with "Vulcan" on the foot, but I have seen "II&Bco" on the back foot. The first pattern, ca.1875-ca.1890, does have a pronounced mold line at the waist. They all have steel-faced horns, though.
The extra number on the foot appears at the very beginning around 1875 and goes away ca. 1890. These older ones usually have the logo at the very bottom of one side between the feet. Look carefully there, it's usually very faint in low relief.
Jock designed this site so only he could post pictures. You can send pics to me by clicking on my name, but I can't post 'em here either.
Looking for a CD : Hello! My name is Kiomi and I need help in looking for a CD or something on traditional Japanese blacksmithing. IŌĆÖve searched around but nothing is popping out at me, IŌĆÖm kind of a rookie in this field and would love if someone would point me in the right direction!
Thanks!
TO ALL : I am working with an IT guy help get into the website and clean up as much as possible. Again I will fund the site as long as I am in business. To much Information here to lose.
Dave Baker
Dave Baker
ANVIL FIRE : To all: I am working with an IT guy to help get into the website and cleanup as much as possible.
Thanks, Dave!
Etching knives : Hello, I am an intermediately experienced bladesmith who just so happens to be trying out acid etching steel. IŌĆÖm using a ~4.5:1 mix of water to PCB enchant from radio shack (ferric chloride, ferrous chloride, hydrochloric acid, and water). How long should I etch in it? I tried about 40 minutes, and the finish was not uniform, and there was deep pitting in some areas. The steel I was etching is D2 that was polished to 220 grit and cleaned thoroughly with acetone prior to etching. Do any of yŌĆÖall have any bits of advice? Am I doing this right?
Paint Question : Many old time tools originally sported bright colored paint to attract buyers. How about leg vises? Were they ever originally painted?
Etching knives : Acid etching is generally used to reveal the pattern in pattern-welded steel. There is little point in etching a blade made up of only one kind of steel, as there is no pattern to reveal. In any case, 40 minutes is a long time, as indicated by the pitting. Start with shorter times, like 5 minutes, and go longer in small increments.
Etching knives : Thanks Jan!
anvil maker : markings include 1 0 7 which I belive is the weight 119#. only other visible markings are: T H U ,to my eyes
Roberts anvil : That is the correct weight. Possibly an M&H Armitage Mouse Hole Forge anvil, that has the letters and they were often very faintly marked prior to about 1860. Or it could have said Peter Wright Patent Solid Wrought. Hard to say without seeing pics. You can click on my name to email pics.
planishing copper : I am making 13" long copper leaves for a tree sculpture going up in my town in Canada. I have been forging for 20 years on the side but copper is rather new to me. I purchased a metal shrinker two weeks ago and it works great for shrinking the leaf margin to make a concave leaf. What is the best way to get rid of the marks from the shrinker? I have my own home built power hammer and english wheel.
planishing copper : What is the best way to planish shrink marks on copper from a shrinker/ stretcher? Power hammer or English wheel?
Lawn Mower Blades : Old-fashioned question here. I was recently gifted a batch of lawn mower blades from a local professional lawn care friend. Anybody have any idea as to the content? I know they're a lot tougher than they used to be in the '50's and '60's due to the hazards of hitting rocks or other hard obstacles and fragging your ankles or bystanders. SO; lower carbon than they used to be; but any other alloys? How do they take to heat treating, etc.? I figure they're probably as good as or better than what the Vikings were using, but before I pound any blades out for friends, it helps to be informed. Your experiences? (Take your time; they're not going anywhere. :wink: )
Mower blades : Hey, Bruce!
In my experience, non-professional mower blades are something like 4130, and pro blades are closer to 5160/9260, at least in the way they respond to heat treatment. The makers expect homeowners to do boneheadedly stupid things, like try to make them harder, but they expect the professionals to have a little more sense.
So: homeowner grade = cannot be hardened enough to break. Pro grade = tough enough to last a long time between sharpenings, can usually be hardened enough to make a good blade.
Peter wright anvil : I have a Peter wright anvil the number are 1-1-25 which is 167 lbs correct n I found a 4 under the horn , I can find any number under the name & patent .the top is smooth the hardy hole has some burs in it little ones like weld splatter can I file it out ?
Mower Blades : Thank you, Alan. Just what I needed.
Wilburs anvil : I make that 165 lbs, at 112+28+25. There usually aren't any other numbers except inspector marks under the horn or heel, and yes, you can certainly file out those burrs.
Info on machinerys handbook versions : Hello! I was trying to integrate the blacksmithing missing parts of my 27th edition machinery handbook (including the cd). I studied your table but I can't quite understand if there is actually less material in the 15th edition compared to the 13th,and vice versa... Is something missing in both? I am about to buy them, so if you say that it's useless and it's just ok to buy only one it would be nice to know! Thanks and compliments for your amazing website and forum!
Help Identifying Swedish Anvil : Novice blacksmith in Portland, OR. Picked up an anvil and think it's a Kohlswa. The Kohlswa lettering is hard to read but I can make out the SWEDEN below it much easier. Was also able to make out a 7 and 0 on one of the feet. On the scale it reads 100lbs. Any help getting a better identification would be appreciated!
Anvil identification : Posted on reddit but wondering if anyone here might be able to help. It's a Kohlswa 100lb. https://www.reddit.com/r/Blacksmith/comments/17owsl6/
Anyone have any thoughts?
horsehead : Do you have a step by step printable directions for making the blacksmith horsehead?
Do you have step by step printable direction for making the blacksmith horse head?
Sorry if this is a repeat, do you have a printable directions for making the blacksmith horse head?
Jareds anvil and horse heads : Looks like the guy on Reddit who ID'd it as a 1930s-40s had the info you needed. Nice one!
Wayne, there are two horse head demos on the iForge section of this site, link button to your left just below "plans." They are printable, sort of. I don't know if they're the one you're looking for, though. For more animal heads, the Guild of Metalsmiths has a book called "iron menagery" that has really good step-by-step instructions.
https://www.abebooks.com/9781931626293/Iron-Menagerie-Guild-Metalsmiths-1931626294/plp
Looks like it's out of print, but there are used copies floating around for as low as $20.
Video File : I've been working on a self contained pneumatic power hammer for a few months. I was incredibly excited to find this website, specifically the user built power hammer section with the Patrick Pelgroms' Self Contained JYH. All the written info has been helpful but I cannot seem to get the video to work despite using various third party flash players. If anyone knows how best to view it or where to find it that would be incredibly helpful!
Missing Video : I can't seem to get the video on Patrick Pelgroms' Self Contained JYH despite trying to use various third party flash players. Anyone know how to get it to work or where to find it?
I've been trying to get the video on Patrick Pelgroms' Self Contained JYH to work using third party flash players but I can't seem to get it to work. Any info on how to get it to play properly or where else to find it?
The Iron Menagerie : It was out of print for a while but The Guild recently completed remastering it and re-printed a bunch. We don't have a deal yet with any book dealers but you can buy one directly from our group by contacting our editor at: tgomeditor@gmail.com.
Sales of this book has supported The Guild's education grant fund for years so you get a good book and the warm fuzzy of supporting the continuation of the craft.
Identification of numbers : I have just bought a HB made in 1911. But it has two other sets of numbers. A 3 under the horn and a 77 on the end of the tail. What do these mean please.
Identification of numbers : I have just bought a HB, but the numbers on the tail end have me puzzled, 77, and a 3 under the horn. Cheers.
Numbers on HB anvils : Those are inspection numbers. The 3 was the inspector, and the 77 may be the maker, finisher, or team designation of the guys who forged it. The records no longer exist to say who these people were, unfortunately.
Iron Managerie : Hurrah! I loaned mine to a friend (Which one? I forget!) and never saw it again. Glad it's available again on a regular basis.
hello : Jock,
Are you still out there? i'd like to shop your store-
Store : Jock died several years ago. The store is defunct.
Burners : Will the Black Beauty Burners be available again?
Burners : Will the Black Beauty Burners become available again?
Burners : Probably never, since Jock died. The good news is that he left the blueprints up here on the site, so you can reproduce them.
Burner blueprints : https://www.anvilfire.com/21centbs/products/P-75/ and scroll down. There's three PDF schematics.
Metal of Heating Element : One of my crew has salvaged the electric heating element from the kitchen oven. He's curious about what metal it is, and if I could hammer anything useful/interesting out of it. Seems to be in the form of a hollow C-shaped tube(?).
heating element : They're usually nichrome or something similar. Very hard to forge.
Hello,
I picked up a decent post vise. But being a real old "newbie", I did not realize that the plate, which anchors the post vise to something, has broken off. Since I have the thick broken piece(with a slot in it), can I just weld some sort of plate with holes to that broken piece? My main concern is if the weld can withsand the weight of the vise and the pounding on the post vise. Thanks, Steve
Post vise : It depends on if the broken plate is cast iron or mild steel/wrought, as well as your welding skills. In a worst-case scenario, you can always take a large U-bolt and use that as the bracket with a piece of wide-flange angle iron as the plate.
The upper mount on a post vise doesn't see any weight or downward force from the pounding, that all goes down the leg into the floor. It does get a lot of twisting/shearing stress, but that's easier to deal with.
hay-budden anvil : looking to find information on my anvil that is a hay-budden #214839 stamped weight possibly 114 not sure but theses are the numbers stamped on the anvil
Hay Budden : If the 114 is on the side under the trademark it is probably the weight, if it's elsewhere it's the batch number of the steel used to make the top half. It should be easy enough to weigh it.
The serial number suggests a manufacture date of around 1914. It has a forged tool steel top half, forge-welded at the waist to a forged mild steel base.
post vice : .the mounting plate is unlikely to be cast-iron due to the unsuitability of cast-iron to shock loading. The vice is designed and expected to take shock and twisting loads. Should be straightforward and easy repair/modification. Make a steel plate to suit the needs of your situation and get it welded. Stick or mig will be fine. As per previous advice it just needs a reasonably competent welder.straightforward solution. Get stuck in, get it done and start using it
post vice : the mounting plate is unlikely to be cast-iron due to the unsuitability of cast-iron to shock loading. The vice is designed and expected to take shock and twisting loads. Should be straightforward and easy repair/modification. Make a steel plate to suit the needs of your situation and get it welded. Stick or mig will be fine. As per previous advice it just needs a reasonably competent welder.straightforward solution. Get stuck in, get it done and start using it
OLD ANVIL : I've got an old anvil that's marked 80 on the front with a T in front of it. Another #AI12821. There also appears to be a large C on the side of the base. I'm trying to find who made it and it's value.
Rays anvil : Sounds like a Trenton, or at least the work of the Columbus Forge and Iron co. They made unbranded ones for at least 25 different hardware wholesalers. The serial number suggests a date of the early 1910s. Value is entirely dependent on condition, i.e. no chips, torch scars, weld repairs, fire damage, etc., not to mention how badly someone wants it. As the recently late and much lamented Thomas Powers used to say, asking what an anvil is worth without knowing all the particulars is like asking what a pickup truck is worth without any other info. For anvils, age is not an important consideration until they hit 200+ years old.
Key Anvil : I have acquired a Key Anvil and can find nothing on the origin or age.
Key anvil : Me either, never heard of one and it's not in the book. Any other marks on it?
Kohlswa date : I just purchased an A model Kohlswa anvil and would appreciate your help with dating it. It is marked with 125 lbs and made in sweden on one side, the Kohlswa stamp is gone from use on the other side. A foot is stamped with an A and on the bottom it is stamped "1775".
It is well used but in very good condition and is a very welcome addition to my shop. One oddity is the 1 on both the weight and serial number is stamped upside down, is this common or just a worker with a sense of humor? Thank you in advance, I look forward to learning about my new favorite tool.
Kohlswa anvils, while made from the 1800s up, were mostly imported into the USA between ca. 1970-2000. I really don't know the history beyond that, though. Centaur Forge (now Pieh Tool) was the main importer until a batch that was left too hard for student smiths made it through quality control. While a very hard anvil is great if you know what you're doing, these tended to chip in a major way if they got a missed blow on a corner. Very good anvils, though. They filled the gap between the decline of made in USA anvils when Fisher went under in about 1965 up until other imports like Refflinghaus, Peddinghaus, and then USA cast anvils became available again around 1995. In other words, for a 30 year period they were all you get as a new anvil in the USA, and they did the job very well indeed.
Thank you for the information Alan. I am aware of the downfalls of the alloys used in the Kohlswa top. The edges do have some chipping but no cracks and there is plenty of good edge left. I have a few large stakes I can use on my acorn table and another anvil as well. I will take care of it. Thanks again
Centaur vs Pieh : One pedantic correction: Centaur Forge and Pieh Tools are two separate conpanies as far as I know. Amy Pieh, daughter of the founder of Centaur, started her own company. If Pieh bought Centaur out I can't find any sign of it on The Google.
Kohlswa anvils : Some Kohlswa anvils (like mine) have the opposite problem: too soft. I got mine in the early-mid 1980s; it was quite soft. I talked to Bill Pieh and he said to return it and he would send another. It was even softer. A friend tested the one they had at Washington Gas with a portable Rockwell tester - the tail (the only part accessible to the tester) was Rockwell C6.
Looking for an article : That I could have sworn was on this site, some time ago. The subject was an explanation of why a hand forged fireplace tool set should cost $1000 and the title was something along those lines. If it's here I can't find it. Does this ring a bell with anyone else? If so do you know where it can be found?
Annealing 5160 Spring steel : Hi and thanks in advance. I am making knives for my wife and daughter made from truck leaf spring steel I assume 5160. I am having a heckuva time getting it soft enough to drill through. So far, I have the blades forged and cut out and starting to drill holes for the scale pins and gave up trying to drill through it. How do I anneal this so it is workable? So far, I have heated them up to nonmagnetic and then buried them in a bucket of ashes. thanks again
Annealing 5160 : 5160 doesn't do the slow cool anneal thing, that just rearranges the carbides into sheet form that eats drills. It also needs to be about 100 degrees F hotter than nonmagnetic to transform. Watch for the shadows to leave the blade, then let cool in still air. It's not magic, it's physics! As the crystal structure changes from body-centered cubic to face-centered cubic (the hardenable form), they absorb energy. You can see this as what looks like muddy shadows in the steel. After the phase change, the steel can glow again. It looks like a sudden brightness spreading up the blade from the edge to the spine.
If you take the blades across this transition a couple of times, always cooling to black in still air, you have "normalized" the steel. That is, refined the grain, distributed the carbides, and left it in good condition for grinding and hardening. For most steels, it's also good for drilling, but 5160 is tough. To drill it, after you normalize it, heat the tang where you want to drill almost hot enough to glow, but not quite, then let cool in still air. This is called overtempering. The steel will now be suitable for drilling with a new bit. I like Cobalt bits from Irwin, they're stronger than HSS and not as brittle as carbide.
The important thing in all this process is the cool in still air thing. Do not put it down until it no longer glows in dim light. If you lay it on something cool it may warp.
leaf springs : Don't assume all leaf springs are 5160. I hear a lot of them now are 9260 (silicon-manganese) which probably behaves differently.
leaf springs : Yeah, they can be anything from 5160, 6150, 9260, 1070, EN43, and so on. 9260 is my favorite, it's more forgiving and tougher than 5160. That said, if it's an American brand, it's usually 5160. That can change from truck to truck, as the manufacturer will use whichever is cheapest that gets the job done. All of these steel heat treat roughly the same, except for 1070, which hardens from a bit cooler. They use these alloys because they are interchangeable in that application and process, in other words.
The trouble with annealing suggests 5160 or 6150 (6150 is usually only found in THICK dump truck springs and sometimes torsion bars).
Anvil Identification : Hi. I am hoping to find out information on this makers mark. I came across this 11lb 12oz anvil in a shed I was cleaning out and it seems to be in great shape. I would really appreciate any information on this makers mark and a direction to research it. Thanks for any help. Just in case I can't figure out how to upload a pic. It has a triangle borderd by another triangle with someting in the center. It isn't the inverted Columbian triangle and I don't think it is a C. The triangle is wide side down with point up.
Rons anvil : The way Jock coded this place you can't post a pic. You can click on my name and email me, and I'll see what I can find, though.
Anvil with little markings : I live in Georgia in the United States.
I recently picked up an anvil with some other scrap metal that came from the maintenance department for a town nearby, Douglas, GA.
I have not weighed the Anvil yet but have been cleaning it up with a wire wheel searching for markings. It appers that there is a triangle on one side with 2 lines through it and one outside of the triangle. It has round mouseholes and a pritchel hole on top and the mouse holes are round as well. the heel has a half moon cutout and what appears to be a backwards number 1 on the left side of the heel next to the half round (mounting area). The toe is fairly flat on top and measures a total of 24 3/8" long, 4 3/4" wide on the top by 15" long, the feet are 11" wide by by 12 5/8" long.
I can submit the photos I have taken but am not sure how to at this time. Just looking for any information on this Anvil, I know nothing about anvils to be honest.
email is matt_davis25@hotmail.com
cell is 912-422-8462
As I said just above, you can click on my name and it should open an email in your browser. You can send the pics to me and I'll see what I can do.
Diesel forge burner : IŌĆÖm a high school bladesmith with limited experience in everything, and IŌĆÖm thinking about using diesel for my forge, as IŌĆÖm not getting as hot as IŌĆÖd like to with propane. Does anyone here have any ideas or thoughts? IŌĆÖm thinking IŌĆÖll first try dripping diesel in my Venturi burner and adjusting the propane amounts accordingly and seeing how that worksŌĆ” ive poked around the internet and just gotten myself confused.
Diesel forge burner : IŌĆÖm a high school bladesmith with limited experience in everything, and IŌĆÖm thinking about using diesel for my forge, as IŌĆÖm not getting as hot as IŌĆÖd like to with propane. Does anyone here have any ideas or thoughts? IŌĆÖm thinking IŌĆÖll first try dripping diesel in my Venturi burner and adjusting the propane amounts accordingly and seeing how that worksŌĆ” ive poked around the internet and just gotten myself confused.
Diesel forge : Hi Joseph. Propane forges should get hot enough to do anything you want, blacksmithing-wise, but there are a couple variables to tinker with (burner size/design, number of burners to volume of the forge, etc.) If yours isn't getting hot enough I would try to tune it in with the existing variables versus adding another (diesel) to it. Propane burns so clean I would be loath to add diesel to it and have to worry about other toxins in addition to carbon monoxide.
I'd look at the ABANA affiliate directory and see if you have a local blacksmith group you can bring it to for help. I'm guessing someone there familiar with propane forges will be able to look at your forge and diagnose your issue(s) pretty quick.
Diesel forge : These exist, but they're based on fuel oil furnace burners. They do not work with a venturi.
Martin is right, find your local blacksmith's guild (we're everywhere, just not often visible!) and ask in person. Most likely the issue is a cheap forge off ebay. Those are terrible designs, some have terrible burners, and I've only ever seen one that could get to welding heat without substantial modification. For the same price you can buy or build a much better burner and buy a roll of Kaowool and some castable refractory to build a real professional-level forge.
hello world2 : https://gruzmash1.ru
Website update .. I have finally found a group willing to take on this project. They are currently working to update and give me access to the actual site. We are saving the archives and removing the store.
Dave Baker
ANVIL FIRE : I have finally found a group willing to take on this project. They are currently working on updating and giving me access to the actual site.
We are saving the archives and removing the store.
update : That's great, Dave!
Heat Treating 1144 barstock : We require the end of an 1144 steel bar to be hardened to 45-50 Rockwell C. The bar is 0.75 inches diameter, turned down to 0.56 diameter (for 0.30 inches) and has flats machined on the end to a 0.325 thickness X 0.30 length (X the 0.56 diameter) to produce a tang drive for a pump. For the tang, what temperature should be used for hardening and what temperature should be used to draw back to 45-50 Rc? I have been unable to find info in the heat treating references I have. Thank you, Myron Boyajian
Diesel forge : Thanks for the advice, IŌĆÖll try it. IŌĆÖm not using an eBay forge, itŌĆÖs a diy fire brick one with 2 devil forge burners. My problem is not getting welding heat (although it could be that IŌĆÖm bad at forge welding and simply lack the skill/practice to do it) and I have the desire to go on to pattern welding.
heat treating 1144 steel : Googling this phrase gives many hits, mostly from home shop machinists and gun makers. Most say heat treating destroys its stressproof qualities. Bergsen Metals datasheet gives maximum hardness of B97, but that may be as supplied. Why not use something easily heat-treatable, like 4140?
Diesel forge : Okay, is the brick soft (insulating) brick, or hard brick? If it's hard brick, that's your issue. Hard brick is a heat sink. It resists fire, but it takes hours to come up to heat. The wool is an insulator and keeps the heat in the forge where it needs to be. For a quick-and-dirty forge, an inch or two of wool topped with a thin coat of Satanite should get you there, and you can use the brick as doors. For a more durable forge, that same inch or two of wool lined with half an inch of Cast-o-Lite 3000 will take a little longer to heat up, but will last years before it needs patching.
One Half Inch Square Tubing : I recently acquired about six feet of 1/2" square mild steel tubing. The metal seems to be about 1/16" thick or 15 gauge. I can still see where the label was, and it was probably bought for some project and never put to use.
So, anybody here have any ideas for interesting designs or projects for it? Lots of things would do for solid bar, but it looks like standard stock for a cheap plant hanger, and I'd like to be a little more adventurous.
Dave Baker: Thank you for your work in saving this site. I miss the Guru, and I miss "the old days," and I miss the crew that was ever willing to provide answers and insights. We appreciate those saving this useful resource.
Diesel forge : Alan-L, thanks for that tip. IŌĆÖm using hard brick. I did that specifically to avoid the health hazards IŌĆÖve been led to believe are associated with wool, (inhalation of particles put in the air due to heating such a fine fiber) especially kaowool. Does lining it with refractory prevent those? Also is soft firebrick a good alternative?
Diesel forge : There are actually no known health hazards to using kaowool. It looks like asbestos, but it is not. If it were more hazardous than any dust (and all dusts are not good to breathe!), OSHA wouldn't allow it to be used as furnace linings in industry. It's only dusty after it's been fired. Before firing it's more like fiberglass insulation, and equally itchy, so wear gloves and long sleeves.
Lining it with refractory does indeed seal it, and has the added bonus of protecting it from flux. Soft firebrick is great, and is almost as insulating as wool, but it has no resistance to flux either. If you intend to weld with flux you have to coat it with something too. ITC-100 is great for that, plus it increases the heat reflectivity by a couple hundred degrees. It's also way too expensive for my taste...
But yes, soft brick rated for 2500F or higher, and coated with Satanite or Cast-o-Lite 3000 or Plistix IR will work fine, and you can still use the hard brick as doors.
half-inch tubing : Hey, Bruce!
One guy I know uses it to make fancy firepit pokers that double as blowpipes. Forge one end to a taper, weld a hook like a regular poker, and flare the other end to make a mouthpiece. Silly, but some pyros really like them!
Diesel forge : Thanks, I will try that
Hello Dead! : ┬¹ŌŅń ņ¾±ŅÓ ± Ń¾ń„ĶĻÓņĶ https://vivozmusora67.ru/
anvilfire Guru Forum Entry Form : topshelftrailers.com