| |
 |
|
|
|
CERIDWEN
|
|
This was my first time using a power hammer, so its a basic project.
|
|
|
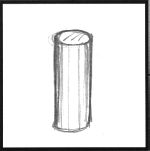
Figure 1 |
I started with a piece about 2" X 6" (50mm dia. x 150mm) mild steel.
You could use any size piece big enough to give you strength once you draw out the middle
|
|
|

Figure 2 |
We put a flat anvil setup in the hammer to squash the piece.
This allowed me to get the face as wide as I wanted it.
I ended up with a cylinder about 2-1/2" X 5" (63mm x 125mm).
|
|
CERIDWEN
|
|
You could simply start with a piece as wide as you want it, but since I was experimenting with the power hammer, it was fun to squash it.
|
|
|

Figure 3 |
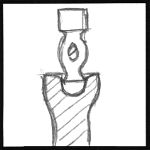
Figure 4 |
|
|
CERIDWEN
|
|
Using a ball-pein hammer, I made a hole the for my candle.
I mainly just guessed at how deep I wanted the hole.
I used a small hammer to start the hole, and then choose a ball-pein that was candle sized to finish out the hole. This does not have to be exact because there is a little bit of cleaning up that will have to be done to the hole anyway.
|
|
CERIDWEN
|
|
We attached a rod to the bottom of the candleholder now that I was ready to work on the sides.
NOTE: This is called a "porter bar".
It is a common method of holding on to large billets.
Its important that the welds be substantial and strong.
|
|
|

Figure 5 |
I squared up the candleholder, trying not to deform the hole, and concentrating on the midsection.
|
|
|
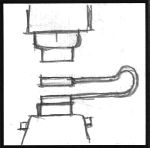
Figure 6 |
Next, we put a spring fuller into the power hammer.
This was about 1" around, I think.
You do not want too small of a fuller because the fuller marks should eventually blend together.
|
|
|

Figure 7 |
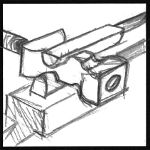
Figure 8 |
|
|
CERIDWEN
|
|
I started fullering about as far from each end as I wanted the final base and top thickness.
I drew the middle to about 1" square before rounding it up.
|
|
CERIDWEN
|
|
This is not as easy as it sounds, both because the fuller did not want to open up enough for the thickness of the piece and because the fuller wants to jump back down to the skinnier places.
|
|
|
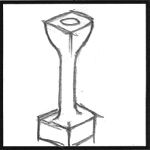
Figure 9 |
In theory, it should begin to look like this. . .
Mine was much more free form and deformed, but the basic shape was there.
|
|
|
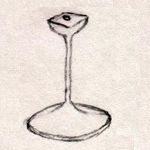
Figure 10 |
Continue to draw out the middle until it is as skinny and long as you want it.
Then you can start to flatten out the base.
Remove the fuller.
Angle the piece under the flat anvil of the hammer and it will taper from the middle into the base.
|
|
|
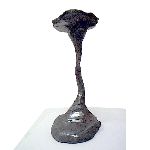
Figure 11 |

Figure 12 |
|
|
CERIDWEN
|
|
You can go back and hand hammer the ball-pein into the candle hole to reshape it.
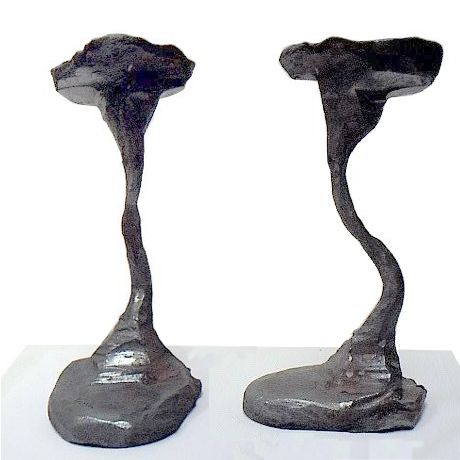
You can really see how crooked my piece got, so I ended up curving the middle to give at a more balanced look and to make it stable enough to stand up.
|
|
CERIDWEN
|
|
It is not as refined as I intended, but the more I look at it, the more it grows on me :)
|
|
jj2k
|
|
Neat demo Ceridwen. How long did that take you to do?
|
|
unKnown
|
|
that's a nice lively piece Ceridwen...Hope I do as well on my first go at a power hammer...thanks
|
|
JOCK D.
|
|
I think you ended up with a very nice "massive" look. Someone will buy it!
|
|
CERIDWEN
|
|
About 2 1/2 hours, just goofing around with it
|
|
AXA
|
|
Very interesting demo I like your candle sticks. Thanks
|
|
Mark
|
|
Nice demo... thank you ...
|
|
Bill
|
|
Verry good demo.
|
|