I've seen temper colors on the inside edge around my hardy hole after shaping a hardy tool hot. That was actually a good thing -- the tempering went just deep enough to let me do some much needed radiusing with a file. I've also burned myself on the end of my horn after flaring pipe.
If you stay away from the edges, though, it would be hard to hurt an anvil with a hot block of steel of reasonable size.
|
|
Mike BR
- Sunday, 12/07/08 21:58:10 EST
|
Robert, don't confuse heat and temperature! Heat is mass x temp. x specific heat capacity. SHC of the shoe and the anvil can be taken as the same so we are looking at a combination of mass and temp. Compare the mass of your anvil with the mass of the shoe. Steel is a fairly good coonductor so the heat of your shoe will be pretty quickly spread into your anvil's mass and the rise in temperature from that will be fairly small.
I use a 280 lb Brooks. Congratulations on owning a very fine anvil.
|
|
philip in china
- Monday, 12/08/08 00:08:50 EST
|
Reasonable size is the key statement. Temperature as well. While an anvil is a large heat sink a piece of 1"x 3" or 4" at a red to yellow heat resting on an anvil could easily draw the surface temper. Since anvil faces are much harder on the surface with the hardness falling off rapidly any reduction in hardness could be a bad thing.
|
|
- guru
- Monday, 12/08/08 00:13:19 EST
|
once again, anvilfire saves the day, thanks for the replies, it was just what i was looking for. thank you kindly....
|
|
matthew
- Monday, 12/08/08 00:56:11 EST
|
Quenchcrack: Thanks for the info. Will look for that resource in my library. Luckily, Helsinki seems to have a pretty good library system.
Oh, and a bit of warm Glog perked me right up.
Cheers
|
|
Rob Dobbs
- Monday, 12/08/08 03:03:25 EST
|
Engineering References: Rob, I've tried to purchase the book QC recommended on the used market and they are still very expensive or "just sold".
One place that has a LOT of expensive reference that may not be in a public library is a University or engineering school. They are often open to the public but you need to check the hours. I often use the University of Virginia Engineering School library as they have huge collections of books such recent copies of all the ASM references, ASTM specs and other expensive and rapidly outdated texts.
A travel day or two visiting such a place is often profitable.
|
|
- guru
- Monday, 12/08/08 10:04:43 EST
|
Thank you all for the replies.
|
|
- Robert Dean
- Monday, 12/08/08 10:08:38 EST
|
Jock, time for an IP block
|
|
- Nippulini
- Monday, 12/08/08 10:24:34 EST
|
Thanks, Guru. Will try that as well.
|
|
Rob Dobbs
- Monday, 12/08/08 11:02:28 EST
|
Rob Dobbs-- try querying the brethren over at Britishblades.com where there are many Yurripeen knifemakers lurking.
|
|
Miles Undercut
- Monday, 12/08/08 11:07:00 EST
|
Got a question about quenching oils--would used motor oil be okay vs. ATF or oils specifically made for quenching? The only reason I ask is that I have an endless supply of the stuff, and if I don't have to pay for something, that just makes it that much better. (the oil in question comes from piston aircraft, so it's not as "thrashed" as automotive oil due to the regulations on oil change periods--if that makes a difference)
|
|
Chris F.
- Monday, 12/08/08 12:53:09 EST
|
Outstanding idea, Miles. But, I'm not a peen. ;)
Thanks!
|
|
Rob Dobbs
- Monday, 12/08/08 12:55:30 EST
|
For an international metals cross reference you might try www.steelforge.com which will get you the home page of All Metals and Forge. Look on the right side of the page for an online conversion utility. I haven't tried it myself so no garuantee that it will return the results you are looking for.
|
|
- SGensh
- Monday, 12/08/08 13:09:51 EST
|
Quench Oils: Chris, The additives and various toxic compounds is the problem with used oil. If you are not worried about the contents of the particular oil as it smokes and flares then its not a problem. Aircraft oil probably has a higher flash point than auto oil. Look into the specs just to be sure there are no heavy metals in the additives.
Another consideration is fuel contamination in the oil. But this will evaporate over a short time.
|
|
- guru
- Monday, 12/08/08 13:51:08 EST
|
I'm done working with "mystery steel". Where can I buy 1065 flat steel stock? I don't see any sponsors listed for this.
|
|
deloid
- Monday, 12/08/08 14:37:43 EST
|
Thanks, Guru. Aircraft oil (when new) contains no metal, however there might be some sort of toxic junk thrown in there. The used oil will (or theoretically should) contain metals due to engine wear. In any case, respirators will be worn when quenching! Thanks again for the info.
|
|
Chris F.
- Monday, 12/08/08 14:43:05 EST
|
Upsetting: I've gotten good results upsetting 1/2 inch bar to thicken one end by standing the 18 inch bar on the anvil step, heated end up (being sure the cold end on the anvil is nice and square) and striking light blows much like hitting a chisel or drilling a hole in rock with a star drill. The process of keeping the bar under the hammer blows seems to translate into an even upset.
Michael-mostly keeping mouth shut and ears open on this forum.
|
|
Michael
- Monday, 12/08/08 15:02:21 EST
|
Okay, but I see no fewer than 13 entire pages re: Finnish knifemakers, 8 for Finland on that site. Betcha dime somebody amongst (love them Brit words, love 'em!) that bunch knows where to find the specs for 5160 and 1095 and matches to same....
|
|
Miles Undercut
- Monday, 12/08/08 16:44:46 EST
|
As Michael points out many of us are quick to open our ears and just listen on this forum at times. I think the diverse true wealth of knowledge is what the general public likes about this site. I have never felt all the Guru's claim to know everything. I feel they even try to help out when they don't have the answers. They will tell us it is a guess or point in a direction.
Even though this forum was recently attacked it still stood strong by all the folks that know the difference.
I like all the different perspectives. We have folks that are Metalurgists, Engineers, Lab techs, chemists, just good old experienced Blacksmith's, professional and hobby Smith's, Tool & Die Makers, Machinist's, Founders, Cutler's, welders, industrial mechanics, Pattern Makers, Carpenters, electicians, Artists,Tattoo Artist, Graphic Designers,teachers, Computer techs and on and on I am sure. Many people who have never touched a piece of hot metal with a hammer have wonderful input about safety, theory , math, steel, history, objective observation from being plant factory managers etc.
I believe this makes this site wonderful and strong. We are fortunate to have a wealth of knowledge forum as a resource. It is so much more important than a site that gives just one persons view right or wrong. I am thankful for it.
I personally have found the knowledge from a particular contributer very helpful. I do not believe he is a Blacksmith. He is a tool & die maker and has had volumes of information that he has shared with us that is very helpful. I know he goes to events now and has become friends with many. I mention this to point out to folks who may not be Blacksmith's, but have particular knowledge base can still be very benifical to many here.
To all enjoy!
|
|
- Rustystuff
- Monday, 12/08/08 17:27:28 EST
|
Hey guys its me again, got a question about my forge this time. I've been looking to get some of the fire clay or cement(not sure what this is called) to line the inside of my forge with since its rather thin metal. I was curious as to where I could come across this online, and how thick to apply it. At school it looks to be about 1 - 2 in thick but metal is thinner and I am not completely sure.
Thanks for any help in advance
|
|
- hillm
- Monday, 12/08/08 17:34:11 EST
|
hillm
www.alligatorclay.com
mesh 35
Looks like they are out of business now.
Try: www.brackers.com
Fireclay Hawthorne 35 Mesh
I believe it is the same thing. I believe I was using Hawthorne.
|
|
- Rustystuff
- Monday, 12/08/08 17:42:16 EST
|
hillm
I guess I only answered part of your question.
You mix the fireclay powder with water. You want a thick soupy consitancy like thick oatmeal. Apply it about an inch deep. Let it dry for a week. It will shrink and crack all over. Then mix up more and fill the cracks and make it another inch thicker if you desire. Also let dry for a week. Make sure it is completely dry before use. This is for safety otherwise it will steam and pop apart causing hot coals to fly at you.
|
|
- Rustystuff
- Monday, 12/08/08 17:52:13 EST
|
Rustystuff, Thank you for your help. Your instructions will help a lot. I don't quite understand where the price is for the fireclay though.
|
|
- hillm
- Monday, 12/08/08 18:15:24 EST
|
Aircraft oil for quench.
Having grown up at a regional airport in the 60-70's, I would offer that most of the aircraft oil is pretty viscous, big engine oil being 80 weight and smal engine stuff mostly 50 weight. To get these high viscosities, the blenders added lots of viscosity boosters, which are long chain polymers. These do break down over time.
To my knowledge, NO heavy metals, in a form that will flash off to fume are present in any engine oil. The one main additive is Zinc ditheophosphate.
I would expect to see wear metals, these would be brass, iron and aluminum, along with some chrome.
I do not believe that engine oil run for 50 hours in an aircraft engine is any less abused than a 5000 mile oil change on a car, with the exception of all in city short run cars.
In short, I would not risk a decent part on poor unknown quality oil. Go to wallyworld and get 5 gallons of peanut oil, or take to the oil jobber that supplies the oil for the aircraft, he can get you a 5 gallon pail of real heat treat oil, that is high flash point, additized to do what you want and will produce a repeatable heat treat.
Good luck
|
|
ptree
- Monday, 12/08/08 18:18:39 EST
|
Hillm, First, is it a gas forge or coal or charcoal forge?
See our FAQ on claying forges. This is for coal/charcoal forges.
Note that in thin steel (not cast iron) forges the steel is cooled from the back. Rusting is more of an issue than burn out and claying aggravates this. The only burn our issue is in the fire port area IF there is one. No matter how heavy or how it is lined, a fire pot can be burned out with an out of control fire. The heart of a blown forge fire can melt cast iron and many refractories (any clay that is not high alumina). Pile on a load of coal, crank it up then walk off and you are likely to find a big hole burned in the firepot.
If your forge is gas then you need to look at other lining methods.
|
|
- guru
- Monday, 12/08/08 18:21:25 EST
|
"fire pot" not fire port
|
|
- guru
- Monday, 12/08/08 18:23:24 EST
|
I don't have the specifics, but years ago, I read that fire clay could be tempered by adding either coal fines or charcoal dust. Sorry, I don't know the proportions. The ideas was to prevent excessive shrinking and cracking after having applied it. Don't forget to add the water.
|
|
Frank Turley
- Monday, 12/08/08 18:35:04 EST
|
I have a coal forge that was home made by me and my grandpa. For lacking of material and because it was free was used an old charcoal grill for the firepot knowing that with how we built it, we would have no problems rebuilding it if it were to fail. Also, it is rather large round so I figured I would be able to avoid having to much heat against the sides.
This does not mean that I want to have to fix it if it does melt through, however. Also, doing aluminum castings at school has got me interested into saving up for a crucible. A small crucible would fit great in my forge. If I do get a crucible however I would have to build up a large fire and let it burn as hot as it can for quite a while. I am absolutely sure this will burn through my forge.
You may tell me I should just get a thicker firepot and I would accept that advice and get one as soon as possible. I would like to be able to use the one I have if at all possible though.
Thanks for the help, and I will be gone for the next 3 hours about so I will be a bit in replying.
|
|
- hillm
- Monday, 12/08/08 18:36:38 EST
|
hillm
As Guru pointed out I forgot to ask type of forge. The fireclay and methods I mention are for steel pan coal forges that only have a tuyere cap or no firepot. The portable type forges. This product and methods are not correct for a gas forge. Sorry if I cause confusion.
I think you will need to call the suppier for pricing.Fireclay is very affordable. I have not dealt with that one. I think they are the main one though.
|
|
- Rustystuff
- Monday, 12/08/08 18:37:05 EST
|
hillm
You're forge is a good candidate for fireclay then. I like fireclay in small homemade and portable type forges. You just can't leave them outside to the weather though. I have clayed many myself and used them. I am for it. Others may disagree. I have found it satifactory. I don't feel you need to purchase a firepot at this point. However, I am not taking into consideration of the aluminum melting in a crucible. I have never used a forge for casting. I know 750 approx degrees is all that is needed. A forge certainly easily exceeds that. I will let guru address the safety factors involved.
|
|
- Rustystuff
- Monday, 12/08/08 18:44:00 EST
|
Rustystuff, let us not forget our resident performing artist who first appeared on this site looking for a light weight anvil to hang from his nipples!
|
|
quenchcrack
- Monday, 12/08/08 18:48:45 EST
|
That is right quenchcrack. We especially love him too!! I am a big fan.
|
|
- Rustystuff
- Monday, 12/08/08 18:53:00 EST
|
Clay Price. . . The price was on the site. Takes a standard browser with javascript allowed to see maybe. 0.17USD per pound minimum of 100 pounds you must register before seeing the multiplied amount in the cart ($17). Shipping will be more than the product which is not unusual today.
|
|
- guru
- Monday, 12/08/08 19:40:24 EST
|
I was paying 10.00 a bag about ten years ago. It makes sense it has climbed to 17.00 a bag. A 100lbs will last forever. Probably enough to line 25 steel or cast portable forges. I still have a five gallon bucket of it. I have no use for it anymore as I use the cast iron fireboxes. I would offer it to you for free, but I don't live near anyone.
|
|
- Rustystuff
- Monday, 12/08/08 21:48:36 EST
|
Rustystuff, why shouldn't I leave my forge outside? All of my wiring(I have an electric blower, still looking for a switch though) is waterproof and good for the outdoors. As soon as I get the time I'm going to wire brush everything down really clean and paint it with outdoor paint, minus anything that will get hot from the radiant heat. Also, I am unsure as to what the melting temp. is for aluminum but we try to get it upwards of 1350 - 1400 degrees so it runs through the mold easily. I'm sure it can get well over this temperature though as I have personally lost steel because it melted off.
Guru, I understand how the pricing works now, thank you. I was expecting either price per bag or price per lb. instead of the $0.17 per quantity they have.
Thank you both for your help and any other suggestions are welcomed.
|
|
- hillm
- Monday, 12/08/08 22:00:17 EST
|
Rustystuff, I didn't see your message before I posted. I really do appreciate the offer but I'm not sure if I would want it free. Taking free stuff from people bothers me... Anyway, I would rather just buy it myself and keep the extra you said I will have for any fixes that need done or for when I start building a nicer forge.
|
|
- hillm
- Monday, 12/08/08 22:04:09 EST
|
To avoid cracking of fireclays when drying, the usual fix is to add "grog", bits of crumbles up clay that has previously been fired. You can use up to about equal parts of grog and fresh fireclay without problems, for uses such as lining a solid-fuel forge. The stiffer you mix the clay (the less water you use), the less likely it will be to crack, and the less severe any cracking will be. High-refractory clays are generally mixed to a consistency thatis so stiff that they must be rammed into a mold very forcibly, as they are only just barely plastic enought to form at all. Also, the less water you use, the shorter the drying time before you can fire the clay. My preference is to mix the clay to the stiffest consistency that will still allow you to form a lump that doesn't crumble when you drop it, though I have friends who recommend stiffer than that. I find the crumbly mixes jus ttoo frustrating to work with, so I make it to where I can form it to shape. You mileage may vary, just as fireclays do. :-)
|
|
vicopper
- Monday, 12/08/08 22:35:04 EST
|
Thanks vicopper.
hillm
vicopper mixing methods for the fire clay sound much better than the methods I have used. I would follow his instruction concerning that.
Why I said not to leave outside.
The clay will absorb moisture even after firing. The moisure will rust out the forge pan, cause the fireclay to swell and breakup and steam while using causing it to blow out with hot coals in extreme cases.
|
|
- Rustystuff
- Monday, 12/08/08 23:05:12 EST
|
A very good point about clays absorbing moisture from rain and dew and condensation. Since fireclays are not vitreous, they WILL absorb free water. If you build a hot fire in a forge that has wet clay, (even clay that has been previously fired), the water can be suddenly transformed to steam and blow bits of the clay and burning coals out of the forge rather explosively. A simple cover over the forge, one that keeps rain and dew off, will take care of that problem most of the time. You don't want a cover that is tight-fitting, as that would trap moisture inside and promote rust. You want an umbrella, not a condom, in other words.
The rusting of the steel pan under the clay is almost inevitable, bu tyou can delay it by keeping moisture out of the forge and trying to prevent condensation caused by changes in temperature. That is difficult with a forge you leave outdoors, unfortunately. Still, it should last a few years, even while it rusts. By then you'll be ready to build a newer, better one.
One note on the grog I previously mentioned - a free source of it is from garden centers. They toss out lots of broken red fireclay flower pots every week. Ask them to save a few for you and pulverize the pieces with a mallet - instant grog for your forge claying projects.
|
|
vicopper
- Tuesday, 12/09/08 00:14:39 EST
|
Hello,
I'm considering buying this 110 lb anvil off of ebay. It seems like a good deal, so I'm kind of suspicious. I don't want to unknowingly buy a cast iron anvil. Can anyone tell just by looking at the picture on the page if this is a piece of junk or if it might be worth buying? I know that this might be a stretch, but any help is greatly appreciated. Thank you. Here's the link:
item=390014855392
|
|
dan
- Tuesday, 12/09/08 01:25:52 EST
|
Dan, This is a typical Chinese anvil pattern. It is probably cast iron. Scroll UP to about 11/25 and see how cast iron anvils hold up. Unless you are looking for a $1/pound junker I would pass on it.
|
|
- guru
- Tuesday, 12/09/08 07:17:17 EST
|
Rust in Coal Forges: Almost ALL coal contains sulfur and sulfur compounds. When water filters through coal ashes it leaches out the sulfur compounds and makes acidic water. Coal coke and steam from using water to put out the fire also create some very nasty acidic compounds. Leave a sheet metal forge out in the weather for a season and you will have no forge. Leave one made of 1/4" steel plate out for a couple years and THAT will rust out as well.
Coal is not like burning charcoal or wood. Charcoal ash tends to make more benign alkali compounds. They still promote corrosion but NOTHING like the sulfurous compounds from coal.
Acidic water from the coal trapped under the clay is a perfect corrosion environment.
Keep it dry, keep it clean.
|
|
- guru
- Tuesday, 12/09/08 07:26:08 EST
|
Hillm, do you need to go online to get the fire clay? I got a bag from a local tile and masonry supply place. It was a few years ago, but I think it was a 30- or 40-lb bag. And no shipping to worry about.
|
|
- Marc
- Tuesday, 12/09/08 08:13:05 EST
|
Cold Shop: A couple of years ago I purchased a dead refrigerator. With a 40-watt bulb it keeps contents warm. I store in it my battery drill with spare batteries, spray paint bottles and soldering propane rig with flux. For a quench tub I found a metal bucket which fits inside a standard 5-gallon plastic bucket. If I were so included, I could store that in there as well.
|
|
Ken Scharabok
- Tuesday, 12/09/08 08:24:29 EST
|
The sulfur in mineral coal varies widely, according to source and type. Years back I pulled two successive small orders from a coal yard in Baltimore. One batch was wonderful, the other was just about as good, but you'd think Lucifer himself had come to visit when you fired it up. You'd get yellow sulfur crystal gardens on the coal as it was stored outside.
It's a transitory world, but some form of roof or shelter helps slow the process of degradation. After all: "We are the infrastructure; all that other stuff is just entropy in action." (Uncle Atli's Very Thin Book of Wisdom)
Moving Days this weekend; Oakley Forge migrates to it's new home 300 yards (400 yards via the lane) from the old stripping house.
Visit your National Parks: www.nps.gov
Go viking: www.longshipco.org
|
|
Bruce Blackistone (Atli)
- Tuesday, 12/09/08 08:33:20 EST
|
Hey Rustystuff, I'm not a tattoo artist, I am a body piercer. I get that all the time though. Funny because I do piercing for a living and smithing as a hobby. Most people assume the opposite.
|
|
- Nippulini
- Tuesday, 12/09/08 09:04:21 EST
|
TGN, funny as a knifemaker anytime we happened to pierce ourselves we considered that we were doing it wrong!
It's nice to have complementary jobs and hobbies; after spending 8-10 hours a day herding bits it's really nice to go home and hit something with a hammer repeatedly!
Congratulations Atli, can you just load everything in the boat(s), flood the area and row it over to the new location?
Thomas
|
|
Thomas P
- Tuesday, 12/09/08 10:41:40 EST
|
Short Moves are sometimes the hardest. About five years ago I had a two year plan to move to Costa Rica. . . I had a pretty detailed plan worked out including what went (too much) and what did not (not enough). My plan has had a LOT of setbacks. Three years into my two year plan I moved "temproarily" I said about a three hour distance. Being a "short" move I did not do it all at once and I am STILL moving. As a short move nothing is crated, it is just put into the car or truck a small load at a time and moved a small load at a time. Well, in some cases the "small" loads have been four tons on a flat bed truck. Dozens of trips of trips have been made and we are far from finished. Some things that should have been jettisoned have been moved and others that may be more important have not.
At the destination things are no more organized than they were at home and very little of the past three years of moving have furthered my two year plan.
Most of the expense has just been another move, drained the coffers and used up a great deal of time.
I should know better because this is the second time I've moved this way and I've seen others do the same.
Many years ago I watched one of my brothers make a "short move".
Everything was tossed into big plastic trash bags, including valuable items, the trash and dirty laundry.
Many small trips were made over a period of a couple days.
The trash bags piled up at the destination.
It took months to sort it all out and many things apparently went out with the trash while much of the trash was lying there years later (waiting for the NEXT move).
More recently (about 8 years ago) a friend made a supposedly temporary move "across town" prior to a planned long distance move.
Storage was needed for a lifetime collection of books and furniture so old truck trailer bodies were purchased.
Most of the books were carefully cleaned and packed into cardboard boxes which were stacked much too tall in the truck bodies along with furniture and everything else that was not discarded.
Years later most of that library that was so lovingly packed is still in the trailers the boxes crushing one and other and who knows what growing on or eating the contents.
And those old truck bodies were scraped for a REASON, they are often no so weather tight.
It may be years before they are unpacked and much of the contents may not be in nearly the condition that they were packed.
When one makes a long distance move the expense forces you to make hard decisions on reducing the amount of accumulated life clutter.
It also often forces you into packing much better.
I knew that for a long distance move with a definite possibility that things would stay in storage for a number of years that everything needed to be crated in sturdy containers as well as preservation measures taken.
Containers or crates that could be moved by hand truck or fork lift and withstand brief periods in the weather and much longer periods stacked out of the weather.
So, I continue to make my "short" and very expensive move that has probably cost more than the longer distance move I was planning on.
I'm sure I've spent more on truck repairs, fuel and labor than it would have cost to move half way around the world.
And somehow the "life clutter" continues to accumulate.
|
|
- guru
- Tuesday, 12/09/08 12:49:22 EST
|
I'm not certain if it's been applied to leaf springs yet, but the commercial introduction of microalloyed steel for coil springs in autos was made a couple years back - controlled cooling and microalloying additions of elements such as niobium, vanadium, nitrogen, boron, and lower carbon to get required properties for the springs. The major selling point was elimination of a costly secondary operation: heat treating. If it ever makes its way over to leaf springs as well, Mr. Cross may be in for a surprise.
|
|
- Gavainh
- Tuesday, 12/09/08 13:03:15 EST
|
Nippulini
Sorry I always mix up body piercer with tattoo artist. You would think I could remember that since I have watched all your online videos and love them.
Plus I have a friend who is a tattoo artist that I have taught some blacksmithing. That helps me get a little extra confused.
BTW...you could always hook me up with the pretty young lady piercer who rides the harley at you shop...LOL
|
|
- Rustystuff
- Tuesday, 12/09/08 13:12:34 EST
|
Marc, I have looked at all of the stores in my area that might have fireclay. I have not been able to find anything suitable for this use. I generally try to avoid buying things online unless I have to or it cost less, ect...
To Guru, Rustystuff, and vicopper;
Thank you very much for all of the information you have given me. I look forward to using everything you have told me to improve my forge.
|
|
- hillm
- Tuesday, 12/09/08 16:53:49 EST
|
Hillm, You can avoid buying on-line, just make a phone call. Most businesses that supply hard to find materials existed long before the Internet and most will take a check IF they do business at all with individuals.
Prior to the Internet it was just much more time consuming to track them down. AND you would be surprised at how many are stuck in the 1980's and won't use e-mail, they insist on FAXing everything. AND there are a few that STILL think this Intenet thing is a fad and they don't need to be on it.
But you CANNOT expect to find everything locally. Often it just does not exist unless you look elsewhere. Even in some big cities, particularly capitals were you can find 100 varieties of paper clip and escort services by the boat load but nary a drill bit over half and inch, a replacement Jacaobs drill chuck key or hog-ring pliers.
50 years ago you buy plain steel rivets in almost any hardware store. Today there are only a few places in the country to order them from. Those same stores sold a few farrier's tongs, punches and forging hammers. Those same stores also had distributor's catalogs where you could buy an anvil, forge, swage block or any type blacksmiths tool. No longer.
Then thee are the big hardware companies that will sell to almost anyone but only distributed a very few sought after catalogs. Prior to putting their several thousand page catalog on line used McMaster-Carr catalogs often sold for $100 to folks who knew their value but could not get on the company's mailing list because they did not buy enough.
Today you have more choices than ever thanks to the Internet. But if you refuse to use it you will find you have far less choice and this trend is accelerating.
|
|
- guru
- Tuesday, 12/09/08 19:11:19 EST
|
Hillm: If you want to move up a notch in performance (and price) from fireclay, look inot a product called Fire-Stop. I just bought a bucket today -- maybe a gallon or so dry -- because I am restorng a coal stove in which the liner has been partially lost. I got Fire-Stop at my local masonry supply place. At a buck seventy a pound it wasn't cheap, but its listed as a refractory cement, so I expect a higher performance than from fireclay. I think fireclay is most commonly used for mortaring fireplaces, which get a lot of heat, but not particularly high temperatures. I also plan to try this stuff on my flat bottom portable forge, which after 30 years is starting to look like it needs a little help. Maybe stretch it by using a vitreous aggregate -- silica sand -- maybe try the crushed terra cotta. I'll let you know what I find out.
|
|
Peter Hirst
- Tuesday, 12/09/08 21:28:14 EST
|
Guru, I didn't mean I don't like to buy stuff online, simply that I find buying things locally is easier and sometimes(not always) cheaper. With online ordering you have to pay shipping and with credit cards or pay pal most of the time.
I do buy stuff online, though. For example, I do a lot of stuff with computers. I built my computer myself. Bought all of the parts and put it together myself. I bought all of the parts online because there are no places around where I live to buy computer parts. Not to mention the large variety that stores online have.
Peter Hirst, the forge I have now is not going to be the highest grade forge in the world. I would love to be able to buy the best materials and make a very nice forge, however that is not in the budget. This is also my first forge so I am not completely sure what I specifically want out of it. Be it deep, long, tall, on the ground, mobile, ect... I do however want to be able to do my castings and if normal fireclay wont stand up to the prolonged exposure to that heat I will look into getting some Fire-Stop
|
|
- hillm
- Tuesday, 12/09/08 22:53:15 EST
|
hillm
fireclay will stand up to the 2400 degree forge fire heat for many years. I know it is a time proven product.
The product Fire-Stop Peter talks about sound very interesting and may be a better substitute. I would do a little research on it first. I would look into the temp ranges and ask the manufacturer if it can be used safely in a coal forge.
The silica sand however is a NONO to use in a coal forge. keep it in the sand molds not the forge. Very bad for your lungs.
|
|
- Rustystuff
- Tuesday, 12/09/08 23:12:48 EST
|
Stretching Refractory Mixes: Most of these are as lean as possible to start with and should not have things added to them. The bulk of these products are refractory aggregates with a small amount of refractory binder. Water set refractories are NEVER as strong as fired refractories such fire brick or kiln furniture. Adding more filler dramatically reduces their strength and ability to resist cracking.
Straight refractory cement designed to build using fire bricks and block is different but any additions should be tested.
Fireclay is NOT a cement or self setting. It is used as an additive to cement and refractory binders. When used in a fireplace it is mixed with Portland cement to make a mortar. While this will resist high temperatures is does not hold up well at calcining temperatures where the cement breaks down. What works in a fireplace is a world apart from a forge.
As long as you understand that what you are doing is a make do type thing then go for it.
|
|
- guru
- Tuesday, 12/09/08 23:34:30 EST
|
Mr. Cross;
I will tell you what is more dangerous than fire;
Someone who urges the impressionable newbie bladesmithing community to cold forge swords from springs.
I find it quite worrying that you own all of those guns, as you seem quite unstable.
Matt
|
|
Matt Coates
- Wednesday, 12/10/08 03:12:27 EST
|
Oops. I'm about a month late with that comment. Guess I should have scrolled down further! :)
Matt
|
|
Matt Coates
- Wednesday, 12/10/08 05:40:10 EST
|
Hillm, one more place to try would be refractory contractors, and maybe masons themselves. I got all my refractory supplies, such as insulating fire bricks and refractory mix, from several local refractory contractors. There are three in my immediate area, and all had no problem selling me some of their excess material at their prices. Very helpful people.
|
|
- Marc
- Wednesday, 12/10/08 08:24:13 EST
|
Finding things online v. local: All the local Home Depots (6 of them within a 5 mile radius) carry 20 Mule Team Borax, just in case anyone needs to know.
|
|
- Nippulini
- Wednesday, 12/10/08 09:30:51 EST
|
I am interested in finding a blacksmith who can do custom work on my fireplace in Manassas, VA. Got any suggestions?
|
|
Daniel Taylor
- Wednesday, 12/10/08 10:50:28 EST
|
TGN---where do they put it?
Hillm; I find it very strange that none of the masonry supply places can't get you fireclay. Did you check with places that only cater to masonry contractors? Otherwise it's kind of like saying no store carries lumber in your area because all the food stores you checked don't.
Thomas
|
|
Thomas P
- Wednesday, 12/10/08 10:52:27 EST
|
For setting masonry, hardware stores hereabouts (NM) sell, or used to, anyway, a mortar called Sereset. Crazes like crazy, though, so needs to be stretched and cured carefully.
|
|
Miles Undercut
- Wednesday, 12/10/08 11:27:04 EST
|
guru,
Just reading the post from the past weekend. it's fine with me if you want to delete this as the thread is closed. Please keep up the good work with this website. Despite what "some" may say, this site has done more for the advancement of our hobby/obsession than anything else I can imagine. Where else can a you post a question and get literally hundreds of years combined experience to answer truthfully in a matter of hours? If we do not pass our craft on to the next generation......
thanks again for all the hard work!!!
|
|
- Nathan
- Wednesday, 12/10/08 11:29:38 EST
|
Daniel, Mail coming your way.
|
|
- guru
- Wednesday, 12/10/08 12:09:15 EST
|
Guru,
The ad banner at the top of this page is throwing HTTP errors.
|
|
Rob Dobbs
- Wednesday, 12/10/08 15:07:20 EST
|
Nevermind. It seems to be working now.
Sorry
|
|
Rob Dobbs
- Wednesday, 12/10/08 15:40:57 EST
|
First, I apologize in advance for being so long winded. Rest assured there are some relevant questions at the end that you can skip to if you like. About a week ago I started looking on the internet for instructions on how to become a swordsmith. I knew it would be hard work, but honestly didn’t know just how hard. I actually made this decision 3 years ago, but I never dared to dream about the possibility until now, because of money and time issues.
Last year things changed for me when I was in a bad car wreck with some very bad injuries. Everything’s fine now and I finally got my insurance settlement. I won’t say how much it is, but I’ll tell you I can now afford anything I need to pursue this hobby. I’ve been reading over your website and I’m more sure then ever that I want to do this. I have a few things in my favor, and a few things against me.
In my favor, I have time: right now I have a job where I can set my own hours and take classes as I please. I have money: I can afford to build and stock a shed in my yard and am planning to do so. I’m tenacious: I have several hobbies that took a few years to get into/become proficient at. I’m a hard worker: I’ve done construction work alongside Mexicans in Texas from dawn till dusk for months on end, and my first job was as a ranch hand when I was eight years old. I’m smart enough to grasp complex technical concepts: My IQ is 158 and some of the aforementioned hobbies are considered to be very nerdy because of the amount of thought involved. I have some contacts that can help: My father in law is a mechanic and fairly knowledgeable about some of the things I know will be useful to me regarding metals. One of my hobbies is American Civil War reenacting and sometimes blacksmiths set up shop. I hear a one in particular loves to teach newbies. I’ll have a lot of questions for him next time I see him.
Against me, I know nothing but what little I’ve researched so far. I’ve never worked metal in my life. I don’t yet have any tools except common household hammers, screwdrivers, and the like. So here are my initial questions for you:
1. I’m planning to mount my anvil (when I do get one) and I want the best material I can get. The question is do I really want the heaviest one I can get? On my budget that’s pretty darn heavy.
2. I’m thinking of getting the 55 pound blacksmith leg vise from blacksmithsdepot.com. Is that a good one?
3. I’ve ordered all of the recommended reading from the how to get started pages, and I’ve found a 14th edition of the Machinery’s Handbook (the site says get the oldest one possible), is that good?
I’m going to be taking a welding course, a drafting course and now I’m planning to get a degree in metallurgy. Any additional free advice is more then welcome.
|
|
Lars
- Wednesday, 12/10/08 18:37:57 EST
|
Nathan, shame on you!
Mr. Turley has been around for a while but he's not that old! (hee hee hee...)
Sorry Frank I couldn't resist. (Let the retaliation begin!)
|
|
- merl
- Wednesday, 12/10/08 18:51:00 EST
|
Lars, Get a hold of Frank Turley. He is one of the assistant gurus on this site. If I had the time and money as you say you do I would take my whole family on a vacation to New Mexico so I could take his class.
|
|
- merl
- Wednesday, 12/10/08 18:58:32 EST
|
Lars- If all that is true if you stay focused in 10 years you could be teaching some of us. Especially given your books and classes statement; it sounds like you are on the right track.
IMHO part of the fun is searching for the tools. If I were you I'd slow down on the new tool buying till you get a good feel for what you want to do and how, and start networking, going to hammer-ins and conferences, and searching out antique stores and good tool dealers.
|
|
Judson Yaggy
- Wednesday, 12/10/08 19:01:26 EST
|
A shop with no Questions: Lars, Everything depends on what you want to do. A blacksmith shop for doing small repairs can be carried on one's back or on a pack animal but a shop to do heavy sculptural work starts with a power hammer in the 100 to 400 pound range (thats the weight of the moving part). The machine might weigh up to 8 tons. Complimentary equipment includes weld platens (AKA Acorn(tm) Plates) starting at a ton and up, heavy duty shop saw and a gas forge the size of a refrigerator.
Everything is scale. If you want to make small things or precision things then a 100 pound anvil MAY be a large anvil. IF you want to be a generalist and do everything from bladesmithing to architectural work then a 200 to 400 pound anvil is suggested. If you go for the huge power hammer and spring for helpers or strikers occasionally then you want the biggest anvil made.
Needed anvil size is directly related to the work and hammer size in use. The best ratio that I have determined is 50:1 minimum. That means if you swing a really heavy 4 pound hammer you need at least a 200 pound anvil. If you are of the light fast hammer school then a 2 pound hammer is suitable on a 100 pound anvil. But if you use a sledge of 8 pounds (and one CAN be swung single handed for a short couple blows OR with strikers) then a 400 pound anvil is recommended. There is also the question of how long you are going to work at the anvil. If it is going to be all day, day after day then a larger than the minimum will pay in how tired you are at the end of the day.
Minimum ratio 50:1, Maximum 100:1.
There are many more important questions. If you are serious about bladesmithing then multiple belt grinders may be more important than a big anvil and you may want a press rather than a power hammer.
If you want to produce large quantities of small items to sell at crafts shows or to Cracker Barrel then a vibratory finisher and a small powder coating booth may some of the productivity tools you need more than a big anvil.
IF, like many of us you expect to work alone then certain power equipment is helpful. Many blacksmithing techniques relied on lots of cheap labor. Today even casual hobbiests have power hammers, treadle hammers and flypresses to replace helpers.
Then there are machines that replace skills that take many years to achieve. Many shops have small CNC plasma cutters to cut blanks, templates, silhouettes and signs. If you can draw it by hand or in CAD these machines will cut one or a thousand perfect parts in much less time than you can clean up one rough hand cut part.
Modern blacksmith shops look more like a modern machine shop than a romantic smithy of old.
If you have little shop time or skills start with "Metalworking Technology and Practice" or a local course that teaches introductory shop classes using that reference. Most Community Colleges and trade schools use it. That will give you the background that blacksmithing schools do not teach.
|
|
- guru
- Wednesday, 12/10/08 20:31:33 EST
|
Sorry, I misspelt the trade name of the fireclay I mentioned above. It is Sairset, not Sereset. Googled it just now, lotsa URLs listed.
|
|
Miles Undercut
- Wednesday, 12/10/08 20:56:10 EST
|
Lars,
Yeah, I'll send you a hard-copy school brochure if I may have your USPS address.
As for Merl's comment, I taught in Maine in 2005, and as a going away present, a senior student gave me a trilobite. I've often wondered if that was a broad suggestion regarding their teacher's dotage.
|
|
Frank Turleyf
- Wednesday, 12/10/08 21:02:23 EST
|
Frank,
As long as the trilobite didn't actually recognize you personally, I think you're okay. :-)
|
|
vicopper
- Wednesday, 12/10/08 21:55:04 EST
|
Lars,
I'll second what Judd Yaggy said: take some classes, read all you can, then start looking for equipment. Until you've done a bit of actual work at the anvil, you can't really know what will suit you best in the way of tooling. There is just too much variety available in most of our tools to say that any one specific item is the "best" for everyone. We all develop our own preferences, based upon our situations and experiences.
I started with a small 100# Peter Wright anvil, but quickly realized it was far too small for the things I like to do. Over the course of a few years I tried several others and finally settled upon a 450# Nimba Gladiator as my main shop anvil. I have a few others that fill in for various functions. Vises were much the same, with a smaller 45# leg vise as my first, until now when I mostly use a larger 100# vise that is ugly as can be but works extremely well. I have three leg vises mounted at differing heights and four bench vises ranging from small jeweler's vises to medium heavy sheet metal and machinists vises, and all get used every week. You can never have too many vises (or vices, for that matter). Much the same for hammers. Most of us have far more than one, many have over a hundred. There is no one perfect hammer. The list goes on, but the point is that these things evolve with experience and changing needs/wants. Right now I want a hydraulic forging press. :-)
|
|
vicopper
- Wednesday, 12/10/08 22:03:18 EST
|
Mister Turley- I sent you an e-mail.
Guru- I am dead serious about the bladesmithing and would also like to make armor. I realize I have a LOT of work to do. I do plan on working alone, so some (or all)of the larger equipment may be needed. I also want the highest quality items I can turn out regardless of how long it takes to make them. The idea of using a CAD program is nice since I'm a self-taught graphics artist and have used several 3d-modelling programs. I'd just really like to be able to draw things by hand better.
As for the book, maybe that should be added to the getting started page? I'll go order it right now.
I'm sorry if I come off as cocky, but all the newbie information seems to be full of warnings that the work is hard and the learning curve is long. The fact is I'm not prone to fairweather flights of interest like I assume most people who come here wanting to make a weapon are. I just wanted to put that across.
Judson Yaggy- I see your point. I'll hold off on the purchases for now. It's hard not to get little ahead of yourself when everything you want suddenly comes in to arms reach.
|
|
Lars
- Wednesday, 12/10/08 22:25:40 EST
|
Howdy Lars
You have a great attitude and motivation. I am in full agreement with vicopper. He gave you great advice about educating yourself as much as possible first.
The vise you mention sounds good. They are good vises. I would just start out with a quality basic medium size anvil around 150 lbs. A coal forge with firebox in it or a gas forge (they have limitations). A medium size vise as you mention. A half dozen basic tongs and hammers. A hot cut chisel hardie for the anvil. The Blacksmithing books and videos available will pretty much point out what those are. Play with forging for awhile and see if you will enjoy it and have a passion to continue with it. Then you may find those basic tools suit what you do or you may have gotten to a point to start adding lots of different and more costly tools.
Even though you can afford anything you desire in tools I would be conservative untill you know you love Blacksmithing.
All the anvil hammer ratio stuff Guru mentions is true. The advantages vicopper mentions in a big anvil and vise is true. I have owned up to a 600 lb anvil and 150lb vise. I use two one hundred lb anvils. They have had up to 2" square stock forged on them. Yes it takes longer and is more difficult. It can be done. I also prefer my 35 & 55 lb vise over the heavy ones. I make due with them. It comes down to personal preference as well. I can make anything those guys can make, it just may take longer with more effort. I don't make a living with it anymore, so it doesn't matter to me. I do have a gas forge and love it. I have a full size coal forge with firebox and love it much more. Gas forge is great to do a quick job that will fit in the forge.
|
|
- Rustystuff
- Wednesday, 12/10/08 22:36:36 EST
|
Lars, Yep, our Getting Started article is point largely at kids. I have been planning on turning it into 3 articles with 3 different methods of progressing. While it is not a common term in the U.S. Germans have HobbySmith as one word. It is a apt title and covers amateurs in the best sense that the "love the subject". Hobby Smiths can be kids with no budget or working folks that have shops better than many professionals.
Note that if there are local shops available you can often take your CAD drawing converted to an interchange format and they will plug it in and run it for you. Lasers, plasma, waterjet and regular flamecutting are available. If they are good to work with then you don't need to spend THAT money.
Metalwork Technology and Practice is listed in my Sword Making FAQ Resource List with a description. I plan to post a full review of several editions but like everything else it is another Round-To-IT.
The above resource list took a lot of effort to put together and gets 1/6th the traffic of the main article. I figure that is about the percentage of serious to "wannabes". I have reviews to write of just two of the books on the list and then I will consider it finished.
|
|
- guru
- Thursday, 12/11/08 00:02:24 EST
|
I just noticed one of our Google advertisers. I cannot say click the ad (Google's TOS) so here is the address. This is something I almost never do.
HandmadeSword.com Samuri Wakizashi Swords.
Apparently Mr. Cross's tirade got us some new advertisers, mostly his detractors and people he hates!
|
|
- guru
- Thursday, 12/11/08 00:11:02 EST
|
Lars, A couple of bits of advice which I hope will be helpful.
1. I have just been reading an article on another site. It is inaccurate and downright wrong in several areas in which I have some specialised knowledge. The point is DO NOT BELIEVE EVERYTHING YOU READ ON THE INTERNET. (Maybe that includes this posting). You can believe this site and anything wrong on it will be corrected by knowledgable people.
2. One interesting source of info on blacksmithing products is the numerous on line catalogues etc. of manufacturers. I am NOT suggesting that you go out and buy a whole ready made starter kit from one of the big suppliers but it might give you some good ideas as to what could be useful. Also if you see a picture of something you might like to have a try at making the article yourself. That is the best way to learn the manual skills. Here in rural China pretty well everything in my shop has been made on site from some very basic tools. Don't worry if you haven't got a "Postlethwaite's patent plannishing hammer". You probably don't need one.
You will find slack tub here and the chat on another site to be very useful. If you have a question then ask! It is how many of us have learnt a lot. But don't ask me. I am a raw beginner!!
|
|
philip in china
- Thursday, 12/11/08 00:53:39 EST
|
Guru- I understand and I'll keep in touch and continue to use your articles as my education and skill progress.
Philip- I think you for your advice. It took me a while to settle on posting on this site cause it seems to be the most reliable from what I can gather. I'm pretty internet savvy, and taking things with a grain of salt comes with the territory. As with anything else I'm going to need to take in I will research tools and get an idea of what I need before I pay for it. The only reason I was asking about the anvil and clamp were because it seems that it would be difficult to even call ones self a blacksmith without them.
|
|
Lars
- Thursday, 12/11/08 01:41:16 EST
|
Thomas, the Borax at the H.D. was located in the cleanser department.
Lars, welcome to Anvilfire and the wonderful world of smithing.
|
|
- Nippulini
- Thursday, 12/11/08 09:59:13 EST
|
Hi all,
I'm nearing completion of what I think I'm going to call the "Guru Special" RR anvil (just got to weld the top and do some heat treating) and have a general anvil question for you all. I'm considering the Nimba Centurion anvil, as from *what I've read* on the subject of anvils/sizes/types/etc. seems that this would be a good fit for what I could see myself getting into further down the road--light to med sized stuff. Nothing fancy--just camp knives, fireplace pokers, pot holders--all the basic "small" stuff. So, as far as anvils go, (and I do know this is a purely subjective issue) what would be the pros/cons of say the Nimba Centurion vs. something like a Euroanvil of comparable weight? I know some of you have these anvils, use them everyday, so am asking what you guys like/dislike about them.
As far as this forum goes, I feel that the wealth of information on this site is amazing and a tremendous help (and there is actually too much of it to sift in a reasonable amount of time--say several years :) There are a lot of "stupid" questions and a lot of "stupid" people who ask questions, and a lot of people who just don't know that are looking for answers, and I feel I that I need to just say thank you to each and every one of you (except Mr. Cross--appalling and apparently mentally unstable at best!) for your time and willingness to answer all of these questions. And thanks again for passing on your knowledge to those of us who are just starting out.
|
|
Chris F.
- Thursday, 12/11/08 10:06:00 EST
|
Blacksmithing and Goals:
Lars: What are your goals; besides “blacksmithing”? I note that you are involved in reenactment. Do you wish to do American Civil War (WBTS; WoNA; “the late unpleasantness”) equipment? Do you wish to do modern artwork? Knives and swords and polearms? Ships’ hardware and tackle? Medieval armor? Repair the neighbor’s agricultural equipment? Architectural hardware? Gunsmithing? Everything and anything? (Oh, the cruel temptation of that!)
The versatility of this activity never ceases to amaze me! Still, it’s a matter of scale. I was just looking at a sculpture in Washington, DC by Albert Paley ( http://www.albertpaley.com/ ) reflecting upon the large scale industrial processes that he uses for these commissions. And yet, he started out as a jeweler. As has been pointed out here many times, with big stuff you can usually work smaller, but with small stuff you have a hard time expanding the scale; and yet it’s wise to look at where you want to set a practical balance point. You may end up with a lot of tools, only a few of which you use all the time. However, some of the more esoteric ones are just invaluable in their very specialized roles; once you specialize.
One of the best “Viking era” blacksmiths I knew did better work with fewer tools than I will ever be able to accomplish (I aspire to competence). When I had to handle the estate, I was astonished at just how few were the tools that he used; but I also knew that he spent a lot of time at his work, and applied a lot of talent.
Tools and buildings and stock are a means of “getting there”; you need to think about where you want to go.
Just my tuppence. :-)
Rainy and dark on the banks of the Potomac. We haul the ship out tomorrow, and I start to move the forge to the new building that night.
Visit your National Parks: www.nps.gov
Go viking: www.longshipco.org
|
|
Bruce Blackistone (Atli)
- Thursday, 12/11/08 10:13:03 EST
|
Nimba Anvils: Many folks cannot get beyond the style of a Nimba. However, the solid mass without a waist is much more efficient pound for pound than the London or American pattern anvil and many of the European derivatives. As cast steel anvils go they are one of the best.
If the Romans had dominated the world during the Industrial Revolution like the English we would all be speaking Latin and using Nimba style anvils.
|
|
- guru
- Thursday, 12/11/08 11:11:01 EST
|
Hello! my husband is an aspiring knifesmith and currently drives from atlanta to chattanooga to forge, which is a very long drive. We were wondering if you knew of anywhere near atlanta where he could make his knives?? Thanks!
|
|
Andrea
- Thursday, 12/11/08 12:00:54 EST
|
Lars: May I recommend checking out the bladesmith's forum at dfoggknives.com? There's a lot of incredible talent there, and more opinions on what you need to start bladesmithing than there are smiths.
Andrea: Lots of smiths around the Atlanta area. Try asking your question at http://www.knifenetwork.com/forum/forumdisplay.php?f=59. That's the forum of the Georgia Knifemaker's Guild. Some of them check out anvilfire from time to time, but many do not.
|
|
Alan-L
- Thursday, 12/11/08 12:21:22 EST
|
I stumbled upon this site and found some very helpful information on steels, heat treating, history of steel, etc.
www.threeplanes.net/toolsteel.html
Be sure to scroll to the bottom of the page for all of the topics.
|
|
quenchcrack
- Thursday, 12/11/08 13:00:07 EST
|
Am I remembering right? Did someone here ask about quantity of oil required to quench a given mass of steel? Well, I got a story along those lines.
Little foggy on the details, but a friend of mine was re-working a coil spring (maybe fifty pound Little Giant size) for a customer and when he was done he decided to oil quench the spring. With the customer watching, he carefully heated the spring to 1500 or so and proceeded to dunk it in his bucket of oil. Well, his �quench bucket� was a nice 5 gallon plastic one nearly full. As the oil heated it boiled into a froth that caught fire. The bucket slumped and pretty much dissolved into nothing spilling five gallons of hot oil on the floor which the hot spring then ignited! Really impressed the customer!
|
|
- grant
- Thursday, 12/11/08 13:42:12 EST
|
Bruce- Well my goals are pretty broad. One thing I like doing is reproducing things that I see. I want to be able to make everything from Frodo's cloak clasp, to Wolverine's knuckle blades, to Iron Man's armor, but right now I assume I just need to learn the basics of the craft as a whole. Later my goals may become more realistic and shrink, or I may find I love smithing as much as I think I will and expand my ambitions. Right now I haven't picked up a tool or opened a book yet, but I can't wait to see which way this takes me.
|
|
Lars
- Thursday, 12/11/08 13:48:11 EST
|
LARS please do not sink a lot of money into tooling until you have tried the craft!
I have been getting folks started smithing for over 25 years and of the hundreds of serious determined folks who wanted to be professional blademakers I'm running at about 1% who go on to do so, About 10% are hobby bladesmiths and about 20% switched to hobby smithing over bladesmithing.
Frank Turley's schhol is one of the tops to get a good through background in smithing. Then think about attending classes at the American Bladesmiths School that are specifically on bladesmithing---from beginning to advanced.
*After* taking such classes you will have a feeling for what equipment you want to buy *and* how to use it.
If you are doing high end modern work machine shop training will also help a lot especially when making fittings.
Let us know how you are getting on too; we're rooting for you!
Thomas
|
|
Thomas P
- Thursday, 12/11/08 14:03:46 EST
|
Grant; I know of one smith who burned down his entire shop that way toasting a couple of powerhammers including a Blacker he had just finished restoring.
Lars for armourmaking get a copy of Techniques of Medieval Armor Reproduction, Brian Price *FIRST*! also hang out over that the armourarchive.org lots of talented armourers over there even if they use the british spelling of armour!
Thomas
|
|
Thomas P
- Thursday, 12/11/08 14:10:06 EST
|
I've been saving and organizing all of the links, references, and suggestions everyone has made. I can't thank all of you enough.
Thomas- Forgive me once again for sounding cocky, but I'm no stranger to being in top 1 percentiles, so I'm certainly not discouraged yet. I've made up my mind that I'm going to Frank Turley's school as soon as possible, and I'm definitely doing the longer course. Thank you for the book reference, I guess that's another one I'll go get. :) From what I've gathered so far I assume my workshop will be of the more modern variety, as long as it doesn't turn into a factory that quickly churns out cheap junk that's barely suitable for hanging on a wall.
|
|
Lars
- Thursday, 12/11/08 14:39:34 EST
|
When you're finished up at Mr. Turley's, I highly recommend attending the ABS William F. Moran School of Bladesmithing. That is if you want to get a huge jumpstart on bladesmithing. I went there last year and it was great. Taking both will put you light years ahead of most newbies, I think. They will give you knowledge, insight, and contacts.
If (or when) you decide to go the ABS school, drop me a line and can give you some advice on what to expect.
|
|
Rob Dobbs
- Thursday, 12/11/08 14:53:46 EST
|
Jock: thank you for fixing the quotation marks. Usually I remember to over-type them when switching from one format (MS Word) to a posting, but not always. It rather drives me to distraction when these programs are incompatible with something as simple as punctuation!
"...grumble, grumble, snarl & growl..."
|
|
Bruce Blackistone (Atli)
- Thursday, 12/11/08 15:25:55 EST
|
i know you guys are tired of questions reguarding forges but i wanted to ask if i could make either a propaine or coal forge using an old wood burning stove that has no use. its an atlanta stove works one if that makes a difference. i planned on lining it with fire clay and the nice part is it already has a vent set up to it and the top can come off. its a good thinckness aswell
thanks in advance
mat
|
|
mat
- Thursday, 12/11/08 15:32:25 EST
|
Mat, the short answer is no on coal, not worth it on gas. Now, you could prove me wrong but in the end you would be doing things the very hard and very impractical way.
|
|
- guru
- Thursday, 12/11/08 15:53:56 EST
|
Learning and doing it all. . . Lars, Etal, Some of the items listed come in the class of metal casting, particularly via lost wax or well designed patterns. This in itself is an art and it has nothing to do with anvils, power hammers or presses.
While you can learn to do simple casting in a couple hour class it is another field that can take a lifetime of study. We have some introductory articles on molding and casting on our iForge page.
While many artist craftsfolk do casting in their shops the majority do not. Most of those that do such as jewelers and sculptors specialize and do mostly casting. There are a few smiths that augment their work with casting but it is pretty rare.
The advantage to learning small casting work is that there are many schools with jewelery courses that teach casting. Most of it is in silver but brass is also cast in the same way.
Besides forging and casting there is metal carving which is yet another specialty. Then there is turning and spinning both of which require a good lathe and more specialized knowledge. Raising to make vessels or helmets is a specialty even in the areas that use those techniques. Recently press work became popular in blacksmithing circles (see the iForge articles on presses and flypresses). You can spend a few years studying engineering to get the most out of a press.
As I mentioned above, the modern blacksmith shop often looks more like a modern machine shop than a smithy. Lathes, milling machines, cutoff saws, welders, presses and the necessary accouterments to handle these such as an overhead hoist system and or a forklift. Besides the gross handling issues all this tooling also requires the small support tooling from wrenches to small and expensive micrometers.
When I designed and built my dream shop (which I have sadly been forced to sell due to divorce) it had a two story forge bay with overhead hoists on a monorail and a truck access door. There was a seperate side for a machine shop and one end of the forge bay had a mezzanine for working on two story pieces such as spiral stairways and sculptures. The forge bay had a recessed floor to fill with gravel or clay to be easy on the feet. There are two power hammer foundations and a place for a large chimney. Over the forge area a ceiling vent led to a large 40" square gable fan. All the steel framed windows had steel wire security glass to avoid accidental breakage. Over the machine shop side there was offices and a planned studio dark room. And the shop was to be complete with a full bath as well as a utility sink. It was topped off with a tin roof and full insulation. 32x44 feet with a planned 20x24 foundry addition. I never figured out where to put the sheet metal working tools. . Another addition? Many were on the mezzanine until I sold them (something I RARELY do) and always regret.
Sounds great but it was never completed. The money ran out with it about 3/4 finished. It was too big at the time but too small for everything I wanted to do. I had about $25,000 in materials in it plus my labor and a paid helper's over about 3 years. The tax people appraised it unfinished at $60K but it is probably worth well of $100K to replace. The shop I am in now is a miserable place with crumbling floors (bad concrete) and a condensation problem that creates more rain indoors than we have had outdoors. . . I doubt I'll ever have a chance at another dream shop. Time is catching up with me.
The point? Tools are not the end. You need someplace to put them as well as places to organize them and a way to move them. I have numerous multi-drawer tool chests that are overflowing and I bought shelves last spring (24' worth) that were full the day after they were put up. Another $1500 worth might be enough. The shop cannot support a hoist so I bought an indoor/outdoor fork lift. Books are also overflowing the shelves in the house and I haven't finished moving my library. . .
Its very easy to get ahead of the space you have to store and organize what you have accumulated. Wanting to "do it all" can easily result in doing nothing, being bankrupt or running out of time in life. Having a good plan and focusing on it pays off in the long run.
|
|
- guru
- Thursday, 12/11/08 15:58:41 EST
|
ok i guess the serch goes on, thankyou though
|
|
mat
- Thursday, 12/11/08 16:00:51 EST
|
before i give up one last thing i would like to ask is if i did go trough with using the stove do you think it could withstand the heat? or would it warp using a coal fire? i'm sure that i can get it to work i just dont know how yet. i'm sorry to hear about your dream shop i would explode if that happened to me good luck with your current one
_mat
|
|
mat
- Thursday, 12/11/08 16:16:12 EST
|
"Will it take the heat?" Yes and no. Depends on how you modify it to make a forge. The existing materials can take forge temperatures in a forge designed to use those materials.
Forges can MELT cast iron, steel and most refractory materials. Steel and CI can be set ablaze. How they are designed determines how they hold up. Gas or coal? It makes a big difference.
AND no matter how many times that idiot Rosy McDonald says it fire CAN melt steel. All it takes is enough fuel and a draft.
|
|
- guru
- Thursday, 12/11/08 17:59:47 EST
|
Chris F,
I have a Nimba Gladiator, the bigger brother of the Centurion. It is an absolutely wonderful anvil and a work of art as well. After using it for a couple of years I wouldn't want to go back to a London Pattern anvil. The tapered flat horn is tremendously useful, particularly on a large anvil, as it allows you to have a "face" that is of variable width. The round horn on the Nimbas is much better than the conical pointy little things on the Euroanvil, in my opinion, which is not to say that the Euroanvil is not a good anvil. It is. I just find the conical horn difficult to work on, compared to the compound curves present on the Nimba or London Pattern anvils.
As Jock pointed out, the squat, center-weighted style of the Nimba makes it work like a much larger anvil, compared to a London Pattern. I'd guess that the Centurion would do the work that you might normally do on a London Pattern anvil of around 350# or thereabouts. Onmy 450# Gladiator, I can clobber 2" bars with a 12# sledge without moving the anvil and get real work done, though the reality is that for stuff that big I use my power hammer 99% of the time. I could do all that I do on a Centurion without any problems, but I got a fantastic deal on the Gladiator so that's what I have.
The one advantage that the Euroanvil has over the Nimba is the side shelf option. I find a side shelf useful often enough that I am going to weld one onto my Gladiator before long, making it the perfect anvil (in my opinion, anyway). Your mileage may vary on the side shelf, naturally.
The Euroanvil also has the option of an upsetting block, which is not someting that I find necessary or particularly useful on an anvil. I prefer a big chunk of scrap steel plate set into the floor for upsetting. For short stuff I can use the anvil face, and for longer stuff the floor is a handier location, permitting me to develop more speed before the works hits it. Again, your mileage may vary, but you asked for opinions and there you have mine.
Best of luck with whatever you decide upon and let us know how it goes.
|
|
vicopper
- Thursday, 12/11/08 18:59:02 EST
|
"Grumble, Grumble, Snarl and Growl". Yes a good firm of attorneys. They worked for my ex wife in my divorce.
|
|
philip in china
- Thursday, 12/11/08 19:02:48 EST
|
Vicopper, i agree with the upsetting block in the floor. I set a dieblock insert flush with the floor level just outside the door of my shop. Much better for upsetting long pieces. And I would love to have either of the those fine anvils.
|
|
ptree
- Thursday, 12/11/08 19:50:06 EST
|
I diluted concentrated sulfuric acid in a plastic laundry detergent scoop once. The scoop promptly started melting. It was already in the sink; I managed to get the stopper in and a cold water bath run around the scoop before it collapsed. Not enough acid to do any serious damage (unless it wound up in *just* the wrong place), but it sure got my attention.
Lars, I'll echo what Thomas said about not buying a shop full of tools to start out with. It takes a *lot* of practice to get good at blacksmithing (not that I've come near doing that). I find it relaxing and enjoyable. If it turned out that you didn't, though, it would be pretty silly to torture yourself for hundreds of hours just to learn to do something you didn't like doing.
Also, the what tools you wind up wanting will depend both on what kind of work you do and on how you like doing it. Unless you're Bill Gates, it really is smarter to buy just enough to get started, and then add tools as you figure out what you really need.
|
|
Mike BR
- Thursday, 12/11/08 19:54:08 EST
|
Ahh Lars it wasn't the top 1% that made it. Most found out that the dream and the reality differed too much for them. One of my students had literally never held a hammer before; he's now selling on a regular basis as a hobby bladesmith.
Why I suggest you do not sink a lot of money into the craft until you have *EXPERIENCE* in it. I've welded up sound pattern welded billets using a improvised forge and charcoal from desert bonfires with a chunk of RR rail for an anvil and a clawhammer for a hammer---it's not the equipment that makes the smith. Now good equipment makes things faster and easier but there are tons of set-ups out there a lot more costly than my stuff that are just gathering dust.
Stop telling us how great you'll be and start showing us stuff you have made!
Let me know when you come over this way to Frank's school and perhaps we can get together for lunch sometime, I'm only about 2 hours south of him.
Thomas
|
|
Thomas P
- Thursday, 12/11/08 19:57:39 EST
|
I noticed that no one mentioned that another great thing a beginner can do is join ABANA. Organizational politics aside, it is a great group with lots of resources and has launched the careers of many a smith.
|
|
Judson Yaggy
- Thursday, 12/11/08 20:14:48 EST
|
Where'd all this come from? The only thing I'm sinking money into right now is books and classes. I've never once stated that "I'll be great", only that I'm not easily discouraged. If I'm offending anyone with my exuberance then I'll shut up.
|
|
Lars
- Thursday, 12/11/08 20:24:11 EST
|
Lars
You are fine. We all understand. We are just kinda throwing everything including the kitchen sink at you. Just stuff we all learned along our journey. We just hope it helps people from jumping ahead and making bad decisions untill they know they love Blacksmithing.
You asked very good questions. We can tell you are determined and intelligent. We all don't mind putting effort into our answers. Ask away.
|
|
- Rustystuff
- Thursday, 12/11/08 20:30:52 EST
|
Lars
If any of us come off snooty it is because we are just eager to help and share information to others. Also many of us are just plain old anvil heads and a little touched. :)
|
|
- Rustystuff
- Thursday, 12/11/08 20:35:22 EST
|
It's alright. I've had a rough day and I'm a little bit flustered. But I guess I really don't have any other questions until I get some work done.
Everyone's comments, resources, and constructive criticism are very much appreciated. It is true that I'm getting a little overwhelmed for the moment though. I'll continue to go over what's here for now, and then chime in when I have something else to say.
|
|
Lars
- Thursday, 12/11/08 20:40:51 EST
|
Lars, Most of this is coming from many of us that have spread our interests too thin sometimes or seen others fail because it all doesn't happen at once. All you need is an anvil, a hot fire, a hammer and lots of desire. But we don't want to see you spending $3000 on an anvil then deciding that you want to do something else (it happens a lot).
You can also get into armour work with a sheet metal shear a wood stump and a couple hammers. A good Beverly shear is the expensive part that makes the job enjoyable.
It pays to start simple and see where it leads.
|
|
- guru
- Thursday, 12/11/08 21:14:27 EST
|
I have been looking into anvil making quite a bit as of late. If I were to buy a large piece of high carbon tool steel(looking into getting a 8
|
|
- hillm
- Thursday, 12/11/08 23:11:07 EST
|
I have been looking into anvil making quite a bit as of late. If I were to buy a large piece of high carbon tool steel(looking into getting a 8" x 8" x 18" piece) would this be hard enough for an anvil? If not how would go about hardening said steel? This anvil will most likely be milled by hand and with the school CNC machine along with some filing and grinding. After looking at the plans here on anvilfire I have decided to mill the hardie hole, albeit in a slightly different manner than shown on this site.
Vicopper,
I just went over your demo on doing castings with wax and I have 2 main questions for you. First, if I were to make a mold of a crucible and use the same fireclay I am buying for my forge (Hawthorne Fireclay, 35 mesh) to make it, would this hold up to the high temperatures of molten metal?.
The second question is a bit more complicated. First, is it possible to melt steel with a good coal fire with the air all the way up(electric blower)? If so would this steel be of the same quality as the original steel? For example, say I wanted to make a cast of some high-carbon tool steel. Would it come out the same strength or would the heating and cooling weaken the metal? Finally, if all of this is possible do you know if I could use petrobond as the mold material as I do with alluminum and will soon be doing with copper.
|
|
- hillm
- Thursday, 12/11/08 23:11:16 EST
|
hmmmm, sorry about the first post; I have no idea why it sent that. I only posted once so I'm not sure how that got there...
|
|
- hillm
- Thursday, 12/11/08 23:12:16 EST
|
hillm
You will not be able to get the coal forge temp high enough for casting steel. You need a consistant 2750 degrees and non-oxidizing. You would need to build a casting furnace for that type of work. To make tool steel you need to add many other chemical elements in the melt.
Making cast iron and cast steel is an extremely advanced skill as compared to aluminum, brass and copper. You really need to learn from a professional foundry man.
|
|
- Rustystuff
- Thursday, 12/11/08 23:25:57 EST
|
guru, thank you for the help. i wold like to also mention i recently made my first mini skining knife using a 32oz ball pien and a 3 lb sledge it came out nice. i made it cold but i still normalized it first and tempered it after hardening with a torch "ugg". i liked making woodsman's palls before but now i think i'm going to start making minies i liked it so much. i'll post a pic of it soon. and to hillm read guru's comment under my last one it refers to melting steel
_mat ps who is rosy mcdonald?
|
|
mat
- Thursday, 12/11/08 23:34:58 EST
|
Making Crucibles: This has been a specialty for over 1,000 years. No, ramable or water-set refractories will not do. To make clay crucibles you need high purity, high alumina clay of a very specific type and it must be fired at very high temperature. The best crucibles are silicon carbide with the next best being graphite. Small clay crucibles are used as short term use or throw away crucibles by jewelers. Prior to the development of graphite crucibles the clay for good clay crucibles only came from a couple places in the world and the sources were very proprietary.
Besides these difficulties a crucible full of white hot metal is one of the most dangerous things one will every handle in the shop. Making your own IS NOT recommended.
It IS possible to make steel shelled refractory lined crucibles for "low temperature" metal melting like aluminium. But not for copper alloys.
Petrobond: Works with brass and copper but with every use you get a crust of burnt sand that should be scraped. But even if you have to scrap a lot of sand it is so much easier than green sand that it is worth it. It is not recommended for ferrous metal. There are resin set foundry sands for that purpose.
Melting Steel: Yes a solid fuel forge gets hot enough but is generally the wrong shape. You need an even surrounding heat. Melting furnaces are generally a different configuration than a forge.
Melting and Casting Steel: This is a very picky business. Without being melted in an air tight crucible or in a non oxidizing atmosphere the steel will burn up. casting steel is a specialty that is NOT worth the effort to do on one's own.
Hardening an Anvil: This is the tricky expensive part of the manufacturing process. It can be done by flame hardening or scanning induction hardening OR you can take it to a heat treater. Flame hardening requires special equipment (adjustable speed torch rack, multi-nozzle torch and quenching head). It also requires a little testing. . . OR you can take a chance and just heat a big wide strip down the center of your anvil as fast as you can and let it cool and self-quench. With the right steel it will be very hard. Leave the corners soft. IF the edges harden then draw the temper to as soft as possible.
|
|
- guru
- Thursday, 12/11/08 23:41:41 EST
|
We are splitting hairs here. I strongly disagree with Guru on one point. A forge does not get or maintain hot enough non-oxidizing heat for casting steel. Completely false.
Yes a forge can get over 3000 degrees and go beyon the liquid state and burn metal. I have spent a great deal of time with casting different glasses of iron in various foundries. I claim not be be an expert. Totally toss out the thought of using your forge for that application. You will only get yourself serious hurt or killed.
|
|
- Rustystuff
- Friday, 12/12/08 00:00:31 EST
|
Hillm,
The answers to both your questions are an emphatic NO. Yousimply cannot make a satisfactory or safe crucible yourself. Don't even try it. You'll only wind up injured or dead of you try to use a home made crucible for melting steel.
As for melting steel in a coal forge, sure you can. Not to cast it, though. That requires a controlled atmospnere, tightly controlled temperatures, controlled alloying ingredients and some decades of experience, not to mention specialized equipment. It is just possible to do cast iron on a small scale "at home", but you need to go into that with a lot of guidance form someone who has done it successfully numerous times. Again, it will take specialized equipment, but it can be done. Just not easily, and you won't be able to control the carbon content well at all. You certainly won't be able to make steel that is usable. Petrobond is just barely okay for casting iron, but there are special casting media for steel and iron that are far better.
|
|
vicopper
- Friday, 12/12/08 00:42:40 EST
|
hillm.
To expand a bit on what has been said about melting steel in a forge "with a good coal fire with the air all the way up(electric blower)?", as you asked:
When you crank up the air enough to get a coal fire screaming hot, you have created a highly oxidizing atmosphere at the hottest part of the fire. Any steel you introduce into that fire will, as soon as it gets up to above an orange heat, begin to lose carbon rapidly. In fact, it will almost certainly literally burn up before it reaches liquidus temperature all the way through. To melt steel (or any metal, really) for casting you need an atmosphere that is non-oxidizing. If the atmosphere is too reducing, you may introduce too much carbon and affect the steel adversely that way, too. These days, most small melts of steel (say, a few tons or so) for casting or alloying are done in electric arc furnaces or induction melters, with controlled atmospheres. This is not a do-it-yourself operation at all.
If you want ot get the beginnings of an appreciatiojn for the difficulties of melting and casting ferrous metals, try to get in on a bloomery firing somewhere. A bloomery will not produce a consistent, homogenous mass of steel, but rather a bloom of spongy, foamy, dirty iron and slag and carbon that might be refinable into steel with a lot of power hammer work if all goes well. It takes a couple of days, minimum, to do the building and firing and is meticulous work and rather tedious, too. There are a couple of people here who have done a fair bi tof bloomery work and can tell you more about it if you are interested, I'm sure. Suffice it to say that casting steel yourself is fundamentally impossible without a huge investment in materials, equipment and training.
|
|
vicopper
- Friday, 12/12/08 00:57:40 EST
|
vicopper
Thank You for chiming in. You explained everything very eloquently. You expended the energy to go into more detail than I desired. Hillm asked a valid and honest question. I feel Guru and myself came short in answering his question completely. My slight disagreeing on one point was not that I didn't feel guru was incorrect. It just didn't come across clearly to someone who doesn't know. I am probably not explaining myself well. I just don't want Guru or anyone to think I was out to argue a point with anyone.
|
|
- Rustystuff
- Friday, 12/12/08 01:47:28 EST
|
Making one's own crucible seems about like reinventing the wheel. They are available on eBay or you can do a Google search on crucible supplier or melting crucible.
At the moment there is a Johnson LP crucible furnace for sale on eBay for $800. Located in WI.
|
|
Ken Scharabok
- Friday, 12/12/08 02:42:48 EST
|
Who's an anvilhead? Touched, OK but anvilhead? Wait, don't look at the hat page on the news, I actually may resemble that remark:)
|
|
ptree
- Friday, 12/12/08 07:19:46 EST
|
Mat: On the coal stove forge idea. Generally, as usual, Guru us right: a coal stove is so different from a forge that never the twain should meet. HOWEVER, if what you have is the Atlanta Midget, or similar, you have the exception that proves the rule. The Atlanta Midget is a coal fired laundry stove that looks like someone cut off a pot belly and put a small two-burner flat top on it. The conical firebox is a little deep , but if you line it with a good refractory about an inch thick,keeping clear of the grate, you'll get a good servicable shape out of it. Keep the grate and shaker in place. The bottom is sheet metal, making it very easy to install a pipe tee tweer and cleanout. Leave the top in place: it makes a small but convenient tool shelf. Remove the 3 inserts(two round and one filler) so you get an oval opening. Hook your stove pipe to the existing fitting, and if you have enough stack height, you'll get a sort of side draft effect out of it as long as you keep your fire to a reasonable size. Sorry to butt in here Guru, but an Atlanta Midget was my first forge, and set up with an old Electrolux, I kid you not, served me well for a couple of years. I even did my first forge weld on it, using anthracite nut coal.
Oh, and on silica in the forge: sorry i should have mentioned that: yes, keep it away from the fire itself, but I would not heitate to use it for the rest of the hearth. Am I wrong here? Keep in mind: when a mason builds a fireplace using fireclay mortar, he is adding firecaly to conventional mortar, which is loaded with silica sand. Presumably its ok at usual wood combustion temps of perhaps 1000 degrees. ALso, refrectory cement like firestop is very different from fireclay. It is a mixture of clay and high temp cement, no other aggregates. MFR rates it at "well over 2000 degrees" on the label, for use as is for firebrick mortar and cast in place. Pretty expensive mortar, prettycheap refractory.
|
|
- Peter Hirst
- Friday, 12/12/08 08:29:21 EST
|
I recently came by a small anvil (14"L, 6"W, 7"H) that is marked "Foos MFG. CO. Springfield Ohio", #4 on one side and "SCIENTIFIC" on the other side. I have tried to identify this anvil through on line resources; but have never seen this manufacturer listed anywhere.
Can you tell me more about this anvil, type, age etc or tell me where I can find out more about this piece on my own?
Thank you
Dave Bowers
|
|
Dave Bowers
- Friday, 12/12/08 09:58:59 EST
|
Thanks everyone for all your information. I will just stick to copper and alluminum.
Ken,
The reason I wanted to make my own crucible is because if it could be done with fireclay it would be cheap and easy compared to the very expensive crucibles they sell. I do not have a lot money and no job as I'm only 15 and nobody wants to hire a 15 year old.
|
|
- hillm
- Friday, 12/12/08 11:32:28 EST
|
No Money: Hillm, Everyone wants to hire a 15 year old! Many folks have a lifetime worth of lawn work, minor house maintenance and other (mostly menial) jobs they would love to have a dependable teenager do for them. But that means knocking on doors, politely introducing yourself and asking for a job.
For nearly four years we have had various teens working on our landscaping. It is hard work but it pays well. The problem is we cannot get someone to do stick with it and finish. In the local area there are many immigrants that would love the work but we cannot afford someone full time (its not just the labor its the materials). But for a couple hours a day and on weekends. . . It is a year round need.
In fact I pay a significant premium to Sheri's granddaughter to come work weekends because she has to drive a significant distance.
This time of year (in the Northern Hemisphere) folks need leaves raked, snow shoveled, wood split and stacked. AND There are always garages to be cleaned and various other tasks. Then there is dog sitting and. . .
It doesn't matter if you live in the country with a 2 mile walk to the nearest neighbor or in the city there are folks looking for a worker willing to work.
Folks looking for part time laborers almost always pay cash but expect dependability just like working in a regular place of business.
Show up almost ANYWHERE with a good squeegee, a ladder and a bottle of ammonia and some soft rags and I guarantee you will go home with $40-$50 for a couple hours work IF you do a good job (cleaning windows). Learn the tricks to doing a good job cleaning windows, don't step on the flowers or mash the shrubs and you will have all the employment you want.
|
|
- guru
- Friday, 12/12/08 12:22:41 EST
|
More Jobs: While many stores and businesses will not hire a teenager full time many "Mom and Pop" and small mostly cash businesses will pay dependable part timers to come by on a schedule to sweep sidewalks, clean up the back alley. Some things need doing weekly, others monthly. The dirtier and more disgusting the job the the more important it is to have done and the more it pays.
Dependability is the KEY. Excuses of dates, ball games, concerts, no transportation, family strife (NOBODY wants to be part of your personal soap opera) or anything having to do with a social life don't cut it. Prove you are dependable and willing to work and word will spread.
I know. I remember being your age. Its hard to go out and ASK for work. It's like door to door sales. But don't say no one will hire a 15 year old.
AND. . you never know. One of those clients might have old tools they will trade for work or sell cheap. . .
|
|
- guru
- Friday, 12/12/08 12:38:13 EST
|
15year olds looking for work... As with everything the Guru said I would like to add DON'T GIVE UP. So what if your turned down 27 times, the 28th might be the one, or the 29th...
It's your attitude too, before you go out looking for work, look in the mirror and tell yourself anyone would be lucky to have you work for them. Also dress appropriately, yes I know that having your belt down to your knees, and your hat on backwards is the fashion and us old farts don't understand youth, but us old farts are the ones who will be giving you the jobs so for a bit conform to our out of date tastes. And good luck, we're pulling for you even if it doesn't sound that way, (Jim who's so old he remembers when only welders wore their caps backwards...)
|
|
JimG
- Friday, 12/12/08 14:13:44 EST
|
Melting steel: I've seen several steel melting furnaces built from propane forges with increasing the thickness and heat tolerance of the insulation and using a really good burner; however the end goal was just to melt the charge and let it slow cool into a "puck" in the crucible, (which was sealed and had flux as well as the charge in it), not to cast a semi finished shape. These melts were for making wootz and the resultant puck underwent a whole lot of processing to get it into final form.
Thomas
They all used commercial crucibles for safety sake.
|
|
Thomas P
- Friday, 12/12/08 15:18:52 EST
|
I don't know what is the minimum age for McDonals but they might hire 15-year-olds.
Ah, yes, dependability. I hire occasional labor for the farm. Guy might call on a Wednesday evening, I tell them to snow up the next morning and they seldom do. I tell people there is a blackhole between my farm and Waverly which sucks up farm laborers.
For the past couple of years I've used a guy who is retired from one of the railroads. Pocket money for him. I give him a job jar and he works his own schedule.
I also hire out shop labor to do grunt work. Used the SIL of a neighbor. When I called him for more work he never called back. However, his MIL jumped at the chance and came out to work two days. I thought heck, she is workinig to put food on the table for him. (And she did a quite nice job also.)
On advantage of payment in cash is the various deductions aren't taken out. $8 hour cash equates to about $12 hour with deductions.
|
|
Ken Scharabok
- Friday, 12/12/08 15:52:35 EST
|
Hillm
Great advice from the above folks. When I was a young lad I worked for reasonable prices. Check to see what other get for a job and charge a little less. Do a first rate job. I made quite a little business for myself cutting yards, trimming, raking leaves and pulling weeds from gardens. Before I knew it I had people seeking me out. I had a car and was buying my own lawn mowers. I was very dependable. I always showed up and early. I did everything to the best of my ability. I watched out for the flowers and bushes like Guru said. Next thing you know I was trimming bushes and shoveling snow. Eventually I got a small Nissan pickup truck and I was cleaning out basements, garages and attics. Then i was timing lower limbs on tress and on and on. I even got a snow blower to help with the shoveling. A realiter found out about me. They hired me to maintain the properties of all the vacant houses they were selling. Then I starting sending monthly bills. It turned into a little enterprizing business. I didn't have lots of money, nut I had a truck, tools, gas and bought pretty much any toy I wanted for myself. I hope this was encouraging. I never advertises. People sought me out because of the previous happy customers. To get started you may need to knock on doors or ask people your parents know if they need lawn work. I probably owned a half dozen lawn mowers by the time I gave it up. As always do it to the very best of your baility. You will come home dirty, hungry, smelly and tired. You may work on a Saturday 12 plus hours. It is worth the work ethic you will gain.
|
|
- Rustystuff
- Friday, 12/12/08 16:22:01 EST
|
Forgive my poor spelling above. Before I could drive or owned a car I pushed my lawn mower down the street with my gas can in hand. Also people who were located 10 miles away would come pick me up to work for the day and feed me a lunch.
|
|
- Rustystuff
- Friday, 12/12/08 16:43:21 EST
|
Lars; have you checked around for a local blacksmithing group so you can get a smithing "fix" before your plans start maturing?
Sorry if you felt I was trying to rain on your parade; but you are not the first fellow to show up here enthusing about becoming a sword maker; not the 20th either.
I spent a year apprenticed to one of the top swordmakers in the USA back in the early 1980's. Rather an old style apprenticeship: 6 days a week in the shop, no pay but I did get two meals a day with his family. I lived on my savings. At the end of the year I got married and a family and had to make the choice to start the long slow slog up to being a "name" or to keep it as a hobby and get a job that would support my family. I chose the family route as I had learned that I enjoyed it much more as a hobby than as a job
Thomas
|
|
Thomas P
- Friday, 12/12/08 16:50:06 EST
|
WOW!! Thomas that is really cool. I never knew you did that. You even inspired a fellow Smith too. :)
|
|
- Rustystuff
- Friday, 12/12/08 18:24:27 EST
|
Hmmmm, I think I'll go out this weekend and see if I can get a job shoveling snow and salting and such. I've tried to get such jobs before, like mowing, raking, shoveling, ect... but everyone either did it themselves, had someone else do it, or didn't want a 13-14 year old kid doing it. I kind of gave up looking for a job like that and haven't really thought about it since then. I've been concerned with getting a job at KFC or McDonald's or Pizza Hut. Also, now that your making me think about it, the house next to mine just sold and someone started renting out the house next to my grandparents a few months back that I haven't talked to yet. I'll tell you how my job hunting goes.
And Rustystuff, "You will come home dirty, hungry, smelly and tired," that's the way I like it.
|
|
- hillm
- Friday, 12/12/08 19:32:54 EST
|
On the anvil making... I think I'm going to change the dimensions on that piece of steel for my anvil. Just to make my self clear it will be completely milled down. There will be no welds and it will be 1 solid piece of metal.
With the hardening of the anvil, with the description you have given for hardening it myself I think I would rather have a professional do it. What kind of place would do that? Also, if there is no one around town who can harden my to-be anvil, do you know of a reliable company/person I could ship it to for the hardening?
|
|
- hillm
- Friday, 12/12/08 19:46:09 EST
|
David Bowers,
FOOS Mfg.Co. made blacksmith tools, portable forges, and blowers; 1885-1893. Reference: "Directory of American Toolmakers" published by Early American Industries Association, 1999.
|
|
Frank Turley
- Friday, 12/12/08 20:16:35 EST
|
hillm,
I don't know where you live, but when I was a bit younger than you I lived in a college town and my first job was as a shoeshine boy in a barber shop. Thoe days are pretty much gone, I know, but if there is a college campus with ROTC where you live, the ROTC guys will keep you busy and profitable if you can do a truly excellent "spit shine" n a pair of parade boots.
When I was in high school and later college, I was always needing money for my hobbies and interests, as well as living expenses. I found that I could always get work (and a great meal) by going to the restaurants in town and offering to clean the grease trap, grill and exhaust hood. That is about the nastiest job in the whole food service industry and NOBODY wants to do it. Many restaurant owners have to do it themselves because their employees quit if asked to do that job. If you are willing and able, you can be assured of steady repeat business as this service is required in order to pass health and fire inspections. I absolutely guarantee you will come home filthy, smelly, greasy and simply dying to get a hot shower. You'll also make some pretty darn good money, since no one else wants to do the work.
Jobs that nobody wants to do usually pay pretty well. I know a couple of guys in the septic tank cleaning business and they drive really filthy trucks for work and Mercedes and Jags for play.
|
|
vicopper
- Friday, 12/12/08 22:00:14 EST
|
Hillm: There are companies that specialize in heat treating. Few tool and die shops / machine shops do it in house. You may have a hard time getting a company to take You as a once and done customer, if that is the case You may have to go through one of their regular customers.
Before You order the steel You need to determine who will be doing the heat treatment and what they offer. It would be wise to choose a material and process that they do regularly. You can check the yellow pages, but it would be a good idea to find out who the tool & die and machine shops in Your area are using. Your Vo Tec school should know who the local tool & die and machine shops are if You do not, but then again, check the yellow pages.
|
|
- Dave Boyer
- Friday, 12/12/08 22:25:30 EST
|
hillm
I forgot to mention I did some septic system work too when I was your age. I would get hired to dig up the septic tank and lines by hand with a pick and shovel. Then I would have to bail it out while standing in yucky stuff in waiters. I did around four of them that way.
|
|
- Rustystuff
- Friday, 12/12/08 23:35:55 EST
|
i'm like you sort of because i always have ideas of what i want to make or do the best teacher in my opinion is time. i say this because i've been trying different sanarios and techniques but over the period of time i've done so ive gotten pretty damn close to seriousley hurting myself. after reading all you have said about crucables and melting steel/ hardening anvils will do just that if you are not careful. what purpose do you have to be melting steel? not to be rude or intruceve but you dont want to cut your life short by breathing in fuemes or dropping molten steel on yourself. i have had plenty of success just using a forge i dug into the ground and a piece of rail and hunk of steel. careful if you buy one online aswell it may only be suited for led. i also say that you should not mill down the block to an anvil shape, are you going to make horse shoe's? i say leave the block with it's mass and weight that way you will have a lower chance of having to treat the steel. if i were you i would check around a junkyard first "if there is one" before i bought an expencive chunk of tool steel with little to no funds at hand. all the things i say are from advice i have been given over time on this site and from people i know who told me i may not like smithing "i do of coarse" and would be disappointed if i spent alot of money for nothing. if you have to get the block thats fine. make sure your safe while you do this you are still young not that i'm old or anything but i dont want to see anyone hurt when i could of said something to prevent it. good luck
MAT
|
|
mat
- Saturday, 12/13/08 00:06:37 EST
|
Vicopper
I have been thinking about the shelf you want to put on your Nimba anvil. I am sure you already have this planned out. If it was me I would put two pins in the side of the anvil and half way or more into the shelf. Then I would weld it. I pinned a horn on an anvil I made from 1070 before I had my pro welder stick it on. Just thinking to much I guess. I think Guru has pictures of it.
|
|
- Rustystuff
- Saturday, 12/13/08 00:42:56 EST
|
Thank you everyone for you advice and suggestions.
Dave Boyer,
What are you talking about my "Vo Tec school"?
mat,
I understand your concern, but I assure you I am being very careful. Well, as careful as one can be around a fire around that's hot enough to melt through steel. The reason I'm asking these questions is because I am interested in them. Just as I'm interested in doing aluminum and copper castings, milling, engineering, and forging. I may never actually do anything important or productive with any kind of casting. Forging has its uses but I like to do it mainly because I find it fun and entertaining. I am asking these questions to learn and to avoid making any mistakes that might occur from running blindly toward a goal, oblivious of the dangers. Most of these things are longer term goals anyways. The anvil probably won't happen for a couple of months at the earliest. The aluminum and copper castings probably won't happen for several months, more than likely late next year. At this point steel castings will probably never happen.
I'm trying to learn what I can and can't do. What is dangerous and why. What I need to avoid and how. What I should do and how it's done. I need to ask questions to learn regardless of if I am ever going to do anything productive with steel castings for example, let alone ever do a steel casting.
As I stated the anvil will probably be a little bit in the coming. I plan on doing a lot of looking around at different probable suppliers of high quality steel and places/ways to get it to the required hardness. I'm going to go over my plans for milling and processing several times and know exactly what I want to do and how I am going to do it by the time I have the metal. With my design I plan to keep as much metal as I can. The only things I plan to mill are a horn, which will be finished the rest of the way by hand, the hardie hole, and a way to bolt it to whatever stand I use.
I really do appreciate your concern for my well being but I have no plans to run off and get myself hurt. I plan to be as well informed as I can be of these things before I attempt them.
|
|
- hillm
- Saturday, 12/13/08 00:52:52 EST
|
"Vo Tech School"
Vocational Technical School, Manual Training School, Technical College. Unlike colleges and Universities these train you directly for an occupation. Many have good welding and machinists courses.
Then there are also specialty craft schools. These range from general crafts schools that teach a variety of things to those that specialize in only one craft. These will teach you the basic how-to but are generally short on the why and technical aspect. The reason is that many folks go to these as part of their hobby or to learn a hobby. The courses are generally short. The in-depth technical and business parts must be picked up elsewhere.
But craft schools are a good place to get hands on experience without buying a lot of equipment you may or may not want or need.
|
|
- guru
- Saturday, 12/13/08 01:26:33 EST
|
During my last two years of high school, I worked at a marina run as a concession on park service land. The marina was below the city sewer lines, so there the park service had installed a pump out station. Every so often, the intake would clog, and sewage would start to back up from the storm drains. For some reason this usually happened when they were washing up from dinner in the restaurant.
We'd call the park service, and about an hour later Jerry would show up. He'd climb down into the sump with a screwdriver, and dig out whatever was clogging the intake. Then he'd wonder into the restaurant kitchen and pour himself a beer.
Then one time, we called and about three hours later a young guy showed up. Jerry'd had a heart attack. The new guy spent 45 minutes flipping switches in the control panel, then said they'd have to send a maintenance crew in the morning. We sure missed Jerry.
|
|
Mike BR
- Saturday, 12/13/08 07:12:28 EST
|
wonder, wander. duh!
|
|
Mike BR
- Saturday, 12/13/08 07:13:11 EST
|
Vicopper,
The uses of the anvil side-face are described on the rathole forge website: for scrollwork; for straightening bar stock; and as a London pattern heel would be used. I have not found any use for it on my anvil. Unless you have something really production specific in mind, I urge you to abandon your side face addition plans.
|
|
Frank Turley
- Saturday, 12/13/08 07:44:06 EST
|
Vo Tech and Craft courses: Hillm, check out your nearest community college. Most have weekend and summer courses in just about anything you want, including metal and sculpture courses. Bucks Co. Comm. College in PA is one that I took these types of courses when I was in middle school! Beginners robotics, video production and another creative course (I forget which). Most community colleges have a barn or warehouse where they store things and usually have a director of such activities.
|
|
- Nippulini
- Saturday, 12/13/08 08:30:41 EST
|
Side shelf on Nimba:
For most of what is done on a side shelf, such as fork tines, tight scroll ends, split scrolls, etc, a bridge tool in the hardy hole will do the job. It just doesn't do it quite as handily, nor does it have the mass/rigidity to provide the most efficient forging action. It also requires mounting/unmounting every time it is used or it gets in the way of other operations. Another minor issue is that with continuing use a bridge hardy absorbs a considerable amount of heat that it doesn't have the mass to dissipate effectively. I do a fair amount of forging that is handier done on a thinner side shelf, and I'm definitely going ahead with the addition to the Gladiator. Should time and use prove it to have been a bad decision, (I make a fair number of those), I can remove it easily enough with a bit of hard work with a grinder and zip discs.
I will be mounting it just the way Rustystuff described, pinning and then welding. It will be a piece of the same alloy as the anvil itself and the welding will be done properly. The pins will take the largest part of the shear loading and the welding will supplement that and prevent withdrawal while providing clean, smooth fillets when dressed. Since the side shelf is fairly thin in section near the edge, it can be heat treated in position to yield the required characteristics without affecting the anvil.
I looked at a few methods of making the side shelf so it was removable, but they all required far too much machine work that my little mill couldn't reasonably handle. By pinning and welding, all I need in the way of special tools is a mag drill, and I could get by without that if was determined enough. It's easier to borrow a mag drill than it is to hump that 450# anvil around, though. I could just weld the shelf on with no pins, but that would necessitate much deeper, heavier welds that risk affecting the heat treatment of the anvil in that area. Pinning allows me to keep the welding to a minimum without losing the solid connection to the anvil mass, provided that the pins are an interference fit.
I will not mount the side shelf even with the face of the Nimba, the way that the shelves on the Euroanvils are done. I plan to mount it below the level of the anvil face by about 3/4", and I will be mounting it on the hear side of the anvil, rather than the far side. The near/far side thing is all relative, of course, depending on which way you address your anvil. I prefer to work with the round horn on my right and the flat horn to my left, not that it matters much.
I realize that there are undoubtedly those out there who think that modifying a magnicifcent anvil like the Nimba borders on (or achieves) sacrilege, but I don't think that way. To me, the anvil is a tool, one that I spend numerous hours per week using, and I want it to suit me as perfectly as possible. To that end, I will modify and/or "adjust" it until it does. It's a tool, not the Taj Mahal. (grin)
I understand what Frank Turley is saying. On balance, there are probably more good reasons for not doing a modifications like this than there are for going ahead, at least for most people. This is all a lot of work for a relatively small reward, and could, if space permitted (which it doesn't), be addressed by having a separate, special purpose anvil. I'd rather have my main anvil do as much as possible and I enjoy challenges like this. I sometimes think I'd much rather build tools than anything else, in fact.
|
|
vicopper
- Saturday, 12/13/08 09:32:57 EST
|
Community College! That's the one I left of the list. . .
|
|
- guru
- Saturday, 12/13/08 09:33:39 EST
|
Adding a Side Shelf Dean Curfman of Big BLU Hammers put a side shelf on his Peddinghaus. No pinning, just welds, material 4140 I think. The most useful part of it is the inside corners it forms which is nicely radiused from the heavy fillet welds. This makes a sort of radiused funnel shape at the anvil face which gets used a lot.
|
|
- guru
- Saturday, 12/13/08 10:37:41 EST
|
Milling or Machining an Anvil Horn:
Note that a cone is 1/3 the volume of a cylinder of equal length. A cylinder is .78538. . . (1/4 pi) of an equal rectangular. So a cone from a rectangular is 1/3 of .78535. which equals .2617 of the rectangular. SO if you make a cone from a rectangular by chip removal you are converting almost 3/4 of that expensive material to chips!
In the machine shop it is often more efficient to saw or "slab off" extra material. You can saw (or flame cut) two dimensionally and reduce that rectangular by 2/3. The amount of chips made this way is microscopic compared to turning the whole to chips. By making a pyramid shape the remaining chip removal is only 22% of what is left or 7% of the original rectangular. That is a LOT less chip making or grinding.
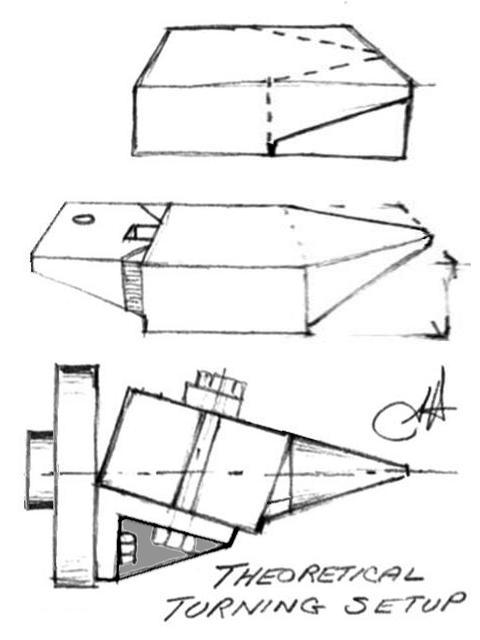
To turn a horn on a lathe requires a heavy duty machine and a special fixture. Not only are you hanging 100 pounds or more on the spindle but you will be making an interrupted cut. If you plan very carefully the top of the horn should be left slightly flat and this hand dressed into the rest.
The drawing above is proportionately short for illustrative purposes.
|
|
- guru
- Saturday, 12/13/08 10:57:24 EST
|
Ok, I think I understand what the Vocational Technical School is now. Although I really doubt my college has any class like that I will check this summer and next year. I am planning to take at least 1 class at the community college next year during school anyway.
Guru,
I see what you mean, this would truly save me a large amount of metal that I would have wasted had you not brought it up. I still plan on making my anvil out of 1 solid piece of steel with no welds but I will keep the excess metal as it will be high quality. I also hadn't put a thought into trying to mill it on a lathe. I am going to put a lot of thought in getting it rigged up so I can machine the horn on the lathe.
These are kind of things I was talking about earlier. I don't know these things and am I trying to learn. Thank you all for your great suggestions and advice.
On a side note, does this site use html code? Like [ i ] [ b ] [ u ]? And how do you put pictures into your posts?
|
|
- hillm
- Saturday, 12/13/08 12:52:15 EST
|
HTML? hillm, Only for me. Its far too easy for someone to include a tag that would crash a table set or to insert links to images like banners and such. Open use of HTML is an invitation to spammers, trolls and hackers. If you put anything between angle brackets <> on this forum it will just plain disappear.
In our new forums certain levels of access will have use of an editor that will allow a VERY limited set of html. Images will only be linked from our member galleries and links will be managed by an input routine.
I waste enough time fixing my own botched HTML and do not need to be fixing others. . .
|
|
- guru
- Saturday, 12/13/08 13:11:01 EST
|
haha, I see. That makes sense to me. I was just wondering.
|
|
- hillm
- Saturday, 12/13/08 13:31:33 EST
|
One Piece Anvil: There are some good designs for one piece anvils but most large wrought or forged anvils are at least two piece. Peddinghaus uses the method adopted by most late 19th and early 20th century makers and welds two pieces at the waist. This lets the base be a lower grade of steel and much wider than the top.
A great advantage to my design with the welded heel is that the hardy hole can easily be machined and is located immediately against the body and over the foot (if you weld the top to a base). This allows a deeper hole than can be milled or broached and moves it off the springy part of the heel. With care in making the weld prep you can have a full penetration weld and only a very narrow band of weld metal at the face. I show how to do that in our anvil making plans.
I've tried to talk several people into going into the anvil making business using the two piece method and a turned horn. The right machine for turning the horn is a vertical boring mill or vertical turret lathe. A 24" to 36" machine is needed. Its an expensive operation but I think it could be profitable for someone.
|
|
- guru
- Saturday, 12/13/08 13:39:25 EST
|
Guru, at the axle shop we had 4 each 36" Warner Swasey turret lathes. I scrapped 2, as they were not in use and in the way. Had to GIVE them to a scrapper for removing. They were under power, had air drawbar 3 jaw chucks and in usable shape. I about cried, but had nowhere to put them for me, and no heavy 3ph power. These would have been great for turning big horns. They were used to peel green axle forgings down, and were rigid enough to peel very big blue chips from interrupted cuts.
It would seem to me that a forged top half of a nice double horn anvil would be a simple drop forge job and relatively cheap dies. For a nice 250# size I would guess that the base, in cast steel would have about 1/3 of total weight. So the forge billet would be about 200# and would only take about a 10,000# hammer:)
|
|
ptree
- Saturday, 12/13/08 14:55:01 EST
|
hillm, all i have to say is good luck whats described here in my opinion will be very expencive and time consuming i think "you've probably heard this b4" it would be alot more prctical to save and buy a real anvil instead of doing all thats mentioned it will end up costing about the same depending on the anvil you buy. note that i'm not trying to disuaid your plans of what your trying to do i wish you luck and i would like to say ive also seen the article you looked at and it could work "obviously". i agree with guru though take classes!
Mat
|
|
mat
- Saturday, 12/13/08 16:01:38 EST
|
mat, I haven't looked around much for anvils but from what I've seen they are very expensive. If you could point me towards some cheaper anvils I might reconsider. I understand that this is going to be rather time consuming. As of now, though, this appears to be a better and cheaper course to me. I have talked to someone about buying a large piece of stock metal, somewhere between 6"x6" and 1'x1' and about 18" long and he said it would cost upwards of $50-$100. All of the tools I need for milling it I can use at my school or my grandpa's house for free. The only thing I'm unsure of is where/how I am going to heat treat it and how much that is going to cost. The way I see it I will have a brand new anvil made to my specific specifications that will be both heavier and cheaper than the anvils I have seen so far.
As I said earlier, if you can show me where I could by good quality large anvils for relatively cheap I very well might reconsider and would be very grateful.
P.S. As of now I am in the planning stage and am unsure of what size I am going to make my anvil.
|
|
- hillm
- Saturday, 12/13/08 16:26:49 EST
|
I built a forge using a bottom of a water heater and a 12" long 1 1/2 inch double threaded nipple with a T joint and another 6 inch nipple to connect a hairdryer to. with the 12 inch nipple screwed into a coupling brazed on the bottom of the water heater cylinder i can get a very good orange color on the metal and i'm using damp magnolia charcoal. if i were to use different wood charcoal could i get to welding heat or is the forge my problem?
|
|
- Jacob Lockhart
- Saturday, 12/13/08 16:34:42 EST
|
Jacob, If the charcoal is dry and deep enough you can get more than welding heat. With good coal you can get a slightly hotter fire with less depth.
IF you get a good heat that brazed joint may become a problem. It may stay together but it is common for the area directly around the tuyeer to get red hot. Just keep an eye on it.
|
|
- guru
- Saturday, 12/13/08 16:52:10 EST
|
Jacob,
I've heard of folks successfully using hair dryers for blowers, so it definitely can work. Yours *might* be on the marginal side, though. I've noticed that the newer the axial hair dryers fans, while much quieter than the old centrifugal ones, generate very little pressure. If you're using one of those, it could well be what's keeping you from welding heat.
|
|
Mike BR
- Saturday, 12/13/08 17:30:59 EST
|
I have some 1 1/2 by 1/4 stock, what kind of depth are we looking at for welding heat? ive gotten it about 5 inches deep and the result was a great orange but i didnt leave it in the fire very long. How long should i leave it in the fire for a weld ?
|
|
- Jacob Lockhart
- Saturday, 12/13/08 19:05:06 EST
|
Jacob,
In a charcoal fire, you generally need to have it about 6-8" deep to get a welding heat. If the charcoal you're using is damp, I'd sugggest you bank some of it next to the fire to dry out while you're getting things going. It takes a goodly number of Btu's to get rid of water and that's heat you're losing.
As for time, I would think a piece of stock that size should come up to welding heat in about two to four minutes in a good fire. If you're too low in the fire, you're losing heat to the cold air coming in from the tuyere, so you want your piece in the upper half of the fire - about 5/8 to 3/4 of the way up from the bottom, in other words. You need to have some fire above the piece for insulation, and enough below it to burn up all the available oxygen so you don't scale the work too much. That's the "sweet spot" in any solid-fuel fire. The actual level varies with the fuel and the fire management, but those are the general guidelines.
|
|
vicopper
- Saturday, 12/13/08 20:04:08 EST
|
Hillm, What sort of school were You refering to when You said "This anvil will most likely be milled by hand and with the school CNC machine along with some filing and grinding."? Where I live, a Vo Tec School or more recently a community Coledge would have a CNC machine, the other schools don't. The Vo Tec school I went to had a good relasionship with tool & die shops, machine shops and machine building companies in the area, they gave thier input on what should be taught, as they would be hiring the students for Co Op jobs, and full time after graduation.
|
|
- Dave Boyer
- Saturday, 12/13/08 22:57:43 EST
|
Dave Boyer, I was referring to the high school I go to. We are lucky enough to have a CNC Machine. We also have several hand mills, a router, several lathes, a band saw, a gas forge, and a furnace for casting plus all of the welding and wood working tools. I think we have a very nice shop but I don't know what other schools have so I can't make a very good comparison.
|
|
- hillm
- Saturday, 12/13/08 23:43:43 EST
|
Hillm, Before planning a large job research the machines. Many have height limits and even weight limits. Often tooling takes up a significant amount of the vertical space on a milling machine. You can do oversize work but it takes planning AND your instructor may not be keen on anything that could possibly damage the machine OR take a lot of work to get back to usable setups. You may also be surprised at how slow some of it goes.
|
|
- guru
- Sunday, 12/14/08 00:09:09 EST
|
Welding Heat: You can get a "welding heat" at the tip of a cigarette or in a smoking pipe. The trick is a contained or focused fire and the proper draft. Too much air can cool a fire AND make it overly oxidizing at the same time. Too diffuse a blast will create a large hot fire without a concentrated hot spot. IT is all paying attention to the fire and some common sense about what is going on. More and bigger often do not work. Bad or odd fuel often does not work. Most charcoal works fine but there ARE certain woods that make poor quality charcoal.
One method of getting a high heat in a flat bottomed forge is to find a piece of pipe about 6" to 8" in diameter and about the same height. Get a good fire going, then set the pipe over the forge and fill it up. Reduce the blast to the least that makes the loudest roar. You should get gases at the top of the tube hot enough to weld over. The small contained fire will have to be fed constantly but it will burn very hot with little air.
|
|
- guru
- Sunday, 12/14/08 00:18:51 EST
|
guru, I have done milling on the machine before and have planned to check on the weight limit. I do not think it will be too big as the clamp inside is interchangeable and the bit is about 7 or 8 feet tall at its highest. Also, my teacher won't let me do anything he hasn't checked himself and sits and watches it go for 5-10 min before leaving so he can hit the E-brake. He has me(or whoever is milling) stay at the machine after he leaves to make sure nothing goes wrong and they can push the E-brake if something does go wrong.
From my experiences with the machine I understand how long it can take. I do not especially look forward to the milling as I expect to be there for upwards of an hour or 2.
|
|
- hillm
- Sunday, 12/14/08 00:21:54 EST
|
It has been a long time since I posted on this board, so now will be a good time to let you know I'm still alive.
I have been working on a solution on how to make my own abrasive grind rocks for grinding and metal removal. The hardest part is finding a suitable binder. I contacted Epoxy.com and they gave me the name of a super hard epoxy that many use for this purpose, but they stated that it had a maximum tolerance of 400 degrees. Another site sells high temperature plastic but the highest temperature tolerance is 600 degrees. I think aluminum can be used for certain types of grit ( boron nitride ). Abrasive grinding wheel companies use one of two types of binders, alumino-alkalisilicate or alumino-borosilicate. Can these binders be purchased or made ? Any ideas from you guru's or experimenters ?
|
|
Mike Thompson
- Sunday, 12/14/08 01:29:09 EST
|
hillm: I sincerely doubt you can make an equivalent anvil cheaper than you can acquire one. Anvils are out there. Someone, perhaps Guru, compared anvil hunting to deer hunting. Some sit and wait for the anvil to come to them and some go out looking for it.
If you live in a small community put an occasional wanted ad in the local paper to the effect: WANTED: Blacksmithing anvil and tools. XXX-XXXX.
Ask just about everyone you encounter if they know where there might be an anvil for sale. Perhaps the convenience store clerk had a grandfather who had an anvil out in his shop or garage you can make an offer on.
Anvils appear regularly on eBay and sooner or later an acceptable one should appear within a reasonable pick up distance. Also monitor www.craigslist.com (or .org). I recently sold a 140 lb Peter Wright for $280 through it.
There are several large regional blacksmithing events and likely one should be within a reasonable driving distance. At Quad-State they are typically 20 or more anvils for sale.
There are a number of blacksmithing groups in the U.S. Here go to www.abana.org and under AFFILIATES find the one which covers your area. My observation is often there will be one or more of their members who buys and sells blacksmithing tools on the side. Some of these groups even offer beginning blacksmithing lessons.
I purchase my new stock from a combination new/used steel place. They frequently have large slabs of mystery metal for $.25 pound. Also sometimes stainless for $1.25 pound.
If you do your own, why not mill out a horn/cone and weld it to the side of a block of steel. For a hardy hole make a bracket you can weld on one side.
|
|
Ken Scharabok
- Sunday, 12/14/08 01:36:30 EST
|
I read some articles above about welding with charcoal etc. I read that the old timers used thermite to weld with. When welding railroad rails together, a funnel shaped object was placed where the ends of the rails were butted together. The funnel was filled with thermite and the intense jet of heat shot through the bottom of the funnel at several thousand degrees of heat ( so bright you couldn't look at it ). I have thought about trying this procedure myself. I love the ingenuity of our forefathers.
I believe they could teach us a lot today.
|
|
Mike Thompson
- Sunday, 12/14/08 01:45:19 EST
|
Ken Scharabok, I have been looking for an anvil and may have someone who can sell me one along with several other tools. If you have a suggested place to look, aside from eBay, for an anvil please tell me. I would gladly look into buying an anvil if I can afford it and if it is of decent condition.
I have looked into ABANA before and the closest one to me is about half a state away. I also have absolutely no idea what "Quad-State" is.
|
|
- hillm
- Sunday, 12/14/08 02:15:16 EST
|
Mike Thompson,
Navigate to Anvilfire News, and go to the second page of the current edition (on Quad State).
|
|
Mike BR
- Sunday, 12/14/08 07:18:58 EST
|
hillm: I apologize. Quad-State is the Quad-State Blacksmithing Conference held at the Miami County Fairgrounds in Troy, OH, usually the 4th weekend in September. (Troy is in Southwest Ohio about 20 miles north of Dayton.) It is likely the largest gathering of those interested in blacksmithing in the world with over 1,000 registered. Typically 4-5 demonstrators. Acres of tailgaters (used tool sellers). Centaur Forge and Blacksmith's Depot have sales areas. Some folks come from over 1,000 miles away to attend.
It is called Quad-State since it was originally envisioned as a way for blacksmiths in OH, KY, IN & MI to get together once a year.
If you are interested in attending send a postcard with your name and address to: Quad-State 09, P.O. Box 24308, Huber Heights, OH 45424-0308 and ask to be put on the registration package mailing list.
I believe in the summer of 09 the Southeastern Regional Blacksmithing Conference will be held east of Atlanta. Hosted by about nine groups.
The Blacksmith Association of Missouri hosts a large gathering each year. Believe there are also large annual events in TX and CA.
Some groups hold their own annual conference, such as in Indiana.
|
|
Ken Scharabok
- Sunday, 12/14/08 08:47:34 EST
|
Ken Scharabok, thanks for the update. It kind of sucks for me though, I seem to be in the middle of nowhere(and I kind of am). I live on the coast of the Mississippi in south-east Iowa. If there is anything going a bit closer to my area that you know of that would be great.
|
|
- hillm
- Sunday, 12/14/08 10:45:26 EST
|
Do you know where I can get rid of coal? I just had the coal bin from my 1920's era house in Leonia, NJ cleaned out, and don't know what to do with it. If it is the same type of coal used by blacksmiths, I would be happy to give it away for free.
Thanks.
|
|
jen
- Sunday, 12/14/08 11:35:45 EST
|
Jen, If the coal is good (you never know) blacksmiths would love to get it. Contact RJ or Ben at:
Old Millstone Forge
OR
New Jersey Blacksmith Association
These are both non-profits in your area and would love to have the coal and would sell it to members to help support the organization.
|
|
- guru
- Sunday, 12/14/08 11:59:54 EST
|
hillm,
Probably closest to you would be the Upper Midwest Blacksmith Association: www.umbaonline.org. One of their regional meetings was in Haverhill, Iowa, a little ways northeast of Des Moines. Tune in www.abana.org and click on Affiliates & Affiliate List.
|
|
Frank Turley
- Sunday, 12/14/08 11:46:17 EST
|
Guru, I think that's a good idea for turning the horn but, something I contemplated for my own anvil design, why couldn't you just make the horn as a seperate piece with a heavy tenion that fit into the front of the anvil body and was then shrink fit and welded in place.
So far in my small experience with my Hey-Bud that has a rather long horn, I find I never use it for anything more than shapeing a curve or something lite like that. I would never think to use it as a bottom fuller or something heavy.
So I wonder if a weld on horn would hold up?
Again I'm kicking myself for passing on a very nice 20 x 60 American Pacemaker lathe last year.
I would agree with you, I think the market is right for an American made anvil at a resonable price.
Across the isle on Iforgeiron someone is making them from cast H13! and that has certainly got me thinking...
BTW, I'll have you know that my Hey-Bud is very happy in the insulated and heat tape heated "dog house" I made for it.
|
|
- merl
- Sunday, 12/14/08 11:49:46 EST
|
Jacob Lockhart, I'm glad to here about your "new" forge, it sounds very resourceful. I hope you make sure to get rid of any galvaniseing that might be left on it befor you use it though. Most hot water tanks are galvanized to prevent rust although some are glass lined.
If you havn't already fired your forge then you should check with the guys here to find out the SAFE way to get rid of the galvanising befor you do.
Read the first three posts in the IForge page if you doubt the importance of this.
|
|
- merl
- Sunday, 12/14/08 12:04:24 EST
|
Mike Thompson, Yes those binders are certainly available.
As a matter of fact they come complete with any type of abrasive you might need already mixed in at a very uniform density and they come in in a conveinient circular shape to fit on a wide veriaty of specily built machines for the purpose of rough or precision stock removel.
Please don't say that you are tring to make your own grinding wheels... that would be about as safe as smokeing from a Zinc pipe!
|
|
- merl
- Sunday, 12/14/08 12:17:19 EST
|
Has anyone got an idea of how best to fashion a simple fish to use as a handle on a poker etc? It needs to be a fairly quick method as my time would be limited. Sorry if this sounds trite but I am up against it and am still learning. Thanks
|
|
Gobannn
- Sunday, 12/14/08 14:43:00 EST
|
Sorry I haven't been here in a day or so. I got kinda busy.
Thomas- No I haven't found a group in my area yet, but some of my books came and I'm reading them right now! :)
I understand that most people don't have the patience and stamina to wait for a 30 second traffic light to turn green, much less make their dreams come true, but I'm not one of those people. I'll make a prediction/promise right now that in 5 years I'll still be here.
I realize that I've learned very little and I knew from the start that I really knew nothing. One other thing I might add to my original list of advantages is that I really had no preconceived ideas of what this would be like. Oh and I never saw conan the barbarian. :p
|
|
Lars
- Sunday, 12/14/08 16:38:36 EST
|
Merl,
You may be right. I had also thought about using a long shaft and stacking many grind rocks on it ( gluing them
together in a row ) putting a bearing on each end of the shaft. Having two shafts parallel, being able to adjust the gap between them, for the purpose of grinding two sides of the metal at one time. By raising one end of the shaft a little higher than the other end, then a taper could be ground. I will work it out, just takes patience.
|
|
Mike Thompson
- Sunday, 12/14/08 16:40:18 EST
|
Making Grinding Wheels: Mike, You are reinventing the wheel, literally. This kind of grinding is done with belts. Everything up to four foot wide sheets of plywood is ground and sanded using belts.
The manufacture of grinding wheels is a highly developed science that has NEVER been a DIY or backyard industry. Wheels with the slightest defect blow up more than just occasionally and require the utmost respect in their design, manufacture and testing.
|
|
- guru
- Sunday, 12/14/08 17:03:09 EST
|
Making a fish handle: Gobann, A fish is forged just like a leaf except for a little bit of texturing, notching for the mouth and using an eye-punch. Of course a flounder (with both eyes on one side) would be easiest!
Since fish are fairly infinite in variety there are many designs you could use including with and with spinal, dorsal or tail fins.
In this case problem is going to be getting enough mass on the end of the bar for a handle larger than the shank. It is easy with a power hammer to start with a 1" diameter piece and draw our the shank. Upsetting the mass is possible but not recommended.
Another way is to bend a fish shape making an outline of a fish. I would start with a fish tail flare for where it meets back at the handle. The bend at the head end could be forged out to a slight taper with mouth and eyes. Fins could be raised with a rounded chisel or special punch.
I made the drawing and went to save it in one of my iForge folders. Surprise! There was a letter I had written years ago and saved as a possible demo to illustrate. The drawing and the letter do not go together but they demonstrate a variety of methods
|
|
- guru
- Sunday, 12/14/08 17:17:32 EST
|
HillM, that price you quoted for a chunk of steel is probably for a piece of scrap UNHARDENABLE A36. The price for a chunk of real tool steel suitable for an anvil will probably cost you more than buying a real anvil new.
So *please* go check out the price for tool steel before you waste any more time on figuring out how to mill an anvil.
How to find an anvil cheap: Talk with everybody you meet about wanting to find an anvil. Using this method I was able to average at least 1 great name anvil in great shape for under US$1 a pound for over a decade when I lived in the inner city of Columbus OH.
My main shop anvil is a 500+ pound Fisher that I got in mint condition for $350---found it by talking with a fellow at a fleamarket selling greasy car parts I wouldn't even dig out of a dumpster for free; but when he howdy'd me I talked with him and explained I was hunting anvils---his uncle had the Fisher and wanted to sell.
I haven't been hunting anvils out here in NM as I have all I need; so I've only been able to find 2 free ones the last 5 years...The first was by asking around at Church; an 80+ year old retired rancher had one in his storage shed and gave it to me.
Asking smiths for cheap anvils is like asking folks to buy their children. You want to buy anvils from people who don't really need them or use them and so are quite willing to sell you one cheap just to get it out of the garage/basement/barn
Now one other thing---you have to be ready to purchase such finds on the spot! So have the cash ready in the bank to be able to pay for a great deal when you find one.
Another great thing about this method is that shipping costs usually consist of a gallon or two of gasoline to go pick one up.
Try it; it really does work!
Thomas
|
|
Thomas P
- Sunday, 12/14/08 17:40:22 EST
|
Thomas P, I will look into the price and type of the steel. The man I talked to(a friend of mine) said he wasn't even sure what the price was but told me an estimate of about $50 at least. Also, I don't see my planning as wasted time at all. If I never mill and anvil, which is a very real possibility, I will still have gotten more experience working with the CNC machine and the CAM and CADD software we use. Learning more about these things is important to me and I plan to go into a career with engineering so working with CADD software is very important. Also, I find these things just plain fun to work with.
If it seemed to you that I was asking for somebody to sell me a cheap anvil I apologize. This is not what I meant at all. I was wondering if anyone knew where I should look for an anvil.
Also, as I said earlier there is someone that may be selling me an anvil along with several other tools. I called the man today and he hasn't had a chance to check and see what he has, but said to give him a call next weekend. If he has anything I may be headed down there over Christmas break to see about buying and anvil and tools.
|
|
- hillm
- Sunday, 12/14/08 18:05:58 EST
|
Well....if you didn't want an anvil cheap (vs a cheap anvil) then all you have to do is to announce that you want to overpay for one and then try to avoid the rain of anvils that descends on you! But my basic suggestion on where to look for an anvil---*everywhere* still stands.
If you want CNC experience think of making a couple of small swage blocks as they will give you more experience and are a handy thing to have. Less material problems too as they generally get less of a workout than an anvil gets and so most steels would be acceptable for them.
The comment about who to buy one from is a valid point if you are trying to make youe smithing money go further. I get $20 a week for all my hobbies and vices and so it can take a long time to build up money for a major purchase; especially if I have to spend close to $100 for propane several times a year. The costs of hunting down equipment I budget to entertainment---you get to meet a lot of interesting people and learn a lot about how things were way back when too.
Thomas
|
|
Thomas P
- Sunday, 12/14/08 20:41:25 EST
|
Mike BR
Thanks for showing me the Anvilfire news 2nd page of quad state. I had no idea thermite welding was still being practiced. Very interesting !
Thanks
|
|
Mike Thompson
- Sunday, 12/14/08 21:00:50 EST
|
For poor folks like myself, I can tell you where to find a crude but effective anvil. Heavy steel slabs are bolted to the front of tractors and other heavy equipment to hold the front end down. I use one of these steel slabs for my anvil. Other amenities can then be added to it.
|
|
Mike Thompson
- Sunday, 12/14/08 21:09:48 EST
|
Thomas P, I must admit that I have absolutely no idea what a swage block is used for. You have given me an idea of milling hardies though which I think I will look into. And yes, I am trying to make my smithing money go as far as I can. I currently have $10 to my name and have no source of income because of a lacking of allowance or job. I hope to get a job as soon as I can though, because along with all of the smithing stuff I would like to buy I am getting close to 16 and need to start saving up for a car.
|
|
- hillm
- Sunday, 12/14/08 21:18:45 EST
|
Fork Lift Anvil
By far the cheapest and most effective anvil I've ever owned, makes two anvils actually! Thanks Thomas!
Go to http://www.marco-borromei.com/fork.html
Now, call junk yards until you find a fork, then bring a big hacksaw.
Thomas spent hours sawing apart the 2" bar, Krieger and I only had to carry the 150lb half out of the woods. I think Thomas used magic to move his half.
M
|
|
Marco/Mike
- Sunday, 12/14/08 21:24:47 EST
|
Marco/Mike, that actually looks like a very good plan. I would probably pile up about 4-6 in of untop of the rail road plate(or a slightly larger piece of metal) to help keep it from moving any. My grandpa was a professional welder when he was younger and could weld it on for me too. The only problem is getting the fork lift. The only junk yard I know of around here doesn't sell metal, only buys it. I would have to do some looking for a company getting rid of it or another nearby junk yard. I'll definitely keep an eye out.
|
|
- hillm
- Sunday, 12/14/08 21:38:32 EST
|
hillm,
Try going to a used farm equipment site, or used heavy equipment site....see if they will sell you some heavy steel slabs off the font of a tractor or bulldozer. Every now and then, I see old equipment abandoned after a contracting job is complete. Parts can be scavanged or they
will just stay there and rust. I may also look at some forklifts at some junkyards. One mans junk is another mans treasure.
|
|
Mike Thompson
- Sunday, 12/14/08 22:09:13 EST
|
Hillm,
Bold the base to a large plank or piece of plywood. I won't move if you're standing on the same base. Call Trucking companies and fork lift companies, ask what they do with bent forks. If you never ask for one, you'll never know if they'll give you one.
The rest of the fork was sawn in half, clamped together with the largest faces even, offset na inch, and welded up. It makes a nice short travel anvil. I'll put up a pic on the same page tonight.
M
|
|
Marco/Mike
- Sunday, 12/14/08 22:13:12 EST
|
Fork anvil - the photos of the other half are up now.
Go to http://www.marco-borromei.com/fork.html
Your anvil is only limited by your imagination.
|
|
Marco/Mike
- Sunday, 12/14/08 22:34:50 EST
|
Marco/Mike, sounds good to me. I got to go to sleep cause I have school tomorrow but I'll check it out about 10:30 tomorrow.
|
|
- hillm
- Sunday, 12/14/08 22:35:32 EST
|
ThomasP, what did you ever do with the other half of that fork?
|
|
Marco/Mike
- Sunday, 12/14/08 22:36:53 EST
|
I don't see any new pictures on the page Mike.
|
|
- hillm
- Sunday, 12/14/08 22:37:37 EST
|
Mike Thompson, do you know any old farmers that are missing an arm or maybe a hand because they tried to free up some jamed corn stalks from a running corn picker?
If you do, ask them just how it happend.
If you intend to some how stick a piece of metal between the gap of two counter rotating abasive surfaces you are going to have a MAJOR accident!
Yes I know this is how a centerless grinder works BUT, there is a work stop that doesn't allow the piece to go past a certain point and no one is doing any hand grinding with them!
What ever it is that you are trying to do I know someone someware makes the correct abrasive product for the job.
Maybe you should be asking for advise on how to acomplish what ever it is this grinding job requires.
Guru, I apologize once again for my inflamitory attitude.
|
|
- merl
- Sunday, 12/14/08 22:45:21 EST
|
Marco/Mike
Apparently has the same attitude I have. I was watching a program once and a scientist ( or some such person ) made a comment that has stuck with me ever since. He said that whatever the mind of man can conceive, CAN be accomplished.
I will not be discouraged. When you tell people about your ideas, most will tell you it can't be done ( they are usually people full of fear and doubt ). Brush them aside and do not take your eyes off of your goal. Believe in yourself and be persistant. I have a compulsive disorder,
so when I get something on my mind, I can't get rid of it.
Some nights, I lay in bed, drilling, sawing, measuring,
fitting this part to that part etc. It is a curse and at the same time, a blessing. I designed a home heating, and cooling system, that seems almost childish in its design,
but works very well, saving thousands of dollars every year. A friend of mine just got through building the same system. I don't make anything to patent or sell, I just do it for my own satisfaction. The point I'm trying to make is, don't give up on your ideas or dreams regardless of how stupid people think you are. You have your own life to live and don't let others deter you from your goals. Sure you will fail from time to time ( that just proves you are human ). Thomas Edison failed over 2000 times to make a light bulb. Some reporter mentioned these failures to him and his reply was....I didn't fail 2000 times, I just discovered 2000 ways it wouldn't work.
|
|
Mike Thompson
- Sunday, 12/14/08 22:48:42 EST
|
Hillm, you may need to "refresh" the page since you visited it right before the changes. Usually pressing the F5 key does the trick.
|
|
Marco/Mike
- Sunday, 12/14/08 22:52:53 EST
|
Mike Thompson,
I do think that way, but I admit I'm "lazy" too. See, if someone else has already tried 2000 ways, I skip right ot their solution. So many thngs in our craft have been done before so often that its just plain wasteful for me to repave the same road other's just built. This site is chock full of people who have already tried 2000 ways and are happy to share so you don't waste time and money. I try to listen to them. They try not to get too annoyed when I stubbornly argue that "I want to" anyway.
In the case of this anvil, I had a rare oppotunity that only one other person had tried [ThomasP]. If there were instructions on how to get a free piece of sprint steel already in an anvil shape, I would have followed those.
Wait, there WERE instructions... ThomasP told me how to do it.
Listening to the wiser heads here saved me a lot of time and money, netting TWO anvils for $50.
|
|
Marco/Mike
- Sunday, 12/14/08 23:08:36 EST
|
I am looking to add a good tap and die set to my new old shop, and a friend has me about convinced this is one item I should definitely buy new and not even try to get vintage. Worn parts and replacing them is the key issue, and I suppose even if I could find a new old stock Vermont or Greenfield set (which is what my inclination is)I would still have that problem eventually. I am looking for mainly SAE stuff plus some 1/4 and 1/8 NP, including the 1/8-27 for lamps. No metric, no bottoming taps. Oh, and a maybe a set of numbered drills to match. Thanks for any suggestions.
|
|
Peter Hirst
- Sunday, 12/14/08 23:09:42 EST
|
I have always had a great intrest in the art of japanese sword making can any one help me find any books on the subject would be very helpful
|
|
joe reinhorn
- Monday, 12/15/08 01:03:41 EST
|
Peter Hirst
I will suggest that you avoid Vermont taps and dies. They're hobby grade on their best day. Hansson is just about the same. Greenfield, on the other hand is good, as is Cleveland. Some sizes, it just doesn't seem to matter how good you buy, they still break du to an unfortunate combination of factors. 6-32 and 1/4-20 seem to be my nemesis sizes.
I do like my old set of Little Giant taps and dies as the dies are sharpenable, something that you mostly can't do with modern ones. Also, that set has a 1/2-12, an obsolete size that I encounter when doing restorations. I think only one of the original taps is still there - all the rest are modern replacements, mostly Greenfield.
I prefer to buy my taps and dies on an as-needed basis, since for some jobs I want gun taps and for others I want bottoming taps or drill taps, or spiral taps or whatever. General purpose plug taps are not the solution to every tapping problem. I also like hex dies whenever possible, since I can use them in a big hex socket for some jobs where a regular die stock is unworkable.
|
|
vicopper
- Monday, 12/15/08 01:16:03 EST
|
I suspect termite welding of RR tracks became economically feasible when the change was made from short lengths to the now common 1/4rd mile or so of continuous rail. Say an old RR track was 22'. There would have been something like 480 joints to the mile of track. If 1/4rd mile lengths now, that would be down to about eight.
|
|
Ken Scharabok
- Monday, 12/15/08 02:24:45 EST
|
VIcopper:
Is your LG set the adjustable ones? Good to know thay can be sharpened: maybe I won't give up on a vintage set. Are they replaceable? If I do go with a new set, what is out there besides Vermont and Irwin Hanson? Say I wanted an off the shelf starter kit, mainly SAE 3/16 and up? Are Greenfiled and Clevelad still in business?
|
|
Peter Hirst
- Monday, 12/15/08 08:13:28 EST
|
For sawing that kind of stuff there was a photo in early editions of Metalwork Technology and Practice that showed a guy sawing a heavy RR-rail in two with a hack saw. The difference was his hand saw was the size of a machine hack saw frame and used about as heavy a blade!
I wished I had thought of that old photo with that big blade when I made my super heavy duty hack saw. On the other hand those blades are very pricey for everyday use in a hand saw where breakage is common.
|
|
- guru
- Monday, 12/15/08 08:33:37 EST
|
to respond to the rr cutting i have had much success with a saws-all with a metal blade. when making my rr anvil i cut the entire web with it after much aggravation with an angle grinder. luckily the rail i found was about 2 ft long and it appeared to be cut with a torch. i',m slowly starting to find out however that the piece i have is quite thin compared to other rail up to about 2 inces thinner :( cutting it seamed rather soft because un hardened. i dont think that a junk yard would like people cutting up fork lifts either even if they let you it will take forever with a hand saw. those things are made to be strong and are very hard. try to find a snapped one
|
|
mat
- Monday, 12/15/08 09:02:21 EST
|
Mat, Fork lift forks are heat treated but not to be hard but to be the absolute toughest they can be.
Taps and Dies: To add to what Vicopper had to say.
Most hardware store taps and dies, even those so called "premium" gold titanium plated ones are junk. To get first class ones you generally have to go to an industrial supplier or hardware wholesaler. Most of the good brands are ones you will not have heard of. Consolidated is a serious brand in taps, dies and drill bits. They do not cost any more than the hardware store junk.
Drill bits should be bought in a drill index. For general English size use you need a 1/64" fractional, Letter and Number. However, if you only want them to match your taps then you can skip a few sizes but then you have all those loose bits. I keep a 1/32" fractional set for general purpose drilling and the others for serious shop or machine work.
My rule on small taps (under 1/2" is use on one job and scrap them. A broken tap can easily cost you the price of a whole set in lost work, time and aggravation. With drill bits it is the same for those 3/8" and under. Unless you have a professional drill resharpening machine and know how to operate and maintain it then resharpening small bits is an expensive gamble.
Note that most modern split point drill bits do not have a tapered web near the point. This is necessary for hand sharpening without a split point. Without the tapered web the "dead center" becomes much too large. Once these bits are dulled they either need to go to someone that has the diamond wheel and tools to replace the split point or to be scrapped.
The primary reason taps (and drill bits) get broken is crooked holes. Hand drilling almost always produces a curved or tapered and curved hole. The second is starting the tap crooked. So hand drilling and taping deep holes (over one diameter) should be avoided if possible. Use a drill press or a drilling and taping fixture to keep everything straight and square.
The last reason for tap breakage is trying to tap too high a percentage of thread. 70% is normal for all but the highest strength applications. 60% works FINE on deep holes (anything over 1.5 diameters). 75% and up should be avoided except in soft non galling material.
The smaller the hole the more multiples of both the drill and tap you should buy. This is a good reason to buy taps and drills on a per job basis.
Having a full set of taps and dies is good for occassional repair work but any time you are doing a job you should purchase multiples for the job. Buying sets of drills in indexes is a serious investment but it is well worth while. It is ALSO very important to maintain those sets. Sharpen or replace bits as they are used.
|
|
- guru
- Monday, 12/15/08 09:16:13 EST
|
Joe Reinhorn,
"The Craft of the Japanese Sword;" by Kapp & Yoshiharo; 1987. ISBN 0-87011-798-X (U.S.)
Odd Tap. Most present day door spindles have a 3/8-20 thread which is an oddball. The taps can be ordered through machinists' supply catalogs. I think beginners sometimes break hand taps and dies by forcing them beyond the point where they feel tight. The operator needs to back up to clear chips. The book, "Metalwork Technology and Practice" has this to say: "Back up one step and go ahead two."
|
|
Frank Turley
- Monday, 12/15/08 11:25:05 EST
|
Gurus'
I am forging cheese cutters out of 1/4 SS, they rust in the dishwasher. I tunrd into "How it's Made" right in the middle of cleaning SS. Acid and electricity, left the SS with a stainless finish. How can I do that in my shop? Safely!
Thanks
Steve P
|
|
Steve Paullin
- Monday, 12/15/08 12:17:18 EST
|
Marco; the "brother" to that fork lift tine is resting out here in the NM sunshine and yes it was a bit of a pain to take it through the woods along the slope a long ways before I could get it to a place my truck could go---all by myself.
Sawing the 2" bar by hand was merely tedious, I used a 24" bowsaw fitted with a bandsaw blade and once the cut was started well I could switch off hands sawing---especially as I didn't have to worry about following a line.
As to how I found a junked forklift ran off a steep bank into a spoil pile years previously---as shown by the tree growth, well the scrounge just calls to me you know...
Thomas
|
|
Thomas P
- Monday, 12/15/08 12:17:22 EST
|
Steve, the reason stainless rusts in the dishwasher is the heat and soap makes chlorides, which will cause 300 series stainless to rust and discolor.
In other words, dont put it in the dishwasher.
I dont put any of my stainless knives or utensils in the dishwasher.
mass market stainless flatware is made from a different alloy, and it doesnt rust- but any decent stainless knife will, and most handforged 304 or 316 blacksmith made items will as well.
As for the polishing- what you are talking about is electropolishing.
there are commercial machines for cleaning welds, they use a 40 volt DC power supply and either phosphoric or citric acid. But its pretty tough to get the really dark black discoloration from forging off without more amps, and a big tub of acid solution.
I like Citrisurf, from StellarSolutions.net (google em) as a safe but effective acid.
Then, you can experiment with a battery charger and a big Rubbermaid tub.
|
|
- Ries
- Monday, 12/15/08 12:34:47 EST
|
I am constantly looking for plans for a hobby sized electropolishing unit for small 316L items.... still haven't found any.
|
|
- Nippulini
- Monday, 12/15/08 13:10:37 EST
|
At the valve company we originally had our own electropolish unit but when it ate it self up the last time we outsourced the work. The company we found Shotblasted first with SS beads and then electropolished. They did a nicer job than we did.
|
|
ptree
- Monday, 12/15/08 13:44:27 EST
|
i had a quick question about how to go about drilling out the center of a brake drum, in other words what should i use to drill the holes for the air to get in to the coal? i'm trying to replace the forge i dug out into the ground because all the rainy weather as of late ruined it as well as my coal. i dont want to make another ground one so any suggestions will be appreaciated_Mat
|
|
mat
- Monday, 12/15/08 14:05:47 EST
|
Brake Drum Forge: Brake drums com with a 1-1/2 to 1-3/4" center pilot hole that is big enough air inlet for a small forge. To bolt on a flange you will need to drill holes to match a "pipe floor flange or steam flange (heavier)". Most brake drums have a steel plate center that should drill fairly well. Those that are cast in one piece are grey iron or ductile iron and also drill relatively easily.
Where the air comes in you probably need to put a bar grate across the opening a single 1/2" round bar or two 3/8" x 1/2" bars on edge make an ok grate. I prefer them loose so they are easy to remove to clean out the forge and to replace them when they burn up. Stainless works better than carbon steel but both work satisfactorily. In a brake drum you could probably bend down one end of the grate bar to fit one of the lug holes. This will hold the grate in place and fill an extra hole.
|
|
- guru
- Monday, 12/15/08 15:54:00 EST
|
Platingsales.com
sells electropolish kits, ranging from $400 to $4000 that look pretty good.
I send mine out, to a pro shop that has a 4'x4'x8' tank and a 1000 amp power supply.
But if you are only doing small stuff, the kits they sell should work.
You need several tanks, and the bigger the work, obviously, the more it costs, but it is no more complicated than home shop plating or anodizing, which several people I know do quite successfully.
|
|
- Ries
- Monday, 12/15/08 15:59:06 EST
|
thanks for the advice i like the idea about,"In a brake drum you could probably bend down one end of the grate bar to fit one of the lug holes. This will hold the grate in place and fill an extra hole". i'll do my best to get this to work i'll tell you how it works_mat
|
|
mat
- Monday, 12/15/08 16:24:10 EST
|
I remember a National Geographic picture from China showing two guys cutting a RR rail with a hacksaw. They had a bucket of water up on a stool with a little hose siphoning it onto the cut.
Guru, I guess you're talking about fairly large threading jobs? I can't see pitching the tap every time I take it out to thread a hole or two.
|
|
Mike BR
- Monday, 12/15/08 18:25:11 EST
|
The smaller the tap the sooner it should be tossed. A stupid 1/4-20 or M10 tap can cost a part that you have hundreds of dollars worth of time invested in OR hundreds more extracting the broken tap IF YOU CAN.
As soon as the tap doesn't feel like its cutting almost like new its time to toss it. This could be the third hole or the thirtieth. When hand tapping these tools have a VERY short life. When machine tapping it is much longer but the durability is greatly variable depending on the setup. When not moving the work and changing nothing but tools they can last quite long. When relocating holes they do not last nearly as long.
|
|
- guru
- Monday, 12/15/08 19:19:54 EST
|
mat: Go to a hardware store and puchare either a 1 1/2" or 2" black iron floor flange. Welding one or two bars across opening becomes your grade. Your bottom tuyere then can be run from there.
Be aware you can normally only thread pipe into these from the top, not from the bottom.
|
|
Ken Scharabok
- Monday, 12/15/08 19:32:05 EST
|
Hey guys, I guess my dad has been talking to some guy at work about borrowing an anvil cause now I have a very decent anvil to use till I get my own. It was in a dark room and I didn't get long to look at it but I'm gonna check it out tomorrow if I can. I'm guessing it's about 100#, but I bad at gauging measurements.
|
|
- hillm
- Monday, 12/15/08 19:40:35 EST
|
In production I have seen taps last from one hole and up. Much there depended on alloy being tapped. In Inconel 625 you might get a couple to 5 holes. In Zirconium Titianium one hole. In C1023, with a rigid setup and the RIGHT lube thousands. The right coolant is not reused drycleaning fluid as some advocate:) It was a semi-synthetic oil, well filtered and applied liberally.
Since we consistantly went for 85% threads per standard, we scrapped lots of semi-good taps. In the common sizes we used I have a nice collection. Used? yes. Work on mild steel? Yes. 1/4-20 and smaller? NO.
We even used to try to regring taps. Bad practice. They gave poor results and life. On pipe taps one would expect that with the taper one could regring. Did not produce a worthwile tap.
|
|
ptree
- Monday, 12/15/08 19:53:59 EST
|
The joys of breaking taps. On one series of jobs we were tapping into some heavy plate to fasten on some devices. It didn't matter where we put them- in fact there was an advantage to fastening them absolutely at random. So we tapped and if a tap broke we just left it right where it was, ground it off and drilled another fixing hole and continued with a new tap. We used to buy those taps a box at a time! From memory those were fairly small- about 8 or 9 mm. The little hard spot caused by a snapped tap was also quite an advantage because of the job so leaving them in didn't matter. The point is, as ever, our Guru is quite correct. Taps are cheap, labour is not. If in doubt, toss it out- or save it until you want a seriously bit of hard material for a job!
|
|
philip in china
- Monday, 12/15/08 20:14:21 EST
|
I agree that the coarse thread small diameter taps are a lot of grief.
4-40, 6-32 & 10-24 being My least favorite.
I can't speak for the brands currently available, but in the early '80s I noticed that TRW taps were not as likely to break as Morse, so even among top quality brands, all are not equal.
|
|
- Dave Boyer
- Monday, 12/15/08 22:43:15 EST
|
Big Tapping
I have fond memories of tapping items we made in the machine shop. Sometimes I would get to spend all day and the next tapping. Many units we made had dozens or hundreds of holes in the faces and on the round that had to be tapped. The tapped holes ranged from small to well over 5" diameter. I used a big mill to stabalize and center the tap. Then a 24" cresent wrench and four foot bar was put into use. I loved the go a little forward then back to break the chip motion. Was like dancing all day. I really had a lot of fun and used alot of tapping oil. Usually the next morning I couldn't figure out why I was sore and stiff. I am sure many of you used bigger taps and better methods. It worked and I loved it. Like rowing the boat all day. We hade special ground reams for finishing and counterboring the holes for the huge plug taps. They were my favorite to tap with.
|
|
- Rustystuff
- Monday, 12/15/08 23:23:55 EST
|
If I had to do that now they would find me on the floor after an hour.
I bet the older fellas snickered all day. Look at the dumb young greenhorn go to town.
|
|
- Rustystuff
- Monday, 12/15/08 23:32:29 EST
|
My experience is resharpened drill bits don't stay sharp very long. Say a new 1/4" bit cost $4.00. You are having a $10 hour ($14 with benefits) employee drill 300 holes. Including putting in and removing stock to be drilled, they can do one hole in 45 seconds with a dulling bit or one hole in 30 seconds with a new drill bit. The difference is the job taking 2.5 hours vs 3.75 hours. The new drill bit paid for itself at least three times over.
If you have a situation to where the employee is full time and may not have anything else much productive to do in the 1 1/4 hour difference it may not matter much. I hire occasional labor so the extra time does cost me.
And then there are employees themselves. Some only have one gear and that is low. Others are more efficient and worth more per hour as their output will be higher. However, say the first employee shows up on time every day. The second has an endless list of excuses for either being late or not showing up at all.
Rustystuff: Had a neighbor tell me the story on how when he was in his early 20s he hired out to carry blocks to masons at a construction site. One day the other block carrier didn't show up and the two masons decided to see how much 'quit' he had in him. They ran him ragged but he finished the day. About 30 years later he applied for a job with the county highway department (a very desirable job locally). The guy doing the hiring was one of those masons. He remembered the block job and hired him.
|
|
Ken Scharabok
- Tuesday, 12/16/08 06:39:30 EST
|
|
|
[
CSI - anvilfire MEMBERS Group |
Getting Started in Blacksmithing ]
|