| WELCOME to the anvilfire Guru's Den - V. 3.0 |
|
THIS is a forum for questions and answers about blacksmithing and general metalworking. Ask the Guru any reasonable question and he or one of his helpers will answer your question, find someone that can, OR research the question for you. This is an archive of posts from December 1 - 8, 2002 on the Guru's Den |
|
|
|
Where can I find a pattern to make copper roses? |
| Eric - Sunday, 12/01/02 01:26:59 GMT |
|
Eric, E-mail to you bounced. Send me a good e-mail address and I'll send you the pattern you need. |
| Paw Paw - Sunday, 12/01/02 01:59:46 GMT |
|
QC, actually certain iron oxides are jet black. "Mars" black pigment is iron oxide. The proper etch should leave black iron oxide. Higher carbon steels etch faster and deeper (also rust faster). I don't know about the carbon. . |
| - guru - Sunday, 12/01/02 04:25:50 GMT |
|
Terry Ridder- I have used a number of different silver solders from Handy nad Harman over the years. I can't say exactly which ones at this point, but all worked quite well with the exception of one batch of IT (very high-temp, very hard) sliver solder I got that had some contamination that made it porous. If Handy and Harman says a given product looks like yellow brass, it will look that way. They are very accurate about their solidus/liquidus points, too. Better than any other brands I have used. They make a good flux, too. If you are looking for a good color match, you'll probably have to use one of the ones you listed. The very low silver content, low melting point solders for brass have a color that is too gray/bronze to match yellow brass well. To get a good color match, the percentage of copper has to be fairly high, which raises the melting point. Based on the numbers you quoted from H&H, I'd use the Braze 090. It will most likely give the best color match and finishing qualities. It will also be the trickiest to use, due to its higher fluidus temperature of 1565� which is only 105� below the melting pooint of 65/35 yellow brass and even closer to the melting point of Naval Brass 60% Cu, 39.25% Zn, 0.75% Sn) which melts at 1630�. If you want a close color match, you'll have to deal with an alloy that has a melting point pretty close to the parent metal. |
| vicopper - Sunday, 12/01/02 04:28:22 GMT |
|
QC- I know that there is a black oxide of iron that is caused by some anaerobic bacteria. It is what makes the black color inside old iron sewer pipes. If I remember correctly what my Father (a chemist) told me years ago, it is iron sulfide, but my memory is a bit vague at that point. |
| vicopper - Sunday, 12/01/02 04:38:28 GMT |
|
Sarah Chamberlain, in S'toon, blacksmiths meet Tuesday nights, send an email, you are welcome to attend. |
| Daryl - Sunday, 12/01/02 15:09:36 GMT |
|
QC from what I understand (this could be wrong) the black oxide formed when useing feric cloride on these low carbon alloys (or no carbon) is Iron nitride, no carbon, and from my own exparaments (I haven't played with nickel/ or wrought) the higher carbon steels will etch faster only when soft a hardened (even tempered) blade will etch a lot faster than a soft one but then a fast etch will tend to wash out the pattern, a slow etch over a longer time (cleaning and carding every few min.) will give a deep clean etch. so far as I know in unhardened steel the carbon count makes very little differance to the etch (in hardened steel it can be a very big problem) that is why billets of the same type steel are very hard to get a good etch on (cable/wire is a good example of this)as only the weld lines will show . I have found that most of the info in the net regarding this (and in books for that matter) is based on/ geared toword knifemakeing and assummes that the billet will be used for that. MP |
| MP - Sunday, 12/01/02 18:22:07 GMT |
|
sorry that last post should read "a hardened blade will etch alot SLOWER than a soft one" also that is only a proble when doing an edge quench as the soft part of the blade and etch through by the time the edge shows the patern. MP |
| MP - Sunday, 12/01/02 18:26:29 GMT |
|
Guru, Is there a plan for a coal box anywhere on your site of the archives. I want to build something that is convenient to shovel out of near the forge. Any suggestions before I start? Doug |
| AZDoug - Sunday, 12/01/02 18:40:19 GMT |
|
Guru, Vic, and MP, thanks, now it's making sense. The etch is creating an oxide coating, not really eating away a lot of metal. Vic, I believe you are correct about Iron Sulfide. It is one of the first things to look for when there is a downhole oilwell casing failure. Hydrogen sulfide will eat up steel in days and leave a black residue. Regarding the etching and rusting of higher carbon steel, this is due to the greater latice strain created by the extra carbon when steel is in a quenched and tempered condition. Martensite is considered metastable and will releave its stress by any means, including corrosion. Generally hardened steel will corrode faster than unhardened steel, regardless of the carbon content. |
| Quenchcrack - Sunday, 12/01/02 18:49:03 GMT |
|
Steve: You can reduce the air consumption on that hammer in many ways. You can use Parker "Poly-pac" urathane rings on the piston for one. Remove the O-ring from the seal for use on air. All packings should be something like Parker "Zebra stripe" a teflon/graphite material. The valves are the most important and need to be fitted to .0005 - .001 clearance for use on air. The valve sleeves need to be removed and bored and ground true. Then the valves are either flame-sprayed or brazed so they can be ground to fit. Air consumption and perfomance will be GREATLY enhanced with these modifications. Fitting the motion valve tight is probably the #1 thing as air leaking by the throttle is not really lost. Sometimes it's hard to get a consistant idle from the worn linkage and large porting of the throttle. I've modified these hammers with a separate idle circut that worked very well. You just need a supply of air going to a ball-cock mounted handy to the opperator. From there a hose goes to a hole tapped into the area BETWEEN the throttle and the motion valve. With this setup the main throttle is adjusted to close all the way and all the air for idle is supplied by this small (3/4 - 1") valve. If you have a tight fitted throttle the small valve can be used to shut down the hammer. Of course you still need a gate valve on the air supply to the hammer or stepping on the treadle will still activate the hammer. |
| - grant - Sunday, 12/01/02 18:51:52 GMT |
|
Coal Bin Plans: Doug, None that I know of. Everyone I know handles coal differently. If I were using a LOT and wanted to be as efficient as possible I would have a bin outside with a opening outside near the forge. It would work well in my current shop since the floor near the forge is about 2 feet below ground level. Nice down hill slope into the shop. But depending on where you are, damp or wet coal may freeze when stored outdoors. In the two houses I lived in with coal furnaces each had a room sized coal bin indoors. The last one was a 20x20 foot room that was filled to overflowing with stoker coal at the beginning of the winter. . . My first forge was fired from the remains of that when we converted to gas. Now THERE is a thing of the PAST. Cast Iron coal bin doors on the outside of the house. . . One of those now long lost childhood mysteries. . . Or maybe a NEW mystery. . what is that door leading to a dungeon? All the time I was smithing full time I hauled and stored coal in 5 gallon buckets. It was convienient on both ends and worked with my portable shop. Kept the back of the truck relatively coal free too. Others I know have designated places (near the door) where they pile coal against the building and then bring in buckets full as they need it. This could probably be considered a fire hazzard but in coal burning locales folks know better. There's those 5 gallon buckets again. . . I knew one fellow that had a big "dirt pan" (earth moving device) that was designed to be moved with a crane. He loaded it in a truck, filled it with a couple tons of coal, then unloaded it next to his shop leaving the coal in the steel pan. This of course required heavy equipment. I have also seen coal hoppers made of wood (like a feed hopper) where the bottom sloped at a very steep angle (over 45 degrees) toward a small bin door. As the contents were shoveled out it kept moving toward the door. I think wood is often used for this type thing because of corrosion problems when made of steel. The disadvantage of this type thing is filling it. IF your site has a elevation drop off where you can shovel or dump coal into the top of the bin and have it come out at the lower shop elevation then it works well. Otherwise it is a LOT of work or you need a conveyor/elevator. In small quantities (about a ton) filling from the back of a truck would not be too bad. |
| - guru - Sunday, 12/01/02 19:23:33 GMT |
|
Graphite Filled Rings are fantastic if you can find them. I put GM graphite filled rings in an old 1955 Chevy big six that had about 1/32" taper in the bore. . . The top compression ring was channel shaped and the space in between was filled with graphite material. Between the careful honing to a nice cross hatch finish and the new rings, the truck didn't use a quart of oil in some ten years of almost daily use. The lack of oil consumption actually bothered me a little because it was not normal for old engines with hundreds of thousands of miles and lots of abuse. . . Supposedly a too dry cylinder wears rapidly. . . but I think this AND the statement that "new engines that use oil need to break in" are JUST LIES. . . told by manufacturers and dealers about faulty work. I've rebuilt several old engines and they never used oil until they had many many miles one them or some kind of abuse failure (broken rings due to over reving. . .). Careful honing to a flat finish is the key |
| - guru - Sunday, 12/01/02 19:40:42 GMT |
|
Hello, I am (very)new to this game. I have always loved to watch Blacksmiths practice their trade at shows ect. I have been looking for an Anvil in my price range for sometime. Most were either beat to hell or too small(under 200lbs). I found one this weekend at a flea market. The anvil is over the 200lb mark but is attached to a stand, making it hard to get the correct weight. I would guess it to be around 220lbs. The price was $250 so I went ahead and bought it. The anvil has good rebound but the anvil does not ring. As stated before the anvil is mounted on a stand with rebar welded over each leg to a plate 1/2" thick. Three 2" pipe legs angle out from there, giving a very stable base. I can't really describe the sound, but it is not a ring. The anvil is in overall good shape but the sound bothers me. Should I be concerned or could the mount change the sound? PS: I have a camera and can send a picture if it would help. Respectfully, Captain |
| CaptainIrish - Sunday, 12/01/02 20:35:00 GMT |
|
Guru, Well, you must be assuming I have a much bigger operation here than I do. I am smithing for fun at present, mostly on weekends. Have coal in 3 55gal drums outside the shop, covered - tough to get the coal out, but may make a barrel handler to tilt to solve that. What I am looking for is something for next to the forge just to hold enough for use. Will just make a wooden box with bottom, back, left/right side that is open in the front for shoveling out unless there is a better idea. I was thinking maybe of making a little taller "hopper" in the back that lets coal out into the bottom as it is used, kind of like those dog feeders. At least I brought back some memories - the house I grew up in in ND also had a big room-sized coal bin in the basement that was filled through a chute, from there shoveled into the furnace. Doug |
| AZDoug - Sunday, 12/01/02 20:43:14 GMT |
|
AZDOUG. I use a coal scuttle for next to the forge. It's a bucket designed for coal for the kitchen stove or water heater. Narrow at the bottom and wide oval at the top for getting out a scoop at a time. They are still available at some hardware stores, at least here in the PA coal region. It's neat putting a retro tool to the use for which it was intended. |
| bbeck - Sunday, 12/01/02 21:43:39 GMT |
|
Az Doug and coal handling You can get about 400 pounds of coal in a 55 gallon drum, and 35 pounds or so in a 5 gal bucket. That way a ton of coal would fill 5 - 55 gallon drums. Each drum would fill 12 - 5 gallon buckets. For larger containers (coal bins) 40 cubic feet of coal = 1 ton. That calculation for a commercial size coal bin. A 5 gallon plastic bucket is easy to handle both in weight and in size. I use a fireplace shovel for a little coal, or just lift the bucket when more than a shovel or two are needed. When empty I load up 12 more buckets. DO NOT use a torch, ( BOOM! is not a nice noise) but use a chisel or saw to cut the ends out of the drums. |
| - Conner - Sunday, 12/01/02 22:56:15 GMT |
|
CaptainIrish. The odds are that your anvil will ring if it is loose mounted instead of secured. I've got my anvil setting on some shingles to quite it down. The ringing of an anvil, while sounding historic, can actually be bad for your hearing. |
| Bob Harasim - Sunday, 12/01/02 23:03:51 GMT |
|
Please Help - I need as much info as possible on how copper was mined and turned from raw ore into usable material in biblical times. My father is to be the coppersmith in the church "Journey to the Manger" and needs to explain this to people as they pass through the 'village'. He also needs as much info as possible on coppersmithing of this time period. Any help would be greatly appreciated. Thank You - Clara |
| Clara - Monday, 12/02/02 00:24:22 GMT |
|
CaptainIrish- If your anvil has a good rebound, then it is hard enough to be useable. The "ring" of an anvil is really a red herring, since it does nothing toward moving metal. Some anvils, such as my small Peter Wright, ring very piercingly, while others have almost no ring at all. I believe it is the Vulcan anvils, made of cast iron with a cast-in-place tool steel face, that have almost no ring at all but work very well. Antique dealers as well as a few outright scammers on eBay love to tout the ring of their anvils, but it is *hardness*, represented by rebound, which helps the hammer do the work. The mystique and romance of a ringing anvil are fine for nostalgia buffs, but smiths need to be more concerned with the physics involved in forging. If your anvil doesn't ring, but does have a good rebound, count your blessings. I've lost enough of my hearing to need hearing aids, due in no small measure to working on loud ringing anvils without wearing hearing protectors. My anvils are both set on a layer of silicone gasket compound to reduce the ringing as much as possible. Regardless of how little ring your anvil has, you should still wear hearing protectors. |
| vicopper - Monday, 12/02/02 03:16:52 GMT |
|
CaptainIrish; listen to vicopper, he's got it right. The only thing about an anvil that matters is the quality of the work that comes from it. My Peddinghaus and my Nimba both sit in silicone and have a pad of leather glued w/silicone under the square horn, ala Steve Kayne. Both anvils are for sale. My Fisher just goes thunk and is not for sale. I love an anvils ring. But the charm goes away real quick. They can be just plain painful after a very short time. If your tool works, it ain't broke. Trust me your first anvil is like your first girl. you'll find more. If you're lucky they will follow you home. :) |
| - Pete-Raven - Monday, 12/02/02 03:41:12 GMT |
|
Hi I am looking to find a refractory material to use to cast some parts in Aluminum - I am using a lost wax process , I have tried Plaster of Paris but too mutch moisture and it steems bubbles in the castings. Thanks Chuck Presnsail |
| Chuck Presnail - Monday, 12/02/02 05:10:34 GMT |
|
I saved a crate from a lathe (small 9/20) that I plan to use for a coal bin at present I an leaveing it baged untill I need it then dumping from the bag into the pan, at shows I just take a bage with me. one bag lasts most of a season oddly enough. I need to add the bin as the guru had said in the winter wet coal can become a solid brick like bag... MP |
| MP - Monday, 12/02/02 06:17:11 GMT |
|
Just to thank Quenchcrack, the Guru, and also Jim, very much indeed for their most helpful thoughts and information. It was the Abana masterpiece lock and accompanying historical comment, which led me to you, and I'm most grateful. BM |
| Barbara Murray - Monday, 12/02/02 10:21:41 GMT |
|
Chuck- If you're gettig steam bubbles in your castings, you aren't getting the flask hot enough in the burnout process. The burnout needs to get the investment to around 1000�F to ensure that all the wax is completely vaporized, not just melted. If you get it that hot, there can't be any water left in the plaster. All free water boils off at 212�F and at about 500�F all chemical water has been driven off as well. See the iForge demo on lost wax casting for more information. Plaster of Paris can be improved as a casting investment by adding a bit of fine silica sand (80 mesh or finer) and some fire clay. Mix the dry ingredients together before adding them to water. Investment plaster, from a jeweler's supply will give much better results and finer detail. Kerr Satincast is one of my favorites. |
| vicopper - Monday, 12/02/02 10:37:18 GMT |
|
Does ITC 100 have a shelf life after the container is opened? Thinking about getting the bigger container and don't want it to go to waste. Coal bin? I use a galvanized steel garbage can and a "grain scoop" for my charcoal. I bust up the lumps and let them fall in the can and it sits outside by the forge with the cover bungied on so the wind doesn't take it away. Grain scoop stays in the can and I just scoop some up and put it in the forge when needed. Put the cover back on to keep the sparks out. Lead in casting brass: If you have brass faucets in your house or did when you were younger, I suppose you had far more exposure to lead than jewelry or other items would give you. Much of the lead in faucet casting brass has been removed, but there were never any definitive tests that proved harm from lead in faucet casting brass. Lead fume or vapor is a different story. |
| - Tony - Monday, 12/02/02 13:49:47 GMT |
|
ITC Products Shelf Life: Tony, I'm not sure but it should be very stable. It comes in a very thick paste (the minimum water) so that it does not settle or seperate. It must be thinned to use. Drying would be the only long term problem. I expect that if you put a very small amount of water in the container after you have used some that it will prevent drying (I do so even in pints). Pints come in durable plastic screw-top jaws. The 1/2 gallon containers are a resealable plastic tub. Being water based I wonder about freezing and have moved inventory into my office. The ITC-213 in pints comes with the jar in a zip-lock plastic bag. I do not know if it is due to possible leakage or a secondary seal. I shall ask. By the 1/2 gallon and up the price per unit volume is significantly lower. |
| - guru - Monday, 12/02/02 14:28:32 GMT |
|
Clara; Copper Production: A quick once-over of the subject is in "The Metalsmiths" by Percy Knauth [(c)1974 Time-Life Books; LoC 73-89680] This should be available from your library or via inter-library loan. It's mostly hole-in-the-ground and blowing-the-wineskins technology, although it may have become a bit more sophisticated by the Roman period. Biblical Archeology Review also might also have some articles on it, and I'm sure other, more knowing folks here will chime in. Research seems to be an excellent way to kick off Advent (which is not just a season of anticipation, but of repentance). Good luck. Visit your National Parks: www.nps.gov Go viking: www.wam.umd.edu/~eowyn/Longship/ |
| Bruce Blackistone (Atli) - Monday, 12/02/02 14:41:28 GMT |
|
itc 100 Tony, I've had the remains of a pint jar for 3 years that I use for touch ups, before you put it away put a tablespoon of water in the jar , keep the lid on tight and like Jock says keep from freezing |
| lydia - Monday, 12/02/02 15:06:10 GMT |
|
Clara, do a search on "Archeo-metallurgy" (not sure if that hyphen belongs there or not). There are many good sites with searchable data bases that could help you. |
| - Quenchcrack - Monday, 12/02/02 15:26:41 GMT |
|
how do i stop the black ring on my finger from my rings they are made of silver? |
| Ben - Monday, 12/02/02 16:55:37 GMT |
|
Bellows that go bang---never had my double lung bellows go bang---of course the upper lung is about the level of the tuyere. (and never "inhales" as the valves to the lower chamber are shut before it starts filling. I have had the flex pipe to the hand crank pop a couple of times, no damage but sometimes a lick of flame out the intake hole of the blower. As a datapoint: I do not use water on a coal fire running steam over hot coke was one way they made gas for gas lights in the bad old days. Thomas |
| - Thomas Powers - Monday, 12/02/02 17:28:08 GMT |
|
Bellows going Boom: My double action bellows was mounted high but the problem was that of being a large outdoors forge with a hood and a back. If there was a slight breeze toward the forge smoke would back up in the bellows. Or at least in the pipe leading to the bellows. Five feet of 2" (50mm) pipe filled with hot explosive gases was probably all that was required. This bellows never went "boom" but it occasionaly went "whoomp" and was expanded to the point of straining the nails! Learning to give a very slight test pull helped. This either told you there was no problem and you could pump as normal OR you got the "whoomp" sound. The difference being that if you gave the bellows a hard pull then YOU would be filling the upper chamber at the same time as the exploding gas, greatly increasing the likelyhood of damaging the bellows. If I every build another Great Bellows it will have a pressure relief valve in the top board. |
| - guru - Monday, 12/02/02 17:59:03 GMT |
|
Silver Ben, I've never heard of silver jewelery doing that. Good silver DOES tarnish but very slowly unless exposed to sulfur compounds. But then I don't wear any type of jewelery. . . Whatever it is, a little clear lacquer on the inside will stop the oxidation and transfer to your skin. |
| - guru - Monday, 12/02/02 18:11:33 GMT |
|
ITC 100: Jock and lydia, Thanks! |
| - Tony - Monday, 12/02/02 21:41:07 GMT |
|
Ben- I have highly acid perspiration and I used to get a dark band on my finger from a silver ring. One thing that aggravates the problem is not having the inside of the ring polished highly enough. When sterling silver (92.5%Ag, 7.5%Cu) is heated for soldering or casting, the copper in the top layer of the metal oxidizes. This oxidation goes a few molecules deep. It is the oxides of copper that turn black, not the silver. Pure (fine) silver oxidizes very little, if at all. If your ring can be safely heated to a black heat or a blood red heat, you can remove all the copper from the surface of the silver by "bright dDipping." To do this, heat the piece to about blood red (when viewed in a very dim light) and quench it in either a 10% solution of Sulphuric Acid or in Sparex jeweler's pickling solution. Sparex is available at jeweler's supplies. Repeat the heating/quenching process several times until no trace of firescale (discoloration) remains. Since the acid attacks the copper and not the silver, you have created a layer a few molecules thick of pure silver. It will not tarnish, nor will it turn your finger black. Commercially, silver rings are often given a thin electroplate with Rhodium, which is very durable and does not tarnish. |
| vicopper - Monday, 12/02/02 22:57:23 GMT |
|
A final comment on blackening steel. I applied a 25% solution of Ammonium Persulfate to the blade of an "antiqued" Bowie knife I just forged. Darkened it very nice to a deep gunmetal gray. Ammonium Persulfate is relatively benign and not near as agressive as an acid like HCl. However, use it with great care and common sense, as you would with any etchant. |
| - Quenchcrack - Monday, 12/02/02 22:58:23 GMT |
|
While I was forging today I happened to notice a jug of antifreeze sitting on the shelf and wondered could it be used as a quenching agent? Only thing I could think of against it is that it would need to be covered to the local pets from drinking it. After all it does change the boiling point of water to a higher temp. Or would it be better to mix it like you do in a radiator or use it straight if it can be used at all? |
| 888 - Tuesday, 12/03/02 03:11:58 GMT |
|
Antifreeze: 888, ethylene glycol is flammable when concentrated. We had 36 megawatts of induction melter and the coil coolant was water/glycol. Small leaks evaporated, but left a sugary residue (carbon). When there was a molten iron spill, the glycol residue burned very nicely. Actually... NOT very nicely. Hard to put out and some toxic gasses are given off when the glycol disassociates with extreme heat. I do not remember what they are. Dow chemical will tell you if you get to the right people. |
| - Tony - Tuesday, 12/03/02 03:25:33 GMT |
|
Hi Guru I am planning to make a knife (a spearhead rather) out of a 10 series steel bar stock by stock removal. My question is: How does the process of heatreating and finishing go? Do I finish the spearhead before I heatreating or after? Or between the hardening and and tempering stage? Many thanks for your help |
| - Spearhead - Tuesday, 12/03/02 03:40:42 GMT |
|
Ethylene glycol decomposition products ethylene glycol is a sweet tasting poison. It is also a skin irritant. It shpuld never be kept where children or pets can drink it. It is fatally poisonous. The heat breakdown products should not be poisonous. The ethylene glycol molecule is a simple double organic alcohol with the following formula HOCH2CH2OH. The OH is called a hydroxyl molecule and an organic alcohol. Heating the molecule will give off methane gas, =H3C, and it is flammable. H2O (water), will also come off as a gas. The term glycol is a fancy term for an organic chemical compound with two alcohol radicals (OH's). SLAG. |
| slag - Tuesday, 12/03/02 04:57:25 GMT |
|
Slag, Not to debate the term poisonous, but methane gas in high enough concentrations is fatal. |
| Paw Paw - Tuesday, 12/03/02 05:02:12 GMT |
|
A friend showed me a cast padlock, it had an interesting touchmark around the keyhole. The hasp of the lock comes completely out ,similar to a bicycle lock. The key was double sided and around the keyhole is a 5-pointed star with 1dot,3dots,2dots,1dot and 2dots. This was supposed to be an old jail lock? Any info would be appreciated. Thanks. |
| - bill heitner - Tuesday, 12/03/02 05:30:05 GMT |
|
I would surmise that the heat will decompose methane (CH4) and oxidise it to carbon dioxide (CO2), and water (H2O). SLAG |
| slag - Tuesday, 12/03/02 06:06:49 GMT |
|
Our local landfill has a methane "torch" that burns pretty regularly. Seems like Methane would be self extuinguishing if it decomposed as you say. But I'm certainly not a chemist, and don't begin to understand the process. But, I do know that it burns, I've proved that. And don't ask how! (grin) |
| Paw Paw - Tuesday, 12/03/02 07:08:29 GMT |
|
PawPaw; Methane? C'mon Bro, dont sell yerself short. Us Wilsons are acetylene generators! }:<) 3dogs |
| 3dogs - Tuesday, 12/03/02 08:11:10 GMT |
|
3dogs, Nope! Methane! (grin) |
| Paw Paw - Tuesday, 12/03/02 08:15:07 GMT |
|
Guru, I am in need of two anvil tools, a cone and a cut-off chisel for my 110# Russian anvil (which, by the way, is somewhat scarred but otherwise performing quite well). Recall that the hardy hole on this anvil is about 1-1/8". The biggest shank on the tools I saw at the Kayne and Son catalog site is 1". Is the 1" size appropriate for the size of the 1-1/8" hardy hole? On another note, a company by the name of Tenaxol makes a non-toxic, non-flamable quenchant that is mixed with water. By adjusting the concentration, the speed of the quench can be adjusted. The material is Polyalkylene Glycol, similar to anti-freeze but safe to use around red hot iron. Park Chemical and others make similar materials. If you are using oil in large quantities, I strongly suggest you investigate the material if for no other reason than it is non-flamable and it might make a dent in your insurance rates. |
| - Quenchcrack - Tuesday, 12/03/02 13:20:10 GMT |
|
AntiFreeze: Slag, "should not be poisonous"? No carbon monoxide given off? What else is in antifreeze? See this (www.houghtonchemical.com/auto/pahnoluniversal/unimsds.htm) It took me less than 30 seconds to find that. Much less time than it took you to say that it "should not be poisonous". Paw Paw, watch out with that personal methane burning. Don't wanna get a burnback into the burner tube. Grin! OK, sorry. That was a nasty visual. |
| - Tony - Tuesday, 12/03/02 13:33:47 GMT |
|
I have to make a stainless door pull and attachments for a home on the salty CT coastline. The homeowner has had problems with surface rust on an installed railing. What type of stainless should I use? Thanks, Jim |
| jim - Tuesday, 12/03/02 13:48:39 GMT |
|
Spearhead, 10 series steels run from stuff that won't harden, 1018, to stuff that is best hardened in an oil quench, 1095, which specific alloy you talking about? As for finishing we usually got the piece down close to final size/finish but left a little to remove heat treat scale or colouration. (we often left the piece at 220 grit stage and repeated 220 after heat treat). There are methods of heat treating that change the surface very little and there are methods that you will need quite a bit of clean up after. What method are you planning to use? Thomas---how are you doing the socket for the spear point? |
| - Thomas Powers - Tuesday, 12/03/02 14:21:54 GMT |
|
Spearhead. 10 series doesn't mean much. For instance 1020 is low carbon, and doesn't have enough carbon to harden for toolsmithing. 1055 and above will harden nicely. Shape the spear head leaving the cutting edges slightly blunted. Don't sharpen or put a polish on the spearhead till after hardening and tempering. Otherwise, your polished surface and cutting edge will scale over, and you will have duplicated your work. When sharpening, don't ruin the temper by friction heat. Padlock. Bill, I have a pretty good identification book for padlocks. I gave it a quick look and could not locate your style of padlock. Reference: "Town-Country Old Tools with Prices", Jack Wood, L-W Books, Gas City, Indiana, 1990. ISBN 0-89145-417-9 Stainless. Jim, there are beaucoups alloys of stainless, but the easiest to obtain and use is probably 304. It is used in 55% of all stainless applications. Remove the fire scale before installing. Carpenter Technology Corp. in Reading, PA, has specs and data. |
| Frank Turley - Tuesday, 12/03/02 14:30:28 GMT |
|
Tony, It may be a nasty visual, but it's also accurate. |
| Paw Paw - Tuesday, 12/03/02 14:44:29 GMT |
|
Spearhead: I'm hoping to finish my spear tutorial for the iForge section BEFORE Christmas. Keep your eye out for it. (Drawings are finished, editing the commentary now. Still will need the Great Guru's blessing!) Visit your National Parks: www.nps.gov Go viking: www.wam.umd.edu/~eowyn/Longship/ |
| Bruce Blackistone (Atli) - Tuesday, 12/03/02 16:56:00 GMT |
|
Bruce, Send it on. I have a couple demos in the works but need time to process. |
| - guru - Tuesday, 12/03/02 17:26:55 GMT |
|
Hi. I am attempting to teach myself 3D and texture design. I am practicing creating some 'medival' door textures and hardware. Unfortunately I am guessing as I haven't been able to find phots on the net of medival door hardware and so have been basing my experiments on newer examples and on what I think rusted iron may have looked like. I have a few basic questions.... Here are two screen shots of hinges I tried so my questions make more sense. http://www.cavebrain.com/cavebrain/3dgs/hinge1.jpg http://www.cavebrain.com/cavebrain/3dgs/hinge2.jpg Ok... 1) Does anyone know if there are any resources that would show medival doors and hinges? 2) How were the hinges attached -I drew some rivets here but they are inset -not sure how they would have been done? 3) I drew the surface of the iron 'bumpy' as I sort of imagine but am not sure what the texture would have been? If it was cast iron, smooth hammered stuff? I know zero about the art of blacksmithery so if you point to an example or site where I might find pictures I can get a better idea. I'm also looking around for examples of what a medival european smithy might have looked like, and what tools may have been around. I haven't done a good search on this yet as I am still working on hinges but if you know of one off the top of your head that is a good place to look at it would be appreciated. I am in Southern California, USA. If there are any places I should check out in person you are aware of then that info would also be great. Many thanks for this very interesting website. I'm reading through the FAQ's now just because this is interesting info. :) Burt |
| Burt - Tuesday, 12/03/02 17:27:20 GMT |
|
Quenchcrack: Few manufacturers can afford to make tools to fit every possible hardie hole (me included), so we generally make everything 1" and you need to shim it to fit. In your case a piece of 1/8 x 1 x 1 angle in one corner should work. You'll have to grind one corner of the shank to fit in the angle and probably a little grinding here and there to make it fit. Many hardie holes are out of square or undersize or oversize. The smith was expected to make and fit his own tools I guess. A cutoff hardie should fit a little loose so it can be gotten out quickly. Actually you should make one adapter to fit any 1" tools. You'll want a flange (washer?) on top so the angle won't fall thru. As mentioned above, I like a cutter to come out easy and most other tools to fit snug. |
| - grant - Tuesday, 12/03/02 17:28:09 GMT |
|
Stainless: I have had good luck with 304 stainless AND leaving the scale on the work. (see our 21st Century page article "Latch"). Now. . the trick is that IF your SS or scale is contaminated with iron dust from scale, deposits in dies and such it will rust. These are usualy small blemishes that do not hurt anything and if waxed or oiled turn dark enough not to see. Note that cold working with steel tools can create carbon steel smears on the surface. Grinder offal from other work may also stick. IF you wire brush stainless ALWAYS be sure to use a stainless brush (preferably not contaminated with carbon steel). Carbon steel fasteners or attachments can also create rust stains as well as a bi-metalic corrosion condition. Where an electrolyte is present (any non-distilled water with disolved atmospheric gases is an electrolyte), steel parts will plate stainless with iron which rusts during the same process. For the best corrosion resistance stainless is "pasivated" in strong acid solutions which remove any iron (and scale) from the surface. This leaves a corrosion resistant nickle/chrome surface. However, this is for maximum industrial duty corrosion resistance. Leaving tight black scale and polishing highlights on textured stainless produces a beautiful effect. If you want to see fine examples of this look at ANY higher quality stainless tableware. |
| - guru - Tuesday, 12/03/02 17:47:35 GMT |
|
Burt; Are you trying to make hinges that look as if they were made over 500 years ago, or do you want to make things that look like they did when they were made in the medieval period? If you were trying to make a reproduction of a 1960's car---would you make it smooth and polished like it did in the 1960's or rusted out with parts waving in the breeze like it does today? This is a major problem with making replicas of old work as people assume that the stuff would look old and rusted out even when it rolled off the "assembly line" at the medieval smithy. Most fancy door hinges were made smooth and the roughness we see are due to 500+ years of weathering. I have a number of references that include clear pictures of extant medieval door hinges; but *NONE* of them are on-line---the internet is a *bad* place to do all your research---do you know how to do ILL? If so I will post some titles to search for. BTW is there a particular time and place you are interested in? 600 AD Saxon hinges differ from 1300 AD Italian ones... Thomas |
| - Thomas Powers - Tuesday, 12/03/02 17:55:50 GMT |
|
Flaming Antifreeze: Ford Motor company had a serious problem with this on ambulance and rescue vehicals about a decade ago. Water hoses (filled with anti-freeze) ran too close to hot exhaust and when they failed the engine caught fire. It was rather embarassing for fire departments to have their vehicals bursting into flames. . . Anti-freeze and water in less than 50% concentration can be used as a quenchant but you need VERY good ventilation. The vapors that produce that sickly sweet taste are as poisoness as the the anti-freeze. You can taste and smell it from the slightest coolant leak in an automobile. You can inhale significant amounts of this with no apparent harm BUT there is a breaking point in all exposures of this type. Salt will lower the freezing point of your slack-tub and is not so much of a problem. |
| - guru - Tuesday, 12/03/02 17:58:51 GMT |
|
Anvil Tools: The majority of tools with a shoulder do not need to be tight. I have collections of tools with 3/4" shanks UP that I use in whatever size hole they drop into. Currently my two working anvils have 1-1/8" to 1-3/16" hardy holes. One of my 100 pound anvils had a 7/8" hardy hole. The problem with IT was that many tools had larger shanks. I still have a few anvil tools that are too big a fit my 300 pound anvil. I use those in my weld platten, swage block OR a vise. Like Grant, I like mine loose. As long as there is enough shoulder that the tool is not hurting the corners of the hardy hole I don't worry about it. Tools that fit are nice but do not want to be too tight. There is a greater probility of damaging an anvil with a tool wedged into the hardy hole than from one that is loose. I think many folks are too annal on this subject and are wasting time making bushings. There ARE certain types of tools that need to fit snugly. Lever type swaging tools need to fit snug. |
| - guru - Tuesday, 12/03/02 18:10:41 GMT |
|
Quench, I have a similar anvil (going by the pictures) with a similar-size hardie hole. I use 1" shanks in mine. Made my hardie hot cut by cutting the sharp end off a splitting wedge and welding on a 1" shank. Works great. If it hopped around enough to bother me, I could weld on some 1/8 stock in strategic spots to make it fit the hole tighter. Steve |
| Steve A - Tuesday, 12/03/02 18:14:11 GMT |
|
Spear: I made one out of leaf spring and for the socket I necked down a pc of 3/4" black pipe and welded it onto the tang. Shaft was from an old gardening tool. My wife felt she needed something for personal protection. I tried to sell her on a 12 ga but this was what she wanted. When the Zulu attack we will be ready! Men of valor stand ye, stand ye .... |
| adam - Tuesday, 12/03/02 18:15:03 GMT |
|
Grant, thanks for the tip. I spent about 4 hrs last weekend upsetting a 1" round piece of 5160. I got it to a 1-1/8" square and ran into the principle of constant volume: it was going to be too short. Another lesson learned. I may try to weld a collar onto it to salvage all that work. A comment about stainless steel: Most are very susceptible to chloride(as in saltwater)attack. Pitting corrosion occurs when the passive surface layer is destroyed by low oxygen contents (as found in cracks and crevices and under fasteners). While austenitic stainless is probably the best at resisting chlorides, it is still a liability in a sea coast environment. Additionally, unless you use the low-carbon version of, say, 304 (304L) the steel must be heated to about 2100F and water quenched after forging. This puts all the chromium carbides back into solution, leaving the chromium free to form surface oxides that resist corrosion. |
| - Quenchcrack - Tuesday, 12/03/02 18:17:07 GMT |
|
Hardy: my anvil has 1 3/16" hole. I forged one stem to fit out of 1 1/4" bar and decided that was too much like hard work so I made an insert out of sq tubing to adapt to 1". 1" is an easy size to find in both solid and tube stock and it also is the most popular size for anvil hardies. You can also make hardy tool stems from angle iron or even a pc of flat stock on the diagonal will work just fine for most tools and there is a lot less grinding to fit. |
| adam - Tuesday, 12/03/02 18:22:38 GMT |
|
hello; anyone else running linux and mozilla? i am unable to get the anvilfire store to work. any suggestions would be greatly appreciated. (suggestions that i get a windows box will go to the great bit bucket in the sky. ) terry l. ridder ><> |
| terry l. ridder - Tuesday, 12/03/02 19:15:33 GMT |
|
Texture on Ironwork: Burt, This is a complicated subject and most non-smiths (including die makers for commercial hardware) get it wrong. Forged ironwork has a distinctive texture resulting from a combination oxidation in the fire and careful forging of the surface to create the desired texture. In most OLD work the smith attempted to show NO HAMMER MARKS. However, texture IS part of the art and this includes chisled lines, punch marks and many other features. Texture from fire scale was often controlled. It was either wanted or NOT. When it was not wanted the smith carefully did not overheat his work and then filed off any uncontrolled texture. Most of the texture seen on very old work, and especially exterior work, is RUST. Or painted over rust or a combination of the original finish, rust and paint. Old carefully cared for work has a gentle aged look that is recognizable. We have some on line examples here including digital art by blacksmiths. See our book review of Medieval Ironwork in England. The original photos were rather poor OR reproduced poorly in the book (I think a combination). But these ARE medieval examples. Then see the other books reviews. We have many examples of new work in the books from Artisan Ideas and Dona Meilach. Then see our NEWS page Volume 16, page 2 and page 13 (details). This is a typical digital effect. However, what destroys the reality is the uniformity of the texture. Textures produced by aging (rust) vary over a surface. Certain exposed areas are rougher and sheltered areas are often like new while areas that are contacted repeatedly by hand, even though they may be bare and exposed are usualy smooth and polished having a graceful aging. To produce good digital art you must study the subject as well as nature and art. Painting on a uniform digital texture is what gives low quality digital art its cheap unnatural look. |
| - guru - Tuesday, 12/03/02 19:21:13 GMT |
|
Terry, the store operates using Java applets. Whatever browser you are using must support these as well as cookies. If you can access the pages but just can't place an order I can take orders by phone, fax (after hours) or email. |
| - guru - Tuesday, 12/03/02 19:25:51 GMT |
|
Burt, I think you would benefit greatly from gaining access to the book, "Decorative Antique Ironwork" by Henry Ren� D'Allemagne. It has been reprinted by Dover [store.doverpublications.com] for $21.95. Much of the work pictured is post medieval, but it is a beautiful overview of early European ironwork. The work shown is incredibly, wonderfully, carefully, done, and I suspect most of it was sold and installed "armor bright". It has already been said on the forum that patina comes with age. Thomas Powers'l960 car analogy reminds me, in a way, of one the the "10 dumbest questions asked by tourists at Mesa Verde National Park Cliff Dwellings" in southwestern Colorado. "Why did the Indians always build ruins?" |
| Frank Turley - Tuesday, 12/03/02 19:42:07 GMT |
|
hello guru; i can see the pages, just cannot order anything. java and cookies are on. my try it from the imac later. terry l. ridder ><> |
| terry l. ridder - Tuesday, 12/03/02 20:04:35 GMT |
|
a question about the electrics of an ac arc welder: i recently bought an arc welder and on trying it found that it does weld perfectly well BUT unfortunately the return clamp and the stick holder both are live and give shocks. as well as this being unsafe i am trying to weld on a boat which makes it impossible as well. the welder turns out to be ac on testing and it is a transformer inside giving 50v. i am in england with 240v in the mains. do you know any reasons for this problem? looked inside and no wires are touching that shouldnt be. wondering if some are connected up wrong. hope you can help! |
| rachel - Tuesday, 12/03/02 20:42:53 GMT |
|
Rachel: Common problem, that. You just need better golves (and dry). Nothing wrong with the machine. |
| - grant - Tuesday, 12/03/02 21:01:41 GMT |
|
Welder Shorts Rachel, Normal welder voltage will shock you especially if you have wet feet or are lying on the ground. In wet locations you need good rubber boots (or "gummybootz" as a German welder kept asking me for. . ). The most common electrocution hazzard when welding is lying on your back on a grounded metal surface or a damp surface and not using good dry gloves. We often get used to handling rods bare handed. The coating normally protects us from shock but you cannot count on it. As Grant pointed out, good gloves are necessary. Possible problems. Transformers CAN have internal shorts and they can be VERY dangerous. The work or ground lead should not be hot. If the welder is proper grounded (the third wire) then the work lead should not be hot. Even if the power supply cable looks good and the ground pin is properly wired there can be a problem with where the cord is plugged in. Faulty grounds are a common problem in electrical systems. People often confuse neutrals with grounds and the result is that the entire ground circuit for a location can be hot. On old systems the ground may be inadequate or counted on the conduit which now has many rusted or broken connections. If the welder is old/used you may need to have an electrician check to be sure there is not a short in the transformer. When the device is powered but not operating this can result in full line voltage on the output. If the short is through a burned or oxidized wire it can be just a small amount of current. But this small amount is still a serious danger. |
| - guru - Tuesday, 12/03/02 22:17:01 GMT |
|
Quenchcrack- I have an old anvil of unknown parentage that has a 1-3/16" hardie hole. After upsetting a piece of 1" bar for a hardie stem, I decided that there had to be a better way. There is. I now make all my hardie stems out of square tubing. Anything even halfway close can be made to work. Simply heat to orange and forge a short taper on the end and then start it in the hardie hole and smack it home with a hammer. Orange or yellow-hot tubing is so easy to deform that it poses little risk of cracking an anvil heel this way, and you get a perfect fit. When it cools, it shrinks just enough to give a close, but not uncomfortable fit. Takes about five minutes to make one as opposed to a couple of hours to upset a piece of solid bar. |
| vicopper - Tuesday, 12/03/02 23:54:48 GMT |
|
Viccopper, am I correct in assuming that you weld the stem to the tool? Do you forge a small stem on the tool and insert it into the tube and girth weld it? Or do you make a butt weld between the stem and the tube? Maybe I really don't need to use 5160 for hardy tools...if the anvil face is only about 40Rc, maybe the hot hardy tools will work at a lower hardness. Perhaps I should go review the demo on iForge where Whitesmith showed how to make cheap anvil tools....maybe Santa needs to bring me a welder for Christmas! |
| Quenchcrack - Wednesday, 12/04/02 00:32:37 GMT |
|
hello im just getting started in the trade and i am useing a charcoal forge and am looking for some dealers for coal in the detroit mi, area any suggestions would be greatly appreciated. thank you for your time jesse |
| hellfire252 - Wednesday, 12/04/02 03:06:59 GMT |
|
I didn't make it to the last ABANA conference, but on their home page they have a pic of a Nazel 2B hammer, can you tell me how/what it was mounted on and what effecy the lack of profoundly thick concrete as a base would have on the hammers' force of blow? I just moved and would be interested in temporarily/permanently mounting mine in a similar manner - maybe... any thoughts? |
| Alan Lewis - Wednesday, 12/04/02 03:27:49 GMT |
|
hello; inspired by jim carother's braid ii iforge demo i have been experiementing with different material and size rods. this evening, i have been braiding 1/16" brass and bronze rods together. after a few false starts do to oversized torch i broke down and purchased a bernzomatic butane micro-torch. a jeweler's torch such as the "little torch" made by smith equipment would be a better choice. anyway, of all the materials i have experiemented with so far this one looks the "best". nice contrast, the yellow brass gives just the right touch to the softer bronze tone. i experiemented further and have been braiding a brass and bronze cross necklace to give to my daughters for christmas. using the folded cross as the base idea, i have been braiding the top and bottom members. the top member is 6 braids and the bottom member is 10 braids. ( counting the half torus on one side of the braid ) between the top and bottom members i have 4 brass rods and 4 bronze rods. i take one brass and one bronze from each of the top and bottom members and braid the left and right cross members. to end the braid i heat the tips of the left and right cross members just enough to get them to "bond" together. a little filing and the braiding is done. a little time with the dremel tool and buffing compound the braid cross looks very nice. thank you to jim carothers for the inspiration. terry l. ridder ><> |
| terry l. ridder - Wednesday, 12/04/02 04:42:33 GMT |
|
Hammer Foundations: Alan, I did not see the setup at the ABANA conference. However, is is not unsusal to park one-piece hammers on any hard surface and run them. On asphalt a wood distribution pad helps reduce damage to the surface. Loss of efficiency is hard to detect on temporary setups without a direct comparison. At the 1999 CanIron II conference Neil Gustafson brought a Kuhn hammer to setup on the lawn WITH the foundation! A large steel reinforced concrete distribution pad (about 8" by 4 feet by 7 feet) with studs for the concrete riser block and hammer. It was broken down for loading and unloading (NEWS Vol 14. page 7). The hammer ran fine but had a decidedly hollow sound due to the foundation not being poured in place. These hollow sounds almost always denote a loss in efficiency. An important reason for deep heavy hammer foundations is to provide a stable foundation and to reduce the transmission of vibration to the surrounding structure. Improper foundations often settle from the pounding and can end quite crooked. |
| - guru - Wednesday, 12/04/02 05:25:14 GMT |
|
hello; side note to my above posting. if you do small diameter rod braiding definitely look into a jeweler's torch. the braids where the little micro-torch was running low on butane are not as tight as the others. terry l. ridder ><> |
| terry l. ridder - Wednesday, 12/04/02 06:06:52 GMT |
|
Thank you all for your advice. From the other articles I've read, it seems 1050 would be the best way to go. What's your opinion on the workability of such an alloy? I was thinking of cutting to shape with a hacksaw and then filing to define the blade. As for the specifics of the heattreating, I was going to use the design of the brick micro forge I saw on this site somewhere (hollowed out brick and a MAPP gas torch). Again what do you guys think? I plan to fix the spearhead to the shaft with stub-tang with epoxy and pins (nails) to hold it in place. Then I'm planning to make a brass collar as a support/decorative device. Bruce: A tutorial would be excellent, I'd be certainly watching out for it. Another question I have is, how do you engrave the metal or etch(?) it? I'm not exactly sure what the etching would look like but I'm looking on how to get the same effect that commercial (household)knife makers brand their knives. |
| - Spearhead - Wednesday, 12/04/02 08:44:35 GMT |
|
Quenchcrack- Yep, I just glue the stem onto the tool with the buzzbox. Works fine for me. I don't do anything fancy at all, just paste it on. I'd rather spend my hammer time making pretty things than spend it making simple tools , but I'm just too darn cheap to go out and buy a bunch of things I can make. |
| vicopper - Wednesday, 12/04/02 10:18:13 GMT |
|
Spearhead, you may find it tough going trying to cut out the piece with a hacksaw. A big grinder works better, although a sidewheel grinder might to the job..eventually. As for the micro-forge, it will handle only small sections and it depends on the size of your workpiece. If it is more than 1/2" thick, you might get tremendous scaling while you wait for it to heat up. Getting an even heat on a large piece in the microforge is difficult. If you quench the piece with un-even heating, you can expect distortion or even cracking. |
| - Quenchcrack - Wednesday, 12/04/02 13:24:10 GMT |
|
What does the term "aluminum/silcon killed" mean? |
| Michael Kelly - Wednesday, 12/04/02 14:45:39 GMT |
|
Forge burners: I made my own copy of the TRex and Shorty burners ( ref. wwww.hybridburners.com) I necked down a larger diameter pipe to make the bells and brazed it onto the burner tube. I drilled and filed out the slots in the intake bells. For a propane jet, I took some 3/16 ss brake line tubing - plugged the end with brass and drilled out the jet size. For the TRex I bought a flare from Larry Zoeller. To make a flare for theShorty I found a short pc of tubing that just slipped over the burner tube. Hardest part was drilling out the tiny jets. Both burners work great. I dont have a scientific test but it was clear that they were running much better than the R Reil EZ burners I had built or in fact any other venturi style burner that I have tried. I am at 7000' and its hard to get a venturi burner to run neutral or lean at this altitude but these guys made a nice blue flame and ran over very wide range of pressures. Most likely they are not nearly as nice as the ones you can buy from hybridburners.com but they were made in a blacksmith's shop without recourse to machining and only cost a few dollars. |
| adam - Wednesday, 12/04/02 15:47:24 GMT |
|
hello; from my metal dictionary: KILLED STEEL The term �killed� indicates that the steel has been sufficiently deoxidized to quiet the molten metal when poured into the ingot mold. The general practice is to use aluminum ferrosilicon or manganese as deoxidizing agents. A properly killed steel is more uniform as to analysis and is comparatively free from aging. However, for the same carbon and manganese content Killed Steel is harder than Rimmed Steel. In general all steels above 0.25% carbon are killed, also all forging grades, structural steels from 0.15% to 0.25% carbon and some special steels in the low carbon range. Most steels below 0.15% carbon are rimmed steel ALUMINUM KILLED STEEL A steel where aluminum has been used as a deoxidizing agent. (See Killed Steel.) Killed Steels Molten steel treated with aluminum, silicon, or manganese until no more gas is in the metal and it is in a quiet state. terry l. ridder ><> |
| terry l. ridder - Wednesday, 12/04/02 16:49:08 GMT |
|
Adam, I'm just finishing up playing with burners again. I made a 1-1/4" Mongo, a sidearm with 1-1/4 x 3/4 x 1-1/4 tee, a smaller sidearm with 1/2" burner tube and I'm doing some fine tuning on a concentric reducer design. 2" by 3/4" reducer. I made my own flares for testing but have 4 coming from Larry Zoeller. I can�t turn my own for what he sells them for. I used schedule 80 1/8" pipe nipples with the ID tapped for 1/4-28 and Miller/Hobart mig tips for all of the orifices. I found the sidearm to be easiest to control with a sliding choke over the open tee branch. A simple piece of aluminum flashing with two edges bent over to slide along and under the branch boss. Even a straight 1-1/4" tee with reducing bushing to the 3/4" burner tube worked very well. I can get excellent turndown and rich/lean adjustment with from .023 tip to .045 and probably .060 although I didn't try .060 yet. I have a liquid leaky 1-1/4" ball valve that works VERY conveniently for a choke, but it did lower the airflow a bit and thus the maximum capacity. The T-Rex is a far superior burner to the sidearm. Did you try a sidearm? If so, did you have trouble getting good controllable flame with the sidearm using mig tips for orifices? Burner capacity is primarily limited by air flow. Improving air flow improves the maximum output of the burner. Airflow is improved by larger air passages and reducing pressure drop due to rough surfaces and changes in size, etc. Burner heat output depends primarily on the quantity of fuel, air/fuel mixing efficiency and how much useless nitrogen is going through the burner along with the needed oxygen. Next topic, Optimizing the flame for heat transfer to the forge...... Pushing a flame inner cone that wants to be 16" long into a forge 10 inches in diameter is not optimum. Grin! Hardies, Centaur sells a Vaughan with 1-1/4" plus tapered shank for about $30. I have a 1-1/4 hardie hole. I made one from a wood wedge too, but it didn't hold up well enough for my abusive nature on spring steel. I can't say I was careful with the quench and temper. |
| - Tony - Wednesday, 12/04/02 17:25:43 GMT |
|
We have a 14,000 lbs STEAM HAMMER, driven by 750 HP Johnston Boiler. Due to high gas prices, we are considering to switch from Steam to AIR HAMMER. Is there any related information on conversion from Steam to Air, you can provide. Any calculations, or comments to this regard will be highly appreciated. Thanks. Gill |
| Parwinder Gill - Wednesday, 12/04/02 17:29:08 GMT |
|
Quenchcrack: The 5160 is still a good choice, but you only need to heat treat the cutting end. When arc welding a shank on to a tool I usually prefer to weld it on the side rather than on the bottom. Bottom makes sense for a forged tool, Hard to get an arc weld tucked in so it doesn't ride on the top edge of the hole. The shank only serves to hold the tool in place and welding it on the side makes it real easy. With many kinds of swages it also serves to put the tool over the part of the anvil that has more mass. |
| - grant - Wednesday, 12/04/02 18:14:45 GMT |
|
Painting question, I know this is a hot-button subject, but..... I have just finished a gate latch for a customer, and I need to paint it. It is mild steel, and was built in a gas forge. It will live outside, and it is being sold for $60. I would like it to last, but can't put $50 into it for painting. Planned steps: 1 - wire wheeled off all the scale, leaving a clean surface. Its a simple shape, so I am reasonably sure I got it all. 2 - wipe off all parts with mineral spirits. Question: is it better to wipe down the parts and let them dry, or to wipe off any residue with a cloth? 3 - 2 coats Rustoleum "professional" red primer. 4 - 2 coats Rustoleum "high Performance" Enamel. Is this process correct and will it provide reasonable protection for the steel? I was going to us ZRC Cold Galv compound before the primer, but the Rustoleum help desk guy said that their primers, which are oil based, could not go directly over galvanizing, and would need a coat of latex in between. Thanks! |
| Jim - Wednesday, 12/04/02 19:02:43 GMT |
|
Hello, I tried to submit this a couple of days ago, but it looks like it didn't go thru. I'm trying to get info on an old piece of equipment that I came across. It's made by Champion Blower & Forge of Lancaster PA, the only number that I can find is 203, both the name and number were cast with the piece. So far I have only been able to guess at its function (some type of press or lathe extension)which is most likely to be way off to say the least. All of my searches on the net been unsuccessful, so any and all help on this subject is most appreciated. Thanks |
| Ron Olufs - Wednesday, 12/04/02 19:08:26 GMT |
|
Ron, You aren't giving us much to work with. A picture would be a lot of help, scanned and emailed either to the guru, or to myself. |
| Paw Paw - Wednesday, 12/04/02 20:08:28 GMT |
|
Burners: Tony, I havent tried the sidearm - nor have I tried the straight jet ejector "mongo" series. I am fed up with breaking tiny drill bits so I ordered some ss hypdermic tubing from Mcmaster in the hope that this will be easier to deal with and give even less interference than the brake line tubing. I dont really understand what makes the difference between a RR style burner and what he terms a "hybrid". After making the first one with plumbing parts, I made a couple more with forged, hand fitted parts and I used the brake line for propane jet , but they didnt perform nearly as well as the hybrid ones I made. Yet to look at it the only difference really is the shape of the intake slots and in this case the RR burner has a clearer intake path. Another thing I noticed about the hybrids is that as I turned up the pressure, I needed to choke back the air which is the exact opposite of what I expected based on previous experience. These hybrids seem to not only put out a lot more BTU but they also have a much better range at the low end. I was quite surprised at how easy it was to tune it so that would go smoothly from 20 psi down to 1/2 psi ( a guesstimate of my gauge reading) All in all it seems like a superior design but why? Flame cones: Tony, just a thought but two or more smaller burners could give the same output but with a shorter, wider flame. |
| adam - Wednesday, 12/04/02 21:34:02 GMT |
|
Guru, i am a metal sculpture student at a college in Rhode Island. I tend to work with light gauge mild steal, and use torch welding to form my hot joints. I have done some arc welding but i am not particularly familar with it. I have come across a large amount of arc welding rods # 9018. i have only done work with #6011. Hopefully you can give me some information as to what purpose the 9018 rods are commonly used for. Thank you. |
| Lisa - Wednesday, 12/04/02 21:55:37 GMT |
|
Lisa, Those are a very high strength welding rod, probably DC from the "18". The first two numbers in E##### rod designations is the strength in thousands of PSI. Rods run from 60 to 110. The second two numbers indicate the coating type which determines if the rod is AC or DC, or the position the rod can be used in. Some rods are only good for flat while most rods you want to use are "all position". E6011's are a very good rod for something that needs to stick together that is rusted, dirty or painted. But they make a rough weld compared to other rods. They are also not as easy to keep going as some other rods and restarts are very difficult. The most common sheet metal all position rod is an E6013. These produce a smooth even weld with a brittle flux covering that peals off on its own if the weld is made correctly. The best ones have a dark "match tip" to make them easy starting. Get those if you can. They are ideal for sculpture. For non-critical work you do not need the E90## rods and the possible aggrevation they will bring. BUT if they are FREE I'd try a few and see how they work. I have often been in the situation where all I had was a box of mixed size and type rods and had something I HAD to do. . . if it is not a paying job or critical work I'll just burn whatever I have got. |
| - guru - Wednesday, 12/04/02 22:13:17 GMT |
|
What is the general opinion of the Lincoln 225 AC welder? I plan to use it for home/hobby work like gluing my forging projects together. Is there a better machine? |
| - Quenchcrack - Wednesday, 12/04/02 22:21:03 GMT |
|
Parts Ron, As Paw-Paw said that is not much to go on. We may be "experts" but we are not clairvoyant. Champion made hundreds of machines over a 50 year or more period. Catalogs full. Numbers on MOST castings are just a foundry pattern number and have nothing to do with a model or catalog number. I would bet its part of one of the many dozens of drilling machines they made. Champion made drills that were little hand crank jobs up to huge floor models for machine shops. But they also made forges, blowers, benders. . . . See our book review page on the Champion and Buffalo catalog CD's. There are numerous sample images. |
| - guru - Wednesday, 12/04/02 22:22:29 GMT |
|
Lincoln 225: Quench, I have one of these, a very simple sturdy machine and inexpensive. I was glad to have it when welding 1/2" plate for a firepot. Other than that I find it a whole lot less useful than my Hobart 135 mig/wire feed which I use almost always with fluxcore wire and no gas. I bought the Lincoln first because it was inexpensive but now I wish I had I gotten the Hobart sooner |
| adam - Wednesday, 12/04/02 22:39:49 GMT |
|
Adam, by Hybrid, do you mean the TRex burners? If so, what makes them superior is better air flow (less resistance and more venturi effect) and more efficient mixing of the propane and air. A burner is a fuel/air mixer and a flame holder. Flame holder is defining where the burning takes place. It is usually a disturbance in the mixed gas/air flow with geometry that controls the direction of the flame. 1 in 12 is a good angle for the burner flares on Reils site. I confirmed that with my testing. Just cause I gotta confirm that the invented wheel is indeed round. Grin. The step at the end of the burner tube is the flame holder. The flare controls the shape of the flame. The flame holder performance affects the turndown ratio as does the consistency of the mixing and mix velocity. Consistency is a big key in burner performance. I've not worked with hypo tubing, but now that you mention it, Needles can be had from the local farm supply..... The mig tip arrangement is really easy to play with. You get the different sizes, then they are easy to drill to adjust and you can shorten them easy, etc. I suggest you try a sidearm. Like Terry Ridder said a while back, they are easy to build. A sidearm can be improved by die grinding the roughness inside the tee and improving the transition to the burner tube. I've not done that yet. The air coming in the side appears to do well on the mixing. Many industrial burners have the air coming in the side. One of the things I did was drill the plug that holds the schedule 80 pipe nipple for the mig tip while the plug was in the tee and the tee was on the burner tube. I did the drilling in the drill press and lined it up well so the mig tip was aimed down the center and straight. It would be even better to do that drilling with the assembly in a lathe while chucked on the burner tube. I found the Mongo hard to control well, but I didn't try to optimize it. As you turn up the gas pressure, the gas stream entrains more air because it runs down the burner tube at a higher velocity. You get more "suction" from the gas flow when the gas pressure is higher. The venturi effect. Two or more smaller burners would work. The 1/2" burner tube sidearm worked really well. But there are even better examples in industrial burners. Just the next thing to play with and learn about. |
| - Tony - Wednesday, 12/04/02 23:07:04 GMT |
|
Adam, I have heard that Mig machines, when not used frequently, have problems with rusty wire. As a hobbyest, I would only use it one or two days per week and it gets fairly humid in East Texas. Have you had this problem? |
| Quenchcrack - Thursday, 12/05/02 00:21:44 GMT |
|
Quenchcrack; I have heard of that problem with Mig wire, but I live in southern Ohio-very humid in summer, and that has not been a problem. I have had a large roll of wire in my machine for about a year now and it has done well. Thats my experience, others may have a different story. |
| Brian C - Thursday, 12/05/02 00:54:01 GMT |
|
Any body out there make their own silver solders? |
| - michaelm - Thursday, 12/05/02 01:33:03 GMT |
|
Mig wire rust: When you first get the wire , give it a very light spray of WD 40.(also helps lubricate the wire) You may want to check on the toxicity though. question: Guru, I recently purchased a Repousse' book which depicts using air tools for the work. I sent away today for some 4140 to make the chasing tools for my gun. Have you ever done this type of work and where else might there be information on techniques, tooling, etc... Thanks, TC |
| - Tim Cisneros - Thursday, 12/05/02 03:04:51 GMT |
|
Rusty Wire: Rust on machinery kept inside is a sneeky thing. Some concrete floors are dry and others breath moisture for decades. . A lot depends on what is under them and how the building is drained. Unheated buildings have a lot more condensation than others. . . and condensation often collects INSIDE things and in places you do not regularly look. Where rusted MIG wire is a huge problem is if you don't check and you run a bunch. . besides getting bad welds the rust dust really screws up the surface lubricity in the feed cable. It is not unusual to have to replace one that has only had 10 or 12 feet of slightly rusty wire run through it. . . Sometime you can run off a layer of wire (not through the stinger!) and get beyond the rust but you need to LOOK closely. I've had rolls rust on the shelf IN the box. The rust was on one side of the roll where is was sitting on its side. . . had to scrap it. |
| - guru - Thursday, 12/05/02 04:52:43 GMT |
|
Power Repousse' Tim, There was a fellow at the 2000 ABANA conference in Flagstaff doing power repousse'. . VERY noisy! He supported the plate between two heavy bars on a weld platten clamping the assembly with bent dogs. Then he heated places to be worked with a torch and went at it with the plate supported in the air. I highly recommend an economizer valve for this kind of operation. If not to save gas, then for safety. This is one of those operations where you use a big torch and are putting it down a lot. It was one of those long slow demos I did not stay for. You can also use power tools using the traditional support methods and annealed plate. European artists are very fond of refined wrought iron plate for heavy repousse'. I suspect the pure iron would also be good. I have seen smiths with air chisle bits in EVERY concievable shape by the hundreds. I can only imagine using a couple circular radiused ends of varying radii and then a few lining tools also with varying dregrees of radiused edge. The important thing in this type tool is that they are very well radiused with soft edges and should look "worn out". Sharp creasers are only used at the very last to define corners and lines. |
| - guru - Thursday, 12/05/02 05:09:58 GMT |
|
Michaelm, I made silver solder once, flying by the seat of my pants. Many moons ago, my daughter had her unfinished silver ring at home on a Sunday. Of a sudden, she jumped up and said she forgot to solder her silver ring for Monday's class. So, the ol' blacksmith mixed some brazing rod brass with silver wire, tiny portions, about 50-50%. I think I balled it together with a tiny torch tip in a depression in a graphite block. Then we flattened it and cut snippets. For flux, we crushed some borax and made a paste with water. It was a one time deal, but it worked. Whew! Tim Cisneros, Russ Swider built a big shop 40 miles east of Santa Fe, and demonstrated a bunch of pneumatic tooling and work, years ago. Russ is hard to run down, but he sold the shop to Chris Thomson [no "p"], and he comes to New Mexico for about 6 months out of the year. Chris is found at www.christhomsoniron.com. He might know something. A footnote: after watching Chris' demo, Tom Joyce asked me, "Don't you think a guy could do just as much work in the same amount of time, by hand"? A bit of a non sequitur. |
| Frank Turley - Thursday, 12/05/02 05:31:00 GMT |
|
9018 welding rod: It has characteristics of 7018. The only time I used it was on a huge steel casting on a base for a rock shovel, under supervision of a factory rep who required this rod. If it is 1/8" dia or 3/32" it would be great for general fixtures etc but not so easy to use for most artistic work because of difficult restart. |
| - anvillain - Thursday, 12/05/02 05:36:41 GMT |
|
beg pardon. I should've said, "after watching Russ' demo..." |
| Frank Turley - Thursday, 12/05/02 05:36:58 GMT |
|
Paint: Jim, The name products you cose are all cow do for amatuers and the idiot at their help desk did not know what he was talking about. The miniscule amount of zinc compounds in their products does nothing to stop rust except in their sales people's imaginations. . . CRC Cold Galvanize is a lacquer based product. Once it is dry so that you cannot smell the solvent you can apply almost any other type of paint over it. Time to wait is usualy over night but it depends on the thickness of the coating, temperature and humidity. In hot dry weather this can be as little as a few minutes. Enamels can be applied over lacquers but lacquers cannot be applied over enamels (unless they are baked and well aged - many years). The solvents in enamels do not effect lacquers BUT lacquers will soften enamels AND other lacquers. Water based paints can be applied over lacquers but will generally not stick to oil based paints (or it is NOT recommended). However, I have applied acrylic artists colors over oil paintings and they have held up perfectly for nearly 40 years. . . It is an absolute no-no but it worked. . . What stops rust in a protective system is free zinc ions. They plate exposed steel surfaces (scratches, breaks) opposite of what used would do. Instead of iron ions disolving and combining with oxygen to make rust the zinc irons move in first. Cold galvanizing paint is pure zinc powder and a minimum of binder. Zinc compound primers and paints have very little zinc and none of it is free metalic zinc. They are mostly oil carrier, filler and pigments. The paint must break down chemicaly before any zinc ions are released. By then the rust already has the upper hand. Most oil paints protect by being gummy soft coatings that do not chip. Painting of hot dip galvanizing (not cold galv paint) is another thing altogether. Paint will not stick to the slippery raw zinc surface when new. So the surface must either age naturally to a flat grey (like my tin roof after 18 years. . ) OR be chemicaly treated to etch the surface before painting. But you were not having the latch hot dip galvanized. . . Cleaning with mineral spirits is never a good idea. These oily solvents just move other oils around and then deposit them in cracks corners and surface flaws. This results in paint failures. Lacquer is better but not good for you. A strong water based cleaner is best. ITC recommends cleaning metal with a 50% solution of household bleach. This removes ALL oil and will slightly etch the surface in the process. Rinse throughly with fresh water. Avoid the mineral spirits and your plan will work OK. . But do not plan on the selected paints being any better than anyone else's plain enamel products. Touching up a piece after screws or other fasteners break the paint surface can do more good than anything. Then there is a good chance that the second owner of the property will paint the gate latch and all one hideous color with exterior house paint. . . I have a couple pad locks painted cheap white (in the keyhole too) along with the hasp and door latch. . . |
| - guru - Thursday, 12/05/02 06:04:45 GMT |
|
Terry; I too lusted after one of the micro torches but when I actually got one, it turned out to be too small for almost everything i do. A regular 000 tip on a regular torch with the regulators turned down low to the proper settings will do most of what you need here. Spear head; you want either a deep socket or a long tang to tie your gig to the shaft. A stub tang and pins won't do under load. One exception is the sort of spear/harpoon used of whales and fish that has a shaft that the detachable head is seated on. The spear head is attached in the middle to a separate line that turns the head sideways when the shaft detaches. The other exeception was a spear head mounted on a longish rod between the heavy shaft and the head. When thrown, the rod would bend on impact making it harder to extract and harder to throw back effectively. Fun. Is the Guru gonna grin at Mr Parwinder's question..will tests need to be made, repeatedly? Lisa: I once bought 1500# of 9018 and used it on everything in sight, a lot of sculpture. It is very strong. And you can use it on many tool steels. The rod was WW2 armor welding surplus in sealed tin cans..5/32 I think. Here are some considerations. The rod must be in the original sealed containers. Any exposure to moisture ruins them..even low humidity air after some hours. Size...the diameter of the rod dictates the size of the arc welder and the size of the welds...be sure you hace a big enough welder. It will run on AC, but not as well. It does better with fairly good weld prep. The rod I had required keeping a short arc to run well, especially using lower amperage settings. Old WW2 rods were made when the toxic nature of the fumes wasn't as important as today. That said; in non critical\ non structural applications......That 9018, even slightly damp will run and stick sculpture together. Even wet, even...(an ill advised, ugly thing to do). Also good for decorative beads and multi pass build up figures. have one can of 9018 left, been saving it..not sure what for. Quench; That welder is the most welding with the least trouble available for the money. They are often available used for $100 or less. I've bought parts from Lincon for 40 year old welders, no problem. The large available range of rods makes it very versitile. Much more so than a a MIG, though the learning curve is longer. RE the mig wire rusting problem; buy the dinky size spools and change em when you have a problem...but, my shop has a little runnel down the middle and floods in from 3 sides in heavy weather and I've only lost 1 roll in 12 or so years. Tony; Thanks for your burner and hydraulics explanations..they help extent the reach of my mental fuzzyness Grant; Are you saying, make a hardy tool that extends solidly to the center of the anvil face and features a stout square socket for hardy tools? Then fearlessly wedge those tapered tangs into that socket so they wouldnt wiggle and would extend more of the anvil's mass to the working face; er, in way less words? |
| - Pete F - Thursday, 12/05/02 07:23:21 GMT |
|
mig rust. I've popped a few packs of silica gel [from the optical /photo shop] inside the welder, under the reel to catch some moisture . no rust so far ,but I do use the mig regularly . |
| lydia - Thursday, 12/05/02 14:36:52 GMT |
|
Mig rust. I've not had any rusting with the copper coated wire. Sweating concrete floors (high humidity) is common in the WI summer. The little wiper pads that you clamp on the wire before it enters the rollers, available from your welding supplier, work very well at saving the liner in the hose from damage by dust etc. In a pinch, a bunched up rag with a spring clip holding it to the wire works fine too. You'd be amazed at what gets wiped off the wire and thus is not going through the liner. Gotta move the wiper to a clean spot every 5 pounds of wire or so. Pete, you are welcome! I'm all about improving reach of mental fuzziness. Grin. |
| - Tony - Thursday, 12/05/02 14:59:43 GMT |
|
Quench: I live in New Mexico where humidity, like flying saucers, is something you hear about but never actually see. The 135 amp welders run off 110v which is very handy although it does mean limited power. I find portability and the ability to weld small stuff much more useful than being able to weld up 1/2" plate in one pass. When I was shopping I found the Hobart and the Miller 135 looked almost identical - both well made, serious machines - the Lincoln is cheaper but its built like a toy (I know most of their stuff is very good) and if you want to use gas you have to buy an upgrade kit for it which pretty much evens out the price. |
| adam - Thursday, 12/05/02 15:27:32 GMT |
|
Burner dynamics: Tony, yes by "hybrid" I mean the Trex design (at least thats the way Ron R seems to use the word). Saying that the burner is more efficient at entraining air and mixing it ... etc... is a bit like explaining that Seabiscuit won his races because he ran faster. WHY? : ) If you compare the Trex burner to the Ron R burner, well from the bell to the nozzle they are almost the same save that the Trex tube is shorter. Above the bell the main difference is the design of the intake ports. If you open up the Trex intake ports allow air to flow more freely, you end up with an open bell just like the Trex. So what makes the difference? Its not the degree of finish on the insides - I have made both styles to about the same standards. Its not the skinny, coaxial propane tube - I have used a pc of coaxial brake line in both styles and the Trex out performs the R Reil. So what is it about the design that makes such a big difference? |
| adam - Thursday, 12/05/02 15:38:00 GMT |
|
errata ahem... meant to say "If you open up the Trex intake ports allow air to flow more freely, you end up with an open bell just like the RON REIL burner" - sorry about that |
| adam - Thursday, 12/05/02 15:39:24 GMT |
|
The Hardie Shank Thang. I forge a lot of bottom tool shanks out of 2"D. truck axles. Neck down the shank on the power hammer and upset into the hardie hole; it's like a giant heading tool. I can't speak for Grant, but I will anyway. He is welding his hardie shank *flush* with the side of the tool that faces the heel. And his suggestion of using a single angle iron is good. A guy can put a small vertical cut in the top corner of the angle, feather the two top edges and bend them to a right angle, so they sit on the anvil face. I didn't get any excess force, tapers, or wedges out of what he said. I sometimes put sloppy fitting tools in the leg vise. A bit of lore. Not many of us are tool dressers, but the old granite tool sharpeners' stakes were always made with a vertical slot through the hardie shank. The bottom tool, which is really a small anvil with a canted face, is wedged under the heel so that it is fixed and immobile. The hardie was custom forged to fit in the pritchel hole, so that you could have two tools is the anvil at once. That way, you could forge-cut-forge-cut without having to change hardie tools. Trow & Holden of Barre, Vermont, formerly made the matching bottom stake and matching hand hammer. Do they still? |
| Frank Turley - Thursday, 12/05/02 15:41:56 GMT |
|
Steam to Air Conversions of Hammers: Mr Parwinder, The considerations for the conversion are lubrication, packing and required air volume. The water in steam lubricates many parts in steam operated machinery as well as helping seal worn valves and rings. Machines operated on air need the addition of lubricators. Generaly on air hammers a lever operated pump connected to the valve feedback linkage provides oil to the control valve and thus to the rest of the hammer internals. Where the steam exhust was recirculated the air is vented. Due to oil mist in the exhust this is usualy some distance from the hammer and workers. Often an oil catching tank is needed on the discharge. In some situations a muffler is required to reduce exhust noise. It will need an oil and condensate drain. Some steam packings are not compatible with oil lubrication. Most are but you need to check. Fuel efficiency is a difficult question. Most places that have abandonded steam have not done so for efficiency reasons. Generally it is due to not needing steam for other purposes or not wanting to replace an aging boiler. Reducing maintenance personell can be an economic factor. Generaly there are significant energy losses in creating compressed air. Friction and heat losses are significant. And air does not behave like steam so it takes a greater volume of air to operate the same device. I am not an expert in this field and you may want to talk to an engineer with steam and air experiance. According to my 1930's Chambersburg manual, a 14,000 pound hammer (depending on the model - 'E' or 'B') consumes on average, 1400 to 1800 CFM air, 112 to 130 pounds of steam per minute. Elsewhere in the same document on an efficiency chart the high end of the range is given for a hammer in good condition and 23% more air required for on in poor condition. If the steam consumption is comprable to what you are currently using then that should give you a feeling for the needed air. |
| - guru - Thursday, 12/05/02 16:52:36 GMT |
|
Fabricated Burners vs. T-Rex: I have recently built several venturi gas burners using MIG tips as orifices and they work very well. I am using a simplified design of my own that is very easy to build (article later). They have no air control. However, there WAS hardware to purchase from three different suppliers (an afternoon shopping) and some jigs to make, parts to cut and welding to do. IF I were in business blacksmithing and needed forge burners the T-Rex burners would be a bargain at $100 each. AND unlike many home built burners, they DO work the first time. The T-Rex burner I have came with a Larry Zoeller stainless flare which I have moved around to use on my burners. The flare makes a great deal of difference in the ease of lighting the burner/forge AND keeping it burning smoothly. However, it gets VERY hot and scales. This will eventualy destroy it. I've tried a little ITC on it but have not really experimented. One furnace I built has a flare built into the refractory and that works VERY well. The end of the burner pipe doesn't even get hot enough to burn off the paint. I am working on making flares or "burner blocks" from refractory such as Kaowool and ITC-100. I could be wasting my time and would be better off just making them out of castable refractory. . . In either case it makes a LOT more sense than a metal flare that is going to burn up. While doing some research on anchoring wire for Kaowool I found the following recommendations: 304SS 1200°F 430SS 1300°F Inconel 600 2,000°F So, if you need high temperature METAL nozzels Inconel looks like the way to go. . But I think refractory burner blocks makes more sense. . . that is what industry uses. Reducing couplings, Reds: I have found that these come in a varity of shapes from various manufacturers. Some are hemispherical in shape and make a lousy venturi funnel while other brands are a nice conical shape. Streamlining of flow in venturi devices DOES make a huge difference and all "reds" are not alike in this regard. The T-Rex's are built with forged reds with smmoth lines designed for high velocity flow. Snowed in, in Virgina. The first serious December snow we have had in 30 years. . . |
| - guru - Thursday, 12/05/02 17:44:22 GMT |
|
Adam, to answer your why question better, I would have to do a computer model of the air and gas dynamics on both. I'm a nice guy and all, really, just ask me, (don�t ask others) but I won't do that for free. Grin! Heck, I won�t even do it for ME. Not fun. The rest of this might be a snoozer for many. Just a warning. A bunch of open slots is NOT the same as an open bell. There is turbulence generated at EVERY edge that air goes across. The total edge length in the slotted TRex is MUCH more than the total edge length in an open bell. I�ve not had a Trex in my hands, but I assume the finish and transitions in size on the inside of the bell are MUCH smoother than that in a cast bell reducer. I also assume there is no weld line inside the TRex burner tube like there is on the pipe. And no burr on the end of the tube like on a purchased pipe nipple, and no scale, and, and.... You have to find a balance between enough turbulence in the right places for good air/fuel mixing and smooth enough in the right places for good air flow. Burner design and use 101. Course cost was $750 about 20 years ago. The air/fuel mix will burn when it is correct and finds an edge to cling to when the mix is at the right velocity (flame holder). The Mongo mixes very well and I had burning occurring 3 inches down the pipe from the air holes. Too soon. Mixing happens in the bell and maybe a little down the tube. So turbulence in the right places in the bell is good. Turbulence after the mix is right is a waste and reduces burner capacity. The slots probably make a big difference over the open bell. Rex Price either got real lucky or he�s pretty darn good and/or spent a lot of time testing. I�ll go with he is good and did a bunch of work. I am using generally recognized burner and airflow theory when I tell you the TRex is superior. The concepts are here, the details are not available without the fluid dynamics work. Or you testing different variables one at a time. Like I am doing with some of the other designs. I do it when I want to and when it�s fun. Generally speaking, the alignment of the gas orifice is VERY critical. Off just a couple of degrees and optimization is gone since the mixing and venturi effect will be reduced. For a concentric flow design, the gas needs to come out the orifice in a straight smooth stream and go straight down the center of the mixing chamber and the tube. Not that it won�t work off a few degrees, but it won�t be a TRex. Performance is all in the details. Know why good engineers are detail oriented?? Grin. Mixing... you have to think on a molecular level. Individual gas molecules in close enough proximity to oxygen molecules. Big bunches of gas molecules with only a few oxygen molecules means the outside of the gas bunch will burn, but not the rest, and the products of combustion of the few that did burn keep the rest of the gas molecules from getting close to oxygen molecules. If there is huffing or an unstable flame, the mixing is not consistent. Frequently, excess air is required to make up for non optimal mixing. That excess air gets heated up by the flame and carries heat out the exhaust. So the energy used to heat the excess air is not available to heat the forge and thus the work. Burner efficiency is all about proximity of gas and oxygen molecules and excess air. So.... if that doesn�t help you, then you just have to accept that Seabiscuit is a faster horse. Without a whole lot more work, I can�t do better than this. Big Grin. Big Burner manufacturers do the calculations and then build and test. Modifications need to be made in nearly every case. The theory gets you close, but you have to get your hands dirty. Like you and I are. And we don�t have the instrumentation to do real hard core burner design. AND THEN...... almost every actual furnace needs burner fine tuning because the burner manufacturer can�t anticipate all furnace conditions. Another exercise in computational fluid dynamics. I regularly made 5 degree changes in burner mounting to make furnace changes. OK, how many fell asleep? |
| - Tony - Thursday, 12/05/02 17:48:29 GMT |
|
At what age would you say a young person could begin learning the art of blacksmithing? |
| Sharon Issa - Thursday, 12/05/02 17:59:17 GMT |
|
Sharon, we have an 11 year old who regularly demonstrates both for the public and here on Anvilfire. (Check the iForge section, he goes by the name of Whitesmith) Three of my grandchildren started working with me before they were 10, and I started cranking the blower for my grand father and great grand father when I was 5 years old. Just how young do you want to start them? (grin) |
| Paw Paw - Thursday, 12/05/02 18:38:30 GMT |
|
My son is 10, do you think he is old enough? He needs a hobby and is quite interested in blacksmithing. Where to start? |
| Sharon Issa - Thursday, 12/05/02 18:48:21 GMT |
|
Tony, stayed awake for the whole thing, cut it out and pasted it in my archives. Good stuff. Thanks. What you're saying in your last post, coming through my ears, er eyes, er...is that burner and forge design is another of those Real Engineering things, where you have to get dirty to really make it work. Calculate to get reasonably close, then build one and fix it. Maybe figure out why it works after it works. Good stuff. Whew. Managed to hop off the soapbox before I really got going. ;) Question: where can I see one of these sidearm burners? Is that something fairly new on the Reil site, or does he have a link to one, or something? |
| Steve A - Thursday, 12/05/02 19:21:41 GMT |
|
My not particularly experienced thoughts on kids and blacksmithing: If they're interested, it's time to let them get involved in some way. I did a lot of carpentry many years ago with Dad's hand wrapped right around mine on the drill, saw, or hammer. And I'm still doing it to this day. But now sometimes it's my grown up hand over a little hand. That's some of the best work. :) The kid needs to have an attention span long enough to get through a hook or leaf...or coffee table. The kid needs to be of a size relative to the tools where he can actually do something. A lot of ten-year-olds certainly qualify, especially if you can find a light hammer and set an anvil down a few inches. Observation from a beginner's class I once attended: a kid who started off with adequate enthusiasm, but ran out of steam pretty quick with a 3-lb hammer and a shoulder high anvil. That would be like me trying to pound the top of a fridge with maybe a 10-lb sledge. I like to see kids with their Dads (or Moms) at forge meetings. It's fun to watch and feels good to see. Steve |
| Steve A - Thursday, 12/05/02 19:31:09 GMT |
|
How do you go about finding a family oriented forge meeting? I am a total novice at this as well as my son! |
| Sharon Issa - Thursday, 12/05/02 19:39:44 GMT |
|
Sharon, Blacksmithing is a great hobby for a youngster but it can be an expensive hobby (anvil, forge, hammer, tongs, fuel, material, place to work). AND when dealing with VERY hot metal there should be adult supervision until a certain level of experiance is acquired. The tendancy to try to catch items when they are dropped is VERY bad in blacksmithing. You have to train yourself to LET IT GO. . . then pick it up with tongs. Blacksmithing CAN be gotten into cheaply but it requires a lot of scrounging and do-it-yourself that may not be available to your son or family. The best place to start is to find your closest local blacksmithing organization. Try our ABANA-Chapter.com page. Meetings are open to the public and there are almost always demonstrations. It is a good way to meet others that may be willing to help find tools, give lessons and provide support in a thousand other ways. In general blacksmiths both professional and amature are some of the finest most sharing folks you will ever meet. There ARE schools for blacksmithing in various parts of the country. But I doubt they would take a 10 year old without an adult and probably not then. There is a Boy Scout metalworking merit badge that includes blacksmithing but the boy must find someone to work with and teach him. There is a merit badge jamboree in Northern Virginia in February where a group of boys are taken through their forging excercises in a single day. It works but is only a quick introduction. I taught the forging and provided some of the equipment last year. At a minimum tools and equipment bought new will cost around $700. Do it yourselfer's do it for less but they generally have access to transportation, shop equipment and do not include their time in the costs. Cost of a mini-starter shop: NC-TOOL Whisper-Baby Gas Forge... $325 Propane bottle for forge..................... $ 30 Low cost Russian anvil..................... $100 Option small 45# Peddinghaus.......... $ 290 Hammer (800g)................................ $ 25 Tongs (2 pair) ................................. $ 75 Vise (bench) ................................... $125 Leather Apron ................................. $ 30 Safety Glasses ............................... $ 15 TOTAL $735 - $915 not including shipping and misceleaneous small tools (chisles, files, hacksaw. . .). A coal forge would SEEM to be safer for a youth but you still have to build a fire and then there is the smoke to contend with. Coal forges are no cheaper than gas unless you build your own. There are also some good books on the subject. Alex Bealer's The Art of Blacksmithing is a good start and the language is not beyond a 10 year old. The costs are not bad considering what can be spent on stereos, tvs or RV's that have a very short lifetime and little educational value. A good grounding in smithing doesn't hurt in any technical field including being a surgeon or an engineer. In fact, many of the folks that post here are engineers and metalurgists trying to get to the roots of their fields. We also have some regular readers that are doctors and surgeons. At least ONE got into smithing so that he could make specialized surgical instruments. |
| - guru - Thursday, 12/05/02 20:00:30 GMT |
|
Thank you - it's a start! |
| Sharon Issa - Thursday, 12/05/02 20:03:06 GMT |
|
Sharon, It would help a lot if we knew where you were located! It won't be much help to you if I give you places to go in So. Cal. USA if you are in South America or France! There are many chapters of ABANA in the U.S. you could start there at http://www.abana.org/affiliates/affiliate_list.html or just go to the main sight at www.abana.org The more info we get from you, the more we can help you! |
| - Wayne Parris - Thursday, 12/05/02 20:11:32 GMT |
|
OBTW - We (try to) answer questions for folks of ALL ages and backgrounds and a few have been far afield from blacksmithing. If you ask around in the right places I am sure that you can find someone to give your son lessons. There are thousands of part time and hobby smiths and many of them are just as skilled as professionals. |
| - guru - Thursday, 12/05/02 20:11:59 GMT |
|
Sharon Issa, For starters, go to that upper right hand area of the guru's page, "Navigate", and click links. Then scroll to ABANA-Chapters.com in the link column. I've had 5th graders in my shop pounding on iron. They occasionally burn themselves, but they had a ball. |
| Frank Turley - Thursday, 12/05/02 20:40:28 GMT |
|
Wow- You blacksmithers are a helpful bunch! I am in Tampa but I already checked the ABANA site and didn't see anyone local. Am I missing something? Thanks. |
| Sharon Issa - Thursday, 12/05/02 20:41:45 GMT |
|
Steve A, sidearm burners are on Ron Reils site and Larry Zoeller has a good picture and parts list. And you are welcome! Jock, et al, yes, refractory is what big burner manufacturers use when the flame holder is in the furnace. Most of the ones I used were AZS Alumina/Zirconium/Silica. About $800 each in the 1990's and about a foot cubed. I have some Zoeller flares coming because I wanted to duplicate what others have done and then see if I can improve it. What I really want to do is get a radiant burner going. The flame is in a swirl and hugs the furnace/forge wall for excellent radiant heat transfer from the flame to the furnace walls and work. Might have a problem with turndown though. Grin. ITC 100 on a metal flare. Good idea! I might try that on the cast iron ones I machined. I will have refractory flares with the final design. Is any design final?? |
| - Tony - Thursday, 12/05/02 21:03:27 GMT |
|
2 T-Rex or not 2 T-Rex: I maded a 3 burner test forge for myself,Reil style burners, 2" insaboard. 4"x8"x 24" long. Worked great! The board insulation just fell apart though. While I had it I bought and installed one T-Rex. I liked what I saw enough that I called and ordered two more. In my new forge I cast the inside of the Zoeller flare w/plaster and then used it as my flare form in my current forge made of castable. Each of the t-Rex burners has its own shut off and I made a sliding plug so that my forge is a 1-2 or 3 burner as needed. A neat tip. You know the metal flex gas hoses, like those used on cooking ranges? There is a smaller version made for RV's or gas fireplaces. Makes hook up and adjustment a snap. With the flare cast into the forge wall I have to move the whole burner to tune the flame. Speaking of flame, what maded me buy the other two burners was the tight flame shape compared to the homemade burners. Look at the pics on the web sites you'll see. And I don't think I saved a dime building my own. I ended up spending so much time running around that it wasn't worth it in the end. The only thing I learned is the the T-Rex's are a good deal. BTW, I don't work for Rex or have even met him. He just has a hell of a product for my money. |
| - Pete-Raven - Thursday, 12/05/02 21:06:28 GMT |
|
Sharon Issa, try going to www.blacksmithing.org . It is the Florida chapter. Then click on the "meetings" on the right side of the screen. It looks like most of the meets are up neer Tallahassee, but if you contact the people in charge of the Southwest and Southeast groups(their phone #'s are in the "meetings" page) they should be able to help you out. I wish you and the little one the best of luck. My brother and his kids live close by and being only 6,6 and 5 years of age they have only watched as of yet. Although their tendancy to pick up a cold piece of iron(never a black piece, only clean!) and begin beating it with a hammer is soon going to be subsided with at least turning the fan. I need to make some very small hammers for them and mabey a proportianaly sized anvil. . . |
| Caleb Ramsby - Thursday, 12/05/02 21:38:21 GMT |
|
Caleb, Start them with a one pound hammer and a 25 pound square block anvil. Later on, they'll treasure those as there "first". Right up there with their first lady friend! (grin) |
| Paw Paw - Thursday, 12/05/02 21:42:40 GMT |
|
Tony thanks for taking the time to answer. Your answer was interesting and hit the mark. I dont need numerical simulation - just some insight into what's going on. So you are saying that the intake slots set up turbulence which causes efficient mixing in the bell? This does make sense to me. I have definitely seen poor mixing conditions where the flame is running rich but the work is scaling heavily. It also suggests the possibility of adding fins on the inside of the intake ports to generate a swirl pattern. Then again, its easy to over engineer these things. I am looking for a design that works well and is fairly easy to make and I think I have that already. Jock's comment about a cone shaped reducer makes sense too - I had been making bells since thats what you naturally get when you neck down a pc of pipe. I notice that Rex Price's "shorty" uses a bell shape so its not critical. (And this is important - to have a design that is fairly robust and doesnt have many critical elements.) I shall try a cone shaped reducer next. As for the trade offs - from a business perspective it probably does make sense, like Jock says to just buy Trex burners. But I got into smithing because I like to make things and *understand* them. If I cared only about business I would have become a corporate lawyer or some other lucrative profession |
| adam - Thursday, 12/05/02 21:54:22 GMT |
|
For those of you that missed it. . that was a Christmas list I posted the response to Sharon. . Miracle on 34th Street has nothing on anvilfire.com! Merry Christmas! |
| - guru - Friday, 12/06/02 00:07:09 GMT |
|
Looking for a method to put a nice petina on glavanized sheet metal to use for interior wall treatment/decor. |
| Bruce - Friday, 12/06/02 00:24:58 GMT |
|
4140/4150 for bending forks: good choice ? popular choice? preference for forks ( hand and vise) ? decent "forgability"? thanks for comments... |
| - rugg - Friday, 12/06/02 00:26:00 GMT |
|
Rugg, That is a good tough tool material. Forks for hot work are made from mild steel. |
| - guru - Friday, 12/06/02 00:30:33 GMT |
|
Galvanized Steel A patina is a oxidation or chemical carbonate finish on metal. Zinc galvanizing turns white or grey white. The best thing to do it paint it. But note that galvanized steel must be aged or chemicaly treated to remove the "gloss" before paint will stick. This can be done with a weak acid like dilute hydrochloric or an alkali like bleach. Then it is usualy best to apply a thin coat of a chemicaly neutral primer and paint over that. |
| - guru - Friday, 12/06/02 00:37:30 GMT |
|
Burner Blocks: For forges I don't think we need anything so sophisticated as pure alumina (like TIG cups) or silicon carbide like crucibles. I ordered some refractory binder today to try on Kaowool to see if I can form flares from that. They sell a "wet Kaowool" for the purpose but it is difficult to get in small quantities so I am going to try to make my own. As a do-it yourself project the plan is to make the flare out of card stock and tape it to a piece of 3/4" burner pipe. The pipe gets a layer of paper wraped around it to prevent the refractories from sticking AND to provide clearance so a slip fit later. Then the form will be coated with ITC-100 and binder soaked kaowool molded over that. When the binder dries the pipe is pulled out and the nozzel oven dried. When good and dry the nozzel will be fired to burn out the paper and cardboard and cure the refractory. Should work and it will use scrap material from building a forge. I'll make a mold box to square up the outside on loose nozzels. I had thought of wrapping some stainless wire in the area where the pipe inserts to reinforce it. Burn out forms work best for many purposes and are much easier to make and use than permanent wood or metal forms. This summer I built a melting furnace with castable refractory using permanent forms and most of the work went into forms that I will never use again. . . It wasn't a bad design, it was the pain of using the forms. I could have built a dozen papier-mache' forms in the time it took to make the wood forms. AND in an R&D environment every form COULD have been different. |
| - guru - Friday, 12/06/02 00:40:06 GMT |
|
Too many typos. . time to take a break. |
| - guru - Friday, 12/06/02 00:42:38 GMT |
|
Guru(s), I need a source for small round tubing, preferably on the west coast. My local supplier (I am somewhat isolated here in central orygun) says no can get. Looking for 1/8 to 3/8 cds in about .049, will take 33/8 hrew if I can get it. Any help appreciated...tks Tim |
| Tim - Friday, 12/06/02 04:37:51 GMT |
|
Speaking of Typos, make that 3/8 hrew. darn fat fingers... |
| Tim - Friday, 12/06/02 04:38:55 GMT |
|
Bruce; Scrubbie the galvanized sheet to clean , then spray on gun blueing or black. Play around here, how long you leave the black on affects the look. 5 min to 20 min. Then use brasso with a rag or a scrubbie again to bring the metal back up. Leave it alittle darker than you think because just wiping the brasso slime off will take off alot more of the patina and you might have to start over. Clean w/alcohol and wax. I've been doing this for years and it works very well. |
| - Pete-Raven - Friday, 12/06/02 04:49:39 GMT |
|
Hello Tim C; Our own EA Chase,at the CBA) who was supposed to demo last Octoberfest, is the master of the small air hammer. He will demo the techniques again I hope and is in the process of writing a book about it..... Tony; air/gas mixing and smooth fast flow would seem to be contradictory needs. How it that resolved? |
| - Pete F - Friday, 12/06/02 05:44:15 GMT |
|
Thanks for the info - pretty much confirms my thoughts about power hammer bases, but it's always great to hear wisdom and experience from others that have "been there, done that", again, thanks! this forum is priceless! |
| akl - Friday, 12/06/02 06:11:43 GMT |
|
Akl, CSI is very reasonable, and it's part of what keeps Anvilfire available for all of us. Click the link at the bottom of the page, "CSI - anvilfire MEMBERS Group". |
| Paw Paw - Friday, 12/06/02 06:53:36 GMT |
|
Anvil ID: Last night I bought an anvil that has no markings other than a serial number. I was told that it is a 300lb Hay-Budden, but I was wondering if there are any Hay-Budden specific characteristics I can look for? I also don't have a scale to weigh it on, so I am listing the dimensions below and would like your opiions as to the weight of the anvil. From a manufacturing point of view, it is forged WI with a steel face. I can't tell of the base/body junction was forge welded or arc welded. Also, could someone look up the serial number in Postmans book (assuming it is a Hay-Budden) and give me an approximate age? Thanks very much. Length: 35" Height: 13.75" Face: 5.25" X 21" Base: 13.5" x 12" HH: 1.375" x 1.375" Pritchel: .75" The serial # has a few digits that are hard to make out but it think it is one of the following two possibilites: 133710 188710 Thanks for your help. Patrick |
| Patrick Nowak - Friday, 12/06/02 13:13:04 GMT |
|
Mowak, Most Hey-Buds had a number from 0 to 9 stamped into the waist under the horn to the left or the right of the handling hole. And where on the anvil is the serial number stamp? |
| Frank Turley - Friday, 12/06/02 14:11:41 GMT |
|
Tubing: Tim, try TW Inc, (formerly Tubesales Corp). They have a couple of outlets in Seattle and one in San Francisco. Check them out at www.twmetals.com |
| vicopper - Friday, 12/06/02 14:32:36 GMT |
|
Patrick, If it's 133710, it was manufactured in 1906. If it's 188710m it was manufactured in 1911. Scrub down the sides and on the foot under the horn with a Scoth Brite pad, do a rubbing of both sides and and the foot, and you may find some more information or clear up the numbers. Take some pictures, including the bottom of the anvil, scan and send them email, and I'll try to help you further. |
| Paw Paw - Friday, 12/06/02 14:54:38 GMT |
|
Burner stuff. This got long. Pass by if you like. Pete F. wow, you didn�t sleep through it did you! Grin. Good question! I think I understand your question, but let me know if I go off track here. First, did I say "fast" anywhere except for the gas stream leaving the orifice? You can get turbulence without fast. Edges in the flow. As in most things, burner design is a balance of many factors. Cost, ease to make, performance, flexibility of operation, etc. Turbulence is necessary in some places in a burner and smooth straight flow is necessary in others. Turbulence for mixing, smooth and straight for the mixed fuel and air, smooth and straight for the gas leaving the orifice so you get good venturi effect. Notice that the bell on the TRex is large in diameter with a lot of edges for the air to go across. The edges and direction changes create the turbulence in the air so that it mixes with the gas. The mixing in a TRex is probably done much closer to the gas nozzle and much better than what it is in a concentric bell burner. I think the Reil burners need a much longer burner tube to get good mixing than a Trex does. If the gas stream was not smooth and straight, there would be no venturi effect to take the mixed gas to the flame holder. I think this is one of the problems with the mongo. There is no neck down for good venturi effect, so the transport of the mixed air/fuel is not so good (consistent) and thus the huffing and burnback at lower fuel gas flow. If you take the mig tip gas orifice out of the burner and hold it up in front of you and run some gas out of it in the right light, you can see how the gas sheds off the stream on the sides and mixes with the still air. You should do that anyway to make sure there is not a burr in the orifice somewhere that is kinking the gas stream. Now picture what must be happening if that air is turbulent instead of still. Better mixing. But still enough straight gas flow to get the gas and air moving into the burner tube and down to the flame holder. When I am typing this, I am visualizing air and gas molecules moving down the burner, bumping into each other, saying hi, bumping into others, getting nice and intimate...... a good mingled party mix.....and then here comes that flame front..... Whammm! Poof! No more individual gas and air molecules. They have sacrificed their identity to serve the greater good that is me being able to make metal hot enough to forge easier. Be one with the molecules! Grin. What we need is someone to make video game kinda graphics showing that. Anyone?? The requirement for mixed gas/air transport is one of the things that make an atmospheric burner much touchier than a blower burner. That is a compromise that must be made in an atmospheric burner. You have to provide the mixing and transport function with the gas and air flow. With a blower, the fan does the transport and much of the mixing. It doesn�t matter as much how you put the gas in. Note that most industrial burners are blower burners. And in truth, many are crude so that they are less expensive to make. After that, I must admit I am making assumptions about some things based on my prior experience and knowledge. Without doing the heavy math or computer work, I can�t say for sure exactly where the air and fuel are well mixed and thus turbulence should stop. Note in a previous post that I said generally, the gas stream must be smooth and straight and must go straight down the bore. I can envision some burner arrangements where the air flow might be a little weird and the best thing to do might be to put the gas stream off at an angle! But that situation would probably change with a different air velocity so that would not be an easy burner to turn down. Thus, It�s almost always better to have the gas go straight and true. Darn air is hard to predict which way it will go. Again, without the heavy math, there is NO way to know besides testing and playing. And all of this applies to PREMIX, ATMOSPHERIC burners. Nozzle mix is much different and blower burners are much different. If you remember that a burner is just a mixer and a flame holder, it is easier to figure out what to do. I�m not done playing with these burners yet and so some of this discussion is premature and incomplete. But that�s OK with me. You just can�t take me completely to task yet. Grin. Pete, did I answer? Remember to be safe here. No eyebrow singeing or blowing up you or your shop. Do ANY of this burner and gas stuff with extremely good ventilation and NO heat or spark sources! Preferably outside. Propane is heavier than air and will blanket the floor with a good mix that, if ignited, will take your house off it�s foundation just like Dorothy�s in the Wizard of Oz! And if you are in the middle of the explosion, you would be lucky to get out of it with just some bleeding from the ears and no hair. There! How's THAT for a visual? Yes, I DO know people who have died that way. One of my ex boss's father. If this stuff isn�t making very good sense to you, go learn more about it before messing with burners. I am assuming those making burners have some prior experience and know how to do this stuff safely. Kids, don't try this at home. And no, we don�t need AZS burner blocks for smithing forges. Grin. Just wanted to let some know they were out there. Very durable from a flame standpoint. Would far outlast the kaowool. Just don�t hit them with any work or they will crack. I�ve not seen any reinforced with stainless wire. I think the differential thermal expansion might cause a problem. Maybe stainless bent wire mesh like in an auto exhaust donut gasket. Hmmmmm Ahhhh... time to get just a *little* more caffeine! |
| - Tony - Friday, 12/06/02 14:57:17 GMT |
|
Tony: I was told by a refractory rep that if you want to put wire in a castable to coat it with wax first. The wax would burn off and would allow for the difference in expansion. I'll race you to the coffee machine, I need some more amps myself! :) |
| - Pete-Raven - Friday, 12/06/02 15:11:38 GMT |
|
Paint Prep: Guru, Thanks for all the advice on painting the gate latch. It didn't occur to me that mineral spirits would leave that much of a residue, but it makes sense. An odd idea came to me last night.... Could I use my dishwasher to clean small part before painting? It would wash and dry them, and the soap would take off all the oil..... Oxidation question: every now and then I get a reddish type of scale/oxidation on steel after it cools. It doesn't happen all the time, and 2 piece of the same bar may not react the same way on different days. I am using a NC whisper Daddy. Thanks! |
| Jim - Friday, 12/06/02 17:43:29 GMT |
|
Sharon, as a counter point; I once assembled a "beginner's kit" of a forge, "anvil", hammer and "tongs" for under US$25. I've also provided a "loaner forge" for folks before. I'd suggest talking with the local smiths and trying out the craft before tooling up to nearly US$1K! Tim Lively has a website dealing with folks building simple forges (clay, ashes, in a washtub) and using random hunks of steel for anvils. You may want to look through their "starting up" archives. Thomas |
| - Thomas Powers - Friday, 12/06/02 17:50:42 GMT |
|
Molecules: theres an awful lot of molecules to be one with. How can I be sure they will all like me? I am one with many things. |
| adam - Friday, 12/06/02 18:24:19 GMT |
|
Hay-Budden Characteristics are fairly distinct on the late types (all tool steel top) if you know what to look for. The horn comes off the body at a nearly a right angle with a small radius the body dropping straight down under it. Although the anvilfire logo is a Hay-Budden my son filled in this rather ugly looking sharp radius so it looked better proportionaly. The section of the horn near the body is also squarish along the horizontal section before it tapers upward into the conical horn. Even on a 300 pound anvil the waist is relatively narrow. Hay-Buddens have the classicly well defined feet with square sides and a distinct corner runing up to the waist. Anvil styles are like people's faces. They are all the same yet all distinct IF you are used to looking at them and comparing them. |
| - guru - Friday, 12/06/02 18:42:42 GMT |
|
Propane and Air: Forget the molecular level. . Propane is a thick heavy nearly liquid gas. When it come out of the orifice friction between the thick gas and thin gas form edies (reverse swirls in the flow) that break up the gas and help mix it with the air. Pour a thin stream of a dark liquid into a clear liquid (coke-a-cola into ginger-ale or Kentucky Burbon into water). You will see the effect but in the case of propane and air it is closer to pouring light motor oil into kerosene. . . More edies, less mixing because of the density and viscosity of the propane. The mixing by edies happens for a long time before the molecular dispersment and is going on for several inches of burner tube. In welding torches and tips a twisted piece of sheet brass is put into a short section of the tip known as the mixer. This creates turbulance to help mix the fuel and air. But afterwards there is a LONG length of tube to help. The ABANA recupretive forge plans uses this type of mixer and I have heard of someone else doing it. I want to bend one up and test in one of my atmospheric burners. I figured out how to anchor the mixer the other night. Saw a short slot across the threaded end of the 3/4" burner pipe, then notch the mixer so that little tabs can be bent into the slot on each side. When threaded into the reducing bell the mixer will be held in place. Just need to find time to work on it. . . Not hard to do, in welding torches they do something similar piening the corners of the mixer in place. |
| - guru - Friday, 12/06/02 19:06:35 GMT |
|
Bright Red Iron Oxide: Jim, This is from pure iron dust oxidizing on the surface of the iron. It is most common on wrought iron and pure iron and is often used as a help to identify these metals. In fact, the Pure Iron guys ran a series of ads with famous smiths holding up a hand with red iron oxide dust stains covering them. In normal work it occurs from iron dust that forms from scale and is then reduced by the forge atmosphere back to pure iron. I'm not sure of the chemical composition of anhydrous red iron oxide but it is different from scale (thus the color). |
| - guru - Friday, 12/06/02 19:12:52 GMT |
|
Hey there old and all wise and knowing Sieb.I havn't writen a while.I am glad to see things have gotten bigger and better here on your website.Could you tell me what other name do metalsmiths use for the steel called "Atlantic 33".I saw a piece a friend had and the edges were rounded and the side of a square bar are concaved some what.I here it is used for jackhamer bits etc.Could you please give me a little more information about this metal,what other uses could it be used for,whether you feel it is a metal still to be used in the 21st. century,and where I maybe be able to buy some to try out.Your friend,BUB |
| Hector A. Giumetti - Friday, 12/06/02 19:50:42 GMT |
|
Atlantic 33 AKA Flutagon: Is a hot work steel described as "non-tempering". It is a specialty steel used for all kinds of hot-work and is supposedly excellent for blacksmiths tools. I have some I purchased from another smith but have not yet tried it our. . . It is available from Atlantic Steel but only in 20 foot lengths. . and like all tool steels is rather pricey. I want to put it in our store but I haven't been ahead enough to afford the inventory. We would sell it in 18" lengths and up. I don't have full specs on it but if we carry it in the store they would be provided along with handling information. |
| - guru - Friday, 12/06/02 20:39:31 GMT |
|
Forget the molecular level? No way guru man! Grin. The eddies aren�t enough for a hot burner. IF you were comparing a propane/oxygen torch to an atmospheric burner, that would be a stretch since in a welding torch, the gas flow does not have to accelerate and transport the air flow as it does in an atmospheric burner. Both oxidizer and fuel are under pressure in a welding torch. Comparing the mixer? �The mixing by eddies happens for a long time before the molecular dispersment and is going on for several inches of burner tube.� I think this is correct in a concentric bell type of burner. But what is also happening is that much excess air is also dragged along down the burner tube. That excess air is one of the primary differences between that style burner and a TRex if the TRex burns hotter. If the eddies were enough to mix the propane and air, it would work in still air. Try letting gas out of the mig tip in still air like I suggested. You will see the eddies. Now try to get those eddies to burn well. They won�t. Not a stable enough mix. And no flame holder either. Need more mixing to get the correct molecular ratio. Understanding the burnable mixture limit thing is necessary. I like the idea of trying different mixers. I�d be concerned about how something going across the front of the burner tube would affect the gas flows ability to get the air in. Might reduce the venturi effect too much. But well worth a try! Maybe it could be made circular so the gas stream could still go through and entrain the air. If my supposition that too much air is dragged down the burner tube is correct, I want to try an inserted machined venturi into the threaded end of the burner tube. The idea would be to reduce the total air flow, but still allow enough air to be mixed with the gas. And the Venturi would help with the mixing. I suppose one has to buy the ABANA recuperative plans, huh? One other thing I forgot to post this morning in the caffeine haze..... Concentric reducers are not concentric. I�m used to that with Chinese fittings, so I bought some Anvil brand. Used to be Grinnel. Made in the US, supposedly. When I chucked up my concentric burner assembly in the lathe last night, with the burner tube in the jaws, the large end of the reducer ran out almost 1/8"!!! What crap! And I made sure the problem wasn�t the threads on the burner tube. No wonder the flame was off center. Pete R. wax on the wire. Good idea! The refractory must be porous enough to let the wax burn gasses out, huh? Ok, I�m done now. I�ve had enough negative reinforcement for one day. Grin. |
| - Tony - Friday, 12/06/02 20:47:53 GMT |
|
Wire in Refractory: I was only going to put it in the cool end around where the burner tube was inserted for addes strength at that point. I considered putting it in the nozzel end but the differential expansion would be too much and it would do more damage than good. Mixers: The twisted mixers are a thin piece of sheet stock about .015" to .032". It is cut the width of the tube (.824" for 3/4"schd 40) then twisted under tension until it has a twist about like a twist drill. Annealed material works best. From the end the only "obstruction" is the cross section of the piece (.0## x .824). However, forcing the flow to spiral IS a type of obstruction but it is a relatively low resistance one. In atmospheric propane torches they use several types of difuser mixers. The most common is a piece of fine screen. The fuel air mix with edies hits the screen and is turned into smaller more difuse flows. Another torch I have has a small piece of brass gear stock in the burner tube. This material is extruded and drawn gear pinion stock designed to be cut off and finished in a screw machine. This has about 16 gear tooth spaces and the center hole. Here there are less holes than the screen but the fuel/air mix is forced against the outside of the burner tube where it does not normally want to flow due to the laminar surface effect (micro edies due to surface friction). This produces better mixing. Plumbing Tolerances: Ah. . no, pipe fittings are almost never concentric. They are rough *** castings or forgings and wherever the hole comes out it is threaded. The tricky part is designing the tooling to center on the mishapened parts. Axialy they are fairly accurate (one threaded axis parralel to the other). But the only ones that are concentric are the solid brass or stainless fittings wholly machined on screw machines. To check the centering of MIG type orifice you can sight down the tube from the fire end. If you can see light through the long small hole in the orifice then it is fairly straight. IF the hole sights in the center of the far end of the burner tube then it is VERY straight. 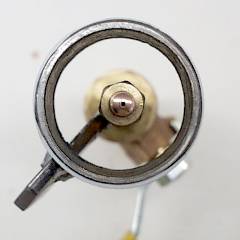 This photo is without the reducer and the tube. But with the rest of the parts in place and the valve open you could sight through the whole assembly. The alignment at the far end of the tube was off less than 1/8". This is inconsequential in this case because most of the mixing is finished by the time it gets to end of the tube and the flow can easily self center at these low velocities. At the inlet end of the tube that 1/8" translates to only a few thousandths of an inch. This photo is without the reducer and the tube. But with the rest of the parts in place and the valve open you could sight through the whole assembly. The alignment at the far end of the tube was off less than 1/8". This is inconsequential in this case because most of the mixing is finished by the time it gets to end of the tube and the flow can easily self center at these low velocities. At the inlet end of the tube that 1/8" translates to only a few thousandths of an inch.Tolerances: Now. . the one that bug me is that many places sell pipe that does not meet the standard dimensions. I used a NEW piece of 3/4" galvanized pipe as a reference when I was making a wood pattern piece for a mold. My part turned out to be .030 undersize. . . Luckily I caught it before I cast the refractory. When I checked the galvanized pipe which SHOULD have been oversized due to the plating, IT was the problem. . . I hadn't looked up the size on 3/4" pipe (1.050" OD), a dimension I used to have memorized. . . The tubing the T-Rex burner was made of was dead on size and would not have fit the cast refractory if I had used the original pattern. But the stuff I bought at Lowes did not meet US standard pipe dimensions. . . I suspect that in many applications it may not meet code if anyone checks. I really hate cheap inferior products and our country is being flooded with them. . . |
| - guru - Friday, 12/06/02 22:21:22 GMT |
|
Sir, I have been in the ranching business for many years. In the mid to late 1970's we had a tool that was used on ranch equipment to stamp either ranch brand or a number in a remote place for identification should the piece of equipment be stolen. I am in need of something similiar for the same purpose today. I have hunted numerous web sites and have been unsuccessful in my quest for such a tool. I hope that you can lead me in the right direction. Thank you for your help. SKC |
| Sarah - Friday, 12/06/02 21:47:32 GMT |
|
Custom Stamps: Sarah, Grant Sarver of Off-Center tools makes them and sells them through Kayne and Son (see the link on our drop down menu or advertisers directory). OBTW - Its Grant that is off center. . not his tools ;) |
| - guru - Friday, 12/06/02 22:20:19 GMT |
|
Iron Oxide is a generic term for 3 different iron-oxygen compounds. FeO, aka, wustite, is an oxide formed at high temperatures. Fe2O3, aka, hematite, is the red oxide mentioned. Fe3O4, aka, magnatite, is a low temperature oxide. The differences in colors is due to the difference in forging temperature. |
| - Quenchcrack - Friday, 12/06/02 22:23:33 GMT |
|
QC, What are the colors for Wustite and Magnatite. From your description and from other available information, I think that North Carolina Red Clay is Hematite ore. The other color clay that we have a lot of is a greenish yellow in color. |
| Paw Paw - Friday, 12/06/02 22:36:50 GMT |
|
Guru: I just wanted to double check on the maximum carbon content that one is safe to water quench. The reason is I found a bunch of cheap 1055 1/4" x 3/4". It seemed to me that 1045 was about as high as one would want to go. Burners: Tony, I don't go fancy on them, more friction the better (sort of) I use smaller orifaces and higher pressure, seems to mix okay. I figured I don't pay for pressure and if you are getting too much air you can choke the burner. As for heat I need to chisel out the spring that melted down inside the forge. For burner flairs I just made a tapered mandrel that I press into 1" id ss about 3" long they don't last long but are cheap to replace. QC I take that tempering colours are an oxide. If so do you know what kind? |
| - Daryl - Friday, 12/06/02 22:58:44 GMT |
|
Water Quench Daryl, Some folks water quench high carbon steel and get away with it. The trick is to NOT have the steel any hotter than necessary. Have an EVEN heat and quench in warm water. Quenching medium carbon steel that is overheated in cold water will crack it just about as easily as high carbon steel. I prefer oil quench on anything that it works on. . . Temper colors are not a colored oxide. They are the result of refraction through a partialy oxidized surface. The refraction comes from partial oxidation of the surface at the molecular level. |
| - guru - Friday, 12/06/02 23:17:16 GMT |
|
Guru Thanks for the info. I use tempering colours in the stuff I make. People of course want to know what it is. So are I've been lucky and haven't had to give too much detail, but now I can truely answer. |
| - Daryl - Saturday, 12/07/02 00:15:25 GMT |
|
PPW, in my experience, the other two oxides are a gray-black. The red in the clay is indeed indicative of iron, and hematite, in mineral form, is blood-red (hemos = blood in somebody elses language...Slag....help!). When they polish it, it comes out jet black. The yellow green color of the other clay is probably just old squished up lima beans tossed out by untold generations of little kids......Sorry...clays are decomposed rock, mostly granite, which is widely variable in composition. Guru, you taught me something new about temper colors...but there are still no molecules in metals...only atoms arranged in crystals. |
| Quenchcrack - Saturday, 12/07/02 01:46:45 GMT |
|
QC, I don't know for certain what it is, but it sure fires up into nice bricks. So does the green/yellow "gumbo" for that matter. |
| Paw Paw - Saturday, 12/07/02 02:07:13 GMT |
|
I am looking to purchase a gas forge. This will be used for forging knives, daggers, and similar items for sale. Can you recommned a good one? Every dealer I have talked to has given me the hard sell along with a lot of conflicting information. Also went are my venting options with a propane forge? |
| AMM - Saturday, 12/07/02 05:39:32 GMT |
|
AMM, Suggest you go to the 21st Century page here at anvilfire. Once there, scroll down to the Product Reviews of the NC Whisper Baby and the NC Whisper Momma. Both are Propane forges. |
| Paw Paw - Saturday, 12/07/02 06:03:43 GMT |
|
Excellent Tony; Thank you! Fall asleep with the gas on?? Not yet...playing with fire gets my attention! Yassah. Would running the intake air through a mesh screen just before it gets to the venturi provide enough small scale turbulence to promote mixing without obstructing the general flow? Next ; if the object , in part, is to get good mixing while still keeping the mixed air/gas speed moving out of the burner faster than the flame front moves in...would it work to neck the burner tube down right at the end ( but still larger than the venturi), rather than flare it? And last, why don't we use stacks on our forges like potters do to enhance incoming air flow so that we could afford the velosity to do better mixing? OOps..I see my Qs are already addressed. As per your proviso...if this isn't fun ( insert bronx cheer here) |
| - Pete F - Saturday, 12/07/02 06:38:25 GMT |
|
Iron oxides The word stem heme or haeme comes from the Greek word hemato(s) meaning blood. Hematite is the red oxide of iron with the formula Fe2O3, hence the name. The blood chemical that carries oxygen to all tissues of the body is called hemaglobin. It is well named for it's blood red colour. The hemaglobin molecule is a complex circlet (technically a cyclic tetra pyrole)comprised of four pentagonal circles (pyrole groups). At the center of the circlet is a captive iron atom that carries the oxygen atom, to the body cells. (and later carries away the carbon dioxide). it is iron oxide in the center, hence it's red colour. The other major, (but less common) oxide of iron is magnetite, Fe3O4. It is known as black sand or black iron oxide. It is attracted to a magnet, hence it's name. (hematite does not). Placer (stream)gold miners who pan river gravel, wash away the lighter material and eventually end up with a residue of, hopefully, gold particles and black sand. (it's heavy). Then they remove the magnetite=black sand with a magnet. The name of the oxide is approperiate, magnetite, attracted by a magnet. Wustite, another oxide of iron, is not common. It's formula is FeO. It is primarily found in slags of old iron smelter furnace remains. It is formed when the reduction of the iron oxide ore (primarily Fe2O3,hematite) is not completely reduced to elemental iron (Fe). The more primitive the process the more wustite is found. The more modern (about 1450 A.D.) blast furnace does not yield wustite in the slags. The blast furnace blast burns enough fuel to produce enough carbon monoxide (CO), to contact all the iron oxide ore (Fe2O3), and steal all it's oxygen to form carbon dioxide(CO2). This leaves pure iron and no iron oxides. All of the above blather is really to answer the question of hema. It is of Greek language origin. Regards to all, SLAG. The Jolly Fat Man is coming, soon! |
| slag - Saturday, 12/07/02 07:23:02 GMT |
|
pyrole should be pyrrole |
| slag - Saturday, 12/07/02 07:23:49 GMT |
|
More burners: Daryl, you are correct that we don't HAVE to be perfect with the burners. They will work with a lot of things not optimized. As evidenced by some of the purchased burners out there. The first stuff I did with this round of playing, I didn't use a regulator on the gas. Just a needle valve. Since a pressure regulator is nothing more than a automatically varying throttling valve, it worked just fine. Bic lighter flame to 4 foot long. Grin. But as the tank pressure varies. a regulator is a good idea so you don't have to keep adjusting the needle valve. If you are melting spring stock, sounds like you are very successful! Jock, I've seen that non standard pipe with walls thinner also. Sometimes they market it as Tubing, not pipe, to get away with it. Where it might cause some REAL problems is when people use it for high pressure stuff like hydraulics. I suspect the welds are inferior too. Pete F. yes, screen should work for an air turbulator. I've not tried it. And you know I wasn't talking to you with the safety stuff. I envision you as the safety king. Grin. There are some industrial burners that have a small sharp reduction in throat near the flame holder. But the ones I've seen like that do not have the flame right AT the reduction. It seems to be used more as a flame stop than a flame holder. Keeping the flame from burning back at turndown. Stacks on atmospheric gas forges could work to increase draft. But what do you do when you throttle it down? The stack would suck heat out of the forge. Ahhhhh! Add a damper in the stack. What? a damper in a forge stack? Yessssss! Pretty soon we'll be adding motor operators for the valves and dampers and a thermocouple or two and a PID controller and flame safeties. And then we will have an industrial furnace! Grin!! Much more productive for a working shop trying to make money. Jock, I misunderstood your mixer. I thought the installed axis was across the flow , not along it. Be interesting. Then along the lines of better heat transfer in the forge, and as I mentioned earlier, getting the flame to hug the wall of the forge as it exits the burner, that helix mixer might help with that. The flare looks like a french horn end for that style burner. Cast one of those babies up! Steve A. from a few days ago, sorry. Yup, theorize it close, then build and fix. Grin. There are many things I can calculate right the first time. I don't know too many people, in fact none, who can design stuff with multiple gas flows and have it work exactly as planned the first time. Unless their expectations are low. Big Grin. |
| - Tony - Saturday, 12/07/02 14:46:58 GMT |
|
Temper Colors Guru, I've always thought that temper colors came from interference caused by a thin oxide layer, just like you get a rainbow effect from oil on the surface of a puddle. I don't remember where I got this idea, and I guess refraction at the molecular level is equally possible (though molecules are generally smaller than light waves, aren't they?). Anyway, I'm curious to hear what your source is and/or how the refraction works. Mike B |
| Mike B - Saturday, 12/07/02 14:51:05 GMT |
|
Guru I am building a forge with some of the T-Rex burners and the information that came with them suggests putting a flashback arrestor on the regulator. I think this is un-necessary because there is no potential for an air fuel mixture to travel up the plumbing as there is with an oxy fuel setup. I looked in the National Fuel Gas code book and the only place I see them used is on devices that premix air and fuel upstream of the burner. I'm not sure if a fuel gas regulator flashback device could even provide enough flow for my four burner forge. Am I correct in my thinking that this device is un-necessary or is there some other reason to use a flashback preventer on a forge ? Thanks Chris |
| chris smith - Saturday, 12/07/02 16:08:05 GMT |
|
Tony: I will post on the hammer in re burners |
| - Daryl - Saturday, 12/07/02 16:29:49 GMT |
|
HELLO I JUST PURCHASED A POWERHAMMER MADE BY THE NOVELTY IRON WORKS COMPANY IN DUBUQUE IOWA THE NAME ON THE SIDE SAYS "BOSS" CAN YOU PLEASE TELL ME WHERE I CAN FIND SOME INFORMATION REGARDING THIS HAMMER? THANK YOU DON |
| DON - Saturday, 12/07/02 18:43:29 GMT |
|
"Boss" Hammer: Don, See our book review page. They are covered in Pounding out the Profits. |
| - guru - Saturday, 12/07/02 22:31:01 GMT |
|
Flashback Check Valves: Chris, I keep them on all my regulators including the one for my big forge. However, the regulator for the NC-TOOL forge did not come with one. In situations where there is no presurized oxidizer (air, O2..) they are probably not needed as you noted. But I often use my propane regulator setup and propane cylinder on my oxy-fuel torch. It is there, it works and I am often out of acetylene. . . will you? |
| - guru - Saturday, 12/07/02 22:36:56 GMT |
|
Venting Gas Forges: AMM, It depends on where and how big. In many well ventilated shops (high ceilings, big doors, or open air shops with lots of doors and windows) gas forges are used without stacks or vents. In closed spaces they should have a hood and vent. Unlike small gas appliances the exhust from a gas forge is very hot so you CAN NOT use aluminium vent pipe. It must be steel, galvanized steel or stainless. A chimney with a wood stove thimble will work. Size of the hood and stack are dependent on the forge. |
| - guru - Saturday, 12/07/02 23:13:10 GMT |
|
Whats the eta of Ms Pieh's company, web site opening? |
| - Pete-Raven - Sunday, 12/08/02 04:55:05 GMT |
|
ETA, heavy on the Estimated: Early next year is the most specific we can be at this time. Around new year's we might be able to be more specific. Cooking Spits Last week or so we had a discussion about cooking spit movements (clockwork, turbine, dog power) and I mentioned that I had seen dog powered one in The Little Rascals. Tonight I saw a unique one in the movie Its a Wonderful Life. In the "honeymoon" scene in the old house a wind up Victrola has a wooden thread spool pushed on the spindle, a quarter turn round belt is running from it to a large pulley on the spit with two chickens cooking on the open fire. I'd estimate the reduction is five to one, and since this is the era of 98 RPM records the spit is turning about 20 RPM. Of course this comes under "comic relief", something old movies had a lot of. In Its a Wonderful Life this also included a pet crow in the Savings and Loan and a pet squirl in the old uncle's house. Of course the whole movie is a bit sureal for the Sesamee Street generation since muppet characters were named after the movie characters, the cop and cab driver pair, "Bert & Ernie" Happy Confusing Holidays! |
| - guru - Sunday, 12/08/02 05:34:01 GMT |
|
Tony; Me, the safety King...gurk...giggle..snort beer out nose! Thanks for your expertese though. Good Guru; It is understood that too many of us don't contribute to Anvilfire by joining the Cybersmiths... but i didn't realize that things were so very bad there that you were down to cooking spit..... sorry. |
| - Pete F - Sunday, 12/08/02 06:13:46 GMT |
|
Hi! I'm internet retarded, but would like to find some plans for building a forge... any suggestions, links or even plans! Much appreciated! manya |
| manya - Sunday, 12/08/02 08:08:12 GMT |
|
I have been playing at BS for 25yrs and decidided to make a gas forge with some other smiths. They have me started with a big, heavy ,two burner ; but now I want to check things out. We need info on gas jets ,propane tank hookups and regulators. Is there a site or chat room to ask these questions? |
| Jim Moran - Sunday, 12/08/02 12:12:05 GMT |
|
Jim Moran, go to the LINKS section here on Anvilfire and look for thte link to Ron Reil's web site. Lots of info on atmospheric burners. |
| Ralph - Sunday, 12/08/02 12:43:58 GMT |
|
Good Guru, I'm old enough to have lived throught the era of 78 and 45 RPM records, but I missed the 98s. |
| Frank Turley - Sunday, 12/08/02 14:53:08 GMT |
|
Hi Guru, I remember someone mentioning "JP Green's pyramid super air set refactory." It is rated at 3000 degrees F. Has anyone tested it that flux will not harm it? Where can it be purchased, and at what price? Flux is killing my NC Knife makers forge. You also had a test on ITC 100 in Iforge where can it be purchase and at what price? Also what is Ms Pieh's company? |
| JG Bleeding Heart Forge - Sunday, 12/08/02 17:02:09 GMT |
|
ITC-100 JG, We sell the full line of ITC products in our on line store and have considerable information on it. Most hard refractories are more resistant to flux than soft ones but it varies according to the chemical composition of the refractory. |
| - guru - Sunday, 12/08/02 18:22:42 GMT |
|
About Gas Forges: As mentioned Ron Reil's page is a good place to start. We probably answer more design and construction questions HERE than anywhere else. Our archives are full of Q&A on the subject. |
| - guru - Sunday, 12/08/02 18:24:34 GMT |
|
Frank. . . Well.. . .whoops . . maybe they were 78's. My grandmother had a Victrola and we had them in our rural school elementary as late as the 1960's. We had a collection of old wax records but I never paid that close of attention to them. In fact I've never been a big user of stereo's and such. I have a very few CD's but the only thing I have to play them in is the PC. . . and my speakers are buggy on it. . . I enjoy listening to music but don't go out of my way to do so. The car radio is about IT. And I cannot stand extra background sound/music in the shop. I rely too much on how machinery, tools and equipment sounds. . . Sounds in the shop warn you when things are going wrong, that whistle in a torch or forge burner, a roar of gears needing lubricant, a belt needing tightening, an electric crackle where is should not be. |
| - guru - Sunday, 12/08/02 18:25:44 GMT |
|
Manya There is a listing "Getting startin in Blacksmithing" on the opening page and at the top of the Guru's page. Click on it. If you can not find them try http://www.anvilfire.com/FAQs/getstart_index.htm Lots of good stuff on how to get started in there. |
| - Conner - Sunday, 12/08/02 18:32:02 GMT |
|
hi guru,i have my grand fathers anvil and possobly his grandfathers,the only marking i can find is an 8 stamped under the horn it weighs around 75-80#'s one strang thing about it is if you look at it from one end it leans to one side but the face is square to the base,it looks like a haybudden that i've seen do you think it could be one,the top is forged and the base maybe cast.thanks in advance.J.R.Clark |
| hotmetal - Sunday, 12/08/02 18:33:10 GMT |
|
Pieh Tool Company is being launched by Amy Pieh, former president of Centaur Forge and daughter of Bill and Bonnie Pieh. After Amy's parents both died the family sold off the business so she is going on her own. The new business will be located in Arizona where shipping will be fast and economical to California and most of the western states. Product lines will include both farrier and blacksmith books, tools and supplies as well as many related items. Keep an eye on the Pieh Tool Company banners and webpage. As more details are known they will be listed there. |
| - guru - Sunday, 12/08/02 18:36:07 GMT |
|
Crooked Anvil: Hotmetal, this is not unusual in old forged anvils. Especially on the ones where the top plate was forge welded on. A great deal of the shaping of these anvils was done by hand using sledges with the anvil on the floor where it was difficult to judge squareness. Without seeing it or having more details I could not identify it. Although some manufactures used serial numbers and most stamped their name in the side of anvils, many anvils were made without identifying markings. Some of these were going to resellers that were going to private brand them OR were often special order. In any case, there are a LOT of anvils without markings. These can only be identified by details of style. Minor variations in line, shape and proportions that are not discernable to the untrained eye. |
| - guru - Sunday, 12/08/02 19:04:00 GMT |
|
Changing Times: I mentioned wooden thread spools in the post about cooking spits. These too are largely a thing of the past. Most spools today are made from plastic and the tubular hole will split or crack if one tried to press it on an oversized shaft. There were many craft, science and toy building projects based on these now hard to find items that were once so common. No more. . . Besides the unusual pulley application in Its a Wonderful Life I have seen wooden spools used as pulleys on small fans in grist mills and a hand made wooden blacksmith's forge blower. You know you are getting old when the common items of your childhood become collectors items. . . |
| - guru - Sunday, 12/08/02 19:05:00 GMT |
|
Which grade of aluminium is reccommended for making pattern for sand castings |
| Uday Pandit - Sunday, 12/08/02 20:01:52 GMT |
|
Please give details of solution hardening & artificial aging of aluminium grade LM25 |
| Uday Pandit - Sunday, 12/08/02 20:03:35 GMT |
|
Pyramid super airset: I use that stuff - works great - easy to work with but a bit stiff as it comes out of the box so I wet it down abit. Seems immune to flux. I went to JP Greens website and got a list of dealers - found one in Wyoming or Montana that had it. $18/50# box and same again for shipping to New Mexico |
| adam - Sunday, 12/08/02 20:10:01 GMT |
|
FRANK: I relate to the old 78s and 45 I grew up with them also. I still have an old 78 colection of Albert Schweitcher playing some of Bachs works. This sure dates me dont it. GURU: I remember wooden spools as kids we made tanks out of them using rubber band, match sticks and a small piece of soap. We would race them up the concrete banisters found all over Jerome. By the way thank you for all the work you guys put into this site I really appreciate it. William |
| triw - Sunday, 12/08/02 20:21:58 GMT |
|
The most fun we had with wooden spools was wire a heavy rubber band over one end and use them to shoot the old non safety stick matches. we would spit on the match head, strike it and then shoot it. they would make a really neat smoke trail and we would have wars with them. Or if you shot them at concrete or stones you could get them to explode when they hit. Lots more fun than sitting in the house playing computer games like a lot of today's kids.Of course they probably won't "shoot their eye out". |
| bbeck - Sunday, 12/08/02 22:07:58 GMT |
|
|
|
|