| WELCOME to the anvilfire Guru's Den |
|
THIS is a forum for questions and answers about blacksmithing and general metalworking. Ask the Guru any reasonable question and he or one of his helpers will answer your question, find someone that can, OR research the question for you. This is an archive of posts from July 16 - 21, 2001 on the Guru's Den |
|
|
|
Compressed air, equipment and tanks. Other than a monthly draining of the water or condensate from the bottom of the tank, doing a visual check of the hoses, and oil check in the compressor, what is the normal maintance needed for this epuiptment? Should the tank be left pressured up overnight, or the air drained ? Guru, you mentioned the cyclic expansion of ox/ac cylinders. This would also apply to the compresses air tanks. Many tanks have been in service for uncounted years, and then sold when the compressors or motors quit. The new owner then replaces the motor or compressor, and puts the old take back into service. Is there a way to tell if a air compressor tank is approaching the failure point due to metal fatigue, cyclic failure etc ? Do they have a working life that can be measured in years? How much rust pitting is too much on the outside of the tank? Can it be wire brushed and painted to stop the rust? With the water on the inside of the tank, this seems to be a good place for rust also. If you just look into the tank and see rust, is there a way to tell if the rust has pitted the metal inside of the tank, and has become a problem ? Also, what is the recommended pipe size and spec for air supply lines in the building? Thanks |
| Conner - Sunday, 07/15/01 22:38:41 GMT |
|
What color were the Canedy-Otto Mfg. Co. blowers when new? I have been resident smith at Old Washington Historic State Park for 7 years. |
| Billy Nations <bgnations at cableone.net> - Monday, 07/16/01 01:59:38 GMT |
|
Guru I have a design problem..... for a garden hanging basket holder.... two curved arms 12" dia 1/2" sq rivited to 1/2" support rod 60" long I need to put supporting "legs" out to the sides on all four flats leaving a 8" spike to drive into the ground.... I have found this impossible to forge weld (my scrap pile attests to this) and I hate to arc or mig weld this... rivets 1/4" x 1 1/2" just dont seem to look right....any suggestions? Thanks Mark |
| Mark Parkinson <mparkinson2 at home.com> - Monday, 07/16/01 02:13:01 GMT |
|
Air Compressors: Connor, Some of these are questions that occasionaly you don't want to ask. A few years ago one of the state's OSHA departments asked thses same questions. The problem was that the proper inspection of the tanks is much more expensive that the tanks themselves. SO, they ordered the scrapping of ALL the air compressor tanks over a certain age (5 years I think). This was rather ridiculous since most air compressors and tanks last well over 20 years without a problem. Inspection requires dissasembling the compressor. Cleaning the tank inside and out, then using remote viewing device to inspect the inside of the tank (IF you can remove one of the larger access plugs. . . In some cases the tanks would be hydrotested. Filled with water an pressurized to 1.5 times the design pressure of the tank. In the event of a failure there is no stored energy in the incompressable water and as soon a a small leak starts the pressure drops to zero. Therefore there is no danger of an explosion in this test. Under normal use air compressor tanks are not stressed anything like an oxygen cylinder (100-200 PSI vs 3,000 PSI). There IS growth but very a minimal amount. There are certain limits under which work hardening and metal fatigue does not occur and most pressure vessles are designed under these limits. Yes the outside of an air-compressor tank should be kept painted. Yes, the inside tends to corrode more than the outside due to combined mositure and the pressurized air it self. Shop piping should be black iron "gas pipe". Copper is NOT reccomended and plastic is absolutely verboten! Size is determined by the distance to prevent pressure losses and the amount of air to be delivered. The farther you go the more pressure drop (resistance) there is. The more HP the compressor has the bigger the pipe (IF you expect to get full use of the HP). If I were plumbing a shop I would use 3/4" ro 1" pipe and 1/2" drops. But it all depends on the type of air powered equipment you are operating. I have a large air hammer I will be setting up in the future and the recommended piping for it is about 1-1/2" and an exhaust of 2". In this application the exhaust is very low pressure (unless the pipe is too long) and can be plastic. Normal compressor tank life is one you would have ask the manufacturer. But they will probably only stand behind their warantee period. |
| - guru <guru at anvilfire.com> - Monday, 07/16/01 02:18:21 GMT |
|
Mark, I take it you are trying to get the legs to attach to the center rod? Why not collar? Or perhaps a counter sunk rivit then collar over it? that way the rivet will hold it together and then the collar will hide the rivet..... |
| Ralph <ralphd at ihpc.net> - Monday, 07/16/01 02:40:19 GMT |
|
Guru, I don't buy the New Age part, and feel fully justified in whipping out my handy bench grinder/belt grinder/cutting torch/arc welder/other modern tools. However, I think that it is cool to see just what can be done with a minimum, and they *do* turn out some awful cool stuff. Along these lines, I was looking at the photos of Nepalese khukuri (crooked knife) makers over at http://www. cystern. com/khukuri/ (remove spaces) and noticed that all of the anvils they are using are large sledgehammer heads. There are apparently several of these and they all are mushroomed over. So, do you reckon that they drew the temper on the sledges to prevent high-speed shrapnel, or what? |
| Stormcrow <jbhelm at worldnet.att.netSPAMYUCKY> - Monday, 07/16/01 03:00:26 GMT |
|
Soft Sledges Considering the abuse and the ratio between anvil (sledge) and sledge being used I don't think the mushrooming is bad. Any steel that is still ductile enough to take hammering WILL move under heavy use. Heavy anvils either mushroom or chip, they have to do one or the other eventualy. These guys go to show you don't need a long anvil face to make a straight knife. Now this is a riot, "Cutting the steel from truck springs, forging the steel to exact specifications". The authors probably don't know that there are no "exact specifications" to that scrap truck steel and every batch is probably different. And another photo clearly shows a (bad) forge weld line where a steel edge is welded into another (maybe softer) steel. Nothing is mentioned in the descriptions. The importer probably doesn't know the difference or they would have some other technicaly incorrect hype about that too. Interesting to see how our much poorer neighbors have to work and the type of tools they must work with. But as poor as they are, they know better than to use a cast iron anvil. . . 5-way forge weld: Mark, First, I will tell you what you probably already know, your competition is arc welding a support on. To make the 5 way weld first upset the bar just beyound the weld area where it will be blending in. The upset should be a gentle bulge in both directions and about twice as big as the bar at the peak. Then upset the ends of the 4 supports and make a short scarf on the outside bars to fit the upset. Wire together and weld. If there is sufficient upset then everything should blend together nicely. Bend the legs out as needed with a healthy radius. IF done right there should not be a reduction of stock size anywhere near the joint. Thats a LOT of upseting and welding for a 12.95 (wholesale) item. An option would be to use two 1/2" square bars on opposite sides with a little curl at the top and a 1-1/2" flat bar on either side that comes up the same distance (4-6") for the other two supports. All the riveting would be on one plane. I know these basket plant hangers are popular in 1/2" stock but I think they are flimsy cheap things. A smith I know has been making the singles by the thousands for a couple dollars EACH over material cost. AND they had a little leaf forged on the hook of each one and several twists in the long shank. He actualy made good money at it but he was VERY efficient and the buyer did the painting. I wouldn't want to compete against him, but that is basicaly what you are doing. If I were making a tall double hanger I would use round or hex stock and twist the two together for the full length. At the bottom I would add in a third piece about two feet from the bottom and a fourth at about a foot. These could have tappered ends so they blended in where they started. I would probably draw them out some distance to make a vine tendril out of the loose end. At the bottom I would mke four "spikes" out of the four pieces. Where they spread out they could be arc welded underneith where you gouldn't see it. If I thought the top or bottom needed strengthing I would use leaf and vine end wrapped collars. A little snake would be cute at the bottom. . . :) This would stiffen the whole and make it something that even the least educated customer couldn't compared with the K-mart variety. |
| - guru <guru at anvilfire.com> - Monday, 07/16/01 04:03:43 GMT |
|
Billy-- I've seen Canedy-Otto blowers tarted up to sell for maximum dinero at the flea market, fire engine red enamel, and sometimes green, with logo emblazoned in golden paint. But I doubt they were painted any color at all when newborn-- mine is plain old cast iron and shows no sign of ever having been painted. Same with my Canedy-Otto drill press. Look at Google for a lead to a brochure merchant who will sell you Canedy-Otto material (for about the same money for each item as what a working blower might run you). |
| Cracked Anvil <cracked at anvilfire.com> - Monday, 07/16/01 04:36:36 GMT |
|
Good Guru: What are the virtues and problems with sitting down in front of one's power hammer? And, is it right to assume that that accounts for the low dies on the chinese hammers? Last, as to why the sticking arc rod is your fault...only you can answer. I was just trying to help....( straight face). |
| Pete F - Monday, 07/16/01 06:24:44 GMT |
|
Guru/Paw Paw I was wondering what you would be willing to tell me about cast steel vs. forged steel anvils... Thanks in advance for your time. |
| Chris Bernard <cberanrd53 at hotmail.com> - Monday, 07/16/01 12:24:04 GMT |
|
Chris, Personal opinion here. Cast steel is better than cast iron. It's not as good as forged steel. |
| Paw Paw Wilson <pawpaw at paw-paws-forge.com> - Monday, 07/16/01 12:31:02 GMT |
|
thanks Guru some great ideas .... just making 10 of em for a local historical house for their "tea" garden think I will try the full length twists carrying through with a leaf and vine wraps and hooks.... the 5 way weld just wouldn't work for me I could get 2 or 3 to stick but not all 4 at once ... ah well that my ratio for forge welding anyway 2 or 3 out of 4 I was just doing it all at once :) |
| Mark Parkinson <mparkinson2 at home.com> - Monday, 07/16/01 12:51:00 GMT |
|
Paw Paw, I seem to remember you talking a while back about a drill bit sharpener that you recieved as a gift. Can you tell me what the name of it is, and where I can get one? I seem to go through a lot of drill bits because I am pushing to hard to get them to cut (ie they are dull). Thanks. |
| Chris Bernard <cberanrd53 at hotmail.> - Monday, 07/16/01 14:05:05 GMT |
|
Design: Mark, great! I get 10% design commision (ha!). |
| - guru <guru at anvilfire.com> - Monday, 07/16/01 14:05:52 GMT |
|
Connor, Air compressor tanks. I looked into some old tanks too, did some research on inspections. The cost of a new tank is so low from Graingers's that it's not cost effective to have the old one's inspected. Not to mention the peace of mind you get from a new tank. I paid for a new tank then put together an old pump, old 3-phase 10 HP motor ( which I had to buy a new magnetic starter for BIG $$$), pressure relay,etc.... I now wish I had just bought a new compressor at the beginning. Would have cost the same! TC |
| Tim Cisneros <blacksmith at theforgeworks.com> - Monday, 07/16/01 14:13:30 GMT |
|
Sitting at Power Hammer: Pete, no reason not to. It depends on what you are doing. I have a photo of a fellow running a 100 pound Compact Bradley hammer while sitting. He was doing mountains of production work. His foot wore a hole through the tubular treadle bar! Bruce Wallace has the hammer now and is doing production work on it. However, Bruce prefers to stand. |
| - guru <guru at anvilfire.com> - Monday, 07/16/01 14:13:56 GMT |
|
Pushing Drill Bits too Hard: Chris, I doubt it. Drill bits feeding too fast either stall the drill or break. The efficient rate for drilling is just below that feed rate. Then big curling chips come steadily out of both flutes. It is almost impossible to achieve enough pressure when drilling with a hand drill unless the bits are very small (1/4" or less). It takes a heavy duty sensitive drill press to push drill bits to their limit. Old hand crank blacksmiths drills with automatic feed would do this, but if drilling holes over 1/2" you REALLY learned what horse power is about! On these you would start the drill a little then preload the feed Screw until most of the flex was taken out of the presss and then let the automatic feed do its job. The preload is very important. What burns up drill bits is
On large dills you should drill a pilot hole about the diameter of the "dead" center of the bit. The dead center is the straight chisle point on the drill web that doesn't have a front or back. Good quality drill bits have the web thinned toward the end so the dead center is not too big. This means that drills have a finite sharpening life. One of the problems with the new "split points" is that many of the manufacturers have stopped thinning the web. So the first time you have to hand sharpen the bit it is worthless. . . I keep a handfull of 3/16" (5mm) jobbers length split point bits in stock for drilling pilot holes. When new these are easily burried in 2" of stainless steel on an OLD worn out geared head flat belt drive drill press (using lots of oil). As soon as these show any signs of wear (usualy broken or worn outer corners) I throw them away. They are too small to hand sharpen AND too inexpensive to dig a broken one out of a piece of work. Any oil or coolant is better than none. I use 50/50 SAE 20 motor oil and kerosene when I have a lot of drilling to do. You have to be careful with this mix because if you are drilling efficiently the kerosene "smokes" off. Its actually evaporating at a rapid rate so you don't want it to catch fire. Plain oil works too but is not as good a coolant. When doing odd jobs and I don't have my 50/50 mix I use WD-40. Machines with a coolant recirculation system are the optimum. Water soulable oil (mostly water) coolant is clean and not a fire hazard. |
| - guru <guru at anvilfire.com> - Monday, 07/16/01 14:51:57 GMT |
|
Cast Steel vs Forged Steel anvils: Modern cast steels that are properly heat treated are thought to be better than forged steel in many cases. Some of our preference for forged comes from hundreds of years of literature telling us forged is better, from an age when forged WAS better. Russell Jaqua of Nimba anvils sent me a very good article on cast vs. forged that I REALLY need to post. Look for it soon as part of our anvil series. |
| - guru <guru at anvilfire.com> - Monday, 07/16/01 14:57:56 GMT |
|
Neo-Tribal, I like Tim Lively's site over Tai Goo's for the very reason that there is less philosophical-artistic BS. The real value of the NT movement is to show folk that they *don't* need to spend big bucks or a lot of time scrounging smithing equipment. A person ought to be able to start one Saturday morning and be forging that afternoon with minimal outlay. I try to remember this and show new MOBsters some NT tricks so they don't get hung up on the whole "london pattern anvil" thing---the skill is in the hands and head *NOT* the tools! I'd rather they spend the money attending Quad-State or buying good books than tie it up in a top dollar anvil. (I do my best to buy up all the ones I see to help encourage this!) For my Y1K demo (Dublin OH, Irish Fest) I use a simple cube of steel (based on a romano-celtic one dug up at Bath). I'd use a cube of WI if I had one that size...BTW most likely the bridge stuff is not wrought iron but may be a clean simple steel and so much more like the "pure iron" than todays garbage can stew iron. WI was much more likely to be used near the sea for it's corrosion resistance, the extra expense wasn't paid for interior bridges as much (before salting the roads you know...) My lateset piece was the tank from a 1929 water tower---the supports were mild steel. From "Formulas for Profit", Bennett, copyright 1939, 4th printing "To identify iron from steel" "Mix 5 drops nitric acid with 10 drops H2O", (remember acid into water *NEVER* water into acid),"File a clean spot and place a drop on it. If it is steel it will turn black immediatly. If it is wrought iron or malleable iron it will stay bright for a considerable length of time." Now a *question*! Picked up a forged anvil originally 150# (marked in CWT) Face was *mint*, horn was good shape, some ostragoth had broken off the heel---along a face plate seam I'd bet since the break is pretty clean, still about 120+# for $40 and a great face. Now the questions the side seems to say POWE--? I glance through A&A and didn't see an english anvil with those markings---I'm trying to figure out how much they mispelled my name on it---any ideas? Thomas POWErs |
| Thomas Powers <thomas_powers at my-deja.com> - Monday, 07/16/01 15:18:08 GMT |
|
Guru. sure thing but this ones a materials paid for plus dinner for two at the house. I'll mail you the 10% right after I've finished, might be cold by the time you get it though... but I will get you a design mention in the news letter that they send out |
| Mark Parkinson <mparkinson2 at home.com> - Monday, 07/16/01 16:34:03 GMT |
|
Chris, That's the Drill Doctor that I was talking about. Wife and Daughter bought me one for Christmas. I used it once, and took it to Lowes and got the largest one. The make it in three sizes. Homeowner 250 Handy 500 750 Professional Buy the 750, it'l sharpen up to 3/4" bits. It also has a provision for sharpening split point bits without losing the split point. Read the instructions carefully and follow them. You'll be glad you did. The sharpening surface is a diamond impregnated wheel. Can be replaced when worn out for about $20 IIRC. |
| Paw Paw Wilson <pawpaw at paw-paws-forge.com> - Monday, 07/16/01 16:36:32 GMT |
|
Chris, in addition to what has been said, I recommend getting cobalt steel drill bits for heavy or repetitive drilling. They stay sharp MUCH longer. I do the same as the Guru with small pilot drills. Buying them a 10 pack or two at a time is much less expensive. I still freehand sharpen my drill bits, and you get pretty good at it after sharpening a hundred or so and ruining a few. But I DO aspire to getting a good sharpener. Especially for the cobalt bits. I saw a video at my local supplier for the drill doctor and it looked like a good way to go. Paw Paw, Thanks for the tip to get the 750. It's easy to take away the relief angle when sharpening by hand. That may be one reason your drills don't cut well? Proper relief angle for the material is important. One easy way to check for a rusted air tank is to tap around on the bottom of the tank with a hammer where condensate would collect. If it sounds any different on the bottom than elsewhere, you can bet there is at least "some" corrosion inside. Do this with no pressure on the tank. |
| Tony <tca_b at mmmilwpc.com> - Monday, 07/16/01 17:05:53 GMT |
|
Standing/Sitting at Power Hammer: I recall seeing a power hammer for an axe forging operation with a bicycle seat at a little below standing height. The advantage of this would be to keep the body and legs somewhat vertical. Depending upon the height of the anvil, too low a seat would put your face too near the action and leave you with a lap full of hot scale and/or flux. Even with a heavy leather apron a good chunk of hot metal spalled off the work could leave you with far too much of a warm glowing feeling in you lap. In the Eastern traditions the work area usually is set lower than certain portions of the anatomy. (Face and eyes, of course. ;) Downright nice on the banks of the Potomac. Visit your National Parks: www.nps.gov Come have a row with us: www.wam.umd.edu/~eowyn/Longship/ |
| Bruce Blackistone (ATLI) <asylum at us.HSAnet.net> - Monday, 07/16/01 19:45:23 GMT |
|
I DON'T BELIEVE IT!!!!!!!!!!!!!!!!!!!!!!! Turquoise Borders in the ol' corral. It's been months since this old bear showed his unusual wit and veracity. And what was the bait that drew this recluse out of his cave....a question about the color of a forge fan. AMAZING. Watch out he don't bite you. Hope he sticks around, Larry |
| L.Sundstrom - Monday, 07/16/01 19:47:47 GMT |
|
10%: Mark, Just order me a bottle of white wine. ;) |
| - guru <guru at anvilfire.com> - Monday, 07/16/01 20:02:58 GMT |
|
Cast vs. Forged: The 7th in the anvil series Castings or Forgings in the World of Anvils by Russell Jaqua is now posted. |
| - guru <guru at anvilfire.com> - Monday, 07/16/01 20:18:14 GMT |
|
I am guessing there is no lazy way to do this but, is there anything that will breakdown cement or stone mortar that doesn't involve heavy duty hammers and chiseling? I figure it is only about 1" or so above stone and brick that I am getting rid of as well. (in case you were wondering this is preparation for rebuilding a cheap throw-together forge that my dad made back in the 50's). Danke. |
| Escher <tbarnett at isd.net> - Monday, 07/16/01 21:08:53 GMT |
|
Escher: Muriatic acid will break down the cement bonds in the mortar. Bitte. |
| Tony <tca_b at mmmilwpc.com> - Monday, 07/16/01 21:30:18 GMT |
|
Neo Tribal...6 or 7 years ago I started with a gear from a shrimp boat winch (4"X 21")for an anvil. I'm guessing around 90 lb. I had an old woodburning stove that I lined with firebrick, ran some pipe underneath, used a yard blower, hair dryer and bathroom vent fan for a blower. Point is, its easy to get started with whatever is on hand or can be scavenged or found for free or minimal cost. Eventually I found a real anvil bought a gas forge and began building a shop to contain the tools I acquired. It dosent happen overnight, but that makeshift anvil (gear) and forge got me started. Now I cant stop (grin). |
| R. Guess <RanDGuess at aol.com> - Monday, 07/16/01 22:18:05 GMT |
|
Brick or stone mortar: There is a difference but neither one like heat. Be sure to wear a face shield! |
| - guru <guru at anvilfire.com> - Monday, 07/16/01 22:55:26 GMT |
|
Don't know about sitting at the power hammer, but may be an interesting idea for those of us with injured backs. In the meantime I'm still learning about the hammer by standing, and the honeymoon is far from over. One thing that does pleague me is that I'm left handed, and have to stand off to the right side of the hammer almost in line with the toggle arms. Were left-handed models ever made?? |
| robert hensarling <rhrocker at hilconet.com> - Monday, 07/16/01 23:03:54 GMT |
|
Air compressor tanks. Tim, thanks for the cost research. And you get a new tank, compressor and motor in the process. Tony, Tank must be empty when this is done. Pressure on a tank, with a fault, being whacked with a hammer is not a good idea. Will drain off the air, and "ring" the tank tonight. |
| Conner - Monday, 07/16/01 23:06:59 GMT |
|
Sitting down at work. Buddy of mine in England works in a shop where they have a tractor seat suspended from the ceiling. Has a heavy chain that it hangs on. Allows them to move back when drawing out, or swing forward to do tool work. Height is adjustable to allow different workers to use it. Makes a lot of sense to me. |
| Paw Paw Wilson <pawpaw at paw-paws-forge.com> - Monday, 07/16/01 23:14:27 GMT |
|
I visited Ron Reils web site; recently down loaded The Best of the Forge 1,2&3 Someone had an artical "Cheap Band Saw" said somthing about using a bi metal blade & gave some directons or prints on a coolant/ recovery system for a cheap band saw That link is now dead I'm looking for a copie or a new link anyone seen this or have a copie? |
| Charels <gromlfk at valunet.com> - Monday, 07/16/01 23:19:49 GMT |
|
Pawpaw. Like a playground swing. The striker is sitting in it, right? |
| Frank Turley <nudahonga at qwest.net> - Monday, 07/16/01 23:41:42 GMT |
|
Frank, Yep. Although there's only one smith involved. The power hammer is doing the striking. (grin) |
| Paw Paw Wilson <pawpaw at paw-paws-forge.com> - Tuesday, 07/17/01 00:06:11 GMT |
|
Right Frank: Before formal power hammers, the striker would sit on the swing and all the apprentices would push him in a steady rhythm while the iron was heating in the forge. When adaquate kenetic energy was applied to the amplitude of the striker's swing and the heat was achieved, the iron was held fast against the side of the traditional square anvil and the striker would hit it on the way by. Then the master smith would quickly reposition the hot work and tooling on the opposite side of the anvil for the return pass. This was repeated till the swing and the heat were lost, and the iron went back into the forge. This is the real reason that the london pattern anvil was only developed when the waterwheel driven hammer came into fashon. The obstruction of horn and heal were distained as modern frippery for so long. Hence the old blacksmithing expression "in the swing of things" and "rock on bro". Apprentices had to wait many years for their turn on the swing, and journeymen were known as "swingers" It is wonderful to be able to contribute to the passing of the ancient methods of our art on to younger smiths. |
| Pete F - Tuesday, 07/17/01 01:08:32 GMT |
|
Pete F, Apparently, When the "swinger" missed and hit the anvil by mistake was the origin of "Chip off the old Block" |
| Tim Cisneros <blacksmith at theforgeworks.com> - Tuesday, 07/17/01 01:37:01 GMT |
|
Pete, You're sick! (LOL) And Tim, you're worse! (Still LOL) |
| Paw Paw Wilson <pawpaw at paw-paws-forge.com> - Tuesday, 07/17/01 01:51:24 GMT |
|
Right and left handed hammers: Robert, the old machines varied some but like most things you guys from the "sinister" side were and still are not supported very well. Little Giants and hammers with dies set at an angle are indeed right handed if you insist on holding the work with your right hand. However, when forging you hold the work in your left hand. When I was doing lots of sculture I realized that my left hand did the skillful guiding of the chisle while the gross striking was done with the right hand. The important thing here is that while the right hand was doing the gross striking it was also PROTECTING the left hand from getting smashed to pieces (most of this time). When I taught my left handed son to forge he automaticaly did it the way I do. And he has always used a hammer right handed since. The fact that both hands have equal tasks in many crafts means that right and left handedness have little meaning IF you learn to work with both hands. In the case of the Little Giant it might be easier for a lefty to work in front when using hand held tooling than a righty. But the more I think about it the more I think it is the same. Other hammers like Bradleys, Champions and Fairbanks can be operated from either side of the hammer and the operators are equaly in line with the (much shorter) toggle links. Nazel air hammers could be ordered with the dies set at any one of 4 different alignments, two perpendicular and two diagonal. Dies on a Bull hammer can be rotated in similar increments and I am not sure of the other modern manufacturers. |
| - guru <guru at anvilfire.com> - Tuesday, 07/17/01 04:36:55 GMT |
|
OH!!!!!!! MAN!!!! Great....JUST GREAT.... OK.... I got a bigger anvil....I made a better forge....I built a better shop to store all of this scrap I have been accumulating...and now...NOW I HAVE TO BUILD A SWING? |
| Keith <kbarker1 at stny.rr.com> - Tuesday, 07/17/01 05:02:13 GMT |
|
LOL.... |
| Keith <kbarker1 at stny.rr.com> - Tuesday, 07/17/01 05:03:12 GMT |
|
Like they used to say "Swing dat hammah!" |
| Pete F - Tuesday, 07/17/01 06:36:23 GMT |
|
I am a rank beginner at blacksmithing but wish to know more and become involved as a hobby. At the moment I make axes for competitive wood chopping, the blanks are forged here in Australia and eventually I would like to be able to make my own from start to finish. I have a design engineering background and have recently patented a new axe design that is creating interest worldwide. My question is this: I have heard that railway car springs are suitable for forging into an axe blade. Do you agree with this or are there some other scrap, high carbon steels you could point me to. Bearing in mind that I come from Australia, it will be hard for me to source things that are available to you every day, but I am willing to put in the effort. For starters I propose to make a blade section and then weld it onto an existing eye of an old head. I would appreciate any information at all. Ragards, Ian S. |
| Ian Stewart <ian.stewart at rfs.nsw.gov.au> - Tuesday, 07/17/01 11:51:45 GMT |
|
Ian: I had a teacher who only used old worn out files for blades for his tomahawks. Presumeably they will all be high carbon, assuming they were a worthless file to begin with. |
| Escher <tbarnett at isd.net> - Tuesday, 07/17/01 12:16:08 GMT |
|
Axes: Ian, "steeling" a blade by inserting high carbon steel edge into a low carbon (or wrought iron) body is a technique left over from when good steel was rare and very expensive. Many reproduction pieces are made this way, particularly axes since the easy way to make them is to wrap the steel around a mandrel and forge weld it. A lot depends on the quality of your forge weld in this technique. As soon as good steel became available in quantity the manufacturing process changed to making tools out of solid steel rather than piecing them. And even axe eyes are now punched. Almost all springs are high carbon steel ranging from 75 to 95 points carbon. However, many are also alloy steels. The exact steel for any given part may change depending on the manufacturer's wims, availability, budget. This means that when you make something from ANY scrap steel YOU become the metalurgist and must determine if the particular piece is suitable for your application. This is done by trial and error testing. If I were manufacturing anything to be sold that depended on its steel specification I would start with new steel of known parentage. This is especially true of any competitive product. If the blanks you are using now are forged in OZ then the steel they are made from must be available. I know there is a lot of industry down there and at least the basic tool steels should be available. I did a simple search on www.yellowpages.com.au and came up with (among a dozen others): Assab Steels Lot 1 Eames St Albury, NSW, 2640 Australia (02) 6041 3399 They carry tool steels and will take any type of payment including credit cards. If you want to protect your design patent then you had better think big and stop fooling with ideas of using scrap. The only protection a design patent has is for the maker to make more, better, faster and cheaper than upstart competition. |
| - guru <guru at anvilfire.com> - Tuesday, 07/17/01 14:22:29 GMT |
|
Blackistone and Others: Has anyone purchased a tome, titled TECHNIQUES OF MEDIEVAL ARMOUR REPRODUCTION from medievalrepro.com? The price tag is $79.95. Worthwhile? |
| Frank Turley <nudahonga at qwest.net> - Tuesday, 07/17/01 14:44:00 GMT |
|
Guru, I found an old knife,that was made in Mexico.It has etching on the blade,and it looks like it was plated with something,does not look like chrome. Question-When did people start using plateing.I'm trying to find out how old this knife is. |
| Bill C. <kaceycamp at aol.com> - Tuesday, 07/17/01 15:21:53 GMT |
|
Electro-Plating: Bill, Plating by electric process has been around for a long time. I suspect that it was done with batteries (an un-plating process) in the 1700's but I know nickle plate became very common in the 1880's along with commercialy available electricity. Prior to that time plating by hot dip process dated to ancient times as our discussion last week of tinning showed. Although using batteries for industrial process sounds primitive to us today it was more common than you would think. In the 1700's Benjamin Franklin not only played with lightening but also the "humane" slaughter of cattle by electric current produced with batteries. |
| - guru <guru at anvilfire.com> - Tuesday, 07/17/01 15:44:27 GMT |
|
Comments on Cast vs. Forged Anvils I just read the article by Russel Jaqua with great interest. I am not sure that I fully agree with everything he says (which is not to say that i wouldn't buy one of his anvils if i had the money). Before I start with my comments i should say that i am a metallurgist (albeit one who just graduated). In my current job great attention is given to the inclusion content of steels. My company uses forged parts and has found that the greater the reduction ratio-from intial ingot to finished part-the less harmful the inclusions becuase they break up during mechanical working. So, if the anvil is made from a bar with enough reduction, the inclusions will be very small individual particles rather than the detrimental stringers mentioned in the article. The second comment has to do with the area of the anvil that is being used. Certainly when working over the center there will be little or no difference between a casting and a forging. However, the horn and tail of a forged anvil will be more resistant to breakage than those on a cast anvil. Certainly, if abused, any anvil will break. If you study cast anvils, you will notice that most of them have tails that are thicker than the forged anvils of similar size. This is because of the strength issue. Lastly, as most of you probably know, castings are almost always more economical to produce, so even if the casting isn't quite as good as a forging, castings will often replace forgings. (This is one big reason why only one company makes a forged anvil). On an idustrial level, these two industries are always competing with one another. To get a well rounded view of the merits of casting vs. forging literature from both idustries should be consulted. |
| Patrick - Tuesday, 07/17/01 16:13:31 GMT |
|
Anvil Shapes: Patrick, Thank you for your comments. However, many cast anvils have thin heals. British cast anvils are very thick but my Swedish anvils are no different than forged anvil patterns and many American made cast anvils have a thin heal also. Some of the finest forged anvils have heavy horns and heals or douple horns. The old German pattern double horn anvils have very short steep horns that are almost indestructable. The evidence provided by old anvils doesn't help. Most broken anvils (heals and horns) are old wrought iron body anvils that the wrought was poorly amalgamated scrap OR where welds failed. Generaly the breaks do not even look like metalic fracture surfaces but that of the balled up scrap or the forge weld prep. On the other hand, when the corner is chipped on these anvils it can run no farther than the steel plate. I've seen a LOT of these old anvils and the chipping is always less severe than on solid steel anvils. But anvils are no longer manufactured by this method and it is unlikely that they ever will be. A great part of the problem we have as post-industrial age blacksmiths is that we look at tools and machines that are a hundred years old and compare them to new. Many of the tools such as anvils have taken generations of abuse before they go to us. Machines like Nazel air hammers were made in an era where manufacturers competed to see who could make the absolute BEST machine possible. Today economic factors are most often what manufacturers must base their decisions just as we as consumers do. |
| - guru <guru at anvilfire.com> - Tuesday, 07/17/01 16:59:19 GMT |
|
TECHNIQUES OF MEDIEVAL ARMOUR REPRODUCTION - I personally enjoyed the book. It is a bit of a mish-mash in that it bounces between actually armour from medieval era, and then considerations made for reproductions. There are some good sections on basic hammer technique (Although I'm sure you don't need that knowledge Mr. Turley). It is good in that there are no good books on modern armour construction. (It can be had for closer to the $60US Mark). I would recommend checking out barnes and noble or other major booksellers since they are all able to get it. For more information on the book and the other books that Mr. Brian Price has planned, check out www.armourarchive.org. Overall - I would say the book is of average value for learning, but it above average due to the rarity of information in this area. |
| Scott Quesnelle <squesnel at legato.com> - Tuesday, 07/17/01 17:01:42 GMT |
|
Recently there was a discussion of galvinic corrosion, and in particular the use of iron and copper in mixed metal applications. What can be done to prevent galvanic corrosion in situations where the contrast in color beteen steel and copper is desired? Are there different solutions for indoor and outdoor applications? Patrick |
| Patrick - Tuesday, 07/17/01 19:05:49 GMT |
|
For cutting small precise things with detailed edges out of 20-gauge up to 1/4-inch metal, which is better for accuracy, etc.--a Henrob torch or a plasma cutter? Thanks. |
| Thomas <lava at mindspring.com> - Tuesday, 07/17/01 20:04:18 GMT |
|
I have seen good results with both but I think that a plasma cutter leaves a better finish and a cleaner cut (a good one not a home unit).. the best finish's I have seen came from a water jet cutter and a wire EDM ..but both of those are way out of most of our price ranges if you go with the plasma cutter get the best you can afford .. it will pay for it's self in the end. MP |
| MP <swordmatt at yahoo.com> - Tuesday, 07/17/01 20:23:22 GMT |
|
Patrick, as far as I know, the only way to stop galvanic corrosion is to interrupt the electrical path between the two dissimilar metals. And as far as I'm concerned, the only way to do that is to not have contact between the two metals AND not have an electrolyte between the two that will carry the current. In other words, the two metals must not be in physical contact and the joint must be dry. Even if you have an insulating washer/bushing or a perfect paint film, you still must not have an electrolyte such as water that can let the current flow around the barrier. There is no such thing as a perfect paint film barrier. So, in reality, you generally put in a non absorbing barrier such as some plastics and live with it. I think Mylar is a good choice for plastic barrier. Even atmospheric moisture can act as an electrolyte. In most cases, interior work will be dryer, so it will last longer. For critical applications, there are active(electrical current) and passive(sacrificial anodes) cathodic protection systems. Corrosion protection is quite a science. I agree with the cast vs. forged comments. A good forging being much better/stronger than a good casting. Sounds like Nimba has done a very good with a cast anvil though. I wish I could justify buying the Gladiator! For now, I'm happy with my home built. Ian, for what it's worth, I've chopped and split a lot of wood by hand. Not competitively unless you count competing against a hydraulic splitter. But If I was competing, I would want a furnace heat treated tool steel blade. I'd be interested in seeing your design. Swinging strikers..... You guys kill me! Grin. |
| Tony <tca_b at mmmilwpc.com> - Tuesday, 07/17/01 20:26:15 GMT |
|
Accuracy: Thomas, With hand held torches the "accuracy" is up to the user. I can usualy cut heavy plate freehand to +/- 1/16" with a Victor. But I have a Hob-O for circles and a rig to put on a lathe for straight lines. If you need accurate cuts then go to a commercial service with a CAD DFX file and they will cut one or a thousand parts to accuracies of +/-.005" in thin material (up to about 1/2" (13mm) plate) and +/-.015 up to about 2" (50mm). Over that the machine torches will keep about +/-.035" (1mm) up to very thick plate. Most service will not garantee this kind of accuracy but that is what is actually produced. For fineness of cut lasers are best, then plasma then other methods. The Henrob torch produces a very fine cut and is better than some plasma systems. But freehand accuracy is a different thing. |
| - guru <guru at anvilfire.com> - Tuesday, 07/17/01 20:32:53 GMT |
|
Bi-Metalic Corrosion: I couldn't have said it better than Tony. I do have a few thinks to say about "clear" coatings. Many substances absorb water including plastics. You would think polycarbonate (Lexan) would be a great moisture barrier. You would be wrong. Acrylic (plexiglas) IS, polycarbonate IS NOT. A few years ago we tried blowing bubble windows out of Lexan. On heating the plastic it developed thousands of little (and some no so little) bubbles. We had used acrylic in the past and it had worked fine. We called the manufacturer. . . "Water absorption" they said. You have to slowly dry the plastic over a period of days and then hold it at 350°F prior to use. Then you put the (hot) plastic in the form, heat it, and form it. We left pieces in an oven set at 350°F for a several days and still got bubbles. . . I took a week of cooking to get a clear piece. Nylon absorbs oil and water and expands when it does so. If you varnish steel it will rust under the varnish (home brew oil/wax finishes are varnish). A lot of folks make bi-metalic stuff and just ignore the problems. But if you care how long your work is going to last or how much maintenance your customers will have to put up with then you consider bimetalic corrosion problems. |
| - guru <guru at anvilfire.com> - Tuesday, 07/17/01 21:39:45 GMT |
|
I am new to blacksmithing, and want to build a better firepot than a brake drum. I was given a pieve of oxygen bottle, and a rough drawing of a firepot made from it. The section is 10" id x 16 inches long. it must be split lengthwise and have both ends beveled in at 45 degrees. Is there a formula to get the measurements to make the 45 degree cuts, or can I just use a framing square? Thankyou for your help. |
| Joseph Shreve <jpshreve at eatel.net> - Wednesday, 07/18/01 01:41:29 GMT |
|
Joseph, Just use the framing square. You're probably already familiar with it, or you wouldn't have thought of it. Or, if you have one, you can use a speed square the same way. |
| Paw Paw Wilson <pawpaw at paw-paws-forge.com> - Wednesday, 07/18/01 01:59:22 GMT |
|
45° A triangle with a right angle and two 45° angles has two equal sides and the third (hypotenouse) is the square root of two times the length of the other sides. Converting a cylinder to a truncated pyramid sounds like a lot of work to me. There are a lot better things you can do with that cylinder base (see our Armory page, The Tools). |
| - guru <guru at anvilfire.com> - Wednesday, 07/18/01 03:06:16 GMT |
|
This is most likely a question that has been asked before but I am very new to blacksmithing(my forge isn't even together yet),but I have been more on the cheap side as of late and have scrounged together a nice supply of iron/steel. but I have no clue as to carbon content so I can know what it could be used for. Does anyone out there happen to know a simple or realativly simple way to tell what kind it is. And also if I am not to much of a pest I have seen mention on some site that you are supposed to do something to your hammer if it is new before you use it. The exact phrase was "Dressing the face". Thank you all in advance for humoring a newbie. |
| Anthony Mundy <mmundy at nclink.net> - Wednesday, 07/18/01 04:52:37 GMT |
|
Anthony let me humor a nubie a just little too much by repeating the advice that the repusse' master Nahum Hersom gave in response to the same question. First, you have to carefully remove the old dress. Then obtain a suitable material and carefully sew a new little dress for the hammer and put it on neatly. Remarkably, he was able to keep a straight face. Re the Henrob and cutting. I think that the Henrob is over rated as a cutting tool. For cutting sheet and light plate steel, a conventional plate cutting tip with the single preheat is as good if not better and much less expensive. Some mfg, like Smith torches, make a drag-type plate cutting tip that is fast and almost as clean as plasma,if you get all the parameters just right.. probably the best deal for your buck. If you can afford a good plasma cutter, all the better.My plasma unit is old and funky and I prefer the torch for steel cutting.Nonferrus goes to the plasma cutter. |
| Pete F - Wednesday, 07/18/01 06:45:51 GMT |
|
Dressing the Face: First you remove the old makup. . . Sorry, Pete's story was catching. . . Anthony, it means grinding and polishing. As-Is most commercial hammers are so-so. Used ones are usualy beat up. Good metal work should not show hammer marks and if called for the marks should be shooth and clean. New (non-custom) hammers tend to have roughly dressed faces and peins. Metalworking hammers should not have sharp corners and the face should have a gentle arc blending into the edge radi. Modern ball piens tend to have terribly formed ball ends that are not nearly the smooth spherical shape they should be. The final finish depends on the class of work you do. Silversmiths buff and polish their hammer faces to a mirror finish. If your work is going to be polished or is in soft metal this is always the recommended finish. Blacksmiths hammers need not be finished that finely but should be smooth and free of nicks and defects. Smiths that work with a hammer every day often taper the face from right to left or front to back depending on their set way of working and handling the hammer. But until you have worn out several hammers (they DO wear out) you are not (and may never be) ready for this and it will be best to keep symetrical faces. Smiths will collect dozens of hammers in different styles and weights but they will use the same hammer for 99% or more of all their forging work. Everything from forging heavy 1" (25mm) stock to wire fine scrolls. The hammer is an extension of your hand and your contact with the work. When you use that one right hammer your touch does not change. There is a maximum best weight that smiths work up to and that is the hammer that they will use for everything. |
| - guru <guru at anvilfire.com> - Wednesday, 07/18/01 11:35:04 GMT |
|
Iron/Steel Testing: Anthony, The "spark test" is about the only one and that will tell you roughly what the carbon content is. Using a grinder with a vitreous (hard) wheel you grind the steel in low light. You observe the pattern of the sparks. Wrought iron makes long sparks with bursts toward the end and no branching. Low carbon steel makes long sparks with few branches and bursts. Then the higher the carbon the more branches and shorter the sparks. High carbon steel makes almost fuzzy looking sparks. Stainless and cast iron make almost no sparks or intermitent sparks. The spark test varies greatly with the type and speed of wheel as well as the way applied to the sample. So it is best to test the grinder with known samples so you know what to look for. With practice there are some alloying ingrediants that can be detected by spark test but beyond a few it is inconclusive except for carbon content. |
| - guru <guru at anvilfire.com> - Wednesday, 07/18/01 11:43:49 GMT |
|
Anthony, There is a chart available that demonstrates the differences that the guru described. I have a scanned copy and can email it to you if you like. It's not perfect, but it does show some of the differences. Jock, should we post that chart somewhere, or do you already have it posted? |
| Paw Paw Wilson <pawpaw at paw-paws-forge.com> - Wednesday, 07/18/01 14:31:43 GMT |
|
Hammers wearing out: When is a hammer cosidered worn out?I�ve worn a groove into the face of my favourite hammer, but no mushroming or cracks. After I dressed it it feels a little "dead", but I might be imagining things. |
| Olle Andersson <utgaardaolle at ebox.tninet.se> - Wednesday, 07/18/01 17:47:55 GMT |
|
has anyone tried using a front hydrolic brake caliper as a "one hand" bench vise? just curious if it would work. |
| Myke <stunti at usa.net> - Wednesday, 07/18/01 22:11:06 GMT |
|
Disk Brake Cylinder: Myke, It would seem to be a good idea but there is no return mechanism in disk brakes. The cylinder doesn't retract, imperfections in the disk push it off so it doesn't drag. Ironicaly the reason you sometimes get a continous squeek from disk brakes is that the disk and wheel bearings are too good! On top of not retracking they take a LOT of effort to retract. Old rusted ones don't even bounce of the disk and can cause excessice wear but what usualy happens is that they won't move at all so you have a very hard brake pedle and no brakes. Small double acting air cylinders can be found for this purpose. If you spring load the return you don't need a fancy control valve but you DO need a two way valve to exhaust the pressurized side of the cylinder. |
| - guru <guru at anvilfire.com> - Wednesday, 07/18/01 22:48:27 GMT |
|
thank you that helps alot see no waisted time. |
| Myke <stunti at usa.net> - Wednesday, 07/18/01 23:49:11 GMT |
|
I am going to Toronto, Canada this weekend. Are there any blacksmiths in the area that I might be able to visit? Any hammer-ins going on? I know this is short notice but please let me know. I have the name of Charles Sutton. Do you know where he is located? An address? Thanks, Betsy |
| Betsy <gardenforge at ee.net> - Thursday, 07/19/01 02:12:23 GMT |
|
Hi guru,,,don't want to be a smarty pants, just wanted to clear something up in your post to Meyle. You're correct that a brake caliper would make a p*** poor vice, but the piston in a disc brake caliper does retract slightly by itself when hydraulic pressure is released. It's not necessary for the rotor to be turning, the retraction is done by the main seal between the piston and the body. This seal is square cut, that allows the piston to slide out as the pad wears, but pulls it back slightly each time hydraulic pressure is released. When the vehicle is in daily operation, and rust builds up from a torn dust boot or water logged fluid, what usually happens is the piston will stop retracting long before it stops moving out in response to the hydraulic pressure. The brakes will often times feel normal, but the affected pad will wear much faster than the others. And the squeal you get from disc brakes doesn't come from the pad rubbing on the rotor, but from the back of the pad rubbing against the piston. Thats why most disc brake squeal remedies work by isolating the pad back from the piston, either with chemical compounds or coated shims. |
| karma-kanic <cimport at swbell> - Thursday, 07/19/01 02:26:31 GMT |
|
You got me K-K. Blue acrylic artist's paint is what is in the tube for some brake pad kits. OEM Pinto pads had something like vinyl material glued to the backs. Most systems use springs but as the pads wear into the calipers the parts don't float the way they should. But the squeel IS generated at the pad/disk interface. Dampening fixes it. So does knocking the corners off the pads with a file (for a while). But the engineers don't know the cause well enough to design around it. I've had vehicles I put 400,000 miles on that the brakes never squeeled but know others with the same model that had cronic problems from when nearly new. In any case, they make a lousy cylinder for anything other than what they are designed for. |
| - guru <guru at anvilfire.com> - Thursday, 07/19/01 03:22:23 GMT |
|
guru,,,I always wondered what that blue gunk was made of,,, |
| karma-kanic <cimport at swbell> - Thursday, 07/19/01 04:38:32 GMT |
|
I am interested in learning raising techiniques. As I have mastered sinking. From what I am trying to learn how to do is make a replica of a Turkish bathing bowl. Any help as to what tools are needed,etc. as to how to start the raise would be appreciated. |
| Marcus <vegenator at aol.com> - Thursday, 07/19/01 05:33:32 GMT |
|
Myke, pneumatic bench vise. I recently bought a used Haberle cold cut saw with pneumatic vises on it. They are incredibly strong. However, you have to be VERY careful with them. They are actuated by a limit switch when the arm of the saw is brought down to cut and have a returning (opening) mechanism operated or actuated by an exhaust when the arm of the saw is returned. I'm not sure of the exact design but it would make a superior one handed vise. A foot valve could also be used to actuate the vise. I added a hand operated valve on the side so I could put a piece of stock in the saw and mark and measure without the vise actuating. I did not put a foot valve on because you could inadvertently step on the foot valve and either open or close the vise accidently. Would make an interesting project.... when I have the spare time....TC |
| Tim Cisneros <blacksmith at theforgeworks.com> - Thursday, 07/19/01 13:46:05 GMT |
|
Here at the Cracked Anvil Center for Analysis, major breakthroughs are in sight, perhaps the most important developments in smithing since the invention of beer. Working in a fully-equipped secret mountain retreat (think of the Bat Cave, or that loft that Rutger Hauer lived in when he was playing the hit man who kept the tommy gun in the baby seat), aided by highly paid CACA researchers, I in recent months have launched a monumental study of some of the most crucial questions confronting our craft as we know it today. Soon I expect to present full documented and footnoted answers to such hitherto baffling enigmas as: Why, why, as soon as your helmet's down, does the phone always ring? Why does the arc spatter always, always, hit that bolt you are going to have to turn next? The one with the nut on it that now you have to dress the bolt to get off because you forgot to spray with the anti-spatter? Why, as soon as your hands are good and greasy, do you always, always, have to take a really urgent leak? Why does the glove always, always, have a hole in it right where the iron is hottest? These and other critical questions will be examined as funds permit. Feel free to submit proposals for addtional areas of research. Watch this space. |
| Cracked Anvil <cracked at anvilfire.com> - Thursday, 07/19/01 14:30:30 GMT |
|
Marcus-- Dona Meilach's blacksmithing book, first edition, has a detailed, step-by-step, lavishly illustrated how-to showing the raising of a vessel from a flat sheet. |
| Cracked Anvil <cracked at anvilfire.com> - Thursday, 07/19/01 14:40:20 GMT |
|
Raising: Marcus, Its also in the current edition of Dona's Decorative and Sculptural Ironwork as is was in the first. See our review (Bookshelf off Home page). We also have detailed step by step on raising a helm on our Armoury page. Note that there is a big difference in ferrous and non-ferrous annealing. Steel must be cooled as slow as possible and can be worked hot. Most non-ferous is quenched and worked cold. Both work harden (except gold I think). |
| - guru <guru at anvilfire.com> - Thursday, 07/19/01 15:17:40 GMT |
|
Cracked, and I had been worried that you have been wasting your time over the last several months...or taking it easy. Now, I understand why you have been unheard from until recently. What was the original factory color of the half barrel quench tub? Larry |
| l.sundstrom - Thursday, 07/19/01 15:44:08 GMT |
|
I like your web site. i run across posting all the time in various searches. I have worked in a foundry for over 12 years, and know casting, some welding. I have done home improvement for many years. I have sweated copper joints on 1 inch diameter and smaller copper pipe and fittings. Q: Now for the question. What would be the preferable method for joining copper pipe type "L"? I am installing a new water system for an induction furnace and I will be installing 3" 2.5" and 2" pipe and fittings. I have never worked with type "L" copper pipe or fittings this large. I know how to sweat joints but I am considering brazing or welding for strength. Thanks, Keep up the good work! Kevin |
| Kevin <savurslf2l84me at aol.com> - Thursday, 07/19/01 18:13:50 GMT |
|
Larry-- that's a snap. The original factory color of the half-barrel slake tub depends entirely upon which factory it came from. I, myself, prefer tubs from the Wild Turkey factory, a distillery actually, which start out when full a sort of rich mahogany, but there are those who prefer J.T.S. Brown, and, of course, Heaven Hill is nice, as is Jim Beam. Some researchers believe the J.T.S. Brown molecules lingering in the tub have a harsh effect upon the steel, however, and we are testing here night and day to determine the truth of the situation. |
| Cracked Anvil <cracked at anvilfire.com> - Thursday, 07/19/01 19:28:06 GMT |
|
Ah yes! Jim, Jack, and Jim. Jim Wilson, Jack Daniels, and Jim Beam. Been friends for many years now! (grin) |
| Paw Paw Wilson <pawpaw at paw-paws-forge.com> - Thursday, 07/19/01 20:42:28 GMT |
|
Lem Motlow and George Dickle aint bad either, but I had to stop drinking that sour mash cause it made me break out.....doors, windows. |
| R. Guess <RanDGuess at aol.com> - Thursday, 07/19/01 21:01:01 GMT |
|
Randall, Uh Oh! Gotta leave that stuff alone, then. Jose Quivera does similar things to me. Last time I got rolled, it was HIS fault! |
| Paw Paw Wilson <pawpaw at paw-paws-forge.com> - Thursday, 07/19/01 21:19:03 GMT |
|
Copper Pipe: Kevin, Brazing CAN be used but I have seen silver solder used on copper for high temperature high strength applications. The type solder used is high copper and has a brassy look to it. It is higher temperature than soft solder or straight silver but much lower temperature than brass. Brazing gets close enough to the melting point of the copper that it is more like welding than the typical operation. Welding copper is VERY tricky due to the fact that it conducts heat very well and oxidizes quickly. I'd go with silver solder. But the cost may not be in the budget. Does the equipment manufacturer hav anything to say about it? |
| - guru <guru at anvilfire.com> - Thursday, 07/19/01 22:07:23 GMT |
|
I make my own knives the old fashion way but I also get blades that are already tempered. I have a bunch of untempered (raw) blades and I am trying to get the process to temper my blades myself. I am looking for the best way to temper a blade as to the capabilities of an athome knive maker. |
| James <SUB3forBOOKING at AOL.com> - Thursday, 07/19/01 23:48:53 GMT |
|
I make my own knives the old fashion way but I also get blades that are already tempered. I have a bunch of untempered (raw) blades and I am trying to get the process to temper my blades myself. I am looking for the best way to temper a blade as to the capabilities of an athome knive maker. |
| James <SUB3forBOOKING at AOL.com> - Thursday, 07/19/01 23:49:53 GMT |
|
I (my job) has an old Peck, Stow, and Wilkerson sheet metal brake. It is warped, probably from an overload. I work in a rental store, and we actually rented this brake, after our sheet metal worker passed on and we had no real use for it any longer. However, I would like to use it occassionally and so I wonder where I might find instructions on trying to straighten a brake. It is an 8 foot, 16 ga. Model 1002 (maybe 1007) I woul appreciate any advice. Bent-out-of-shape, Glenn |
| Glenn <Funder_5 at msn.com> - Friday, 07/20/01 00:13:01 GMT |
|
Hello Guru, I just tried to order from the online store and it will not go thru, is the problem on your side or mine. |
| Myke <stunti at usa.net> - Friday, 07/20/01 00:17:53 GMT |
|
Store: Myke, The system often gets overloaded in the evening. Try again later. :( Be sure everything in your address is correct and that you enter an e-mail address. Being an on-line system it demands a valid e-mail. |
| - guru <guru at anvilfire.com> - Friday, 07/20/01 00:42:49 GMT |
|
Thanks will do |
| Myke <stunti#usa.net> - Friday, 07/20/01 00:48:14 GMT |
|
Hey Guru, I have had an interest in Smithing for some time now and I'm leaning towards knifemaking.I've yet to get started. I feel as if I should have things in place before I begin and that, of course, would include tooling up for it. I'm having a great time looking for the tools necessary to get started and have already realized the advantages of a forging hammer. I resently sent away for a set of plans for a hammer from the ABANA and found Larry Zoellers'Web Site,who has taken the plans and reduced the size of the ABANA hammer to a 35# unit that he claimes will run on a 115V compressor. The hammer should fit quite nicely in my shop(garage!). Last night on the Anvilfire sight I took note of the hammers that were put together with old car parts(very cool stuff!). While looking thru the photos I realized that they run on some pretty small motors. So now I say to myself"Self,why not run the modified hammer with an electric motor instead of a damn noisey compressor!" What I'm wondering is weather to use a pulley system OR (the other revalation) to use a direct drive DC gearmotor that runs at 117 RPM and has 232 in.lbs of toque and has only a 1/2HP motor. The East Coast hammer has a flywheel and makes use of 2 shock absorbers. I'm figuring that 1 shock will do it for 35#. Hoping to here your views, Aldo Bruno |
| Aldo Bruno <aldobigbean at aol.com> - Friday, 07/20/01 01:44:51 GMT |
|
"Raw" blades: James, A lot depends on what you mean by "raw". Blanks for stock-removal often come hardened and tempered. If you do not overheat the steel they will be ready to go. Other pieces of material come "annealed" that is dead soft. In that case they need to be fully heat treated. Then there is as-forged and that can be one or more of several conditions, annealed, normalized, hardened, tempered. Often raw forgings are many things. Tempering is just one step in a multi-step process. Some steels require normalizing before hardening. Others do not. Carbon and alloy steels harden and temper one way, stainless steels harden another. Almost every steel has a slightly different requirement as to the exact heats and times. So it is best if you know exactly what kind of steel you are using. If you have a standard designation steel (AISC, SAE, UNS number) then the heat treatment can usualy be looked up in standard references. If the steel is a proprietary specialty type then only the manufacturer or perhaps distributor will have specs. The following is the general process Step one, Normalizing - Heat evenly until about 100°F above the hardening temperature. Then let cool slowly in air. Step two, Heat to Harden - Slowly heat to about 350-400°F then heat to the "upper transformation temperature" (about 1500°F). This is approximately were the steel becomes non-magnetic for 60 to 85 point carbon steel. It is higher for most other carbon steels but will vary in alloy steels. Heavy sections need to soak to be sure the center is hot. Do not overheat the steel and then cool to the hardening temperature. Heat UP to the correct temperature. This is what is known as a rising heat. Step three, Hardening - Quench the steel. Quenching is cooling the steel at a fast enough rate that produces the desired results. Quenchants, the medium used to cool the steel can be brine, water, oil or air, depending on the type of steel. Quench an oil or air hardening steel in brine or cold water and forget using THAT cracked up mess. . . Quenchants should be room temperature or a little warmer but not hot. Air quench requires a little air movement but not a blast of air. Heavy sections of steel are often quenched in a more severe quenchant in order to cool the interior. Step four, Tempering - Immediately reheat the steel to 350°F min or as high as 1300°F (depending on the steel). Tempering reduces the brittleness of the steel by reducing the hardness a little and increasing the toughness a lot. It is also a stress reliever. Let the steel cool in air after tempering. If you repeat the tempering process it is known as "double tempering" and has some benifit on thick or odd shaped sections. Remember, these steps do not apply to stainless steels. There are various methods of testing the temperatures (such as using the non-magnetic point, or temper colors) but none of those realy matter if you don't know what you have. Then you just process the steel by the "seat of your pants" method like smiths have done for millenia. But the problem IS that until recently smiths didn't have to cope with thousands of grades and alloy steel that we have today. So, if you don't know what steel you have then YOU become your own metalurgist and trial and error test until you get it right. Heating the steel to the hardening point often scales the metal so you don't want to harden and temper a finely finished part. You can reduce this problem some by wrapping the part in stainless steel foil and sealing it from air. OR you can do your heating in salt baths (a whole other subject). The equipment needed is a furnace of forge that will reach 1800°F and is big enough for the work. A tank of quenchant, AND if you want to do it right, temperature measurement and control equipment. You can temper in the same furnace that you harden in but many folks use different devices. A kitchen oven will reach 425-500°F and is suitable for tempering many hard edge tools like knives. The most important "equipment" is the knowledge to do what is needed. |
| - guru <guru at anvilfire.com> - Friday, 07/20/01 01:45:44 GMT |
|
EC-JYH: Aldo, the EC-JYH was built with shocks to mostly prove a point. The shocks have great height adjustment and make an easy to build system but the efficiency is lousy. It hits like a creame puff even though it has a 60 pound (~25kg) ram. The simplest and most successful JYH is the "old rusty". Mechanical hammers are generaly MUCH more HP efficient compared to air hammers. The inefficiency of air hammers is typical of all air tools. A 100 pound (45 kg) mechanical hammer will run well on a 2HP motor (3HP for durability) and a 50 pound hammer on 1-1/2HP. The EC-JYH ran on 3/4 HP. We had a second 1/2 HP motor for a total of 1-1/4 HP (yes that works) but the hammer ran too fast and needed to slip the belt to slow it down (by the next day!). The speed problem was related to the shocks. At too fast a speed the shocks "floated" the ram. It never struck. So we had to slow it down (losing power). The hammer has wonderful control but is a little odd compared to most hammers. It has a very hard first blow and then eases off. To cure the lack of power problem I hope to one day add a leaf flat spring between the shocks to give the linkage that extra "over travel" that that makes power hammers hit harder. At the same time I will swap out the large pulley for an even larger one so that both motors can be used. Both these mods have been waiting for me to have time to work on it. I suspect I will build a couple air hammers first and I still have a 350# Bement to setup! |
| - guru <guru at anvilfire.com> - Friday, 07/20/01 02:04:24 GMT |
|
Bent Brake: Glenn, This is usualy the end of the road. . . I'll assume this is one of those "lighter" models with a fabricated steel bending beam (if its CI forget it). The brake will have to be disassembled. If it has a truss tension bar it will have been stretched, saw it in two. Then set the beam on a big press and bend back to shape. To get around the press you can take the beam, chain it to a heavy weld platen (a big cast iron table with holes) OR a very heavy "I" beam (24" x 75# or so) and use a hydraulic jack to bend it back. A 20 ton bottle jack might do it but I would want a 50 ton before starting on this job. Some special supports may need to be made (torched from havy plate). I've straightened many things this way. You have to very carefully sneak up on the "striaght line". After you are done the extra material will need to be cut out of the truss rod and welded back together. If I were doing this for me I would probably over bend the beam a little, then weld two big steel turnbuckles on the truss rod and straighten the beam back out. This would preload the beam. I SUSPECT that they come from the factory that way with the rod welded in place. Normaly the bottom CI platten has a truss rod system that is adjustable. Even though TECHNICALY Cast Iron doesn't bend it does flex a little. Have fun! |
| - guru <guru at anvilfire.com> - Friday, 07/20/01 02:27:03 GMT |
|
Cracked, Thanks for the reply on the half-barrel slacker tub. The reason I asked was because my slaker tub is a square aluminum tank and I was tring to find out what color to paint it to make it round in that Dr.Dempsey says that most blacksmiths use old half-barrel whiskey tubs. Thanks for expending valuable CACA time responding to my question. I will try to advoid J.T.S. brown-molecules until your results are out. Larry |
| l.sundstrom - Friday, 07/20/01 15:22:31 GMT |
|
Glenn-- The magazine Modern Steel Construction's issue of February, 1995 has a detailed article describing heat-straightening of damaged steel, including some really humongous wide flange in highway overpasses. If you can isolate the brake beam and have access to a large rosebud, this might work-- but I'd practice a lot before trying it. The author, R. Richard Avent, P.E., Ph.D., is (or at least was when the piece ran) a porofessor in the Department of Civil and Environmental Engineering at Louisiana State U. He ran experiments on heat-straightening starting in 1985 on pieces large and small, including more than 1,000 bench tests, 20 tests on big stuff and several field repairs to derive his how-to protocol. Heat might well affect the temper ofthe beam,(but, hey, if it were all that hard to start with, then howcum it bent, right? And if the junkyard looks like the next stop anyway, what do you have to lose?) Avent says on this question, "If heating temperatures and jacking forces are controlled, heat straightening does not significantly change the strength characteristics of the material." Academics can be helpful and it might not hurt to call or write him for further detailed advice. I'd definitely try this before scrapping the brake. |
| Cracked Anvil <cracked at anvilfire.com> - Friday, 07/20/01 15:34:48 GMT |
|
I am having trouble soldering elements of a bronze sculpture together. I am using easy silver solder, flux, and have cleaned the areas to be joined quite well. Once I have the bronze glowing and attempt to get the solder to flow into the joint, the solder balls up and falls away. I know the the melting point of the solder I'm using is 1000F and the bronze is 1200F...so I have to be careful not to melt the bronze. Any ideas why the solder is being repelled? Would I be better off using brazing rod? |
| aj <joki at cma-oh.org> - Friday, 07/20/01 18:38:56 GMT |
|
Kevin: Go to your local welding supply and ask for some type of "phos-copper". It will come in packs of 12 or so, 1/8"x1/16" rods. This is the strongest and easiest method of joining copper that I know of. Like a weld with steel, you will fail the copper before the joint. No cleaning or flux is needed. Just loads of heat. I recommend that any one who works in copper to give this material a try. Its pretty good. I've been using this for the copper compressed air lines in my shops for years without a single problem. |
| Pete <Ravnstudio at aol.com> - Friday, 07/20/01 20:33:56 GMT |
|
Guru, I hope I'munderstanding this correctly.For me to run the Zoeller Simple Hammer with a motor and fly wheel I can see that a direct connection would beat the crap out of it so I'm going to need some thing to remove the sudden jolt but still give it the balls to allow the 35# ram to do its job. Am I getting this right.Please understand. I'm a Plumber with a vivid imagination and my wheels are turning a mile a minute on this one.I'd love to get this right the 1st time,although I'm figuring I'm going to have to do a little experimenting |
| Aldo Bruno <aldobigbean at aol.com> - Friday, 07/20/01 21:56:13 GMT |
|
JYH: Aldo, The linkage in a power hammer is rather complicated on a dynamic level. The first thing it must do is raise and lower the ram, the second is compensate for variations in the height of the work and the third is to attempt to increase the length of the stroke of the hammer resulting in higher velocity and more powerful blow. The best linkage invented for this is the spring and toggle linkage invented by Dupont, used on the Fairbanks hammer and rapidly coppied by everyone else. Bradley and a few others replaced the coil springs with rubber cushions. This linkage works by having two arms connected to the ram by two toggles. The two arms are pushed by a spring or elestomer device. Now this is the important part, the two toggles connect the arms to the ram in a nearly straight line. The weight of the ram suspended on this straight line puts a nearly infinite force on the arms and sprig witch cannot support an infinite force so the spring compresses letting the ram down slightly and changing the toggle linkage line to something less than straight and changing the inward force to something much less than infinite. In operation this lets the ram travel 3 or 4 times further than the crank on the drive wheel both UP and DOWN. The linkage does everything in the above discription. There are very few other methods that work. One linkage that works the simplest is the "spring hammer", like the ABA "Old Rusty". Spring helve hammers operate by the flexing of a long leaf spring. They get SOME over travel and increased power but not nearly a much as the toggle linkage. The shock absorber linkage does items one and two but not three. In fact it does the oposite of increasing the stroke and power, shortening the stroke, ruducing the velovity and power. It is a tricky thing to fully understand. |
| - guru <guru at anvilfire.com> - Saturday, 07/21/01 00:05:28 GMT |
|
Brazing soldering problems: aj, Are you using a flux. If the bronze is that hot and not fluxed it will be covered with oxides and there is no way that soldering or brazing will work. Same for the silver solder. Brazing rod works on bronze SOMETIMES but depends on the alloy of both. Generaly you are welding brass with brazing rod (both melting). If the bronze is the wrong type alloy the mix will not be compatible and the result a mess. Flux is required in this case two. Brazing and braze welding is done with borax flux. Soldering and silver soldering require their own particular fluxes. |
| - guru <guru at anvilfire.com> - Saturday, 07/21/01 00:12:02 GMT |
|
Can you direct me to sections of your website or to other referance sources for information re case hardening and color case hardening? If so, please advise.Please assume that I know nothing about the subject. Thank you. JRD |
| John Dick <jrdick at kalama.com> - Saturday, 07/21/01 02:12:49 GMT |
|
Guru,I have been smithing for a couple years now(moderate experience). Right now I am looking for anything I can find on "diamond steel"; production, properties, uses, value, ect. Everywhere I have looked so far has been a dead end. Can you please help me? |
| Joshua Essex <Thorknad at yahoo.com> - Saturday, 07/21/01 03:49:19 GMT |
|
Case Hardening: John, I've posted on the subject in the past but our archives are a bit of a bear to wade through so here goes again. . There are various case hardening salts and a process called "nitriding" we are not going to cover these. CASE HARDENING, is the process of producing a hard surface on wrought iron and steel parts by increasing the carbon in the surface by absorption, the hardening by the usual method (heat and quench). Finished low carbon steel parts are packed in a ceramic or steel box with powdered charcoal. Bone charcoal is supposedly the best. The box is then closed with a cover and sealed with fire clay. The cabon hardens the part but also uses up the oxygen and prevents oxidation of the part. A crucible with a lid can be used. Special graphite boxes have also been made for the purpose but I have never seen them for sale. The box and parts are then heated to a red orange heat (1700°F to 1800°F) and held for a period of time depending on the depth of the case required. This can be from 15 minutes to an hour or more. The parts can then be cooled and then later hardened and tempered OR they can be quenched directly from the furnace. This can be messy as the entire contents of the box are often dumped into the quench. However, this is the recommended practice for finely finnished parts such a gun parts or precision parts or screws. COLOR CASE HARDENING, is a specialized process and an art. The parts are first finished to a high degree and cleaned so that there is no oil or fingerprints. The better the finish the brighter the colors. Then the procedure as above is followed. The difference is the quench tank. In order to produce the temper colors on the surface of the parts air is bubbled through the water quench. As the parts cool to different temperature and the air contacts the parts it produces differnt temper colors. After quenching the parts are removed, cleaned and dried. Then they must be oiled or lacquered to protect from rusting. The process takes quite a lot of air and how it is bubbled through the tank can be varied to produce varying results. Much testing and experimentation is required to setup a color quench that produces the expected results. |
| - guru <guru at anvilfire.com> - Saturday, 07/21/01 04:44:45 GMT |
|
Diamond Steel: Joshua, I don't have a clue. I avoid using trade names for steels unless absolutely necessary. All standard steels (and there are thousands) have numeric or alpha numeric designations that tell you what they are. |
| - guru <guru at anvilfire.com> - Saturday, 07/21/01 04:47:58 GMT |
|
AJ, I used my mig welder with a bronze wire feed on a bronze sculpture I did last year. Worked beautiful. TC |
| Tim Cisneros <blacksmith at theforgeworks.com> - Saturday, 07/21/01 05:03:58 GMT |
|
guru, Could Joshua be talking about diamon plate? The non-skid type? |
| Paw Paw Wilson <pawpaw at paw-paws-forge.com> - Saturday, 07/21/01 05:31:45 GMT |
|
I am completely new to blacksmithing, and although I have purchased some books, and found some tools, I do have three questions that I can't find an answer to. One, how do you power the blower on the homemade forge. Two, is a 55 lb anvil to small? Three, how would I find a smith in my area, if none are listed in the phone book? Is there a resource that I might use to locate one here in Utah? Thank you. I am a Journeyman Stone Mason, who got the blacksmithing bug when I decided I would like to make my own tools. |
| Lance Davis <lance_davis_2001 at yahoo.com> - Saturday, 07/21/01 05:33:07 GMT |
|
Sundstrom: It will require several colors and some skill in the art of trompe'loil ( or however it is spelled). The problem is that you will loose the use of the corners ( unless you remember) if it is well done. Curse those unexpected blacksmithing expenses....just bill your next client for it. |
| P-F - Saturday, 07/21/01 06:49:50 GMT |
|
Joki: In my expierience, if the bronze is glowing, it is too hot to solder. If you know the solder temp, get some templ( temperature indicating) sticks below and up to that temp..as the guru says, you will also need flux. A last issue ( aside from having to clean it down to bright metal again and de-greasing) is color matching. If the joint is a different color, it may look funny. Matching colors in solder/braze rods are available if you hunt...but they may age differently than the bronze. Tig or MIG welding with matching alloys is ideal. |
| P-F - Saturday, 07/21/01 07:11:08 GMT |
|
Lance the Good Guru is probably getting a few pitiful hours of sleep so I'll take the opportunity to confuse you. power forge Q.....traditionally a hand crank mechanism is most common, often with some sort of flywheel. If you get into production ,a small electric motor and a mechanism to selectively slow it down is probably best. Anvil.....A 55#er ( not cast iron) with a stout stump under it is an educational starter and probably good enough for for the odd small forging or tool. Splendid work has come off much less. If you do it much, you will hunger for a lot more..more anvil mass=less work expended to move metal. Area smiths.... looking in the phone book only gets you folks who had smiths as progenitors mostly...and there are a lot of them ,it is to be noted. Anvilfire has a listing of blacksmith assns ( under ABANA?) across the nation. My advice is , dont fool around....go to the BS meet nearest you. You will learn the most the quickest and generally there are used tools for sale too.... Now remember ( this will sound obvious but it turns out not to be) never pick up a piece that is too hot. And the Guru sleeps on as the puppy snaps at my typing fingers......Pete |
| P-F - Saturday, 07/21/01 07:34:48 GMT |
|
Hi, I'm relatively new to metal work. I have a hay-budden anvil (200 lb) with a surface that has some scratches and cuts. I thought I would try and use resurface rod to fill then grind. I've read that anvil should be heated to 400 degrees first. Given weight of anvil, I'm not about to lift and put in kiln somewhere. Must it be heated first or is there a simpler way like putting hot metal on top of it. The scratches and cuts only go about 1/16 inch to 1/8 inches deep? Thanks for help. Muleskinner |
| muleskinner <kbraitman at frostburg.edu> - Saturday, 07/21/01 11:18:39 GMT |
|
I must bow once again to the mighty guru. I have been told that 12L14 needs to be carborized to a depth of .030. Could you please explain carborizing to me? THANKS AGAIN |
| worldsazoo <worldsazoo at hotmail.com> - Saturday, 07/21/01 13:41:15 GMT |
|
Muleskinner DO N O T!!! weld on an anvil. just carefully grind most of them away (that is grind so you have a Mostly flat face). It shoul have lots of nice steel left to forge on even after a 1/16 is removed (after several hours and lots of weels). id leave the deepest ones though if they are not over the center of the anvil (that is where most of the work is done). |
| OErjan <pokerbacken at angelfire.com> - Saturday, 07/21/01 14:09:07 GMT |
|
Hey Gurus, I am looking for a fine art foundry in North Carolina. Do you know of one? Please help. Thank you, Lynne |
| Lynne <Schnitzelsltd at aol.com> - Saturday, 07/21/01 15:05:30 GMT |
|
Guru, diamond steel is not a brand name, it is a type of carbon steel. My uncle had a knife that could cut a 3/4" carbon steel bolt with one good swing. Every time it came back sharp. It said on one side of the ricasso "forged diamond steel" and on the other side had the smith's emblem. He bought it by auction and has it stored in another state. So we don't know where it came from and we can't get to it to look at it right know. Any help you could give would be tremendously appreciated. |
| Joshua Essex <Thorknad at yahoo.com> - Saturday, 07/21/01 15:29:43 GMT |
|
Hi,folks Sometimes after I harden one of my blades (clay tempered)It develops some warping slight bend or something.how do you deal with this.should I start over or try to straighten it? thanks ,chris |
| chris makin <cfm15 at home.com> - Saturday, 07/21/01 18:20:31 GMT |
|
Diamond Steel: Joshua, I repeat BRAND NAME! Steels like other things are often sold by brand or trade name. This is usualy to prevent the customer from purchasing the same steel from a competitor that uses industry standard designations OR if their steel is not QUITE standard. The knife industry is notorious for selling blades made from steels that THEY make up phoney sometimes mythical names for. |
| - guru <guru at anvilfire.com> - Saturday, 07/21/01 18:45:48 GMT |
|
Warped Blades: Chris, Sword makers are known to judiciously "adjust" their blades on the trunk of an oak tree striking it with the flat of the blade. . . A stump and wooden mallet will also work. If the blade doesn't survive. . . well, that's life. Warping is caused by residual stresses in the steel. Normalizing then checking the straightness before hardening may help. Stresses are sometimes caused by unequal forging of one side so take care to rotate the work as you forge it. Laminated blades that have unbalanced cross sections (more of one steel than the other on one side) are also likely to warp. Unevenheating can also be a cause. |
| - guru <guru at anvilfire.com> - Saturday, 07/21/01 18:53:31 GMT |
|
Sorry if i was little abrupt earlyer. I had an opportunity to work a patched anvil last week. Just one word, INTERESTING. Some patches where hard some where soft and some hard as "#"�#�. So if you plan on doing it be prepared that you might end up worse than before. |
| OErjan <pokerbacken at angelfire.com> - Saturday, 07/21/01 19:02:43 GMT |
|
Carbonized: Worldsazoo, The term carbonized is an incorrect word used for carburizing which is the same as case hardening. See description several posts up on case hardening. Getting the depth correct is determined by time and temperature. In carbonitriding (Cyanide or cyanide free hardening salt bath) it takes 4 hours at 1600 to 1625°F to achieve an 0.030" case. (ASM Heat Treaters Guide) This is a heavy case and much less is often used. Heavy case hardening should be oil quenched (as apposed to light case hardening being water quenched). You may want to temper the part at 350 to 400°F after hardening. There will be little or no loss of case hardness. OBTW - thank$ ;) |
| - guru <guru at anvilfire.com> - Saturday, 07/21/01 19:16:05 GMT |
|
Anvil Repair: muleskinner, OErjan is repeating my mantra "Do not repair the anvil, Do not repair the anvil, Do not repair the anvil". . . . Good anvils (And Hay-Budden's are one of the best) Have carefully hardened and tempered tool steel faces. They are a surprisingly sophisticated tool. The only time I recommend repairing an anvil is if it is useless. Most forging is done in a "sweet spot" smaller than your clenched fist. The whole thing does NOT need to be perfect. |
| - guru <guru at anvilfire.com> - Saturday, 07/21/01 19:23:01 GMT |
|
Getting Started: Lance, Blacksmithing is a good skill for a stone mason. Both take patience. I've built my share of stone walls. Besides making or dressing your own tools you may find some customers that need decorative ironwork to go with the stone. That 55# anvil you are looking at is probably the middle one of these: 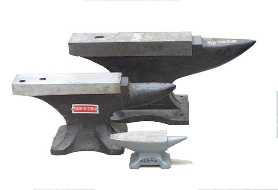 I power the blowers on my homemade forges by plugging them in! See our "Getting Started" article and the links in it. |
| - guru <guru at anvilfire.com> - Saturday, 07/21/01 19:34:47 GMT |
|
Guru, I have a problem making tight quilliions/hangards. They always seem to have a little wobble and bobble to them. Do you have an efficient method of forming them without using stock removal? |
| Joshua Essex <Thorknad at yahoo.com> - Saturday, 07/21/01 21:54:10 GMT |
|
I am trying to construct a hoisting device to lift a 200 pound load off of an auto roof rack. I have looked on the web for over an hour for the following information: the weight, per foot, of square steel tubing, 1.25 inch thin wall, 1.25 inch thick wall, 1.5 inch thin wall, and 1.5 inch thick wall. Thanks |
| Bill Weiler <weilerb at ix.netcom.com> - Saturday, 07/21/01 22:22:30 GMT |
|
Guards: Joshua, Since the begining of time these have been carefuly fitted by filing and scraping (see iForge demo on scrapers). The parts should have to be force fit together, then the handle covering should also push the parts tighter together. If the fit is loose you can almost always cold forge the metal in the guard around the hole and reduce its size. You also need to be sure that the tang is as large as possible at the blade end. Most tangs (and illustrations of them) are much too small. They can taper to the pommel end for a threaded or braded pommel but the front should be as large as the blade alows. The guard is then fitted to this large part of the tang. On a large blade the tang may need to be reduced in size behind the guard but should be done so with a smooth radius to prevent a highlt stressed corner. The guard also needs to be of a substantial thickness around the blade. It may rapidly taper away but should be thick enough to have a substantial grip on the blade. Details of design are important in custom work. Custom blade makers have improved greatly on the traditional joints and silver solder them together. The joints are still snuggly fitted but not quite as tight. The guard is sweated on and only the smallest fillet of silver solder (if any at all) should show. Grips are bedded on with epoxy further strengthening the assembly. |
| - guru <guru at anvilfire.com> - Saturday, 07/21/01 22:36:35 GMT |
|
Structural Tubing: Bill, I can't remember seeing a structurals database on the web. Its a lot of information. I know, I have one we hand typed in. 35,000 plus bits of data, all quadruple checked. The AISC 1973 data was a little tweeky on tubing so I recalculated all of it myself. Your first problem is there is no such thing as thin/thick. Structural tubing comes in fractional and sheet metal gauge wall thicknesses. There are 12 thicknesses of 1.5" square tube and 10 in 1.25" square tubing. 1-1/2 x .25" wall sq. tube = 3.7 pounds per foot 1-1/2 x 18ga wall sq. tube = .956 pounds per foot 1-1/4 x .1875" wall sq. tube = 2.4 pounds per foot 1-1/4 x 18ga wall sq. tube = .7894 pounds per foot Mass2, Mass and Weight Calculation program, DOS only, Jock Dempsey The more important questions are, "what sections do your local steel distributors have available", and, "how much load can the tubing take". The first question is easy and simply takes a phone call but the second is more complicated. That will require an engineer. When you find out what tubing the wharehouse has they will tell you what it weighs. |
| - guru <guru at anvilfire.com> - Saturday, 07/21/01 23:02:33 GMT |
|
|
|
|