Wood-ash & clay lined fire-pots,
I've been all over this subject and can see where some types of forges would require this kind of work done to them.
I'm wondering if the larger heavy-duty constructed fire-pots would have some added life by doing the same to them.
My forge fire pot is made 12 X 10 inches which slants down to a 6 1/2 X 6 inch bottom, and 5-inches deep.
All 4-sides are made from 1/2-inch steel plate and the bottom is from 3/8 steel.
It's all still new and I've got to hook-up my tuyere with the clinker-breaker, ash-dump and air-flow gate.
On-the-flip-side, I could see where doing a clay lining could clog-up the clinker-breaker if it broke loose from the sides of the fire pot.
I had to drop the brake-drum forge....do you guys know how hard it is to just find used but good brake-drums anymore??? Sad in a way, you know.
|
|
Danial
- Tuesday, 06/01/10 09:39:10 EDT
|
Coal Forges. I have never heard of lining a firepot. I line my hearths with concrete, Portland and sand mixed. The lining is to protect the hearth not so much from heat as from rust, wear, and tear. I line it from the top of the firepot side flanges to the hearth border. American hearths are often, 24" x 30" and sometimes larger. Firepots get hot, but not always so hot that they need some sort of protection. You get a sweet spot (heart) of the fire in the top center of the firepot about the size of a soft ball. The sweet spot is a little above the hearth line. That's why we insert out work horizontally, not like a dipstick.
Hawley's wet wood ash idea was to make the firepot of the ashes by digging out a "duck's nest" of the appropriate size for the work, and this was for a SIDE BLAST fire. If a guy was forging small stuff like jewelry or hardware, he would scoop out and tamp a smallish duck's nest. If doing large work, he would deepen it. Controlling a side blast fire is shown in the London book, "The Blacksmith's Craft."
This has NOTHING to do with the small rivet forges that have no firepot, just a tuyere grate. Sometimes, those little round forges will be stamped, "Clay befor using." I think that maybe some of the old timers did use fire clay, but fire clay by itself is notorious for breaking and cracking. I'm told that it could be helped by tempering with coal dust or fly ash mixed into the clay, but I never tried it nor do I know the proportions.
I started out in the 1960's, and you could still order new firepots, so-called tuyere irons, from Kennedy-Foster in Clifton, New Jersey. I got the Buffalo which I liked. It had about a 3/8" wall and had a ovoid clinker breaker with a rectangular hole through it. Running the school, I have gone through several of these over the years. The wear, rust, shrinkage, and buckling was mostly on the side flanges, mainly because we wet the coal. Little by little, I replaced them with some firepots that had 1" thick walls. These came from a Mississippi foundry that is no longer in business. I could put in a plug also for Roger Lorance's cast iron products. I have from him one thick walled firepot, one small, solid cone mandrel, and one small swage block.
I heard of one instance where the firepots got so hot that they needed to be replaced yearly with custom-cast ones. Bruce Lepage used to weld up gun barrels etc., and he said that the pots got red hot and even warped somewhat. Bruce is a gunsmith/engraver who does the engraving on the Alex Bealer Award froes.
|
|
Frank Turley
- Tuesday, 06/01/10 11:08:15 EDT
|
Ok, I get it now.
I'm learning & catching-on.
Still a 50/50 chance that I wear the
|
|
- Danial
- Tuesday, 06/01/10 13:14:26 EDT
|
Ok, I get it now.
I'm learning & catching-on.
Still a 50/50 chance that I wear the "Newbie-hat" backwards at times.
Thanks Mr. Turley!
|
|
Danial
- Tuesday, 06/01/10 13:15:00 EDT
|
Eeerrrrhhh!!!!
I HATE my work PC!
sorry for the double-post.
|
|
Danial
- Tuesday, 06/01/10 13:16:03 EDT
|
The newbie-hat.... it has green horns.
|
|
- Nippulini
- Tuesday, 06/01/10 13:41:18 EDT
|
Non-adjustable, too.
helps prevents from getting "big-head" syndrome.
|
|
- Newbie
- Tuesday, 06/01/10 14:24:21 EDT
|
what is a carving block i can not as yet find it on here anywhere
|
|
Chance
- Tuesday, 06/01/10 18:05:14 EDT
|
Chance,
It's a block that goes in a vise to support a small piece while you chisel or punch it. Kind of hard to explain with just words, but there's an illustration and some explanation in iforge 16. (I haven't checked all the iforge demos; there might be more information in others)
It's hard to see in the illustration, but in use the flat bar on the bottom of the block goes against one vise jaw, and your work is held between that and the other jaw of the vise. That way, tightening the vise holds *both* the block and your work in place.
|
|
Mike BR
- Tuesday, 06/01/10 19:55:15 EDT
|
Chance, I'm not sure what you are looking for.
Perchance, is it a Bench Hook?
Then there is also the angled support block used in a vise for carving. Blacksmiths Depot sells them, look under Vise Accessories. As mentioned by Mike BR above. Clearer photo on the BlacksmithsDepot.com page.
In wood working a "carving block" is merely a large block of wood. A "butchers block" is sometimes called a "carving block". Blocks for linoleum block printing are also called "carving blocks".
|
|
- guru
- Tuesday, 06/01/10 19:59:22 EDT
|
thank you all so very much . i have worked with steel for some time fabing and welding . growing up on a horse farm i was exposed to shoing but now i want to expand my skills and have some more fun lerning and playing . every now and again i come acrose items that i can not place or fiend info on . so thank yous so much.
|
|
Chance
- Tuesday, 06/01/10 20:40:18 EDT
|
All right, I asked about H13 for punching tool eyes a few days back. Having given a preliminary glance at the price of H13, let me revise my question:
Given the situation of low-level production runs of hand tools that I need to punch eyes in, using a hydraulic forging press set up to hold 1" square shanked tooling, what alloys would the gathered wise smiths (or wise guys, if you will) recommend for making the eye punches? If it is still H13, I'll order some and swallow the cost, but if, say, 4140 should do well for the task at hand, I'll do that. Particularly since I already have 1" square 4140 leaning in one of my corners. Any other alloys that should stand up to several dozen/couple hundred eyes, let me know.
Thanks.
|
|
- Stormcrow
- Wednesday, 06/02/10 00:13:02 EDT
|
Stormcrow, In the axle shop we often made tooling inserts for the upsetters from 4140. BUT, these were not slender pluches that had long residence time in the hot forging. AND the tooling was cooled and lubricated after every single contact with the forging. With the right lube you can get away with a lot, but you can not fool the simple laws of physics. If you get any alloy hot enough to allow the hammering to mushroom the head, the punch is stuck.
Now hot work alloys have a higher temp before that happens.
In most hydraulic press forging, the contact time is longer than say for mechanical press or hammer, and the tool gets hotter per operation.
|
|
ptree
- Wednesday, 06/02/10 05:08:54 EDT
|
I have a star foundry power hammer that is worn out and was thinking of using the frame to build a airhammer.Was wandering if any body had any suggestions. Tanks
|
|
bo
- Wednesday, 06/02/10 12:13:04 EDT
|
My hat has a green tail; can I be a newbie too? I'll gladly accept gifts of tools and materials!
Thomas from 9000' in the Andes in Chile
|
|
Thomas P
- Wednesday, 06/02/10 13:05:36 EDT
|
Bo, My friend Josh Greenwood converted a scrapped 50 pound Little Giant to an air hammer. He had to make a new ram and guide assembly due to all loose parts being missing. It worked pretty well. He shipped it to Costa Rica and a smith down there is using it. However, the fellow there but fancy new controls on it with too small of ports and piping and reduced its speed and power quite a bit. LG's have a 15:1 hammer/anvil ratio so they work well in this case.
|
|
- guru
- Wednesday, 06/02/10 13:06:26 EDT
|
Stormcrow, S7 while not rated a "hot work steel" has high temper temperatures and makes good hot work tools.
As Ptree noted slow moving presses heat to tooling a LOT. Many folks have found they could build reduced HP hydraulic presses for drawing and bending but for punching you need lots of HP to get the punch IN and OUT fast. As I noted earlier, coolant/lubricant helps a lot.
Dressing the corners of your punches also helps with end flaring. Hot punches do not CUT the steel, the push it out of the way. Punches with rounded corners go in smoother and you do not have that corner to rapidly expand and get stuck.
Round corners and lubricant. . think about it.
Technique is also to be considered. While you MAY have the power to just push on through you may need to use methods similar to hand punching, small steps, cooling the punch between steps.
For hot slow punching, pure tungsten punches is used. While it is not very hard it does not soften at steel working temperatures. Kinda pricey though.
|
|
- guru
- Wednesday, 06/02/10 13:17:01 EDT
|
Bo, I have a Star hammer that is not worn out, and they are a good deal lighter than the 50lb LG the Guru mentions. I think you could do it, depending on which guide setup it has (wraparound or regular slide with gibs), but I'd keep the tup weight around the 50 lb level of the original so as not to overstress the castings.
|
|
Alan-L
- Wednesday, 06/02/10 14:39:30 EDT
|
I have a question about a 50 lb Little Giant.
As Im working It will sometimes rock back and forth so much that it heading out the door. It just started this after I made a small adjustment on the spring.
The hammer wants to go to the left. Its sitting on a square of plywood. The wheel turns clockways.
Other than wanting to walk around it works very well.
I will move it back and check it out more carefully.
Any one have this problem? (and thank you for any advise)
Dan-O
|
|
Dan
- Wednesday, 06/02/10 18:37:50 EDT
|
Stormcrow; Hofi uses a tungsten penetrator from a military projectile for punching hammer eyes, but then You have a greater chance of finding one of those "lying around" in Israel. [You asked for wise guys]
If You are spending money for new tool steel, buy the right stuff [H13]. It is all expensive. H13 is used in the plastic mold and die casting die industry. You might be able to get drops & scraps from a tool & die shop for scrap price.
There is quite a difference in what You might put up with in terms of frequent punch dressing making a few dozen parts and what You need for efficiency making a few hundred.
|
|
- Dave Boyer
- Wednesday, 06/02/10 19:31:20 EDT
|
Dan, get a copy of Dave Manzer's how to cure the tap bang miss blues. It is the best explaination of the powerhammer hula. www.anvilfire.com/bookrev/manzer/manzer.htm
|
|
JimG
- Wednesday, 06/02/10 19:46:20 EDT
|
I guess looking for tank projectiles must be like hunting mushrooms -- you'd better know your tungsten from your DU!
|
|
Mike BR
- Wednesday, 06/02/10 19:49:30 EDT
|
i did a Wayne Goddard edge quench and followed up with two one hour tempering sessions at 375 degrees. the third was supposed to be one hour as well but the timer malfunctioned and they cooked all night and 375. does this present any problems??? i can repeat the process but would rather not if it isn't necessary. thanks.
|
|
miller
- Wednesday, 06/02/10 21:52:22 EDT
|
Miller, you probably lost a point or two in hardness but picked up some toughness. Hardness drops less per hour of tempering the longer the process continues. I would not re-heat treat it but check it with a file to assure yourself that the edge is sufficiently hard to meet your needs.
|
|
quenchcrack
- Thursday, 06/03/10 05:16:21 EDT
|
Walking Little Giant: Dan, LG's need to be bolted to the floor or a large heavy wooden base at least 4 feet wide and 3 to 6" thick. The factory recommended foundation was about 6" in each direction larger than the hammer base and 18 to 24" deep.
|
|
- guru
- Thursday, 06/03/10 05:40:40 EDT
|
Thanks, I think i figured it out. The plywood its sitting on has mashed itself out on the right and left sides leaving the center high,leaving the hammer to want to tip back and forth.
Regarding D Manzers tape, I have it. Anyone with a LG should see it.
Regarding the base ,I will be moving this hammer this summer I hope and will make improvements.
Thanks
Dan
|
|
Dan
- Thursday, 06/03/10 06:32:38 EDT
|
Someone on eBay is selling H13 in different diameters up to 5/8" for a buck a pound. I don't know if you need to buy full lengths (he says he's got 12' rods) or what shipping would be.
|
|
- Marc
- Thursday, 06/03/10 06:34:46 EDT
|
The press has punched eyes well so far. The problem has largely come from not having a means of pulling the punch back out of the eye, leading to panicked wrangling to get the steel off if I don't pull up quickly enough. The extra contact with the punch gets it hot, which can lead to it mushrooming. The punch has rounded edges and it tapers.
I'm building a tool to strip the work piece off the punch, though, and should have that together today. Heck, that combined with an actual decent punch lube might take care of it. Might not, too. If not, or if it only slows down the punch mushrooming, I'll see about getting some pricier steel.
I remember reading a website years back talkng about Hofi's tungsten punch (or drift, can't remember which it was).
I'll let y'all know how continued experimentation with the punching setup goes.
|
|
- Stormcrow
- Thursday, 06/03/10 09:39:12 EDT
|
Stormcrow, The very best punch and drift lube available, is a Henkle Surface Technologies product "Forge eze 185 P3"
You will probably have to buy a 55 gal drum. For our trade a 50/50 with water is about perfect. Does not smoke, flame, and is easy to use. Apply to tooling hot enough to flash off the water, and leave a dry solid film.
We used this at several of the comercial forge shops I worked at.
|
|
ptree
- Thursday, 06/03/10 11:50:23 EDT
|
thanks quenchcrack!
|
|
miller
- Thursday, 06/03/10 13:23:27 EDT
|
Strippers: (not the human variety).
A static punch stripper is a pretty simple device. It can either be a hole in a plate OR a U shape slot. The U shape gives better visibility but weakens the part. Strippers often see a high percentage of the punching load so should be pretty strong. Normally they are bolted to the die set or base on stand-offs made from tube or pipe. The longer and heavier the stripper the heavier the bolts need to be and the larger the diameter the standoffs. Generally these things are made with very little extra clearance.
On some presses the stripper is a semi-permanent attachment made from a forging that bolts to the front of the press frame. They are generally relieved so that the die holder "nose" can go flush to the bottom of the stripper and when the ram is UP the bottom of the punch is slightly above the bottom of the stripper.
Some die-sets use spring loaded stripper plates. These push down against the work holding it snugly just prior to the punch doing its job and holding the work until the punch is "stripped" out of the work. These are primarily used for thin or precision work in high production and built into engineered die-sets.
|
|
- guru
- Thursday, 06/03/10 15:54:01 EDT
|
Would it be of benefit for us (anvilfire) to purchase a 55 gal drum of "Henkle Forge eze 185 P3" and repackage it in smaller quantities? We now ship UPS so we can ship odd liquids.
|
|
- guru
- Thursday, 06/03/10 15:57:10 EDT
|
I would certainly order some Henkle Forge eze 185 P3 from the online store if it came in a more reasonable size for a backyard blacksmith. Say a 1 gallon jug.
|
|
Martin
- Thursday, 06/03/10 18:12:17 EDT
|
Jock! Most blacksmiths think a stripper is just the hammer they keep handy for knocking the part off the punch.:)
|
|
- grant
- Thursday, 06/03/10 18:19:50 EDT
|
Guru, I can provide the contact and exact spec's if you need. The MSDS is pretty bland. The concentrate has a little elevated Ph, but not bad.
A gallon is a nice size and I spill more than I use.
Let me know.
|
|
ptree
- Thursday, 06/03/10 18:48:20 EDT
|
Count me in, I'll buy some. Love the stuff I got from ptree via Ralf S (if it's the same stuff). Found out the hard way that it needs to be in a stainless contatiner thou.
|
|
Judson Yaggy
- Thursday, 06/03/10 19:07:47 EDT
|
I jumbled the actual name of the forge lube, it is P3 Forge 185.
|
|
ptree
- Thursday, 06/03/10 20:05:23 EDT
|
Judson, your product was a no longer available version of the same product that was a little enhanced for blacksmiths.
The Henkle product is used very extensively in the forge trade and should always be available. Henkle just won't sell in less than 55 gallon units, and prefers much larger buys.
At the axle shop we used 5 to 7 totes per week, and each tote was 350 gallons. We did have some applications that sprayed the tooling every 6 seconds for 3 shifts 6 days a week. That tends to eat a lot of lube. We also had the issue of gear oil contamination from the upsetters. That should not be a problem in a small shop. In the axle shop about 350 gallons a week of gear oil went into the bearings of every upsetter, than ran down the side and dripped into the pit under the machine full of the forge lube. Made it hard to re-use the lube. That pit also caught most of the scale, and dead rats and ciggerette butts, so that stuff was too foul to reuse.
|
|
ptree
- Thursday, 06/03/10 20:12:11 EDT
|
Thanks, guys. I actually just bought some Puncheaze from Big Blu. I also got my stripper bar (which, yes, has led to some interesting expressions on people's faces) finished up today but did not have the chance to try it out before my students started showing up. It's welded out of some 1.25" rebar. May require tweaking, may not be strong enough to do the job, but I'm going to see what it does. With this press, there's been a lot of feeling my way slowly with temporary tooling and then building the real deal based on what I find from the temps. I may decide to knock the two "fingers" off and just use a slotted plate as per the guru's comments, but we'll see how the current setup does first.
Until the Puncheaze gets here, how effective would white grease aerosol spray be? Am I doing anything other than slightly cooling the punch with that?
Oh, and thanks, Marc, for the tip about eBay. I didn't get that particular stock, but I bought some 2.75" x 9.5" round H13 from another guy. Probably all I'll need for a loooong time, and much eaier to afford.
|
|
- Stormcrow
- Friday, 06/04/10 00:45:53 EDT
|
Stormcrow, if you use an aerosol, first be aware that almost all aerosol spray cans now use propane, or butane for the propellant so it may get exciting if you spray it on a very hot tool or the forging is close.
The white lithium grease may be better than nothing, but a spray moly di-sulfide would lube better. The oil carrier in both will smoke/burn.
|
|
ptree
- Friday, 06/04/10 05:46:50 EDT
|
Don't forget that BigBLU carries their own brand of Molybdenum disulfide (MoS2) and graphite lube called Puncheize. It is much cleaner than using Never-Sieze. It is applied to fairly hot tools and allowed to dry.
In every case any lube is better than no lube. Grease tends to flare worse than coal dust. While some smiths have used beeswax it has much too low of melting point and also burns well. However it might be a good carrier for graphite. Lubes that flash off and burn help cool the tool but make life exciting. The water based lubes that dry on the tool generally do not burn excitedly and are much safer.
The last few times that I hot punched holes I used grease with much improvement over no lube. That was before I knew about other lubes. I still often see smiths dry punch large holes. . . just old habits.
|
|
- guru
- Friday, 06/04/10 06:47:17 EDT
|
Lots of talk about punch lube, but no ones mentioned Uri Hoffa's formula.
|
|
Carver Jake
- Friday, 06/04/10 09:02:12 EDT
|
...and now for something completely different...
Anybody here ever forge a traditional Okinawan sai? That's the three-prong martial arts truncheon so fondly used in a variety of movies and TV shows for its defensive, as well as offensive, capabilities. I might have a commission from a coworker; but I tend to look before I leap these days.
Warming rapidly with the added embellishments of humidity AND bad air on the banks of the Potomac.
Visit your National Parks: www.nps.gov
Go viking: www.longshipco.org
|
|
Bruce Blackistone (Atli)
- Friday, 06/04/10 11:00:11 EDT
|
No disrespect to you, Bruce. Please.....
(I'm not trying to change the subject.)
Could I ask someone that's knowledgeable about forge-blowers to e-mail me as to what you'd check for on buying a used one?
We're off again this week-end to check-out leads on tools-of-the-trade, mainly a Champion manual hand-turned blower for the new forge.
But I won't lie......they scare me.
We've been very fortunate with what we've got so far and I don't want to bring that to an end with picking up the blower that I "should" have walked away from.
What would you check for?
Should I take tools to look inside at the fan-blades and gear-teeth?
The fella said it's rusty but works great and he'll come off of his antique-price tag for me because I'm wanting it to use and not just collecting myself.
But that doesn't make me feel any better on being "dumb" as to what I'm checking for before taking it.
Thank-you.
Danial
forgenarmory360@yahoo.com
|
|
Danial
- Friday, 06/04/10 13:00:36 EDT
|
Bruce, From photos I've seen of the traditional ones the extra "prongs" are extensions of a punched guard. Modern versions look to be arc welded and then then ground and polished to make the cross joint. The rest of the construction appears to be very knife like (permanent or removable pommel - various grips).
Not being a thin edged weapon it looks easier to do a good job than on a knife.
|
|
- guru
- Friday, 06/04/10 13:05:07 EDT
|
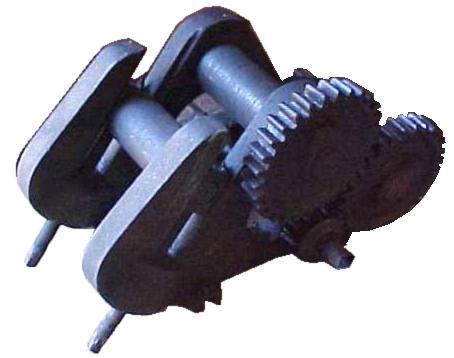
Blowers, Noise is the key. Good ones make little or no gear noise. Over time as the gears and bearings wear out the gear box gets VERY noisy and then they get hard to turn.
Once in a while a blower sits too long and the fan blades rust off. The out of balance condition will be obvious if you crank it.
Other than noise, original parts such as wood crank handles are nice, the original stand (if it was stand mounted, some attached to the forge).
These things have no seals so if you put in oil it WILL leak. If you put in too much it will pour out. Leaking is normal. Thus it was common to run them without oil until they wore out. The better Champion blowers would last many lifetimes as long as they were kept lubricated with clean oil.
|
|
- guru
- Friday, 06/04/10 13:16:08 EDT
|
If i hot punch holes i am a huge fan of using salt and scale. Just mix the two in equal amouts, and add water until it becomes a paste (like thin clay). it works pretty well for me, at least better then coal dust.
|
|
- bigfoot
- Friday, 06/04/10 14:02:42 EDT
|
Bruce; round or faceted shaft?
Thomas
|
|
Thomas P
- Friday, 06/04/10 14:41:03 EDT
|
On the blower, if it's a Champion 400 they can be hard to get the gearbox cover loose for internal inspection. If it turns fine and doesn't feel like it's full of gravel it should be good to go, just add oil. The last blower I got had been sitting outdoors for 20 years and had siezed up tight, but after soaking it in PB B'laster for a day it now works better than most with no gear noise at all.
If it's a Lancaster #1 geared blower, the gearbox cover will come right off with four short screws. The same rules apply, but the #1 has the quirk of turning more easily in one direction than the other due to the spiral-cut gears. There will be a locking bolt on the side that can be adjusted to reduce play. If the single ball bearing that's supposed to be in there is gone (both of mine were) a short piece of 3/8" rod well greased will make a fine replacement.
Finally, for the oil use something light and sticky. Chainsaw bar-and-chain oil is fine but can be stiff in very cold weather, automatic transmission fluid is also great, and fully synthetic 5w20 motor oil is amazing but expensive.
Under no circumstances should you add heavy gear oil, unless you want a serious workout and have the blower bolted to the floor. I found that out the hard way...
On the subject of punch lubes, I have a gallon of Ptree's old miracle stuff. It makes any of the old-fashioned homebrew lubes look like glue. I've had to start being very careful with my touchmark! Before I used the magic lube on it, I had to use a stiff stomp under the treadle hammer to set a nice stamp 1/16" deep or so on bright cherry red steel. Now if I use that same force and heat I drive the touchmark a full quarter inch in!
|
|
Alan-L
- Friday, 06/04/10 15:19:43 EDT
|
For hand work, besides punch lube, coal dust, etc., it has helped me to take the working end of the tool to bare metal.
|
|
frank Turley
- Friday, 06/04/10 17:05:02 EDT
|
Alan-L, I used to warn folks about tryng the magic lube on scrap. I went cean through to the face of the anvil in one blow with a hot cut when the same conditions without took 5 to 8 blows when I first tryed the lube.
I found that the magic lube, an alkaline salt dry film, also allows a much better reverse extrusion up into eye punchs and my hollow cut touchmark.
BigFoot, I tested the various homebrew lubes, using a drop weight tester, and the alkaline salt was #1, Heavy moly di-sulfide paste was #2. Heavy graphite paste was #3 Then on down hill. I stopped the salt testing as I found the dis-associated cloride gas offensive.
I did R&D testing for years so I did a set-up that provided for that old stand by ONE Variable. The lube.
Drop weight tester so the impact energy was the same, mounted to an anvil so the anvil was the same. Used made up virgin punches. so the punches were the same on every test.
If you guys think coal dust, salt and scale, grease etc, you will find a true industrial, Professionaly fourmulated and tested lube to be MAGIC.
Just as the Guru advises to not be a varnish fourmulator when you can buy a varnish that has millions of $ in R&D behind it, why settle for a weak home made lube?
Want an excellent lube, that does not flame, does not smoke, makes no dangerous dust? Use the comercial alkaline salt lube.
There are also makers beyond Henkle. I have extensive experience with the Henkle. Fuchs, and others make similar.
|
|
ptree
- Friday, 06/04/10 17:24:12 EDT
|
FREE FIVE GALLONS OF PUNCH LUBE!!
DONATED BY BP
DIP YOUR BUCKETN IN THE GULF COAST AND ENJOY!!
Only one free bucket per customer
|
|
- BlackJack
- Friday, 06/04/10 19:55:38 EDT
|
Where can we buy small quantities of the Henkle or Fuch lubes?
|
|
Carver Jake
- Friday, 06/04/10 23:10:59 EDT
|
Carver Jake, Thats the rub. The makers of the industrial forge lubes work with big industrial users and for the a tiny sample is a 5 gallon bucket. I got Henkle to send a sample to the late Tom Clark. Most blacksmiths would not believe the difference and had to see it used to believe the performance.
I convinced a small lube fourmulator to make a version improved for dip only use and sell to the general public. They sold in gallons and 5 gallon pails.
Tom Clark bought a couple of pails, and Glen at I-Forge iron bought some to sell from his site.
Most of the original drum sat, as there were not enough sales. When that small fourmulator was bought and reorganized in the recent downturn, I aquired that remainder of a dum, repackaged and sold to folks at Quad State. The users have found it to be excellent. In fact the seller of Puncherize, sold here, uses the lube they bought from me to punch the eyes on their hammers.
A 55 gallon drum is a lot of lube to us, and nothing but a pain to the big fourmulators. BUT< for those who have tried it, it i something that is worth the trouble to get it.
I call it ball bearings for my hot work tools.
|
|
ptree
- Saturday, 06/05/10 06:18:44 EDT
|
Jake, We are looking into handling re-packaged amounts of this type product. Initial costs are not insignificant. Besides the product include handling the full 55g drum (rack or pump), return or disposal of same drum, new containers (sufficient to withstand shipping) and labels.
Repackaging is a funny business. Some manufacturers get upset and will refuse to sell to you if you purchase their bulk product and repackage it.
|
|
- guru
- Saturday, 06/05/10 06:42:38 EDT
|
Ptree, You say Puncherize is sold here, where is "here"?
Yes, I have checked the Internet and couldn't find it.
|
|
Carver Jake
- Saturday, 06/05/10 08:03:14 EDT
|
Sai; Guru: Good information, the older style makes sense; the modern ones are too "techie" for my taste.
Sai; Thomas: I'm contemplating either when I talk to the person; I like the faceted, but are there advantages/disadvatages in forging or performance between the two or just aesthetics?
Free Gulf Coast Punch Lube; BlackJack: I had to smile at that one!
Meanwhile, if anybody is curious on the impact on the National Park system (most of y'all own it, and the rest of you can visit the parks, after all) we have a site at: http://www.nps.gov/aboutus/oil-spill-response.htm .
Danial: Jump right in! This is an open forum, so you don't have to take a number and stand in line. :-D
Meanwhile, on blower lubrication, I once had the brilliant idea of using 90 weight oil in my little hand cranked blower for the portable demonstration forge (for when I'm NOT doing Viking Age). The idea was that heavier weight oil would leak more slowly. SLOW was right, the blower got slower and slower and eventually barely moved. I had to take the whole thing apart and clean it (there was other gunk in there too, of course) before I could use it again.
(Anybody have any other uses for 90 weight oil? Punch lube? Gulf Coast wildlife control? Demonstrations outside BP offices {...that was yesterday, across from my building in DC!}?)
Sunny and warm on the banks of the lower Potomac. Off to see Shrek the Last with youngest daughter. Wheeee! :-D
Go viking: www.longshipco.org
|
|
Bruce Blackistone (Atli)
- Saturday, 06/05/10 08:16:29 EDT
|
90 weight......rear end lube for my 1600 Vulcan Classic..........
|
|
Harley
- Saturday, 06/05/10 08:31:32 EDT
|
Carver Jake, The puncherize lube is sold by Big Blu an advertiser here on Anvilfire.
|
|
ptree
- Saturday, 06/05/10 12:54:42 EDT
|
For gear type hand crank blowers I prefer and use ATF. I am running a Cannady Otto in the main shop and it turns very nicely even when it is in the middle of the Indiana winter and 20F. And My Cannady does not leak the oil. It has a tight gear case and has a drain valve that shows full when open and oil drips out. I change the oil every year, and continue to get some gunk out even after hard core cleaning and several years of oil changes.
(I have 2 spares on the shelf)
|
|
ptree
- Saturday, 06/05/10 12:57:23 EDT
|
I used to use EP90 oil as case lube when full length resizing heavy magnum cases- but in that application a litre will last a very very long time! I used to use the stuff in my Landrover diffs.
|
|
philip in china
- Saturday, 06/05/10 17:44:00 EDT
|
Oils: About 40 years ago. . . I had a Phillips 66 service station. We carried a WIDE range of oils and top brands.
EP90 was THE standard gear oil used in transmissions and differentials for American cars for decades. Then there was a change to a multi-viscosity oil 80w100EP. But British cars used motor oil in the transmission. You could run SAE30 year round or SAE40 in summer and SAE20 in winter IF you were inclined to change the transmission oil. If you forget to change out the heavier oil they will be difficult to shift in the winter.
I also carried a drum of 140EP gear oil. I used this in my old 1950 Chevy truck transmission and it made a world of difference in noise. You could ALMOST hear yourself think!
We carried SAE60 and 50W racing oil that sold well for motorcycles in the summer. My brother-in-law swore by it and I traded him 2 cases and $100 cash with him for the Chevy truck and a work bench.
Certain 1960's models GM products with hydraulic lifters required SAE 20W20 year round in the engine. Any other oil and they made rattling sounds like a diesel. I discovered this just prior to totaling my 1961 Pontiac Tempest (a classic even in the late 60's). A sad day.
IF you can find it I highly recommend SAE 20W20 non-detergent for lubricating all kinds of machinery. Detergent is used in motor oil to absorb water from condensation. This is OK in a system that gets hot enough to evaporate the water every time it is run but fosters rust on machinery. So non-detergent is better. We stocked it for some of the older cars that specified it and a few cranks that thought if it was good enough for King George it was good enough for them. . .
When the original Never-Seize came out they had a big thick testimonial paper with all kinds of anecdotal stories about its use. On use was to spoon a pint into the differential of a race car along with the EP90 and get 6x the life from the gears and bearings. Other uses included lubricating car bottom furnace wheels that often reach 800-900 degrees F or more. I use it on bolts that I want to come off later including wheel lugs, and all kinds of low speed sliding parts. It should be used on forge bolts if you every want to get them out at a later date. I also use it on open gears as it is a LITTLE cleaner than black gear lube.
We used a 50/50 STP 10W30 oil mix for assembling engines and used the same to fill a Sears air compressor we bought on sale (no returns) that had a knock in the pump. Quieted it down and out lasted the tank.
I am afraid I am the one that recommended EP90 for hand crank blowers many years ago. . . Yes, its too heavy in most cases. SAE20 to 40 depending on climate and wear would be right. But ANY oil is better than no oil.
We carried two grades of grease for zerc fittings. The heavy one that was too thick for modern use was used only in special applications and we had a contractor that bought it to coat concrete forms as it stayed on the form, not the concrete. This would also be the stuff that old-time blacksmiths called axle-grease and used for punching.
Years ago I bought some special gear grease. It was a thick extra sticky stuff with molybdenum disulphide which made it jet-black. Works great for open gears and slow speed applications EXCEPT. . being sticky and black it was the PERFECT stuff to demonstrate the spread of contamination. A couple days after using the stuff on one of our machines you could find it on every machine hand wheel and door knob in the shop. . . Took a year to stop finding the stuff in places it should not be.
The best "sticky" lube I've bought was a special HD spray on hoist cable oil. On the other hand the "chain lube" for my fork lift is a thin runny stuff that appears to have some molybdenum disulphide in it.
In the nuclear biz the big 4.0" to 4.75" diameter pump studs required a special molybdenum disulphide coating on the threads. It was a paint an and let dry before installation type stuff.
I have some nuclear grade silicone grease which is THE thing for lubricating rubber parts in water service. Prevents o-ring wear in valves and eases assembly. A VERY little bit goes a long way. Note that many silicone greases are more common grease than silicone. . .
There are literally thousands of specialty lubes used for various applications. Many are just what the factory had on hand and get specified for replacement use. . . Others were carefully tested and recommended on a scientific basis. Selecting the right ones can be a bewildering task. But at the minimum every shop should have a grease gun with standard auto grease for zerc fittings and a couple cans of 20W20 oil. I also keep Never-Sieze on hand and dry graphite. If you use air tools there is special lube that either goes in an oiler or should be put directly into the tool on each use.
Tools and machinery last MUCH longer if oiled occasionally. . .
|
|
- guru
- Saturday, 06/05/10 21:24:33 EDT
|
My question is regarding a junkyard hammer.Im trying to locate an anvil big enough to stay somewhere in the 1/18 rule.A 50lb hammer would need a 900lb anvil.
My question is,Is the anvil weight just your main post. OR is it your main post + your base?
|
|
- chad fowler
- Saturday, 06/05/10 22:55:51 EDT
|
Chad, the normal for a hammer is 15:1 and only a few very heavy duty hammers met 20:1 and this was an "extra". Modern small hammers are often less than 10:1 but should not be less than 6:1.

As you can see at 15:1 the point of diminishing returns has been reached and only 12% is gained by going to 20:1.
The anvil weight is everything from the lower die down that is solidly connected metal. In extremely heavy framed hammers part of the frame may be included. However, hammers like the Little Giant had a 15:1 anvil discounting the frame. Generally a base plate is part of the anvil mass unless it is very thin. The frame must be evaluated according to throat depth, connection and material. However, only a small portion is usually included in anvil mass. Part of the reason for a high ratio anvil is to reduce the stress between anvil and frame.
Finding single large pieces of steel can be difficult and expensive. Besides the suggested built up anvil methods several pieces of heavy plate could be welded together. Do not stack flat plates as "flat" is not very flat unless each joint is machined. But vertical seams make a unit that reacts solidly.
Occasionally large steel (usually in rounds) can be found at scrap yards. The trick is getting it sawed so it has flat ends. This can often cost as much as the steel.
Remember that the true goal of building a "Junkyard" hammer is to keep costs as low as possible. If a hammer is cheap enough it does not need to be very efficient.
Good luck with your project!
|
|
- guru
- Sunday, 06/06/10 06:49:53 EDT
|
The reason im being so picky is because i have two boys that are starting to get the bug(ones 12 and the other 10).Ive got carpal tunnel real bad and tendinitis.Unless its really small stuff i cant stay at the forge very long(and still pick up a coffee cup).
To make a long story short,im building a trip hammer. I have been researching JYH for a long time.With ease of construction, budget and safety in mind,Im down to three models.Jerry Allens power hammer,Ray Clontzs tire hammer, and Ron Kinyons air hammer.From what ive seen Ray and Ron both have really solid hammers.Most of Jerrys hammers that ive seen on y-tube jump and buck like there going to come apart,and i dont want my boys around something that powerful, moving that much.Unless im wrong(very possibly) it all has to do with weight,cause Norm Tucker has got a really sweet one on y-tube.
I really like Jerrys hammer.I just think it needs to be beefed up to be safe.
Am i wrong?
|
|
Chad
- Sunday, 06/06/10 09:20:51 EDT
|
Dear friends,
I'm locksmith from Prague ( Czech Republic) and I'm 63 years old. Already year study locksmithery, wrote I'm instructional book Locksmithing and teach locksmiths from Czech and Moravia this enclosure. Belong to also to experts in field of locksmithery in Czech republic. Internet me provides great deal of information and I'm very happy, that the I'm got on your www pages and with big satisfaction I'm draw down book. (I'm yearn very much about this book) : "On the Construction of Locks and Keys by John Chubb". I have to you very thank, that the this book may I read through. Once more thank you have the honour Paul Gec
|
|
Paul GEC
- Sunday, 06/06/10 12:58:08 EDT
|
My oldest son has done a replica viking knife for his 4-h project.We did it out of 5/8" sucker rod.I dont know the exact carbon content, but it looks like a sparkler on steroids.
Are we going to crack it out in a water quench? Should we use oil instead?
|
|
Chad Fowler
- Sunday, 06/06/10 13:03:39 EDT
|
Chad; what did the sample piece you tried HT on do?
If you didn't save a sample the best way to go would be to quench in oil---not a viking method of course and then check hardness if it's not as hard as you like (and early knives tended to be pretty durn soft in general) *then* you make the white knuckled decision on whether you should re-heat treat and quench in water/brine.
Sucker rod can be a number of different alloys and I can't tell which one you have from here, sorry.
Thomas
|
|
Thomas P
- Sunday, 06/06/10 14:34:46 EDT
|
Chad, I have a Rusty style hammer and it sits very well when running. I did put adaqaute anvil in place, plus I used a 8" square tube for the center column. Once built and in place I filled that center column with about 600#+ of scrap steel shot and dust.
I also used the compact spare tire clutch in the second version, and that makes for a very controllable and steady machine.
|
|
ptree
- Sunday, 06/06/10 16:54:28 EDT
|
Thomas, please forgive my ignorance but im not sure what "HT" stands for.I assume it stands for heat treatment, if it does we havent tempered it yet.We heated it up to critical temputure and left it in the fire over night.Next night we forged the blade,twisted handle and scrolled the end.He had some file work to do on the blade,and now we are ready to go back to the forge for tempering.
By replica i meant that he based his design on the knife, not so much the materials.As far as carbon content we did a spark test on the grinding wheel.I should have clarified my statement better.
Ptree,that is also what im looking at is an 8" column and a 6" anvil on a 1" base.The 6" round is actually a 10' long hydralic cylinder.I havent quite figuared out how im going to put everything together yet.I figuared i would get all the main frame parts then start studying pictures some more.
P.S. What is an old railroad anvil(bridge) worth?
Theres one at the scrap yard in pretty bad shape,looks like someone used it to split logs on.Face is cut up pretty bad.
I dont really need it cause ive got a 300lb bridge anvil and a 160lb london style anvil already.But if its cheap enough, what the heck.
I thank all you guys for being who and what you are,and taking the time for anyone who is willing to listen and learn!
Chad
|
|
Chad Fowler
- Sunday, 06/06/10 20:16:43 EDT
|
Chad, 6" diameter steel bar stock weighs about 100# per foot of length. The density of steel is .283# /cubic inch, or a little less than 500# per cubic foot. Hope this helps Your calculations.
|
|
- Dave Boyer
- Sunday, 06/06/10 21:45:33 EDT
|
Thanks for the info Dave.
|
|
Chad Fowler
- Monday, 06/07/10 05:59:12 EDT
|
* jet-black molybdenum disulphide gear grease as a training-aid to demonstrate the spread of contamination to others*.......Now THAT'S thinking outside the box!
GURU,
If the "OH-SO Smart" people in the "nuclear-biz" rely on styrofoam to gather "surface-smears" samples to test for contamination......then why isn't the whole-world using styrofoam as toilet-paper???
Maybe the "PHYSICS-Dept." needs some molybdenum disulphide gear-grease on their neck-ties!
Guess some questions just answer themselves........
|
|
- "hickory-hill" T.N.A.C.
- Monday, 06/07/10 08:06:13 EDT
|
Power Hammer Balance: All rotary motion crank machines need counter balance weight on the crank wheel to balance the crank and link components. Note that the ram cannot be balanced but all the rest of the components can.
On a spring helve hammer the crank, crank link and back half of the spring should be balanced by the counterweight on the crank. The amount can be calculated OR found by trial and error. With the ram disconnected the machine should be vibration free at full speed.
On a Dupont linkage or bow spring hammer the crank, link, spring and half the toggles should be balanced out. These parts should rotate at full speed without vibration.
On machines with adjustable strokes the balance must be a compromise. At short stroke the hammer needs less counter balance and at full stroke it needs more. Normally the balance should be right at the middle range.
Mechanical balance will reduce much of the rocking and walking but the upward force of the ram must be resisted by the anvil mass and frame in a one piece hammer (a hammer without a separated anvil). Too little and the machine can hop completely off the ground.
The crank wheel is technically not a flywheel but with the added counter balance weight it acts like one. Tire hammer drives are even more so. Some flywheel effect smooths out the hammer operation but too much will make it hard to start and stop.
Tire Hammer Drive Issues: It has been reported that the tires are wearing out in the spot where the drive wheel initially contacts and starts the motion. It has also been reported that tire shops will not or often cannot change these tires (much less after modifying the wheel by welding a plate onto it as is the common plan).
In order to avoid short term problems we recommend that nothing be welded to the tire/wheel assembly and all connections be made by bolting. Then the tire can be rotated 4 or 5 times prior to wearing out completely. On our hammer in progress we drilled a second set of holes so that we can rotate the wheel in 8 positions. But this was a modified wheel with a flat plate replacing the stamped and ribbed middle section.
For the long term consider using a flat belt clutch rather than a tire clutch. While this is initially more expensive it will last as long as the rest of the machine with the occasional and easy replacement of the belt. To make the large pulley a multi-V belt pulley can have the middle ridges machined off and the edges squared (for belt guides).
|
|
- guru
- Monday, 06/07/10 10:40:24 EDT
|
Yes HT is heat treat and basic "junkyard steel" rules are to save a test piece that is forged down to a similar thickness that you then can *test* your proposed heat treat on *before* you risk your good piece.
So you have an idea of the carbon content---what about Mn, Cr, Ni, V, Mo, ... which might affect the heat treat quite a lot.
Thomas
|
|
Thomas P
- Monday, 06/07/10 10:45:23 EDT
|
Guru, I have been advocating bolted attachments to compact spare tire drives all along. I will check mine this evening, but I do not remember any unusual wear to the start point.
|
|
ptree
- Monday, 06/07/10 12:34:58 EDT
|
I am very interested in joining your group. I have grown up in the metal working business as my dad owned a tool and die shop and we machined all types of stuff and I had no choice but to learn the trade. After dad passed we sold the shop and I got away from that business and learned to weld and fab and also as a hobby blacksmithing and have been smithing for over 30 years now. I came across your site doing research on some of the jack leg vices that I have. I am now retired and plan to devote more time gathering my tools and blacksmithing..anyway I dont see where to join? please check out ACIdredging.com I built the boat barge and refitted the amphibous excavator to float.. I sold the biz 6 wks ago..Glad to be done. now its time to play..thanks for your time
|
|
Al
- Monday, 06/07/10 15:21:27 EDT
|
I would also be interested in posting some pics of some of my anvils and vices to finally find out what I've got
|
|
Al
- Monday, 06/07/10 15:23:44 EDT
|
All the Clay Spencer hammers have the crank plate welded to the wheel as did the one Steve Barringer built that was in Paw-Paws shop.
Some of the wear problem is related to hammer capacity and technique. However, those I've heard of with bad wear were experianced smiths that would not be too timid on the clutch.
Our hammer has a bolt on wheel but specially modified to have a flat center, thus probably would not fit a tire changer IF someone could do it. Replacing it with a pulley for a belt drive would not be too difficult at some time in the future.
If I were to build another "tire hammer" I would be inclined to use a standard wheel and tire. Many are not much bigger than the mini-spares. For a small hammer that does not need a lot of reduction trailer wheels are available with flat plate spoked hubs. The flat surfaces are MUCH easier to deal with.
|
|
- guru
- Monday, 06/07/10 15:37:19 EDT
|
Is anyone making the boxes for the 4 inch coarse thread post vises? Mine is totally worn out and slipping .
Thanks
Regards
Warren
|
|
warren goolsby
- Monday, 06/07/10 19:38:12 EDT
|
I am looking for a smith to help me with my metalworking merit badge in the St. Paul MN area, any suggestions?
|
|
brian
- Monday, 06/07/10 19:52:39 EDT
|
Guru, I am not timid with my machine, and I see no wear spot. Now my machine is a weekend use machine, but has been in service with the tire clutch since about 2005. One thing I did differently than many is to set mine up to have the roller on the motor hit the top dead center of the tread, and I run about 35 to 40 psi, so I get pretty good contact from the roller. If I lose a little pressure I can tell as the treadle goes farther down. I add air about every year.
I used a standard compact spare and cut part of the center of another wheel to weld the pivot to. Uses a couple of the lugs to hold it on, and I use the precision, sealed double taper bearing assy from the rear axle of a Gran Caravan. Zero problems from the clutch assy as a whole to date.
|
|
ptree
- Monday, 06/07/10 19:53:34 EDT
|
The trailer wheel sounds like a good idea for those willing to spend some money. The axle ends & hubs are available as spare parts from boat dealers, and there are several tire/wheel selections.
|
|
- Dave Boyer
- Monday, 06/07/10 20:32:51 EDT
|
Chad - HT stands for heat treat. To harden common carbon and alloy steels you need to take the blade above critical and then rapidly cool it. After cooling, you temper it. "Rapid" varies with carbon and alloy content and section thickness. For a knife made of unknown steel with a relatively thin section I'd try oil (preferably warm - say about 100F) first. Water or brine has a higher chance of cracking it.
Quenchants in reverse order of severity (mild to severe) still air, moving air - such as a fan, oil - as it warms severity usually increases a bit, but is off set by being closer to the flash point, warm water - say about 100 F, colder water, cold brine. There are also synthetic quenches used commercially that used to be poly-glycol/water mixes that were monitored/controlled to duplicate oil quenches.
Preferably with liquid quenches, you have some form of agitation and temperature control to assure uniformity. For a knife - in and out of the quench, and if you do just 1 temperature control isn't as important. What you do when going in and out of the quench is disrupt the bubbles that form on the steel that actually slow the quench in that area.
Al - I don't know that we're a group per se, just a bunch of folks interested in blacksmithing with various backgrounds and knowledge. We do run into each other at blacksmith events - I expect to see Thomas and ptree as well as some other posters at Quad State in Sept. Probably not before though. I'm in western PA, ptree is I believe in Indiana, Thomas can usually be found in New Mexico, etc.
|
|
- Gavainh
- Monday, 06/07/10 21:49:11 EDT
|
Vise Parts: Warren, Replacement vise screws and boxes are only occasionally made by a machinist repairing their own vise.
The problem is that the typical price for a used vise such as you have is about $75 to $120. A new screw assembly would cost more than a replacement vise.
The other problem is sizes. Leg vises were sold by the pound in 5 and 10 pound increments (30, 35, 40. . .). Common parts only span two, possibly three sizes AND varied according to manufacturer. A manufacturer would need a half dozen sizes to cover the smaller vises and a dozen to cover the full range. So there is no money in it.
|
|
- guru
- Monday, 06/07/10 22:34:47 EDT
|
More about Vise Parts: Besides the size issues many of the old vises were made with hand cut threads and spiral brazed threads in the boxes (imagine a coil spring brazed in a tube). These were made as matched pairs and would not necessarily fit any other.
These old pieced together boxes started as a hand rolled and forge welded tube. The threads were made by coiling a small piece of square bar to fit the screw, then spelter brazing the coil into the tube. The flange, rear hub and key were also individual pieces brazed on. The flange usually had a notch for the key to help keep it from breaking off.
Thus the Peter Wright one piece "Solid Box" was a big improvement which many other manufactures quickly followed.
|
|
- guru
- Tuesday, 06/08/10 06:25:08 EDT
|
Ancient History. When I began bending iron in the 1960's, there was only one mail order horseshoe and blacksmith supplier that I knew of, Kennedy-Foster out of New Jersey. In their catalog, they listed a "box and screw assembly" as a replacement item for your ole leg vise.
|
|
Frank Turley
- Tuesday, 06/08/10 07:25:56 EDT
|
Tired of cheap hardware store bandsaw blades snapping on me. Anyone have a good source for QUALITY bandsaw blades?
|
|
- Nippulini
- Tuesday, 06/08/10 07:26:52 EDT
|
Nip,
Tool Center?
http://www.toolcenter.com/
They make custom length blades as well as stock standard sizes.
|
|
- Rustyanchor
- Tuesday, 06/08/10 07:32:48 EDT
|
Nip, Hagemeyer NA. Aske for Lennox brand Diemaster II.
502-961-5930 ask for Mike.
Good price, and that is the best general purpose small bandsaw blade on the market. I use the 10 to 14 tooth variable.
|
|
ptree
- Tuesday, 06/08/10 08:55:49 EDT
|
Like Jeff said, get the Lenox Diemaster blades - nothing else. I found great service and quality at http://www.woodcraftbands.com/
You need to call in your order for best service and he's not open on Fridays. Very fastidious welds on the blades, the mark of a quality operation.
|
|
- Buford Heliotrope
- Tuesday, 06/08/10 09:12:33 EDT
|
Nip, Lenox are the best (see above). However, the high tech blades require a high tech blade welding machine. Blades that break at the weld are an indication of a poor weld and can be the result of a machine that is out of calibration or operator error.
When I went from cheap blades to Lenox the dealer claimed the welder for the blades cost them $20,000 (in 1980) and the operator had to go to school for a week to be certified by Lenox to operate it.
True or not, the Lenox blades I bought for my 4x6 saw would last until the the HSS steel teeth were almost gone and none every broke. Previously cheap blades from another supplier would often still be like new and snap at the welds. . .
I was paying $5 each for cheap carbon steel blades that had VERY short lives. At the time the Lenox cost me $18 each BUT lasted more than 10x longer than the plain carbon steel blades.
Note that if you are free hand sawing metal on a 4x6 cutoff saw the blade life is always going to be much shorter than straight cutting. While these little saws WILL cut curves they are not properly designed for doing so.
For my large (20") woodworking saw I've bought the cheaper blades and never had any trouble. Even though the welds are probably the low quality I was originally buying the larger diameter rubber tired wheels and lack of twist in the blade is much easier on the blade. So these were OK. But I would never use them again on any size twisted blade cut off saw as they are not cost effective.
|
|
- guru
- Tuesday, 06/08/10 12:08:16 EDT
|
I bought a batch of the Lennox last year at $19.96 each for my 4 x 6
|
|
ptree
- Tuesday, 06/08/10 12:32:07 EDT
|
I just recently (April 5th) bought 64-1/2" Lenox Diemaster 2 band saw blades in the 14/18 Vari-Pitch for my 5x6 cut-off saw and paid $16.50 each. The 93-1/2" blades for the vertical saw were $22.00 each. I buy more than 5 at a pop so there's a *small* price break. Never have broken one of his welds and he ALWAYS matches the teeth so carefully at the weld that there's never a gap. A missing tooth at the weld will strip subsequent teeth very quickly or even break a weld, but many places don't take the extra ten seconds to dress the ends that perfectly.
|
|
- Buford Heliotrope
- Tuesday, 06/08/10 12:44:45 EDT
|
My costs may have included shipping at the time. . . .
Been a LONG time ago and its hard to remember. The Dimaster blades were pretty new at the time and prices may have gone down.
|
|
- guru
- Tuesday, 06/08/10 13:37:05 EDT
|
I use the 10 to 14, the 14/18 and for really thin stock like 16 ga tube I buy the Lennox portaband in the 28 tooth. All work a treat.
|
|
ptree
- Tuesday, 06/08/10 13:51:15 EDT
|
Thanks for all the advice. I love this place!
I use a 4x6 as a chop saw, never tried anything other than a straight cut. It's a Chinese Grizzly knock-off I got at Re-Tool a while ago. The last blade I got popped at the weld during the first cut. Big box stores suck.
|
|
- Nippulini
- Tuesday, 06/08/10 13:55:46 EDT
|
AI, There is not really a place to join. It's like eating a big family table, you just kind of jump right in. Welcome to Anvil Fire.
|
|
- daveb
- Tuesday, 06/08/10 15:27:47 EDT
|
Bandsaw Blades: I ran a heat treat facility that had three big band saws and we found Lenox blades to be the best IF you broke them in properly. Light pressure for the first dozen cuts will give you much better blade life.
|
|
quenchcrack
- Tuesday, 06/08/10 18:19:41 EDT
|
I use Lennox as well, in both the big saw and hand held. I run a coarser blade in the portaband than ptree thou, if I want an accurate cut I go to the stationary saw.
Nip- if good blades don't make a difference, look to your blade guides or tension. You could also quit cutting stainless ;).
QC- Good advice, thanks!
|
|
Judson Yaggy
- Tuesday, 06/08/10 19:55:32 EDT
|
Quenchcrack has it. Those M-42 toothed flexible back do have a break in and the fine folks at Lennox send a "How to" with the blades I get. On my little 4x6 H/V bandsaws, I hand feed slow on the first cuts and also use a lighter tension. Takes a couple of minutes, but does payoff.
I also try to always change to the right pitch for every job. Try to cut thin stock with a course pitch and you ruin the blade. Hence the three blade pitchs I use.
|
|
ptree
- Tuesday, 06/08/10 19:55:55 EDT
|
Judson, I use the Lennox porta band stock, in the 28 tooth wavy style in my 4x6 for thin stock. My porta bands are usually courser. I should be more clear. I just finished 2 hours in the shop this evening cutting 16 gage square tube. Used those 28 tooth wavys and it cut like a laser, and did not strip a single tooth.
|
|
ptree
- Tuesday, 06/08/10 19:58:41 EDT
|
Band Saw blades: I very rarely cut thin material in my 4x6 saw but having the right blade makes a big difference. I generally use the coarsest blades available for the saw (10-14 variable pitch) and can run it at top speed on stainless and annealed tool steel. Cutting these materials the blades only last about half as long as on mild steel. I might get a longer blade life at slower speed but you have to consider the value of your time as well.
Cheap blades may not survive cutting one piece of 2" diameter stainless and I've cut dozens with the high quality blades.
|
|
- guru
- Wednesday, 06/09/10 08:16:47 EDT
|
The smith I share shop space with wants to build a helve hammer. Ive never used one, or a power hammer of any kind. Is anyone here have experience with one or are you using one now? Pros cons?
Im not really much of a blacksmith but a darn fine blade smith. I have been doing pattern weld Damascus by hand for about 18 years now and as much as I love it I have to come to the conclusion I cant expect to be able to swing a hammer forever.
|
|
Kevin
- Wednesday, 06/09/10 10:40:59 EDT
|
Hmm I picked up a horse shoe out of the rocks up here; Have to get Frank to look it over and tell me about it---the iron it calls to me!
Thomas going downhill next Monday
|
|
Thomas P
- Wednesday, 06/09/10 11:36:57 EDT
|
Kevin, tyr clicking on "ptree"'s underlined name and he may be willing to send you all you need to know about helv hammers.
Also, if you pull down the "Navigate" tab and click on the power hammer page you will find a large selection of types and designs that have been home built.
Most of us here agree that some kind of power hammer is the only way we'll be able to continue at the craft...
Keep in mind that the old time blacksmiths were'nt really tougher than we are today as much as they just wore out and died much sooner than we do. I think this is why we seem to think that most of them were strong and vital at an older age than we are.
Of course, opinions may vary...
|
|
- merl
- Wednesday, 06/09/10 11:58:31 EDT
|
Yes Thomas, only you would find a horse shoe on "Mars"....
|
|
- merl
- Wednesday, 06/09/10 12:00:34 EDT
|
No this is at the low site, 9000'; it is even possible to find vegetation if you check carefully for it---feral burros are around these parts too. Mars is up at 16568' where I haven't even seen lichen! (though if it was a tad wetter I'd probably see it up there too...)
I just picked up a couple of pieces of construction debris up at the high site---my suitcase load is getting odder by the day...
Thomas
|
|
Thomas P
- Wednesday, 06/09/10 15:24:59 EDT
|
Helve Hammer: Technically, a helve hammer is the old fashioned "tilt" hammer, a long arm and a ,mechanism to raise and drop it.

These are limited by the short fall and gravity. Later versions were operated by a spring and crank but the hammer was still attached to the end of the wooden (or sometimes steel) "helve".
Ptree's hammer is a "spring helve" where a guided ram is moved by a long leaf spring connected to a crank and link.
|
|
- guru
- Wednesday, 06/09/10 18:46:07 EDT
|
Just another idea....how about placing an old jack hammer in a frame...have top and bottom dies...run the hot metal through like a singer sewing machine...fast,hard blows...maybe good for welding damascus etc.
|
|
Mike T.
- Thursday, 06/10/10 00:54:50 EDT
|
Mike, Been done. A fellow in Alaska did it and called the hammer "old rattler". Works, but is very noisy and has little control.
|
|
- guru
- Thursday, 06/10/10 06:26:33 EDT
|
What does the 4x6 and 5x6 designation mean in reference to bandsaws mean?Also I wonder what blade speed different people are using.Cheers.
|
|
wayne
- Thursday, 06/10/10 06:43:41 EDT
|
Square tube steel.
Can any one give me any tips on twisting 3/4 X3/4 X 11 gauge tube?
Im only getting a OK job using heat and the twisting lathe.
Is this something that needs to be done by hand?
Im starting to think solid steel would be less work.
Dan
|
|
- Dan
- Thursday, 06/10/10 06:45:06 EDT
|
Have you tried packing the tube with dry sand? I've had some success with that method. You really need to ram it in tight and be sure it's DRY sand. Moist sand can cause some issues. Pack it, ram it, weld caps on, then you can treat it as solid bar.
Now for something completely different. A buddy of mine had his leg amputated a few years ago from a bad motorcycle accident. Last month he was complaining of pain at the stump.
Apparently some of his internal hardware became fatigued and had to be removed.
He is planning on letting me work his fixators into jewelry for him to wear.
Now I don't think Junkyard Rules apply on titanium and cobalt implants. Any tips?
|
|
- Nippulini
- Thursday, 06/10/10 07:49:33 EDT
|
Nippulini,
Yeah - wash your hands afterward, okay? :-)
|
|
- Buford Heliotrope
- Thursday, 06/10/10 07:56:56 EDT
|
Jackhammer: there used to be a website out there that had two different people doing that in slightly different ways.
As I remember one issue is that they don't have much throw---a powerhammer the dies may be a foot apart and the system works such that you can "follow a piece" down in thickness quite a lot. The Jackhammer has a limited throw and can't exceed that so you would have to build in a method of changing the spacing during operation.
Also the jackhammer is designed to have some give in it's support structure and so you can't mount it rigidly in a frame you need something like springs to take the place of the beer belly traditionally used as a backer for the beast
So yes it has been done but takes a lot of work and even then doesn't work as well as a more traditional air hammer.
Thomas
|
|
Thomas P
- Thursday, 06/10/10 11:18:35 EDT
|
what alloy Ti?
Thomas
|
|
Thomas P
- Thursday, 06/10/10 11:19:26 EDT
|
One advantage of getting the new woodshop delivered this month is that it will finally free up space to accommodate and finish the "Renaissance Power Hammer" in the new forge.
Things have been on hold the last few years while estates, construction, and moves were sorted out, but all of the existing parts were stowed in the barn and I think I can get it all together this autumn and winter.
|
|
Bruce Blackistone (Atli)
- Thursday, 06/10/10 11:47:41 EDT
|
I want to start by saying thankyou for all the good advice I have recieved from this site. My question is about a rollbender I am building. It is an orbit motor driven machine with two bottom rollers and one top roller all driven by number 50 chain. The bottom rollers are 14 inches apart.
I am having a hard time bending 1-1/2" .100 wall square tubing with this machine.
Would it help to place the bottom rollers further apart?
|
|
Dan
- Thursday, 06/10/10 12:37:58 EDT
|
What diameter are your rollers Dan?
And what is the problem, slippage? stalling?
|
|
JimG
- Thursday, 06/10/10 13:28:49 EDT
|
What type oil should be used in a hand crank blower?
|
|
- gary
- Thursday, 06/10/10 13:29:31 EDT
|
Gary, Automatic Transmission Fluid is a good, works in any climate oil for hand crank blowers. Buy the cheapest, since most blowers leak badly, by design.
|
|
ptree
- Thursday, 06/10/10 13:54:50 EDT
|
To answer your question about the roll bender Jim. The rollers are 2.4" in Diam. They don't slip. The orbit motor just stalls. So I have a torque problem. A better gear ratio would take a lot more redesigning since I don't have enough room in the frame for bigger sprockets. It would be less work for me to move the rollers farther apart. Would the same torque bend the same steel more easily with rollers further apart?
|
|
Dan
- Thursday, 06/10/10 14:26:33 EDT
|
Dan: What exactly do you mean by "orbit motor"?
|
|
- grant
- Thursday, 06/10/10 15:22:35 EDT
|
Jim: The orbit motor is the hydralicaly driven gear motor that I power from my hydralic pump on my hydralic press. Mabey it's my Canadian slang but that's what we call them up here.
|
|
Dan
- Thursday, 06/10/10 16:09:51 EDT
|
Dan,
If you have insufficient torque, you have to address that by multiplying it, not by changing spacing. If you take less distortion of the tubing at a pass you can get by with a bit less power, but in the end, it takes a given amount of power to deflect a given size of steel past the yield point. They're the Laws of Physics; not the Suggestions of physics.
I'd suggest trying to find a gear reducer motor for your bender. That way you could end up with the same sprocket for your final drive but have gear reduction (and corresponding force multiplication) before that sprocket. Look at Surplus Center to see what's available. Not cheap, but it will do the job. They're also available in right angle drive to solve space/mounting problems.
Note: the radius bend that you can accomplish is a factor of the roll spacing - if they get too far apart you can't deflect the tubing enough to get it to yield sufficiently.
|
|
- Buford Heliotrope
- Thursday, 06/10/10 16:26:01 EDT
|
2.4 dia, seems a bit small, anyway you could make them larger?
the larger a wheel is the easier it rolls. I don't know what HP he used, but I knew a guy with a homemade roller for recurving cultivator shanks and it had 6inch rollers.
|
|
JimG
- Thursday, 06/10/10 16:34:37 EDT
|
Dan,
If you're already using a gear motor, then you should have plenty of power unless you have a hydraulic relief valve set incorrectly or something like that. Pressure reading okay at the motor?
Are all your rollers driven, or do you have one or more that are free-spooling? If all are driven that can increase the force required since the outside of the curve must stretch and contact with coupled driven rollers on both sides simultaneously will work against itself to some degree.
You should be able to roll 1-1/2" square .100" wall tubing to a minimum radius of about a foot using no more than a one horsepower electric motor with the proper gearing and drive system. How big is the motor on your hydraulic pump? You would need about 1-1/2 to 2hp to yield 1 hp at the motor, I'd think, with the losses and inefficiency.
When all else fails, try taking two of the rolls out of the chain loop so they are just idlers and see if that helps, If that isn't enough, heat the tubing to about a low red, just above black heat - that should reduce the force needed by about half.
|
|
- Buford Heliotrope
- Thursday, 06/10/10 16:36:02 EDT
|
Dan,
I once a demonstrator (Charlie Orlando if I remember correctly) hot twist square tube by sliding a piece of solid round inside as a mandrel. A piece of 1/2 round ought to fit in your tubing.
Buford,
Just to be picky, it takes a given amount of *work* to deflect steel past a certain point. The more power you have, the less time it takes to do that work. If you could eliminate friction (a big if, I admit), an ant in a wheel could power Dan's rolls. It would just take a *long* time to do it (and some ridiculous reduction gearing).
|
|
Mike BR
- Thursday, 06/10/10 17:11:24 EDT
|
Bending Tubing: Dan, A larger radius WOULD be slightly easier but if you are making a bend then I assume it must be some specific radius when you are done.
The necessary torque is difficult to calculate but I can tell you approximately how much torque my old Champion bender generated. First it has 3.5:1 reduction gearing, this is powered by a hand crank with an 12" long handle. The amount of push on the handle varies from an estimated 2 to 5 pounds (more could be applied but be very tiring).
12 x 2 = 24, x 3.5 = 84 inch pounds of torque.
12 x 5 = 60, x 3.5 = 210 inch pounds of torque.
Tubing will require the high end or greater. It will also probably require two of the rollers to be driven as they are in the Champion and other benders.
To determine the necessary HP and reduction combination lets start with.
1 HP @ 1800 RPM = 32 inch pounds torque.
To obtain the 210 IP, multiply by 1.11 for 90% efficient gearing ( 210 * 1.11 = 233, and divide by 32, equals 7.3 (reduction)
So you need about 7.3:1 reduction at 1 HP.
At 7.3:1 the rollers will turn 226 RPM. At 2.4" diameter they have a 7.54 circumference. This means the work will move at 142 feet per minute or about 2.4 feet per second. That is fast enough to be a little scary. Half that would be reasonable.
At half that speed you need 15:1 total reduction and 1/2HP which is also more reasonable. This produces the same approximate torque as my Champion bender.
What would the champion bender bend?
3" x 3/4" flat to 36" circles (per Champion specs).
3/4" square to 18" circles (9" radius - my test)
1" schedule 40 pipe (1.315 OD) to a 7 foot circle
1.25" x 1/2" channel flanges in to a 7 foot circle.
Note that the tubing and structurals were at the limit of the bender and we broke the cast iron tire on one roller bending the channel and had to replace it with steel. This old bender had 3" CI tires cast around a 1" diameter shaft.
The structurals took a minimum of 3 men and usually 4 to guide the tubing, crank and steady the bender. Guiding the tubing was tough and we eventually machined a large half round groove in one roller and put set collars as side guides on another. It still took a "crew" but was easier to control. We also found that while bending in stages seemed a little easier the material work hardened and it was best to use as few passes as possible.
I suspect to bend your square tubing is going to require a heavier bender (about twice as powerful) but the final radius determines the necessary torque. Calculating it is not easy that is why I give the example above. These are real world cases. We did the tubing and channel numerous times with the above bender.
The more reduction you use the less HP is necessary up to a point. As the torque increase the roller diameter also needs to increase. Since it appears you do not have a specific HP or torque on the hydraulic motor it would be tough to make specific suggestions.
|
|
- guru
- Thursday, 06/10/10 17:40:21 EDT
|
Does anyone know where I can get plans for a milliamp DC electolytic rust removal system? I am thinking in terms of a small DC charger for a phone or something similar. I have some delicate parts to restore.
|
|
quenchcrack
- Thursday, 06/10/10 18:21:05 EDT
|
Dan, Any hydraulic motor will use a LOT of oil to hit rpm. If the motor start/stops and sort of stutters, you have a lack of flow. If there are flow controls in the line to the motor and they are also used on the press cylinder, they should be metering in and they will starve the motor in some cases. Last if the pressure is insufficient for the demanded torque the motor will stall. Also if the motor is badly worn, and leaking internally no torque. One way to easily check for motor internal leakage is to stall the motor first thing in the morning when the oil is cold. Lay a bare hand on the return line and feel for heat. If hydraulic oil goes from high pressure to no pressure without doing work the energy becomes heat.
|
|
ptree
- Thursday, 06/10/10 20:06:29 EDT
|
Thank you for all the advice for my roll bender problems. I finally have it working the way I want after increasing the gear ratio and spreading the bottom rollers from 14.5 inches to 20.5 inches.
|
|
Dan
- Thursday, 06/10/10 20:12:22 EDT
|
Dan, We would love to see a photo of your rolls. You can email it to me and I'll post it.
|
|
- guru
- Thursday, 06/10/10 20:40:09 EDT
|
Dear Guru,
I was reading your article about forging a sword lol. Never got to the sword part... Will start by forging a snake or kitchen knife ;).
This weekend i am working on building my first brake drum forge. Anywho i noticed you metion kryptonite as a fictional material. And it was thought to be. It was written about for this very purpose since krypton is a nobel gas and under normal circumstances does not bind to anything. However a couple years ago a white powder was found in a mine shaft (in india i believe). Chemical analysis was done and the chemist searched the chemical formula on google. Wouldnt ya know it... It was the fictional kryptonite. The chemical is inert, doesnt glow, is white, powder, and has no use that has been found...
But it is kryptonite :) wish me luck on the forge :)
Mike
|
|
Jammin246
- Friday, 06/11/10 07:30:14 EDT
|
But does it stop Superman!
A couple of the so called "inert" gases have been found to have bonded with other elements. So far they are useless anomalies. But you never know.
Starting small in blade making is the best way to go. Learning to forge high carbon steels, heat treating, finishing and fitting parts. Many folks will tell you that good kitchen knives are more difficult technically than making a sword. If you can master the small blade then the larger blade is just a matter of scaling up and more work.
Pocket knives and folders are also highly technical and their methods apply to non-traditional weapons such as fantasy types with fold out spike guards or hidden "extras".
|
|
- guru
- Friday, 06/11/10 08:35:34 EDT
|
Have no idea what alloy this Ti stuff is. I forged a small piece today. Worked nicely actually. HT is a mystery for me though.... after forging I let normalize and tested the piece. Brittle. Although I must say that the temper colors that appear on Ti are simply brilliant!
|
|
- Nippulini
- Friday, 06/11/10 08:39:25 EDT
|
Hey thanks for the advice.... I think i found my new favorite forum lol.
Cheers
|
|
Jammin246
- Friday, 06/11/10 09:18:06 EDT
|
Nipp, Ti is bad about absorbing oxygen when heated and is often worked using vacuum furnaces. In small scale or specialty operations it can be coated with ITC-213 to prevent gas absorption. If I haven't sent you some let let me know.
Yep, the Ti temper colors are fantastic and very permanent as far as I can tell. I have a piece of Star Trek jewelery (insignia) that is Ti with a gold to blue rainbow of colors.
ITC-213 is used by a number of large steel forge and rolling mill operations to reduce furnace scaling. In one plant the scale reduction was some 25 tons a year! Just the cost savings in scale disposal was cost effective. The cleaner product and saved material were benefits as well.
While it is probably not cost effective for most hand forged work it would probably improve results for bladesmiths and others doing more technical work.
|
|
- guru
- Friday, 06/11/10 10:09:02 EDT
|
Guru, The Ti I tried to hot work was an alloy that picked up nitrogen from the atmosphere at temp and crumbled. Cold it worked about like Rc 32 steel:(
|
|
ptree
- Friday, 06/11/10 11:23:50 EDT
|
Rats. . yep its Nitrogen that Ti picks up. The ITC-213 is still the stuff for the job.
|
|
- guru
- Friday, 06/11/10 12:47:02 EDT
|
Hmm may need to pick up some ITC-213; as soon as my triphammer comes on line I need to forge a Ti door stop for my boss's boss he's a Ti-a_phile and got upset when I told him that Ti makes *BAD* laptop cases compared to Al due to heat dissapation issues. So I figure I will make him a Ti door stop to turn him up sweet...
Thomas
|
|
Thomas P
- Friday, 06/11/10 13:14:39 EDT
|
I had a fancy Ti Laptop. . An "Armada". Yeah, the case was near indestructible but one of the plastic hinges broke and the monitor had anchoring problems to the case that caused loose connections. I had to occasionally massage the edge of the screen to make it work. . . It had never been dropped and was always carried in an expensive padded bag (2" of foam) that I always handled (no baggage handlers).
Folks that build these things for durability could learn a LOT from the pocket and wrist watch industry.
|
|
- guru
- Friday, 06/11/10 13:39:17 EDT
|
Would ITC-100 work? That's all I have on hand. I think all the hype about Ti is about the first three letters of the word.
|
|
- Nippulini
- Friday, 06/11/10 13:48:09 EDT
|
Nip, no it will not stick properly to the metal. The 213 is a red color (like primer) and sticks to metals. It thins much thinner than 100 and parts can be dipped or just wiped on. Mail coming your way.
|
|
- guru
- Friday, 06/11/10 14:00:48 EDT
|
I read an article awhile back about making stainless steel damascus. It was discovered that the welding could only take place in an oxygen free invironment. Would ITC 213 or ITC 296A accomplish this ?
|
|
Mike T.
- Friday, 06/11/10 16:24:05 EDT
|
Mike, the coating would prevent the weld.
The way to do high tech Damascus steel is to wrap the billet in stainless foil. The first folks doing this used stainless tubing, welded on end caps, drilled a small vent and put in a drop of kerosene. The kerosene would absorb any oxygen by burning, the excess blowing out the vent hole. Then when at welding temperature the entire billet and tube were forge welded. Due to the tubing having an oxide coating inside it generally did not stick to the billet and was pealed off after the welding.
Stainless foil is used in a similar fashion. However, it fits the billet closer and the kerosene may not need to be used. The foil also has some oxidation on the surface and does not stick. Most of it is torn off during the welding and the last pealed off.
After the billet is welded and the first heat completed a coating could be used during the drawing out steps in order to reduce decarburization. After cutting to make a new stack the surfaces need to be ground and cleaned perfectly for the next weld. This can be done without the foil in regular carbon steel but would need to be used for stainless again.
There are very high scale losses in making laminated steels and using foil or a coating like ITC-213 can save very valuable metal. Reducing decarburization will also reduce the amount of loss from the necessary grinding down to good metal.
ITC-296A is a high purity version of ITC-100 and is used to line kilns that need to be very clean and crucibles to reduce foam and slag sticking which shorten the life of the crucible and reduce efficiency. It is used a lot in precious metals industry (gold and platinum) where microscopic losses are still big bucks.
ITC-213 and 296A are used together to coat metal troughs used in foundry work to increase their life as a "non-stick" surface. 100 and 296A are used on reusable refractory parts in the same service.
|
|
- guru
- Friday, 06/11/10 16:44:30 EDT
|
Offline. . .
We were ofline for about 10-15 minutes this evening due to a server failure and replacement. All is well now.
|
|
- guru
- Friday, 06/11/10 21:02:20 EDT
|
I was looking at an American Wrought Anvil on ebay #120580962179 offered by Steve Prillwitz of matchlessantiques and hammered2bits. It refers this anvil to being made by Hay Budden for Montgomery Ward referenced from AIA by Richard Postman. I asked him these questions, but have not yet received a response. I was wondering Mr. Postman's thoughts concerning the maker of this anvil since he wrote his book? Maybe he has new information? Steve is around the corner from Postman, so I hope he can ask him to clear up the confusion about this make anvil. The geometry of the anvil appears to be different than any of the three style Hay-Budden anvils? It has a fourth handling hole in the front foot as Hay Budden anvils did not? Why would they reinvent the wheel or spend the money for just a Mongomery Ward Anvil? I wonder if this may be a case like an employee from the maker of Trenton anvil going a couple blocks away and starting a facility and producing Arm & Hammer Anvils? We know American Wrought were made in Brooklyn like Hay Budden, but I wonder if they were seperate locations and makers? Any thought from you gents? I hope Postman has new info and Steve is able to obtain it.
|
|
- Happy Jack
- Saturday, 06/12/10 12:16:05 EDT
|
It "does" have the rectangle handling-hole, but not so sure that it's from H.B. though.
So it's not just Peter-Wright anvils that has them......
Gotta add that INFO into the anvil hunt note-book.
It's painful to look at anvils on e-Bay!
|
|
Danial
- Saturday, 06/12/10 13:49:13 EDT
|
Hay Budden: Happy Jack, Hay Budden made a full line of anvil types including European export models with a double horn. The also made custom anvils to spec for individuals (special weights, proportions, features). I would not be surprised that they made a special style for a reseller.
My 200 pound Hay-Budden came with two pritchel holes, two 3/4" bolting holes in the feet under horn and heel, the shelf cut off one side of the horn and an extra thick base. In general it is an ugly anvil as Hay-Buddens go and the best I can tell these were factory mods.
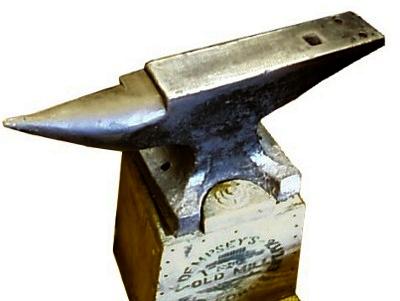
Steve Prillwitz is probably the most honest dealer of anvils you will find. However, he works hard to get the most money he can from what he sells. His prices are not cheap but you will not find a more reputable dealer on ebay or anywhere else.
|
|
- guru
- Saturday, 06/12/10 16:16:01 EDT
|
I meant no disrespect to Mr. Prillwitz.
They are some of the best-looking anvils one could see that are for sale.
It's like being a kid, looking at candy even "after" your folks said. "NO....you're not getting any."
It IS a habbit now.......to watch the last 5-minutes of the bidding on some anvils at time.
Getting a Shipping-Rate to my location lets me know that I'm "JUST-LOOKING" only.
I'm still stuck in Anvil-Hunt MODE where-ever we go, it doesn't STOP.
One could follow Anvilfires "HOW TO FIND AN ANVIL" with a helping of "just be respectful to everyone you ask" and in time anvils will come find YOU. It's true.
|
|
Danial
- Saturday, 06/12/10 17:56:34 EDT
|
Indeed Mr. Prillwitz is a good fella. Just always wondered about the American Wrought anvils since I read the #5 Fox fire book and Mr. Zollenger's mentioned his anvil was an American Wrought. Thanks for your opinion concerning this brand as well Guru.
|
|
- Happy Jack
- Saturday, 06/12/10 20:52:22 EDT
|
Happy Jack, I used to have 3-4 Foxfire books, these are wonderful books, where can I purchase the whole set ?
|
|
Mike T.
- Saturday, 06/12/10 23:24:40 EDT
|
Hey Nip, somewhere on youtube I saw a video from a guy that made a forged Ti knife. He had it in a vise and was trying to bend or break it with a large sledge. It didn't budge! No bending, no breaking and he is really smacking it! I was impressed.
|
|
- merl
- Saturday, 06/12/10 23:35:09 EDT
|
Well a search for Author: Wigginton Title: Foxfire over at abebooks.com turned up 924 or them...
Thomas
|
|
Thomas P
- Sunday, 06/13/10 11:31:46 EDT
|
Mike (stainless damascus)
funny you should ask about stainless damascus... yesterday i was prepping just such a beast for a couple swords.
I dont find any trouble forge welding stainless damascus, but mostly because i use a lower grade stainless than i would if i where just making a stainless blade.
All i want out of my stainless damascus is the strong contrast in color. Say im working on a knife, if im useing a low grade stainless and heat treating by hand, the stainless will not harden. So if im a little sloppy when i draw the temper the stainless also gives a little bit of flex and shock absorption.
I do nothing special except a liberal application of excessive heat when i forge weld my billets. Its worked with great success for many years. Ive often been told that i cant possibly be doing what im doing, how im doing it but then again i may be the idiot savant of damascus.
I generally just use stainless steel roof flashing and cut it with a scissors
[URL=http://s538.photobucket.com/albums/ff342/styxx1974/?action=view¤t=cuttingstainless.jpg]
[IMG]http://i538.photobucket.com/albums/ff342/styxx1974/th_cuttingstainless.jpg[/IMG][/URL]
then i build up 21 layers, 10 stainless sandwiched between 11 high carbon and run a dirty weld over it to keep it closed when i stick it in the forge.
[URL=http://s538.photobucket.com/albums/ff342/styxx1974/?action=view¤t=closeofpreforgeweld.jpg]
[IMG]http://i538.photobucket.com/albums/ff342/styxx1974/th_closeofpreforgeweld.jpg[/IMG][/URL]
I just get it hot, flux the snot out of it and dead blow the first weld. After that i can go to town.
[URL=http://s538.photobucket.com/albums/ff342/styxx1974/?action=view¤t=closeofpostforgefirstweld.jpg
][IMG]http://i538.photobucket.com/albums/ff342/styxx1974/th_closeofpostforgefirstweld.jpg[/IMG][/URL]
With a rough grind you can see just from the heat how the stainless will stand out from the blade when its complete.
[URL=http://s538.photobucket.com/albums/ff342/styxx1974/?action=view¤t=heatbluefromgrind.jpg]
[IMG]http://i538.photobucket.com/albums/ff342/styxx1974/th_heatbluefromgrind.jpg[/IMG][/URL]
|
|
Kevin
- Sunday, 06/13/10 15:27:16 EDT
|
oops im sorry my links suck.
if you go here you can see them Sorry about that
http://s538.photobucket.com/albums/ff342/styxx1974/
|
|
Kevin
- Sunday, 06/13/10 15:43:01 EDT
|
Keven but that's not stainless damascus; that's stainless and regular high carbon steel.
Welding stainless to stainless seems to be the big issue; I know lots of folks who do stainless to WI or plain steel.
Unless the HC is also stainless then "Nevermind"!
Thomas
|
|
Thomas P
- Sunday, 06/13/10 17:05:02 EDT
|
no just high carbon. I think im confused because welding stainless to stainless how would you see the difference in the layers?
or maybe im not getting it. I've found that when I use nice stainless sheet or something that has too much chromium in it I work twice as hard to get a weld to take.
Still welding it to the high carbon steel.
|
|
Kevin
- Sunday, 06/13/10 17:19:04 EDT
|
Kevin,
It looks like you made some pretty damascus....have you tried dipping it in an acid bath for contrast ? I saw beautiful damascus rings on the internet, you might try making them.
Guru,
Can W1 and high carbon steel be welded together ?
|
|
Mike T.
- Monday, 06/14/10 02:18:36 EDT
|
Kevin, Thanks for the pics.
Different grades of stainless have different corrosion resistance. If you weld a billet of say, 304 & 316 then etch in sulphuric acid its a similar effect to using 2 different carbon steels.
|
|
- John N
- Monday, 06/14/10 03:53:14 EDT
|
Something I have been thinking about trying is to drill holes in a bar of steel,then driving pins in the holes. Then forge welding. Something a little harder. Drill a 1/16" hole in a 1/4" pin, then drive a 1/16" pin through the 1/4" pin, then drive these pins in a steel bar with 1/4" holes drilled in it. This should make a target effect or birds eye effect. Just a thought. Kevin, I think this cold be done by alternating stainless and regular H/C steel. What thinkest thou ?
|
|
Mike T.
- Monday, 06/14/10 07:05:23 EDT
|
Wrap a 1/16" pin with WI, then weld it together. Use the layered WI/HC pin (now about 1/4") pushed into the drilled holes, weld. Just another way of acheiving the same outcome.
|
|
- Nippulini
- Monday, 06/14/10 07:52:03 EDT
|
Stainless to stainless and bulls eyes
While there is not a lot of color difference you can see the difference between a piece of 304 and 440C stainless when next to each other. Its not much but there IS a color difference. And as noted, the hardenable version will etch more than the non.
There are other reasons for making laminated steel other than color and pattern. Alternating soft ductile layers with highly hardenable layers results in a blade steel that both holds a hard edge and is still strong enough to be bent at a relatively tight radius. This type of laminated steel is often used for edges and more decorative patterned steels for the body of the blade.
Mike, if a proper press fit and with both pieces very clean the pins should weld together without forging. Otherwise the pins need to be a little longer than the holes so they upset in the holes. I THINK I've seen this in some article on laminated steels but cannot remember where. Bulls eyes are also made by drilling into a laminated billed then forging flat again.
The real trick to stainless and carbon steel combination's is if both are hardenable. Then you need to carefully determine how to use overlapping methods of heat treatment for both metals. This is where heat treating reference books such as ASM's come in handy.
|
|
- guru
- Monday, 06/14/10 08:00:43 EDT
|
Nip and Guru,
Thanks for your input.
|
|
Mike T.
- Monday, 06/14/10 08:52:05 EDT
|
Guru,
I can see where drilling into laminated billets can produce bulls eyes. Mr. Hrisulas (sp.) uses a cutoff saw and makes 1/4" cuts down the side of the billet, then turns it over and makes the same cuts, but alternates them with those made on the other side, then forge flattens it to produce a ladder effect.
|
|
Mike T.
- Monday, 06/14/10 09:01:35 EDT
|
There are many methods of producing patterns in laminated steel. The CD/DVD set produced by J.D. Smith and now sold by Artisan Ideas includes some very sophisticated techniques.
While I found a lot of faults with the production of this CD set the information there is is well worth the price.
Controlled patterning of laminated steels is an art with infinite possibilities. Just the combination of twisting and relaminating can create hundreds of patterns. Removing material by machining, while wasteful, can produce as many patterns as your imagination can think up. Hot punching then stock removal to flat can also create a great variety of patterns. Then there is the mosaic method which allows one to create virtual paintings in steel.
|
|
- guru
- Monday, 06/14/10 10:44:43 EDT
|
There's a great many ways to produce specific patterns in laminated metals. If you have a hydraulic forging press you don't need to do the drilling or cutting, you can just press the pattern in with properly shaped dies and then grind off the surface differences. You end up with the same result, but the pattern goes much deeper into the billet, thus removing the potential problem of gruinding too deep and losing your pattern.
For example, the last few blades of raindrop/birdseye/bullseye I made ( a pair of Scottish Dirks with matching sgian dubh and a big two-handed sword)were done by first making up a 180-layer billet of straight laminations, forging that to the rough shape of the blade(s) I wanted, but left about 1/2 " thick, then pressing it between a pair of dies drilled in a honeycomb pattern. This raised little bumps about 1/8" tall. When ground smooth, I had a nice 1/4" thick blade blank. When forged and ground to final dimensions, the pattern remained uniform and undistorted throughout the blade.
I got both dirk and sgain dubh blades from one billet that measured about 2" x 1/4" x 18", and the sword got its own billet that started at 1.5" x 1/4" x 32" and finished as 1.5" wide x 48" long, 3/16" thick at the grips tapering to 1/8" at the point.
|
|
Alan-L
- Monday, 06/14/10 11:08:16 EDT
|
John - I think im going to play around with stainless/stainless some time and see what kind of contrast i get. I mostly stay away from full stainless unless im going to send them out for heat treating. Honestly a lot of my reluctance to play with it is that I just really like the look I get the minimal effort it takes to make it. 99% of what I do is for the pattern and contrast so im out of my element here. Same with cable Damascus.
Mike - Yes i love to acid etch, in fact im actually a fan of slightly over etching the steel a little for fitting pieces, gives it a nice texture that just feels interesting. The one I took a quick picture of is only rough ground with a 60 grit belt. After I finish grind and polish it I will etch and take another picture. With a little luck that little test piece will make a nice trade knife.
The coolest thing about Damascus to me is the amazing diversity you can get when working in the medium. Drilling or drifting for a pin or just forging it back flat is also the basics for doing mosaic Damascus. If your really patient with a file or know someone with a flow jet or laser cutter you can do some neat pictures. I stick mostly with cutting, grinding or filing into the billet then forging back flat. If you like bulls eyes you don’t have to punch all the way through either. You can punch or chisel into the steal and grind it back flat. I tried this with writing my name in a blade once but didn’t like the results enough to keep playing with it personally. One of my shop partners used to use a meat tenderizer as die and put little pyramid dings down the billet and grind it back for kind of a checker board look.
Like Nip and Guru said, you can get similar effects multiple ways. With a little persistence and some imagination you can do anything.
|
|
Kevin
- Monday, 06/14/10 11:36:24 EDT
|
I'm not sure if this was said,but..If you grind or cut a design in you forge it flat..If you forge a design ,you grind it flat
|
|
- Arthur
- Monday, 06/14/10 13:21:21 EDT
|
Also, on the damascus I was thinking of using brass to (spalt ?) the blade. Maybe brass chips or powder. I did find a site for ordering brass powder. How would Yall go about this, if you even would ? Sprinkle the powder on stainless foil, lay the blade on it, sprinkle the other side, then wrap it up. Heat and hammer ?
|
|
Mike T.
- Monday, 06/14/10 16:49:13 EDT
|
Im just going over to the dark side of patternwelding stainless, not tried it yet though!. Ive done a fair bit of mosaic (not can welding), and have succesfully welded a 4 bar core sword, fully edge wrapped. Im ready for the challenge!
Ive started a website for my damascus ( www.shadowforge.co.uk ) Its still under construction but has 1 of my blades on there! I hope to have quite a range of my work on there soon. My reason for stainless welding is primarily jewellery, but will san-mai for blades aswell.
|
|
- John N
- Monday, 06/14/10 16:51:20 EDT
|
Kevin and all,
Check out Ariel Salaverria knives, daggers etc.
http://www.knifedogs.com/showthread.php?p=78307
His personal web site......WWW.AESCUSTOMKNIVES.COM
He experiments every day...makes unusual and one of a kind blades etc.
|
|
Mike T.
- Monday, 06/14/10 17:01:04 EDT
|
Brass on Steel: Mike, I would make impressions (cut or punch and then torch braze the brass on rough finished work.
|
|
- guru
- Monday, 06/14/10 17:10:02 EDT
|
John,
You definitely make pretty damascus !!!! I will look forward to viewing your site from time to time. Is wootz steel made by melting iron and hammering out the bloom, then layering-laminating ?
|
|
Mike T.
- Monday, 06/14/10 17:11:24 EDT
|
Guru and all,
Thanks for all of your information, this site is definitely a tutoring and learning site. I learn more from this site than you will ever know. Gathering and combining knowledge is wonderful !
|
|
Mike T.
- Monday, 06/14/10 17:14:50 EDT
|
Hi Mike, Im far from knowledgable on wootz, though I have worked a little of it (not cooked my own cakes though).
A guy from the states (Ric Furrer) who is very knowledgable was over in the UK last year teaching, and I think I got the jist.....
Basically 'wootz' is just a very high carbon, low alloy crucible steel (with a little vanadium). Its the large dendrites that form that create the classic 'snowflake' patternation on the blade. The challenge seems to be in the working of the 'cake' from the crucible to get 'working' blade steel. In a nutshell it needs to be thermally cycled (sub critical) many many times, and only worked very gently for the first few dozen heats.
After a certain point the cake will start to behave more like a modern steel and can be forged into a bar / blade.
(please correct me if any of the information above is inaccurate)
Ive been stalling trying to make my own crucible steels as it becomes all encompassing (ive seen it happen to others!), I got a bit addicted to basic patternwelding, and dont need a major drain on my time at the moment! :)
oh, and I went on a week long sword forging course with Howard Clarke so am dreaming beautiful hamon, and that itch is going to need scratching!
|
|
- John N
- Monday, 06/14/10 18:45:03 EDT
|
True Wootz is made in a crucible. Cast iron is decarburized in a slow process and then the iron cooled slowly which creates a unique crystalline pattern. The "button" from the crucible is then carefully split, rolled out and then forged to draw it out. It is tricky stuff to work. Atli's article on swords on our Armoury page covers the process better than my description.
Many blades were 100% Wootz but it was also incorporated with wrought in Europe.
|
|
- guru
- Monday, 06/14/10 18:49:16 EDT
|
This may be of interest to some of you,. at a recent 'forge in' someone had a top grade thermocouple, and we measured the temp in my home made single venturi burner, vertical forge. Just above what I consider to be the hot spot it was reading a steady 1470C !!!
This is my main welding forge (loosly based on Don Foggs design) and I knew it was a hot one, but I diddnt realise it was running hot enough in the base for crucible smelts!
|
|
- John N
- Monday, 06/14/10 18:56:23 EDT
|
Mike T- I've done what the Guru describes for brass inlay i.e. punching in a design then torch brazing into the depression. It works well but watch out for two things. First don't over heat the steel when brazing or you will get some porosity in the brass, and second don't over grind and eat thru the design. It also looks really good if you temper color the steel to purple or treat with a bluing patina. Quite a striking color contrast.
|
|
Judson Yaggy
- Monday, 06/14/10 19:39:57 EDT
|
There is a bunch of things you can do with torch brazing. I once saw an artist making welded steel boxes and then he covered them with a sort of lumpy textured braze coating. When cleaned they looked like large rough cast brass cubes.
A jeweler I knew made all sorts of brass jewelery from brazing rod. One popular motif was butterflies. He made a hemispherical butterfly shape to put on hair tied in a bun. Very beautiful. He made the body by just building up big droplets. The rest was an open frame, the joints flattened with a hammer and then ground to blend in. This was the fellow that taught me about in line flux feed for brazing. Very little flux on the work and what was there disappeared in a pan of Sparex.
|
|
- guru
- Monday, 06/14/10 21:50:56 EDT
|
we have an info page up on our web site for wootz if any one in interested
http://dragonsbreathforge.com/whatswootz.html
|
|
- mpmetal
- Tuesday, 06/15/10 07:16:49 EDT
|
Not to leave out forge brazing for effect. Alfred Habermann used to make sizable wall hangings which were covered with braze material. One can use copper, brass, silver, and silver solder for coating a piece. I've made trophy-style buckles with copper pieces placed randomly on the face of the buckle. I take a slow rising heat in a high coke fire, and I use borax for flux. When the copper melts, you can sometimes get a relief, free form, topographic map appearance. Coke should be on top of the workpiece to refract the heat, because there exists the possibility of burning the steel bottom before the copper melts. Not good.
In the 1950's and 60's, there was lots of steel sculpture done with textured brass done with a torch. Tom Bredlow called it the school of "drip and drool."
|
|
Frank Turley
- Tuesday, 06/15/10 09:40:47 EDT
|
Drip and drool. . . I like that. The guy I saw in the 70's must have been a hold out. .
We called the guys demoing the early Riter air hammer with the narrow sharp edged fullering dies the school of "crash and bash". No art or technique, just bashing the heck out of the bar. This gradually developed into "free hand forging" which uses much subtler dies and more artistic techniques.
|
|
- guru
- Tuesday, 06/15/10 10:44:06 EDT
|
Mike T
- Thanks for the link he (Ariel Salaverria) has some really cool stuff. Its always a pleasure to look at what everyoene else is doing.
If you look at his page on making a spoon he does a really good step by step pictured process of how he starts his billet and drills in to get the bullseye pattern as nice as he does. He ends up with a really good looking piece of steel
http://www.aescustomknives.com/docs/knifemaking27.htm
John - very pretty blade cant wait till your site is up and running!
Guru - great idea about the arits who covered his boxes with brazing, ive always wanted to experiment with that sort of thing but havent had a good aplication. I cant wait to get into the shop and play again.
Im always impressed with the great work and helpful resourses this place show cases from its members.
|
|
Kevin
- Tuesday, 06/15/10 11:01:09 EDT
|
Besides torch brazing and as Frank noted forge brazing which gives and entirely different result, you can also mix brass and steel. I used to make bronze rams heads from 1/4" brazing rod and a building up process, then braze then onto an iron handle with a tapered and barbed point to be sure it stayed on permanently. The process resulted in a strong bright brass handle on a steel fireplace tool. Brass and iron are often mixed using brass collars on iron and seperate brass pieces such as scrolls or leaves riveted or collared to the iron.
Similar bright metal highlights could be done in stainless.
On some really expensive work the highlighted areas are created by using gold leaf. While this sounds pricey it is probably cheaper initially than brass parts. The brass which starts bright may need polishing on a regular basis. The gold leaf will remain bright until it is damaged or comes off. Replacing the gold leaf every so often may be comparable or less expensive than repeatedly polishing the brass.
|
|
- guru
- Tuesday, 06/15/10 13:51:45 EDT
|
Thanks for the info on wootz mp I found the historical page a fun (and informative) read.
|
|
JimG
- Tuesday, 06/15/10 14:36:33 EDT
|
directions to the link on abana web site for "how to makeyour own smithin magician
|
|
smily
- Tuesday, 06/15/10 19:07:40 EDT
|
I have a question about the saftey of my shop...My shop is 20'x20' wth 12' ceilings of T&G pine..I have a powered vent in the roof..one of those mushroom shaped units like they use in resturant kitchens..plus big doors & windows
I was forging today ,about 100F. in the shop and I suddenly thought about the ceiling....I got up there with a thermometor and it was 160F.
Am I Looking for trouble?? I've been there for several years...Thank-you.
|
|
- Arthur
- Tuesday, 06/15/10 22:36:04 EDT
|
Too Hot? Arthur, The char point (just before wood catches fire) is 325°F. So you are well below that and probably quite safe.
You might want to do your measurement on a similar hot summer day when you are not forging to see how much of that heat is contributed by the forge. In hot weather the conditions that increase heat as you approach the ceiling and roof are significant. You also might want to check at a foot or so above the floor to give a general comparison.
In a blacksmith shop the powered vent should vent the shop, not the attic. Attic venting does help cool the building but not exhaust smoke and fumes well. I would want that big powered vent in the wall over the forge if its a gas forge.
The 12 foot ceilings are much better than lesser heights. For good ventilation in a forging and welding shop you cannot have high enough ceilings.
Something to think about is that building codes call for most walls to be covered in plaster or sheet rock for its fire resistance. This is particularly true if you have walls covered with paper backed insulation. Exposed insulation is common in unfinished areas of older buildings and garages. It should be covered to prevent the paper (even the foil covered stuff) from catching fire.
Sheetrock, even unpainted is light in color and brightens a shop as well as increasing fire resistance. I also like bright tin roofs for reducing shop temperature.
I think your shop is OK but might benefit from more ventilation (for you and the shop). Also note that many smiths that use gas forges indoors also have carbon monoxide detectors. This should be about head height as air tends to stagnate in layers even in fairly open buildings.
|
|
- guru
- Wednesday, 06/16/10 07:22:03 EDT
|
Guru, I would offer that since Carbon Monoxide is slightly more dense than air, one should follow the instructions on the device for placement.
I believe you will find that the device instructions call for placement at about 18 to 24" above the floor.
I went to a fire safety training seminar years ago and one of the items mentioned was that natural wood undergoes a change, I beleive it is called pryolisis(SP?) when exposed to temp's that are elevated but below the kindle temp. This can then reduce the autoignition temp significatly. This was reported to often occur around chimney flues where the wood was too close, yet below the autoignition temp. I think that I remeber 200F and above was the trigger temp.
140 to 160F is actually pretty common in attics with bad ventalation.
|
|
ptree
- Wednesday, 06/16/10 07:54:38 EDT
|
Blacksmith Shop Ceilings
Historically, most blacksmiths shops did not burn down from roof fires, despite the fact that until the industrial revolution almost all of them had some form of combustible roof. (This could be because there are so many other easy ways to burn them down! ;-)
That said, careful planning and good ventilation are excellent ideas and not to be discouraged. In my old shop, with a wood and gypsum board or sheetrock ceiling, I added an extra layer of gypsum board directly over the forge, with aluminum foil as a reflective layer over that. Lack of deterioration of the foil did indicate that either it was doing the intended job, or that it wasn’t really needed; but it made me feel better and safer. In over 15 years I managed NPT to burn down that one, despite the attempts of rodent-arsonists who build their highly ignitable nests in crannies where hot clinkers and coals tended to fall.
Ptree; CO: Is this a solution to my current (minor) rodent problems? I just suffocate the little beggars with the carbon monoxide from my gas forge? Seriously, I do have a CO detector, but I seldom get any reading above zero unless I position it in very close proximity to the forge; I’ll have to try it in various lower locations and see what the reading are. On the other claw, the new forge building has LOTS of ventilation all the time, plus windows and hatches as necessary, so I may not be getting much of a buildup anywhere.
Cloudy and expecting heavy thunderstorms on the banks of the Potomac.
Visit your National Parks: www.nps.gov
Go viking: www.longshipco.org
|
|
Bruce Blackistone (Atli)
- Wednesday, 06/16/10 09:32:06 EDT
|
Air Stratification and gas density: I've observed smoke in blacksmith shops with high ceilings to collect in a layer either at head height OR just above it. When the conditions put it above you it is not too bad, but when it is a few feet lower that's not so good. In a friends shop with 30 foot ceilings and fair ventilation the smoke likes head height. . .
While CO at room temperature may collect near the floor I know hot forge gasses hang much higher. I know that in my old shop with 16 foot ceilings and a large 3 foot exhaust fan that forge fumes still liked to collect near the ceiling and in my upstairs office. . .
If smoke, which was heavy with water vapor, particulates and CO2 hung where its normalized temperature says it should it would always hug the ground. But it does not.
Looking for CO in your living room from the furnace or fireplace. . . yep, near the floor or sleeping height may be right. But hot forge gases? They will float a hot air balloon, not hang at the floor. I would check at the level I work and breath in the shop.
|
|
- guru
- Wednesday, 06/16/10 10:04:56 EDT
|
Bruce, CO production from any fuel burning appliance is a function of the how well the combustion equation is balanced. In a perfect case the methane or propane would completely be converted to water vapor and Carbon Di-oxide. Seldom do we manage a true stochimetric combustion, and we get unburned hydrocarbons and Carbon Monoxide and Carbon Di-oxide. A well tuned forge burner, will produce some CO, but how much is a function of the unknows in that burner, at that moment.
I have an use a CO dector at work that reads in Part per million. We check the factory daily for CO, 4 places per aisle since we run propane fork trucks. With the trucks well tuned, and getting about 10 to 20% outside make up air from the HVAC, I see 3 to 5 PPM. One badly tuned forklift and I see 17+PPM in the area the truck is running. (We have 25' ceilings.) Oddly as the tanks get almost empty, I often see elevated CO reading from that truck and they stink from the accumulated residues in the tank. I have one of these Handheld CO meters that is out of date, and tried it at home and saw 5 to 15 ppm CO when running my gasser, and nothing from the coal forge with side draft. BUT!, I have a 24" turbine vent above my gasser, and a 8' x 8' door 18" from the gasser, that is open when I run it.
These handheld meter are not the best instrument, but at $258 they work for the factory.
Hot CO rises, and then as it cools sinks to the floor and searches for the low spot. This is one of the killers in Permit Required Confined Space entries. Have a below the floor pit of space, and any CO tends to accumulate there. Only 2 of the confined spaces I tested in thousands of entries, One was a pit and had deadly CO level. Gas engine welder running in the next bay of that factory, unseen. The other was above the floor and had zero oxygen due to the Nitrogen controlled atmosphere feed being on in a HT furnace. Saved 3 lives minumum, by strictly following the OSHA rules pre-entry.
|
|
ptree
- Wednesday, 06/16/10 10:14:52 EDT
|
Guru
Thanks to yopu and all the others who offered sugestions...My roof vent goes directly thru the ceiling to the outdoors..Granger helped me figure out the size..If I forget to turn on the vent my co2/carbon monxide alarm goes off...when I turn on the vent the levels drop down to zero so the vent works..I will add sheetrock over the forge...Thanks again..
|
|
- Arthur
- Wednesday, 06/16/10 10:16:47 EDT
|
Smily -
I must have my thumbs taped down today because i cant find the link for the "how to makeyour own smithin magician" on the abana site. Can you link me?
Guru/ptree thanks for the CO2 reminder i need to install an updated detector. We run a coal and a gas forge at the same time and often have one of the welders going too.
Thank you
|
|
Kevin
- Wednesday, 06/16/10 11:25:52 EDT
|
Hi, guys.
Got my H13 and Puncheize, so I should be good to go soon.
In the meantime, I have someone asking about making some custom sheet metal forming stakes. He has one that he wants made a little bigger.
It's one of these Potter units:
www.potterusa.com/index.php?page=shop.product_details&flypage=flypage.tpl&product_id=35&category_id=3&option=com_virtuemart&Itemid=53
He wants a bit different design, but much the same.
One of his problems with the Potter is that it is picking up dents from his hammer. According to Potter's website, their stakes are made from cold rolled 1018.
This surprized me. I was thinking more along the lines of 1045 or 4140, drawn relatively soft after heat treatment.
I haven't messed with sheet metal forming much, and certainly not with good stakes. What are y'alls thoughts on this?
|
|
- Stormcrow
- Wednesday, 06/16/10 12:46:20 EDT
|
Stakes: Bending and rolling stakes are often soft but those used for planishing and hammer work should be tougher. I would think your 1045 or 4140 Hardened and tempered would make a first class tool. Many older stakes of this type were cast steel and fairly hard. But many are also cast of ductile iron and not heat treated whichmakes them similar to mild steel.
A lot depends on the metal to be worked. Most non-ferrous can be worked on soft stakes but steel plate for armor needs tougher harder stakes. Top quality stakes should be suitable for both.
The Potter ball end stake referred to is also not very well shaped. When cast or forged the ball end is quite spherical and the shank leading to it well rounded. It is also raised upward. The middle has a flat at the middle over the stake and then the strait "tail" is crowned with rounded corners. These machined stakes are made trying to fit them into a square bar and do not have have the gracefulness of the earlier makes.
There are also a lot of "standards" such as saddle type stakes missing from his line due to his
manufacturing process.
I'm sure you could make a better tool and price it accordingly.
|
|
- guru
- Wednesday, 06/16/10 13:56:47 EDT
|
More about Stakes: I've studied the manufacturing of these for some time. I once had a good old blow horn stake that was obviously made from two pieces and forge welded together.
The shank and slender taper were one piece and bent, the larger horn made from bent 3/8" thick material forge welded to a scarf at the bend.
Many old stakes were fabricated by forge welding and many later stakes by arc welding.
Many have also been made as one piece castings from steel OR ductile iron.
All these methods work and I have all types in my small collection.
A big part of the job of making good sculptural stakes is the hand grinding and finishing.
The ball end on the above mentioned stake can be forged close to round but will require a lot of careful hand finishing to be right.
This is one of the few places where a deep ball shape swage block depression would be helpful.
Needle case, candle mold, blow horn taper and others of similar shape need to be lathe turned or ground after forging.
Wire rolling grooves are milled and hatchet stake edges machined OR ground on a large grinder. These fine detail stakes need to be hardened steel as well.
|
|
- guru
- Wednesday, 06/16/10 14:25:21 EDT
|
Even More Stakes. . . Smiths are in a unique position to produce a more varied line of stakes than shops without forges. Some artist types like snake curved tapered stakes which can not be made without heating and bending. The saddle stake I mentioned above has raised ends that would require a LOT of material removal to make by machining. The armourer stake with the ball end is another that one end is usually raised to fit better into a hemi-spherical shape. Blow horn stakes have the large funnel cone end that is best made by hot forming. But the long taper, which can be forged is best finished round by either turning OR grinding while rotating in a lathe. Machine rotating while using a hand held grinder or sander gives a nice smooth even finish without nearly as much work.
Another advantage the smith has is forging the tapered shank fast and efficiently compared to other methods.
|
|
- guru
- Wednesday, 06/16/10 15:34:12 EDT
|
ptree,
Are you sure about the CO density? If I'm not mistaken, the molecular weight of carbon is 12, and oxygen is 16. So CO should be 28. That's the same as N2 (14+14=28) and less than O2 (16+16=32), so CO should be just slightly *less* dense than air.
|
|
Mike BR
- Wednesday, 06/16/10 19:59:39 EDT
|
Mike BR, the MW is 28, and the specific gravity is indeed 0.97. But that is for a pure CO. CO from a fuel burning appliance is in practical life a mixture. Not pure. The unburned hydrocarbons, water vapor etc make the exhaust fro fuel burners usually as heavy or of greater specific gravity than air. In my practical working experience, carbon monoxide from fuel burners will stay at floor level unless you have good agitation. Many well designed warehouses and factories have intakes at the roof or near and exhaust at floor level if heavy propane or fuel burning trucks are used to take care of this.
0.97 is so little difference that the lowered density from heating will cause more effect.
|
|
ptree
- Wednesday, 06/16/10 21:17:53 EDT
|
ptree --
That makes sense. Even a little CO2 would do the job, and there's always CO2. (But H2O (1+1+16) on the other hand . . . (grin)).
|
|
Mike BR
- Wednesday, 06/16/10 22:00:10 EDT
|
That's quite helpful, guru. Do you happen to have a picture available of the ball end stake shape that would be better? According to Google, the Interwebz only have a single mention of a "bal end stake". ;-)
Forging the tapered shaft for mounting would be a lot quicker if my power hammer was finished...
|
|
- Stormcrow
- Wednesday, 06/16/10 23:12:54 EDT
|
My question is-What steel should i use for a hot working chisel?
|
|
Robert
- Wednesday, 06/16/10 23:20:00 EDT
|
Hot Work Steels: Robert, I order best to OK, H13 or H27 is best, S7 is often used, then any high carbon tool steel. The hot work alloy steels hold their working edge up to a low red. The S7 has a very high temper temperature so also holds up well. The high carbon tool steels are still quite tough when hot but nearly so much as the high alloy tool steels.
Plain carbon steels were used for hot work tools for thousands of years but had to be treated carefully and cooled repeatedly. They often had to be reshaped but they did work. A punch lube (discussed last week - look UP) helps all hot work tools do their work faster and stay cooler.
|
|
- guru
- Thursday, 06/17/10 07:54:33 EDT
|
Stormcrow, Let me look. I know there are photos in TOMAR and I have a pictures of an anvil pattern with the same design IF I can find them. . .
|
|
- guru
- Thursday, 06/17/10 07:56:04 EDT
|
Round Nosed and Armourer's Stake Anvils:

General purpose round nose stake from TOMAR
Due to being featured in Techniques of Medieval Armour Reproduction (AKA TOMAR) this has become a very popular stake in armouring circles even though it is fairly rare today. Notice the straight end becoming rounder toward the end. I believe this is a cast stake. Width about 1-3/4".

Pattern for armourer's anvil
Photo taken at the 2003 Armour-In
Ted Banning and his friend Jeff McCrady made this pattern for the top of an armourer's anvil (base not shown). It is a larger and slightly more exaggerated version of the general purpose stake from TOMAR. Width about 3". I do not think this pattern was ever cast, nor has this photo been published previously.
Also see Working In Metals page 10 for a drawing of a similar stake titled a "round stake anvil". This stake is also shown in numerous books.
A Peck Stow and Wilcox (Pextow) catalog from 1905 describes some stakes as wrought iron with steel faces and cast iron with polished faces. They did not include this stake.
Peddinghaus Hand Tools who makes a wide range of high quality stakes does not make this one.
|
|
- guru
- Thursday, 06/17/10 11:14:58 EDT
|
EVEN More about stake anvils: IF the stake is large enough that it is going to be mounted in a stump or its own stand the shank can be straight at the bottom. A square shank can be bedded into epoxy in a large drilled or burned hole. It can also be wedged or bedded into a hole formed by laminating up the stand from structural lumber. A taper does not hurt in either case as they are self tightening. If bedding in a taper using epoxy a foam extension should be used so that there is room for movement into the taper.
Among the tapered shank stakes I have collected there is no standard size shank or taper. One day I will measure them all and publish a chart.
|
|
- guru
- Thursday, 06/17/10 11:41:57 EDT
|
Armourer's stakes are very dependent on the armourer and how they like to work, (dishing vs raising for instance).
I would suggest looking over at armourarchive.org a site dedicated to armouring. Lots of threads on making stakes; folks selling stakes, etc
One popular style is ballbearings or mill balls mounted on shafts ranging from small to "oh my gosh!" (my largest just fits in a milk crate and was a headache ball from a crane...Ted has ones that make it look puny...). Then the same with an off set near the ball is handy. Then there are cresting stakes, specialized knuckle stakes, a world of stakes with very special uses.
General rules like hard on soft or soft on hard---use a steel hammer on a softer material form or a softer hammer on a steel form. Using properly dressed hammer faces can make a world of difference in the ammount of work to clean up the rough shaped piece.
Several advantages of being a smith are: you can work *hot* much easier on the joints, ears, can work heavier material easier, do much tighter curves, less problems with failure due to work hardening, can heat treat if you used the proper alloys, etc And you can make your own stakes and forms---heat a piece of 2" rod and use your swageblock to form an anti-clastic stake; preheat high carbon steels for welding; make your own dishing forms, etc!
Thomas
|
|
Thomas P
- Thursday, 06/17/10 13:46:51 EDT
|
When I was collecting balls for sheet metal work I ended up with balls and stakes ranging from 6" diameter down to 2" in 1" increments and then some smaller. Took less than a year of traveling to various events to find them all plus several lever type hole punches, a Beverly shear and other sheet metal stakes and tools. Surprisingly it is more difficult to find good raising and dishing hammers. In most cases they were priced out of my range (for hobby work). Today BigBLU makes a very nice set of repousse' hammers for the purpose.
Popular stake arrangements early in the century were bar irons that held small work surfaces. For armouring Eric Thing made a heavy T stake that accepted small curved sections of various radii in a hardy type socket. This is much more efficient than having balls over 6". You need just a few square inches of work surface with the correct curve for raising or planishing. To make these curves it helps to make radius gauges. I've made large radius gauge sets from plywood as accuracy is not too critical on these things. But sheet metal ones would be classier.
|
|
- guru
- Thursday, 06/17/10 15:50:29 EDT
|
If only I had known:) At the valve shop we made ball check valves. Those balls ran from 5/8" to 6". I saw several hundred a month get scrapped for years. Most were 440C, some 316L, some Monel. I could have had all for $0.32/#.
I did take home many, but if I had bought a half ton or so, what a tailgate bonanza:)
|
|
ptree
- Thursday, 06/17/10 20:02:38 EDT
|
Those would have stayed nice and shiny as well!
I think Ted's largest "ball" was a 16" diameter stainless ball valve part. However, it is not a solid ball but a light skeletonized hemisphere to reduce material.
I'd forgotten how big my largest ball was. It is 8" (75 pounds). A ball mill ball I got from Ted. The next down is a 6" ball on a 3" shank that I picked up at Quadstate. Its a heavy equipment ball joint forging. The next two down are hemispherical stakes made of cast ductile iron that I bought at the Southeast Conference (I think). Below those I have several ball bearing balls. I thought they were 1" increments but the larger are in 2" increments. It is still a wide range of spherical surfaces to work on.
As Thomas and I both noted, as blacksmiths we have a great advantage in the stake game. Many can be made from scrap pieces of shaft and bar either straight or bent. Many smaller stakes are easily forged and T stakes welded.
Stake Types and Names:
Every trade has its own specialty stakes for getting into tight places or specific shapes. Some are named for their original use such as the "blow horn" stake used by brass musical instrument makers, "candle mould" stakes used to make candle molds by tin smiths and the "tea kettle" stake, one of many used by silversmiths.
Other stakes are named for their shapes such as the "round head" stakes,"hatchet" (sharp edged) stake "flat" stake and mandrel (cylindrical) stakes. Others are named for their purpose such as seaming and creasing stakes. Seaming and conductor (not sure where this comes from) are straight cylindrical bar stakes.
Many stakes are shaped like the specialized blacksmiths hardy tools used for decorative work. While both tools are designed to fit a holder they are often used more in a vise due to its height and tight grip.
In the CoSIRA book Decorative Ironwork there is an interesting "multi purpose" decorative ironworkers' stake used in a vise. It has one square arm, one round arm with a tapered end and an arm with a tapered and gently curled end. There is a detailed drawing of the stake in the book.
Besides the infinite variety in shape, all these stakes could be made in several sizes.
|
|
- guru
- Friday, 06/18/10 07:20:27 EDT
|
Naming tools is an interesting task. I've named most of the new hand hammers and written the use descriptions for many of the tools sold by BigBLU (including naming the "Blu Max"). As relatively generic tools the names have to reflect function but not be too specific. OR such as the "Blu Max" have a cachet suitable for a memorable trade name but not infringe on someone else's trademark. It may sound easy but the manufacturer could not do it. They paid me to do the job.
When I set about writing about swage blocks for swageblocks.com I came up with a variety of swage block types and definitions. No one else had looked that deeply into the subject and there was no block categorization until I defined and named them. That is often the privilege (and responsibility) of being the first in a field. Someone has to do it.
Back when I was designing tools and machines for the Nuclear industry the tool names were very specific. If you were working on a 93A pump the impeller bolt lifting tool was a "93A Impeller Bolt Lifting Tool". Many of our tools operated through a lead glass tooling window and most of those tools were prefixed or included with "tooling window" such as "Long Shank Tooling Window Wrench Extension". Then there were tools named with acronyms which I won't even get into. . . The trick with many of these names was being specific but keeping the names brief enough to use without confusion. Part numbers were given in the instructions as well as names but how many folks can remember part numbers?
While naming things can be a job it was once a game. In Victorian England it was a parlour game to name groups of animals and remember those names. The most interesting names stuck. So we have a "gaggle" of geese and a "murder" of crows. Once part of a nonsensical game, they have long been an accepted part of the English language.
Naming things is sometimes done by committee such as the names of the newer elements in the periodic table or terms in the metric system. Naming by committee is often a contentious business and sometimes takes decades to settle. Terms such as centigrade that was later decided to be named for the originator Celsius because it was decided to be possibly confused for terms for angles. However, temperature and angles are still stated in "degrees" in both the metric and English system. In the English system Fahrenheit connected geometry to temperature by having his two "opposites", boiling and freezing or water 180 degrees apart (opposite directions in geometry). So we still use the degree sign in both systems and confusion still rains supreme among the general public. Committees rarely get it right. . .
Names and terms often do not translate into other languages well. I had been having a long discussion with a European friend about making a small stake anvil and it turned out that his understanding of "stake" was the shape of the top and had nothing to do with the shank and taper. In English, any "stake" is a tool with a shank that is usually designed with a taper to fit into a block of wood or a metal holder.
In German the names of modern technical tools is fairly easy but a little unwieldy to others. A "pump bolt extraction tool" would become a single run-on word such as Pumpboltextractiondevice (but in German) .
Many tools have multiple names, each trade calling the same tool by a different name. Thus there is often a lot of confusion about the names of tools.
Its the name game. . .
|
|
- guru
- Friday, 06/18/10 08:53:32 EDT
|
Now would be a good time to show people the comic I drew about names around the shop...
|
|
- Nippulini
- Friday, 06/18/10 09:24:40 EDT
|
I saw a very large rock breaker bar at the fleamarket today that looked like it would make a great large stake. It was $25 and I already had a pexto stake like it would make...
Naming: old fellow was calling a set of letter stamps "stencils". I didn't argue because in his shop they might have been called stencils.
Naming II: some of my hammers have been named based on their shape so "frenchie" is the french crosspein (named by a student who covets it dearly...)
Had hopes of a nice little Atlas lathe as the inheritor of it was about 2000 miles away and had sold off an old Packard Car for about 1/10 the value. Nope; when I called him he wanted about 3 times what I thought was proper for this area.
Thomas
|
|
Thomas P
- Friday, 06/18/10 11:27:18 EDT
|

Tools with names . . . By TGN colored by JDD
|
|
- guru
- Friday, 06/18/10 11:30:34 EDT
|
The DIY-anvil section here at Anvilfire has a good write-up on a "homemade" swage block. Also in this write-up shows the swage block on its side and in a stand to bring the swage block up to a working height, but what really "stuck out" is how it's used as a Stake-Plate working surface with various stake tools that fit into the prepared stake holes.
This sparked an interest with me back when anvil hardy- hole sizes & hardy tools to fit them was being talked about.
The newbie-idea was to take railroad track plates that's between the track & cross-tie, have various squares cut out in the center of the plate to fit various hardy-tool shank sizes as well as using the outer spike holes to anchor the plate to the top end of a section of log/ stump.
"OR" build-up a DIY-swage block & stand using stacked plates welded up with a stake-plate work area on one of the sides........very much like the DIY-block in the article.
This DIY swage block / stake-plate combo using RR-track plates would not make a huge working tool, but still give flexibility to the user.......or that's the "thought" anyways.
would you care to give your thoughts on this, Guru?
|
|
Danial
- Friday, 06/18/10 12:18:21 EDT
|
Danial, The "build up" method of making a swage block is a good way to create tapered holes to fit any stakes you may have on hand as well as holes for hardies. It helps a lot to have a good saw to cut the parts straight and clean. This plan was designed to need only a saw, welder and grinder. If you have a heavy drill press or access to machine tools then more can be done.
A top plate with drilled and saw cut holes as you suggest, welded over supports building up the block would be stronger than just welding up the box sections and may fit straight shanks better. Essentially you are making a bolster plate and adding mass behind it. Square holes can be made using the methods shown in our iForge article Stake Plates and Bolsters, making square holes.
I have a large old industrial block that has what looks like every imaginable square hole but only a few of my square shanked tools fit it. However, at a couple hundred pounds it makes a very sturdy receiver for such tools. If I were to make a bunch of armour or sheet metal stakes I would find a bar size that fits one of the holes OR make a bushing that fit the block and stakes well.
While many folks like putting a swage block in a steel stand, I prefer a heavy wood block stand. Steel stands are real finger choppers especially with relatively light blocks in the 40 to 60 pound range that one would handle by hand. On a heavy wood block stand you can roll a block on edge between supports without lifting the block and lowering it into a frame. I was given plans for an angle iron stand to fit small blocks many years ago which I refused to publish due to its inherent dangers.
I have stands that came with my big industrial block but it is much too heavy to lift by hand thus requiring a hoist. When there is no possibility of handling by hand then the stand can be any type you want.
Like many DIY projects this one may not be very cost effective unless you have a lot of scrap steel and discount the value of your time. But it is good practice fitting and arc welding and you do not need to make it all in one weekend. The learning experience is the real value of many DIY projects and the resulting tool just a perk.
|
|
- guru
- Friday, 06/18/10 13:50:51 EDT
|
Will valve grinding compound polish a blade ? Maybe using coarse, then going to fine ? Using it on a buffing wheel ?
|
|
Mike T.
- Saturday, 06/19/10 01:56:06 EDT
|
Mike, Compounds for buffing are formulated to stick to the wheel where valve grinding compound is not. Buffing compounds have a wax base that adheres to the wheel where valve compound is in oil.
Buffing wheels can be used to cut, polish and color metals. Rough cutting is done with a rough wheel and relatively coarse compound at high speed. Cutting can also be done with grit impregnated rubber wheels. Polishing is done on a variety of sewn cotton wheels and coloring is done with soft wheels.
The problem with using these wheels for cutting on any product is that you get rounded or blurred features. Lines that should be straight, clean and crisp get rounded and misshapened. You see this on cheap import blades.
High quality blades are hand finished on belt sanders and by hand on flat surfaces or with tools that are properly shaped. Once a fine flat finish is achieved buffing is the last step and should not need a coarse compound. However, hard emery compounds may be needed for polishing hardened and alloy steels and then tripoli for the coloring step (the finest finish).
See our FAQs page under Buffing and Wheels for more information.
|
|
- guru
- Saturday, 06/19/10 08:35:08 EDT
|
A little off subject about names. One time, I was talking with students about wrought iron, and one of our books mentioned 'silica slag.' Without a pause, one student said, "Oh yeah, Silica Slag was that ugly fifth grader that I went to school with."
|
|
Frank Turley
- Saturday, 06/19/10 09:22:06 EDT
|
dear guru i bought a german style anvil today on the side is a parsial round marking the folowing leters are readable vergis____nicht.h& i am looking for some info on this anvil
|
|
henning
- Saturday, 06/19/10 13:08:52 EDT
|
Henning, There have been far too many manufacturers both large and small in Europe to keep up with them much less have detailed information. Once in a while, IF you have a complete name a search may bring up a current or historical company.
Richard Postman found over 200 manufacturers in England alone while researching his new book. At this point no one has researched a book like Anvils in America covering European anvil makers. It would be a wide open field for someone fluent in multiple languages that lived in Europe and had time to do the research.
Richard was very lucky in his research to find the Tool Museum library collection in Tennessee (which may no longer exist) and a collection of Blacksmith and Farrier magazines (which I now own) while doing his research. But he also traveled to meet people who had been part of anvil manufacturing companies, as well as various libraries and wrote hundreds of letters in his research. To do the same in Europe would be a much more complicated task. But maybe someone will pick up the gauntlet.
|
|
- guru
- Saturday, 06/19/10 13:43:00 EDT
|
Band saw blades: I just bought a couple bi-metal blades from a place called Cut Technology, in Washington state. $14.50 for a 64-1/2" bi-metal 10-14 TPI. They make them themselves, in America, and sell direct. They're called Cougar XX M42. It may take me a while to report on longevity, as I'm just a weekend hacker, but so far they seem to cut well. The weld is ground nice and smooth. And I read a couple good reports on them. They definitely don't seem like cheap imports.
The sales people are easy to reach by email, but they only do phone orders. And I had a small problem with the shipping charges, which they fixed right away.
|
|
- Marc
- Saturday, 06/19/10 14:54:44 EDT
|
Wheel bearing removal:
I'm trying to remove the wheel bearings from a golf bag cart, but just don't know how. I don't want to bash away, as I might bash the wheel itself. But all online wheel bearing info is either cars, bikes, or skateboard. None of these are the same.
So any insight on how to replace these?
Thanks.
|
|
- Marc
- Saturday, 06/19/10 14:56:47 EDT
|
Bearing Removal: Marc, Some things are made to press on and have no provision for easy disassembly. These are "lifetime" items. . when they fail, that it the lifetime of the whole.
In many cases bashing away is the only way. It helps to use something soft (brass or aluminium) to prevent swelling the shaft. When replacing bearings you can afford to hammer the old ones off but you need to be more gentle putting the new ones on. Always try to push on the part of the bearing that is the fit you are separating (IE the inner race to get off a shaft, the outer race to get out of a hole).
Many bearings are removed with screw pullers. These come in sizes from huge machinery types down to little instrument types. Pullers are often designed for certain purposes but can be used or adopted for others. I have a little puller made for battery terminal connectors that also works on small items and a steering wheel puller set that was fairly inexpensive that I have added numerous bolts and blocks of steel to the set to fit other things.
Press fits are also disassembled using sets of U shaped wedges, single or a pair used by taping them in from the sides to push the part off the shaft. They make these to remove pressed on Jacobs chucks and I have used them for other purposes.
Pressing using an arbor press or vise is generally the safest and gentlest way to remove and install bearings. In both cases a U shaped support is used for the shaft to pass through and support the bearing. Pieces of tubing are also used to support the part or press against a hub.
Slide hammers with puller ends are also used to get press fits apart. I have a large mechanics set and I've adapted a body work slide hammer for pulling small things apart.
Finding the right tools to support parts for pressing is often the most difficult task. I often use socket wrenches as they come in many diameters like having a set of graduated tubes. Sometimes I saw off a piece of pipe or tubing and occasionally I have had to machine a special tool in the lathe. U-slot support plates are made by torching, machining or drilling and sawing depending on the size and accuracy needed.
Occasionally when fits are too tight or in a tight location heat or cold is used. Cold is usually safest but requires dry ice and access to the fit. Heat can soften (temper) shafts, burn out lubricants and do other damage. But combinations of heat and cold are often used on large fits.
Without being more specific or actually seeing the assembly I can do no better than the general information above. Maybe it will give you an idea where to start.
|
|
- guru
- Saturday, 06/19/10 15:36:31 EDT
|
Mr. G.
I live in the Charoltte NC area, want to have a replica tag out of tin 2.75 x 2.75 diamond 1/4" thick with four inscriptions stamped on the face and hole for a leather neck strap. How much would this cost, where could I get a few samples made close to me, and at $100/hour how many of these could be made. Very similar to a military dog tag, the look is everything.
|
|
Davvie Mims
- Saturday, 06/19/10 17:22:13 EDT
|
Thanks, Jock - You've given me plenty to work with. I would expect these to be one of those lifetime deals, considering what it is. But I'll start pressing things and see where it goes.
|
|
- Marc
- Saturday, 06/19/10 18:36:40 EDT
|
Dog Tags. . These are made with a little machine where you turn a character wheel, pull the lever, the tag is stamped and advances, then you set the next letter. Someone with the machine could probably make one proof read tag every 2 to 5 minutes, thus 12 to 30 an hour. My time estimate is based on using a similar machine to cut paper address stencils. So cost at $100/hr (a little high for this work) would be 3.33 to 8.33 each. Half at a reasonable rate. The machines cost a couple thousand dollars new so it would take an order of 400 to 500 to pay for the machine with no labor and 1000 with labor. But used machines can be found for much less.
Many businesses used to have these machines for making tool and machinery tags, tool room chits and such. However, I personally do not know of anyone with one of these machines. However, I suspect folks in the WWII and similar reenactor groups have them.
Stamping with hand stamps (from the front with V edged punches) looks different and is a slow process that is difficult to hold a straight line. I've done a lot of these for personal use and it could take 10 to 15 minutes to do a three line tag that is obviously not machine made due to the spacing and alignment. There would also be losses due to scraped parts so production rates would probably only be 3 to 4 an hour. This is picky high concentration work and the pressure not to screw up makes it one of those $100/hr jobs. Stamp sets only cost $20 to $40 and the first 10 tags would pay for the stamps and make a profit (labor) if you had to purchase the stamps. But costs would be $20 to $30 per tag. This is something many folks could do. You can also get reverse round front stamps that make a raised letter like the machines BUT they are even more picky to use by hand.
If you want to try some hand made ones contact me with more details. I am up near Mt. Airy, only about 90 minutes from you. If you want the clean neat machine made ones you will need to keep asking around.
|
|
- guru
- Saturday, 06/19/10 20:02:27 EDT
|
Marc,
Race removal.For removing races on a car or truck, I would get a long thin chisel, go to the other side of the wheel ( opposite from the side that the race was on ) put the end of the chisel on the outer edge of the race and hit the chisel with a hammer, then keep working around the race until it was out.
|
|
Mike T.
- Saturday, 06/19/10 20:28:39 EDT
|
Dog tags. The hand stamp machines work. The newer version is electric and has a typewriter like keyboard. The step up from that uses a computer. Great for ascending serial numbers and the like.
|
|
ptree
- Saturday, 06/19/10 21:18:53 EDT
|
Tool Names. Had a very annoying left hand adjustable wrench which we had to call FRED after my mother complained about the language.
|
|
Hugh McDonald
- Saturday, 06/19/10 22:46:46 EDT
|
Davvie Mims: at 1/4" thickness You might consider having them engraved, but You did mention tin... In aluminum or brass, the people who engrave plastic lanimate tags or trophy placks might be able to do the engraving, if You provided the blank. If You want thin sheet stocked stamped to provide a tag of 1/4" thickness, that is a horse of a different color, and requires a stamping die, not just the letter & number embossing the others are talking about.
|
|
- Dave Boyer
- Saturday, 06/19/10 23:29:12 EDT
|
I was wondering if that 1/4" thickness was a mistake since he said "tin" and wanted them to look like dog tags. . . Hand stamps work on thick materials but as I noted are difficult to get straight lines and even spacing.
|
|
- guru
- Sunday, 06/20/10 07:44:50 EDT
|
Hello. I would like to send pictures of an unusual stump anvil for you to add to the anvil gallery. Please supply an email address. As i cannot find one anywhere other than this one! thank you, Adam.
|
|
Adam Marshall
- Sunday, 06/20/10 12:13:25 EDT
|
In response to Henning's question,
"I bought a german style anvil today on the side is a parsial round marking the folowing leters are readable vergis____nicht.h& i am looking for some info on this anvil"
From Daniel Vogel of Switzerland we get:
".. the letters on your anvil reminded me of a flower in German named 'vergissmeinnicht' what means in English is: forget-me-not"
|
|
- guru
- Sunday, 06/20/10 15:51:05 EDT
|
Adam, Email coming your way.
|
|
- guru
- Sunday, 06/20/10 15:51:25 EDT
|
There are at least a half dozen companies making custom dog tags, and most will make custom shapes as well.
Any of them is going to be a LOT cheaper than somebody starting from scratch, and trying to make one, without the proper equipment.
Just google "custom dog tags" and a whole page of companies come up.
In the standard shape, they are usually around six bucks a pair, for any text you want.
Even in a diamond shape, with text on all four sides, I bet they would be pretty reasonable.
|
|
- Ries
- Sunday, 06/20/10 19:25:58 EDT
|
I got a gift cert. to a well known book seller today. Whats the best book for a beginner to buy ?
|
|
wayne
- Sunday, 06/20/10 19:32:05 EDT
|
Wayne, It depends on your focus and experience. If you have no metalworking experience and expect to get deeply involved the beginning book is "Metalwork Technology and Practice". It is a text book that has been used for 50 years and has been constantly updated by a series of publisher and authors.
If you are looking for a general blacksmithing book with lots of depth, The Artist Blacksmith by By Peter Parkinson is one of the better new books. I would complement it with Alex Bealer's The Art of Blacksmithing.
If you need the most basic step by step instruction then The Backyard Blacksmith By Lorelei Sims is very good and very clearly illustrated.
Artisan Ideas also sells a beautifully illustrated book that is more coffee table book than how to but covers all the basics plus in beautiful large photographs. The title is, Secrets of the Forge by Antonello Rizzo.
Every book on the subject has a slightly different focus and every book has some little trick or technique the others do not have. Each trick is usually worth the cost of the book if you use them.
Also note that with the exception of Metalwork Technology and Practice these books are all the equivalent of text books at a MUCH lower cost. This makes them a GREAT educational value. Metalwork Technology and Practice IS a text book and sells for text book prices. However, it is available used for much less than new and older copies are more suited to blacksmithing than the newest editions which have been edited to cover modern shop technology.
|
|
- guru
- Sunday, 06/20/10 21:52:22 EDT
|
Idea for making Mokume. Get a steel pipe, short enough to fit in the forge, screw a cap on one end, get another pipe that will slide tight in the first pipe, weld caps on both ends of it.....then put the brass, silver, borax etc. in the first pipe, slide the second pipe down fully in the first one, then heat to temperature in the forge, then remove the pipes, striking the end of pipe number two with a hammer until the weld is made, remove the end cap on pipe number one, strike pipe number two again in order to remove the mokume. May have to heat it some in order to knock it out. What do you think ?
|
|
Mike T.
- Sunday, 06/20/10 23:26:56 EDT
|
Mokume Gane is usually made without flux.
The layers are cleaned and stacked, then clamped together so no air can get in. The stack and clamp assembly is heated until the the lower temperature melting metal reaches a slight softening temperature (not quite slushy). It is removed then the clamp plate struck to complete the weld. No flux is used but the metals must be cleaned immediately prior to making the joint.
Keeping all air out of the joint is critical. Using a heavy clamping plate makes sure the applied force and the welding pressure is as evenly distributed as possible.
I don't think your method provides the flat surfaces or keeps enough air out, but I may not be fully understanding what you are doing.
|
|
- guru
- Sunday, 06/20/10 23:52:13 EDT
|
I checked the plans for a gas burner with blower. But, I couldn't find plans for a two burner gas forge with one blower. Can you direct me or refer me where I can find some basic plans for the above.
|
|
David
- Monday, 06/21/10 01:12:41 EDT
|
David, These simply use large diameter pipe and a T to split the flow. Gas is mixed in early (just after the fan) so that it is equally distributed and well mixed. The pipe size should not be too large as the flow velocity can drop below the flame front velocity and cause back firing into the burner. I use a reducer nozzle at the burner ends to accelerate the gases just before entering the forge to prevent backfiring. After the reduction the opening in the refractory can taper outward. The more symmetrical the plumbing arrangement the better. This means a T half way between the burner nozzles. It helps if there is some pipe between the T and blower so the fuel and air mix well. This also gets the blower away from the hot forge. It helps to put a heat shield between the forge and blower. This is simply a piece of sheet metal about 1" away from the side of the forge that air can circulate around.
|
|
- guru
- Monday, 06/21/10 01:47:13 EDT
|
Bearing removal - the Bash Brothers way.
Bashing was the answer. I tried the arbor press, but no luck with that. So I used the Guru's method of backing with sockets and was able to bash the bearing centers out with my treadle hammer and a piece of 1/2" round mild steel. The races came out with a small screwdriver and the same method that Mike T. said.
If I was getting paid for my time, a couple of wheels from Tractor Supply would have been cheaper then this free-on-the-road thing. But an hour or so playing in the shop trying to figure out how to get something done can be therapeutic.
|
|
- Marc
- Monday, 06/21/10 08:07:16 EDT
|
Its a learning curve. But its also why many shops do not take on small jobs. Its the nuisance factor.
On British cars the Spicer U-joints are installed with no way to remove the bearing caps and both axiis are put together the same. They are not like the American types with U-bolts on one half. The factory method was to tap on the joint with a hammer and have inertia raise the bearing cup out of its hole. . . Well, this MIGHT have worked on perfectly new clean parts but after a few years of rust and dirt the inertia of the little cap was far from sufficient. You could beat the joint to a mushroomed mess without the cap moving. I used many methods over the years doing various amounts of damage to the parts almost every time.
Then a fellow asked if I had a cutting torch. . . Sure, I replyed. He said, torch the cross into four pieces. . . then he demonstrated. While the grease made an exciting fire with the oxygen the parts torched easily then the bearings gently tapped out of the yokes doing no damage to the parts. In fact, the heat burned off all the excess grease, paint and undercoating making installation of the new parts much easier. While it seemed like a violent method, it was MUCH better in the long run.
We also used to have to replace wheel bearings on Triumph TR-6's. The were a heavy press fit that required a press of sufficient tonnage and lots of heat. When they came apart it was always with a "POW" and parts flying around the shop. I later discovered that the noise and flying parts were due to the springyness of the typical auto shop hydraulic press. Using a good heavy duty press the parts do not fly.
The old 50's and early 60's Dodges had a keyed and tapered fit rear hub and brake drum. Removal required a special puller with a large fine thread screw and a hammer struck nut with arms on it to strike. We would often pound on this tool for an hour before the hub would pull off and I had one that would NOT come off. We did not have a torch at the time and another shop got the job done. . .
For certain gear or hub pulling jobs I have a heavy duty Snap-On slide hammer with a two arm and three arm pulling attachment. You can buy dozens of attachments for these things. The hammer is about 8 pounds on a 3/4" diameter tool steel bar about 3 feet long. It has been years since I used it but when you need it, you need it.
Besides having the right tools for the job I've had to install or remove a lot of bearings with a BIG hammer. You try to avoid it but sometimes it is all you can do.
|
|
- guru
- Monday, 06/21/10 10:49:59 EDT
|
I have a 2 lb cross peen hammer that is soft from being overheated in its previous life. The stamping label says cast steel and a spark test implies sufficient carbon to respond to heat treatment. Jack Andrews "New Edge of the Anvil" has a very brief description on making a small hammer. The heat-treatment is to bring the hammer to critical slowly and then quench the face and peen by dipping in water to about 1" deep. Quickly polish the face and peen and draw the temper to a light purple. Maintain that temper but allow the eye to cool slowly.
I understand the treatment but am not sure I can get the polish fast enough to catch the right temper. Also a temperary steel bar handle seems like a practical way of handling the hammer for this process.
I would appreciate your comments and any helpful suggestions from your expertise. Thanks.
|
|
Gil
- Monday, 06/21/10 11:09:19 EDT
|
Gil, This is the residual heat method. The "quick polish" is usually just rubbing on some coarse sandpaper or touching the part on a belt sander. It just needs to be clean and bright, not polished to a mirror finish. When heating to critical check with a magnet. Non magnetic is usually about right. At this heat you do not get a lot of scale so cleaning it off is not like cleaning a piece heated to forging temperature.
A steel bar (threaded rod) or tongs that fit, either one works. Just remember that you will need to be able to rotate the bar to quench the ends. It is also recommended to use a stirring motion when quenching. Be sure your water is warmed a bit to prevent shocking the steel.
|
|
- guru
- Monday, 06/21/10 11:53:25 EDT
|
Well, a neighbor of mine had a devastating fire in his garage/machine shop a week ago. He had a lot of nice older machines in there, and I am wondering if any are worth trying to salvage. There were a couple of small lathes, a small bridgport mill, etc, etc. The fire got very hot, to the point of melting aluminum castings and melting the vinyl siding off the house from 60 feet away. Does anyone have any experience with restoring machines that have been exposed to high heat?
|
|
Dave
- Monday, 06/21/10 12:02:05 EDT
|
Dave,
The Chinese - they melt them down and make new machines.
|
|
- Buford Heliotrope
- Monday, 06/21/10 12:42:46 EDT
|
In heavy industry, hydraulic pullers are common for pulling bearings. On the big forge machines where the roller bearing races can oftem be 24 to 32" diameter, the normal method of removal to to run a large, hot heavy stringer bear from an arc welder about 25% of the way around the id. The races can be slide out almost effortlessly then. They cool the races in dry ice to shrink them to get the new ones in.
|
|
ptree
- Monday, 06/21/10 13:46:44 EDT
|
Burned Machines: Dave, It MIGHT be worth it but its hard to tell. It would also have to be a real work of love. Older machines with no plastic parts and few if no zinc alloy parts would be the best candidates.
Problems. . . Any hardened and tempered parts may be softened OR even over hardened if the fire was hot enough and the parts were quenched by the fire department. They are more likely too soft. This includes critical parts such as spindles and bearing surfaces.
Small brass, bronze and zinc parts may be melted and their location and shape hard to identify. Some machines have zinc gears that if not melted may have gotten hot enough to sag or warp and be out of round. Gears are very expensive to replace.
Fine finishes may be rough or scaled and need refinishing. IF these are also parts with close fits they MAY end up too loose.
Obviously any motors, wiring or plastic parts would need to be replaced. Paint will also have burned off and many machines had significant layers of filler to make the castings clean and smooth.
Parts such as special wrenches, accessories and tooling may have been lost in the fire. On some items like chucks, losing one jaw from an interchange set ruins the chuck or makes it difficult to use. I have had several 3 jaw chucks that use two sets of jaws, one with the longer parts IN and the other with the longer parts OUT. One out of six jaws being missing make the chucks difficult to use and the parts are not replaceable on most old and many small chucks.
If you do not know about all the small parts and pieces and collect them carefully from the mess it can be a costly mistake and may make the restoration impossible or very expensive.
All this said, I would try. But it is a big task even on a small machine. I've had a number of machines that rust was the primary issue and even that can be a LOT of work. AND speaking of rust, those burned machines are going to start rusting VERY rapidly adding more damage. If they are going to be saved they must be moved, all the parts collected and at least well oiled to start.
|
|
- guru
- Monday, 06/21/10 15:42:27 EDT
|
We have a hydraulic porta-pak with electrical knockout punches. Same setup is occasionally used as a bearing puller. Due to needing to drill and use a manual knockout for the initial hole I was never a great fan or the porta-pak knockout system. Unless you are doing a lot of repetetive holes the work of setting it up is more trouble than using a manual (screw type) knockout. More tools. . .
|
|
- guru
- Monday, 06/21/10 16:22:54 EDT
|
Dog Tags -
at the local walmart they now have an engraving machine that will make dog tags. Literally they are tags for dogs but come in many shapes and colors including the classic military dog tags. I believe it makes tags for about $7.50
I don't believe walmart manages the machines in their foyer but if you have a wally world by you its worth keeping your eyes open for.
|
|
Kevin
- Monday, 06/21/10 16:43:15 EDT
|
I was close to taking the sawzall and cutting torch to my bandsaw today. After ruining a perfect blade (got pinched in a roller and curled the teeth) I decided to completely take everything off and put it back (one at a time mind you) until everything was kosher. Getting beautiful cuts every time now. Just wanted to give you guys an update, thanks for all the help.
|
|
- Nippulini
- Monday, 06/21/10 19:24:33 EDT
|
Adjusting and getting everything lined up on bandsaws is a real chore and can make one crazy. . But when right it really does make a difference. It helps to have a saw with at least the minamal adjustments. Many do not. . . :( That is why I am loathe to recommend most of the small cheap saws.
|
|
- guru
- Monday, 06/21/10 19:44:24 EDT
|
Dog Tags for Davvie Mims
At 1/4" thick he might mean a tag similar in style to a brass machine name tag. There are outfits that reproduce such items using acid etch to recess the background and leave the lettering raised. Usually polish the whole first then the acid finish background looks pretty good with the polished lettering. I expect the stencils are computer generated so an investment in setup could produce whatever look is required.
Might find a source by nosying (sp??) around the old engine groups that restore steam and gas engines, tractors, etc.,.
Also, some mold shops, (like ours), have laser engraving equipment that essentially accomplish the same thing. Takes a couple of hours to get going with the computer generated artwork, and up to $100/ hr run time. Depth of burn is run time. .005 deep might be 3 minutes, .030 deep might be 15 minutes, all depends.
He said looks are everything so a little more specific info would be good.
|
|
- Tom H
- Monday, 06/21/10 20:25:07 EDT
|
Guru Naming Tools
"93A Impeller Bolt Lifting Tool" might actually be:
"Lifting Tool, 93A Impeller Bolt"
General use first then specific application.
|
|
- Tom H
- Monday, 06/21/10 20:31:43 EDT
|
Of course Uncle Sam might name it:
"Tool, Lifting, Impeller Bolt, 93A"
(sigh)
|
|
- Tom H
- Monday, 06/21/10 20:33:16 EDT
|
Or Uncle Sam, with his infinite logic, could name that very item:
"Grape Jelly"
and who could argue with that wisdom!
|
|
- Tom H
- Monday, 06/21/10 20:34:49 EDT
|
Your "old iron" through the fire.
Most any old machine tool would be worth trying to fix/re-build after a fire.
As the Guru has pointed out there will be issues with parts that have lost their temper or have gotten hard or warped from the heating and quenching but, if the castings are good and have been properly seasoned when they were made they should be OK.
As was said, this will be a labor of love for your friend and may not be worth the time and effort unless the machines are common enough to make replacement parts available or if the machines are rare enough that they are indeed worth the effort.
Either way they need OIL RIGHT NOW!!
I would get something like Marvel Mystery OIL in there but probably not take anything apart just yet unless restoration is going to begin right away. A big box of parts that no one remembers what they blong to will kill the restoration project quick.
There are a lot of surplus machines out there that could be used for donor parts and maybe the burnt machines could be used as a donor to fix one of them up as an alternitive...
Good Luck to your freind!
|
|
- merl
- Monday, 06/21/10 23:11:05 EDT
|
Burn't machines. If I were to plan to restore, and these had any water from fire fighting applied, I would search out a few gallons of a water displacing oil. Made for use after phosphate coating. Birchwood Casey and others make these oils. They float the film of water and make a nice soft waxy long lasting film of preserveitive oil. If these machines got heavy water applied when hot look hard for cracks and decide early if fixable. If possible, drain all gear boxes and tanks and refill with good clean oil since the water and oil mix will make acid over time.
|
|
ptree
- Tuesday, 06/22/10 07:05:51 EDT
|
Places that are really critical - if plain bearings made of bronze or babbitt have not been destroyed they rapidly corrode due to bimetallic corrosion. Get oil on these ASAP and rotate the shafts IF possible. Lathes and Mills often have bronze nuts on handwheel screws. Check these early.
|
|
- guru
- Tuesday, 06/22/10 07:17:46 EDT
|
for Davvie Mims
Another possible outlet, a friend of mine gets a lot of one shot pieces made through a websight called http://www.100kgarages.com/
Its a websight with literally thousands of people who do small to large runs of very specific items. Because many of these guys are small shops sometimes you can negotiate a pretty good rate. Ive found a couple people ive used for a couple single pieces that would have cost me more time than to have them make the part and ship it to me.
|
|
- Kevin
- Tuesday, 06/22/10 14:29:38 EDT
|
Old Machines and Spares:
I have two c.1950 6" Craftsman lathes. One is my small working lathe and the other is a spare. I got a good deal on it and it came with attachments and extra chucks. But I do not need two 6" lathes setup.
Years ago our family shop had a 6" Atlas very similar to the Craftsman. I bought one that was in so-so condition for $100 and parts from it were used on my Craftsman and the family Atlas. Years later my Dad resurrected the remains of the Atlas when he needs a small "sit-down" lathe.
I've had a number of 20 to 24" so called "camel back" drill presses. Many of the parts are interchangeable. When I recently setup the 24" Champion it needed a spindle thrust bearing. I used the spindle bearing out of my otherwise worn out 20" Joseph T Ryerson. Other parts of the Ryerson went to a lathe drive and the remains of the machine will be used as a vise stand. I'll keep the gears and shafts in storage.
Parts of the Ryerson went to the old 14" Porter lathe I am setting up. If I could find a scrap Porter I would love to have it for parts. Mine has an abused tailstock and broken gears in the carriage. I can fix both but spares from a scraped machine would be a lot easier. . . and probably cheaper.
Old metal turning lathes that are near to scrap can make fine wood turning lathes and are considerably heavier than most wood lathes. Machine tables off old milling machines, shapers, planers and drill presses make great fixturing surfaces or tables for DIY devices such as a weld positioner. I'm going to cut off the top half of my old Ryerson drill press and use the base for a vise stand. It has the rotating table that locks much better than a rotating vise base and the table raises and lowers via a hand crank. I think it will be pretty handy.
Think about it before scraping old machine tools.
|
|
- guru
- Tuesday, 06/22/10 15:07:10 EDT
|
Kevin, Interesting resource.
|
|
- guru
- Tuesday, 06/22/10 16:44:53 EDT
|
Hello Folks,
I want to cold forge some Aluminum hooks, 1/4 diameter, about 6" long and then threaded 1/4-20.
What aluminum alloy would work best?
Thanks
Bart Trickel
|
|
Bart Trickel
- Tuesday, 06/22/10 17:37:47 EDT
|
Bart,
1000 series alloys should be the easiest to cold forge (though not the strongest). If you're just bending 1/4" rod into a hook, almost any alloy would probably work.
|
|
Mike BR
- Tuesday, 06/22/10 18:04:44 EDT
|
Bart, For cold working you want pure aluminium or A-1000. It is what the soft tubing lawn chairs are made of (but not the fancy fold up camping types that are an aircraft alloy).
Some of the high strength alloys can be bent and shaped cold but do not forge well as they rapidly work harden. To forge or swage these alloys cold you need to make the shape in one blow. A-2024 is one of these alloys. It is used for aircraft skins and spars that need bent flanges.
|
|
- guru
- Tuesday, 06/22/10 18:10:12 EDT
|
Is there anything I need to know about the billets I received? They are "rolled steel," and I would like to know the important properties before I stick it in the forge!
|
|
Anne
- Wednesday, 06/23/10 02:19:16 EDT
|
Anne, That is a pretty vague description. Everything from plate and structural beams to tool steel is usually rolled. A few things are not but most are. See Steel Product Types
If it is low to medium carbon steel you can just toss it in the forge.
If it is high carbon or alloy tool steel it should be warmed near the forge before putting into the forge to reduce thermal shock.
"Warm" is uncomfortable to the touch up to about 300°F (149°C).
In a coal forge you set the steel close to but not in the fire and using a gas or other furnace type you set the steel on top or on the hearth (if the forge has one).
There are thousands of types of steel. To know the specific properties you need to know the type.
Steels generally have some sort of standardized number but the systems vary around the world. In the US there are a number of standards, SAE, AISC, ASTM and the Unified system among others. Common "mild" or low carbon steels are SAE 1018 or SAE 1020, ASTM A36 (structural). A common alloy steel is SAE/AISC 4140. Tool steels typically have letter number names. A2 is an air quench steel, H13 is a hot work steel, O1 is an oil quench steel and W2 is a water quench steel. M series are types of HSS (High Sped Steel). S7 is a shock resistant steel.
Any time you give a steel number you should know or remember the standard that goes with it.
Preferably it should be stated to avoid confusion. EXAMPLE:
In tool steels an M steel is high carbon high alloy and very tricky to heat treat. In ASTM M steels are a low carbon boiler plate (I think). In other countries it may mean something else.
Books like Machinerys Handbook have good general descriptions of the steel numbering systems and a good sample of the steel types as well as beeing valuable for other things in the shop.
|
|
- guru
- Wednesday, 06/23/10 07:18:44 EDT
|
i am building a coke forge that is open. im going to use a hand pump. it will be made of firebrick and morter. i have studied swordsmithing for several years but never worked with any metals. i want to make a sword. i know it willnot turn out pretty, but thats not what im looking for. i want a sword that feels balanced in my hand, and can take a blow. i want to know what the easiest metal to work with is, what method of preheating;hammering,hammering,coolingis. what would work best? im looking for a blade compatible with both single handed and two handed use. it will probably take months for someone like me to forge a crude blade but im determined to see this through.
|
|
bengerman
- Wednesday, 06/23/10 17:28:03 EDT
|
Bengerman,
The guru has a fine section of this site in the FAQ for making swords. From the standpoint of someone who has made swords for years its brilliant. And if you take the over all message to heart you will in time be able to make some wonderful things.
If you have never forged anything before i reccomend starting with projects that will build your skills and be usefull. Make tools. Youll need them.
|
|
Kevin
- Wednesday, 06/23/10 17:45:51 EDT
|
Bengerman; if you have "studied swordsmithing for several years" you already *KNOW* the answers to these questions!
If you do not perhaps you should re-think the status of your studies. A good book like "The Complete Bladesmith", J.P. Hrisoulas, would have all this in it and should have been one of the first ones you have studied.
If you live in America you can easily ILL books like this at your local public library.
I would suggest 5160 as an easily obtained and worked steel to "learn on". How it is worked is in *ANY* book on bladesmithing. If your studies have been primarily on-line then you can probably begin to see some basic issues in that method.
Note that spending time with a decent smith can really jumpstart your hands on learning. In the USA ABANA has many affiliate chapters around the country that will be happy to have you show up for meetings and hopefully find a local smith to mentor you a bit. Also the American Bladesmith Society runs a school in Texarkana AR that can get you up to speed *fast*.
As to making *good* swords pay attention to things like Distal Tapers and Harmonic Nodes as they are a major part of getting a blade that is light and fast and sticks to your hand like glue! Try to see/handle as many *original* using swords as you can---(the repro's are often quite bad even when they claim to be accurate!)
Note too that "balance" depends a lot on the type of sword; many are balanced forward to increase energy transfer when you *hit* things.
And finally welcome to the madness! If you are ever around central NM, USA give a shout and you can visit my smithy!
Thomas
|
|
Thomas P
- Wednesday, 06/23/10 17:56:50 EDT
|
Easy to work and ultra strong is an oxymoron. The better the steel, generally the more difficult it is to forge, heat treat and finish.
The easiest metals to work with are gold, silver and brass in that order. That is why so much ancient work was in gold ans silver. Brass and bronze do not quite as well but are much cheaper. The easiest modern metal to work is alloy aluminum. The so called "aircraft alloys" 2024 and 6061 cut easily, finish beautifully and are nearly as strong as mild steel. 7074-T6 aluminum is very springy and harder than mild steel. In aluminum the harder it is the easier it works (unless you are bending it). Aluminum can be forged but you have to be very careful not to melt it. A temperature controlled furnace is recommended.
In ferrous metals the easiest steels to work are the high grade low carbon steels such as SAE 1018-20. But this is not a hardenable steel. As the carbon increases and the steel becomes usefully hardenable it becomes more and more difficult to work. The 5160 recommended by Thomas is used for many things including springs and can make a good sword. But at forging temperature it is about twice as hard to move as mild steel. As steels get more sophisticated their heat treating is often more difficult. Forging must also be done carefully, not over heating the metal and not working to cold - lots of short heats.
See our Sword Making FAQ Resource list. Start at the beginning if you haven't worked metal before.
|
|
- guru
- Wednesday, 06/23/10 19:07:33 EDT
|
More Steel Generalities: Modern steels are infinitely easier to work than ancient steels. The early blacksmith spent a lot of effort carefully coaxing the needed performance from his steel which was often almost as much of an unknown quantity as modern junkyard steels.
Even the more sophisticated modern steels are designed for the best possible ease of working. They are also a known quantity that one can look up their properties and handling requirements. The ancient steels that were often better than others were usually an accident of location, their ores containing traces of things that gave them better or worse working properties.
The modern smith also has the advantage that steel is plentiful and relatively inexpensive. One can afford to learn on and scrap work made from a high quality steel. Whereas the ancient smith HAD to make every piece work and recycled the smallest scraps.
|
|
- guru
- Thursday, 06/24/10 08:01:47 EDT
|
My very first blade I ever forged was made of HR mild steel. Why? Well, at the time I didn't have any real selection of alloy steel. Also, mild is REAL easy to forge. You don't have to worry much about HT. I find it's good for practice. Did it make an incredible blade? No... I don't even use it but it would make a nifty letter opener. Then I moved on to high carbon steel. Once again, not an exotic alloy with delicate HT. Good practice, better end result. No one ever taught me how to do forging, I came up with this system by accident. If I ever had the opportunity to teach, I would start him off with easy-to-beat mild steel and work up to the better stuff. I find that it's more effective to learn a few facets of the craft at a time rather than to absorb gallons of information on the first try and expect brilliant results.
|
|
- Nippulini
- Thursday, 06/24/10 08:32:03 EDT
|
My very first blade I ever forged was made of HR mild steel. Why? Well, at the time I didn't have any real selection of alloy steel. Also, mild is REAL easy to forge. You don't have to worry much about HT. I find it's good for practice. Did it make an incredible blade? No... I don't even use it but it would make a nifty letter opener. Then I moved on to high carbon steel. Once again, not an exotic alloy with delicate HT. Good practice, better end result. No one ever taught me how to do forging, I came up with this system by accident. If I ever had the opportunity to teach, I would start him off with easy-to-beat mild steel and work up to the better stuff. I find that it's more effective to learn a few facets of the craft at a time rather than to absorb gallons of information on the first try and expect brilliant results.
|
|
- Nippulini
- Thursday, 06/24/10 08:32:10 EDT
|
Sorry about the double post.... I forgot to tell everyone that my wife's pregnant belly is holding a baby with a penis. Yup.... I have a SON! Well, not until November.... still happy as a clam though!!
|
|
- Nippulini
- Thursday, 06/24/10 08:33:35 EDT
|
Video of the U-sound
http://www.youtube.com/watch?v=0YP38yXGcZw
|
|
- Nippulini
- Thursday, 06/24/10 08:39:49 EDT
|
congrats Nip
|
|
- daveb
- Thursday, 06/24/10 10:52:37 EDT
|
That's great Nip! at least now you know what kind of toys to get him (hammers, tongs, anvils...and safety glasses!)
It's a ways off for you but, I desided when my kids were two and could walk with out grabing on to stuff or falling down unecxpectedly they could come in the shop with me.
They were also big enough that the smallest childrens size safety glasses would fit them and actualy cover their eyes effectively. Even so I didn't do anything that might cause hot sparks or chips to go flying off. Mostly just some tinkering and answering alot of "What's this for Dad?..."
I still keep the picture my wife caught of my oldest boy, when he was probably three, standing on a wire milk crate and running the table back and forth on my surface grinder "just like Dad does".
I wanted to comment also that when ever I am trying out some thing new to forge I usualy first make it from mild steel as well. I can get mild steel at the farm supply store in a pinch and it also lets me focus on the how to form the piece without the added distraction of " this has got to be perfect the first time because this is the only piece of ----- steel I have!"
As a matter of fact I'm going to start working today on a demo for making a draw knife at my annuale antique power club show.
At the show I'll unwind some 5/8 coil spring stock for the actual piece but, at home I use the 5/8 mild to practice the moves and working sequence.
|
|
- merl
- Thursday, 06/24/10 11:01:16 EDT
|
suggestions.
With out going into details i have agreed to help keep a troubled youth now in his mid 20s occupied with "wholesome" activities. even if he learns some new swear words in the process.
Anyhow he has never really done anything physical but he likes the idea of doing something in metal. I have no idea what kind of basic projects to even start him on.
Knowing he wont read up or do homework... what would you start him on?
|
|
Kevin
- Thursday, 06/24/10 11:26:35 EDT
|
Children and Advise for their future:
Gee, what happened to just passing out cigars? (gotta be a cartoon in that).
Our twins are now in their thirties and I am a grandfather twice by my daughter. While I love my grandchildren, my children were the most life changing event in my life. Having children changes you in very profound ways.
But don't expect them to LISTEN to you when you want them to, OR be interested in the things YOU like. . . Some kids do, some you might THINK are listening and a few may follow in their parents footsteps but most have different ideas about their life. Children are BORN with fully formed personalities that you will not change.
To see what I wish my children would listen to me about, especially for my grandchildren, see my post on nutrition and health on the Hammer-In.
|
|
- guru
- Thursday, 06/24/10 11:41:57 EDT
|
Nothing. If he won't do his homework he won't get anything done. Don't waste your time (unless he pays you).
|
|
- bigfoot
- Thursday, 06/24/10 11:42:30 EDT
|
I came into smithing through blademaking and one thing I have noticed is that people who learn on mild steel tend to have mild steel habits and will often work high carbon steel as if it was mild---hitting it too hot, hitting it too cold, leaving it in contact with a cold anvil or postvise, etc---So I generally advise folks to learn on the material they will be using!
Lots of folks say they can't find better steel and that RR spikes are "free" yet at the same place you can get RR spikes you can find track clips that are often double the carbon content of an HC spike (which tops out at the *bottom* boundary of medium carbon steels).
Now if you are trying to figure out a preform or an order of work; sure the cheap and easily worked stuff comes in handy; but if you are training someone to make a blade I feel that using a proper steel is important---not the least that if they have "beginner's luck", (which I interpret as you were standing over them coaching them the whole time), then they end up with a *knife* and not a letter opener.
Merl; I gave both my daughters hammers and cut down saws to use. Cleaning them back up nowadays for the grandkids of both sexes to use. (I've always felt that *real* tools with handles reshaped for small hands and saws cut down with a beverly shear to fit child use were safer than some of the "fake" kids' tools) I have a 4 oz stanley ballpein that I've been trying to give my grandson lately---at going on 18 months he can swing it already but his mother objects---must be my maniacal laughter;
Bwa-haahahahahahahahahahaha
Thomas
|
|
Thomas P
- Thursday, 06/24/10 12:22:45 EDT
|
We NEVER gave our children fake or plastic tools. It was one of my big appointment's when I was a kid to have a cast iron hammer that broke driving its first nail and a saw that would not cut cold butter.
I found small forged steel claw hammers (about 2-4oz.) at a store and bought small high quality pliers and other tools for our kids tool chests. Many of the inexpensive screw drivers with the reddened wood handles and black oxide steel coating are actually good hardened and tempered tools and I bought these as well for them. I gave each a coping (or scroll) saw with good (coarse) blades and built them both small work benches with vises. This was when they were about 6 or 7 years old.
They both learned about REAL tools and both have better than average tool collections now. Of course I'VE supplied a lot of their collection. Both received Milwaukee 1/4" Hole shooter drills with the real Jacobs chucks for high school graduation gifts and my daughter asked for a machinists tool chest with lots of drawers (the big Kennedy chest) for college graduation. She got it. . and its full. Her husband is still jealous of HER tools. . .
|
|
- guru
- Thursday, 06/24/10 13:01:53 EDT
|
Bigfoot i would normally agree however im stuck with this kid.
Its my girlfriends nephew and he has had a sketchy past he is trying to work through and grow out of. While im not getting paid for it i will surely pay if i don't pitch in and help.
Im trying to find things that are active (non video game) out of the house as father and step mother use him as full time day care while he is trying to rehab, and away from the regular temptations he has faced and hopefully show him that even if this isn't what he ultimately finds to distract him he is capable of doing things.
So im still looking for some small starter projects that will produce tangible items he can hold, touch, see and show off to others that he can do something.
|
|
Kevin
- Thursday, 06/24/10 13:07:19 EDT
|
hooks, letter openers, hammers, tongs, chisels and maybe a punch or three. I would use him as a stiker/ helper monkey for a while to see if he actually likes sithing.
|
|
- bigfoot
- Thursday, 06/24/10 13:39:03 EDT
|
Car spring is very cheap at scrapyards or mechanic shops (the kind with a bunch of old cars sitting around, not Pep Boys) and produces excellent knives if heat treated right. If "I'm poor and I don't want to mess up precious tool steel" is the mentality, then that is the solution, I think. Once pounded into shape and stock removed, then you go through the heat treatmnt theory and process. That way, you aren't getting it all at once. This is how I'm currently teaching it.
Kevin - I'd normally say a small work knife, but depending on the nature of his troubled past, that may not be a good idea. Useful tools of some kind would be good; there is a great deal of satisfaction in using a tool you have made yourself to make other items.
|
|
- Stormcrow
- Thursday, 06/24/10 14:24:04 EDT
|
Kevin:
If he or his famuily or friends do any camping or use tents, tent stakes can go from very simple to twisted, beast-headed monstrosities. ;-)
One of my specialties is making various candlesticks out of tire irons. Tough to work, but the socket is already there and it shows how common objects can be transformed.
|
|
Bruce Blackistone (Atli)
- Thursday, 06/24/10 15:34:25 EDT
|
Depending on the kid. . He might like making his own equipment, a forge, RR anvil, hammer, tongs. . .
Or if he is interested in the super primitive a pit forge burning home made charcoal.
A lot depends on attention span. But making your own fuel, then using a hole in the ground to get enough heat FORGE STEEL. . . now THAT would have impressed me when I was a kid. Check out the wood tweezer type tongs in the Zulu Blacksmiths vidoe on our AnvilCAM-II page. Start with those kinds of toolls and you are REALLY bootstrapping. Or in this case sandal thonging.
|
|
- guru
- Thursday, 06/24/10 16:05:47 EDT
|
Guru,
It's funny you should mention toy hammers. Earlier this year I was working on a project that required turning eyes on .032 coppper. Out came my very first hammer from the back of the drawer. I'm sure I didn't look very cool using it (among other things, one claw is broken off the cast iron head), but it did the job. The smallest ball peen I had was *way* too heavy.
Stormcrow, I've always figured the shops that put those Crayola-colored springs on Hondas should be a good source of used springs. But I haven't looked for one to prove it.
|
|
Mike BR
- Thursday, 06/24/10 18:29:06 EDT
|
Hi, Im looking for some information norse sword blades. specificaly how they were handled and how the guard was attatched. I have seen reproductions where the guard is mig welded and then ground back but im looking for more traditionel methods. I have read that the guards were sometimes soldeded, or posibly brazed, and if this is the case then what solder was used and how is this done without affecting the heat treatment at the base of the blade?
secondly the handle. im assuming there was a wooden component (?) if so was the handle rivited in 2 sections either side of the tang or was it simply fitted over a narower tang and held in place by compression from the end of the tang being rivited over the pommel?
how was the handle wrapped? leather? wire? if someone has any answers or can recomend a good book that i can buy then it would be apreciated! :)
|
|
wayne
- Thursday, 06/24/10 18:59:54 EDT
|
Wayne; if you are in the USA you can ILL "The Sword in Anglo-Saxon England, H.R.Ellis Davidson at any public library. Makes it a whole lot easier and cheaper to see if a book meets you needs before shelling out $$$ for hard to find books!
Guards were not soldered or brazed on the originals.
Why do you assume there was only 1 way of doing a handle?
Shoot we've been using cars centuries less than they used swords and we have gas, diesel, electric, LP, etc cars and we tend toward standardization! (In general I would suggest a solid handle with the tang hole perhaps burned to size before the pommel was riveted down)
Also remember that the tang generally wasn't hardened and sometimes wasn't even a hardenable alloy!
Thomas
|
|
Thomas P
- Thursday, 06/24/10 19:51:03 EDT
|
On many blades modern bladesmiths silver solder the guard to the blade, rarely on swords, but this was never a traditional method. I think riveted slabs is relatively new (1800's?).
|
|
- guru
- Thursday, 06/24/10 20:10:47 EDT
|
Thanks thomas ill track down the book that you recomend. im in the Uk so i dont think that it will be a problem.
Fair point about standardization!
Im awair that the tang wasnt/isnt hardened. Im an artist/ historical blacksmith by trade, and asside from a coupple of blades and my own tools im new to this area of the craft, so please forgive my nievety!
so if i were to silver solder the blade, my point is that in my mind (and im theorising here) final fitting is done after hardening and tempering, obvosly the tang is not hardened. silver soldering requires a heat abouve the tempering range, so how do modern bladesmiths solder the guard without badly affecting the heat tretment of the blade?
|
|
wayne
- Thursday, 06/24/10 21:10:08 EDT
|
Ball Peen Hammers: In the not to distant past you get ball peen hammers from 2 oz. (56g) in relatively small increments up to 4 or 5 pounds. Today the range is not nearly what it was. However, I just noticed that McMaster Carr is now carrying a nice range of ball peens. McMaster has 10 from 2oz. 4lbs. Not a bad selection. The set would cost $138. They did not have this range just a few years ago. - Maybe someone noticed my comment that they were no longer available. . .
In any case, a full range is nice to have. I spent a year collecting ball peens to replace a set I thought I had lost. The old ones are nicer crisper patterns than the new ones.
|
|
- guru
- Thursday, 06/24/10 21:25:45 EDT
|
Silver Soldering Guards: Wayne, low temperature alloy is used and the blade is clamped in a vise as a heat sink. A small torch is used. A wet rag is also used to keep the heat from traveling up the blade. If a little temper is lost near the guard it is not much of a problem.
|
|
- guru
- Thursday, 06/24/10 21:54:17 EDT
|
cheers, thats all I needed to know :)
|
|
wayne
- Thursday, 06/24/10 22:44:59 EDT
|
Kevin, How about a belt buckle. A quick project, if he screws it up, make another one. Then he can show off his handiwork.
|
|
Carver Jake
- Friday, 06/25/10 00:31:33 EDT
|
Carver Jake; beginners projects: The belt buckle is an excellent suggestion. D-buckles are sometimes a little tricky when you first try to make them, but not too challenging. Plate buckles are good too, and can be very plain or impressive according to the time and skill applied.
Viking Sword Books; Wayne: I'll try to post from my home library tonight.
Off to the Smithsonian Folklife Festival ( http://www.festival.si.edu/ ) on lunch-hour+ today; I'll note any blacksmiths and metalworking. Between Pacific Asian Americans and Mexico there is (are?) bound to be blacksmiths there.
Visit your National Parks: www.nps.gov
Go viking: www.longshipco.org
|
|
Bruce Blackistone (Atli)
- Friday, 06/25/10 08:22:44 EDT
|
Wayne, "Swords of the Viking Age" by Ian Pierce, Boydell Press 2004.
Note that the fuller always runs about halfway up the tang, and the gap between fullers and guard is not filled with anything. The blade face of the lower guard is recessed to fit the blade, and the guard is a press fit. On Viking swords we speak of upper and lower guards, with the upper guard being the lower part of the (usually) two-piece pommel. The blade is peened onto the upper guard, and the pommel proper is the riveted to the upper guard. Not easy to do!
As far as I've been able to find, soldered guards are a 20th century innovation. And be careful asking for "silver" solder. Most bladesmiths mean silver-bearing lead-free plumbing solder when they say silver solder. That contains 4% silver max, and flows around 450 degrees F. True silver solder is a braze as you mention, and flows between 900-1600 degrees F depending on the alloy.
Riveted slab handles are found on some older blades, but not usually sword-length ones. The medieval German großmessers are an exception, but as the name suggests they were considered more of a big knife than a sword despite the length.
|
|
Alan-L
- Friday, 06/25/10 12:50:28 EDT
|
One other thing about Viking swords, and most pre-1450s swords: no ricasso (the flat section between the edge and guard on modern knives). The edges are sharp all the way into the guard. One of the many ways to tell if someone knows what they're doing. :-)
|
|
Alan-L
- Friday, 06/25/10 12:53:38 EDT
|
"Knives and Scabbards, Museum of London" has several examples of riveted handles on knife blades; not early medieval due to the find dates unfortunately.
Thomas
|
|
Thomas P
- Friday, 06/25/10 14:12:51 EDT
|
Great suggestions!
This kids problems related to what he could put in his body not necessarly what he could stab or shoot into someone else but i think ill wait on a small knife till he has at least some hammer control. I think small tongs and a belt buckle will be the first days projects. I can never have too many tongs so i can show him one fairly quickly and then kinda monitor his progress and a belt buckle shouldnt be too bad either.
I have to make a new vein hardy so maybe we can do some leaf key chains too, if i get that done that is.
|
|
Kevin
- Friday, 06/25/10 15:37:46 EDT
|
Even tools like screw drivers can be hand made. Simple ones with hand made wooden handles and ferrules made from copper tubing are good combined media products. Use scraps of spring steel to make the shanks and they will be better than many.
Small hammers are not hard to make and a good way to teach punching and drifting. I make them on a long bar then cut off at the face. If you make a hammer, tongs and a couple punches and chisels you have a start on a small set of hand made tools that one could be proud of.
|
|
- guru
- Friday, 06/25/10 17:09:00 EDT
|
It occurs to me that I promised one of my brothers a couple draw knives years ago that I still have yet to make. Maybe a banner tool making session is in order. Catch up on some of those things I have been meaning to make for a while and maybe get the boy interested in something productive.
|
|
Kevin
- Friday, 06/25/10 17:58:29 EDT
|
Does he like camping? Nothing like forging something and then *using* it---like hot dog/marshmallow roasters or a tripod to cook over an open fire.
I love to make camp cooking gear and take out my price in FOOD!
Thomas
|
|
Thomas P
- Friday, 06/25/10 19:44:26 EDT
|
Ah, COOKING tools. . . ;) Tools, tools, tools.
AND there is money in making GOOD high quality hand made tools!
|
|
- guru
- Friday, 06/25/10 19:47:44 EDT
|
I enjoy making and modifying existing tools! I make a lot of spoons for tire and brake service work.
One tool I'm interested in making is a ring/hoop roller? Anybody have experience building something like that?
Jim
|
|
Slim James
- Saturday, 06/26/10 01:17:39 EDT
|
Slim, Ring rollers vary a lot depending on size and if they are motorized or not.
The principals are pretty simple, 3 rollers, one adjustable to bend and change the radius of the work piece. Some cheap ones power only one roller but these are only good for small work. At least two rollers should be powered. This means you need gears between them.
Scroll up to the post I made on June 10th (or see the archive if I have archived this month - soon). I will get a better photo of my Champion ring roller but this is a very robust and simple roller design. The gears are as-cast and could be replaced with precision laser of water cut gears. The small pinon gear provides speed reduction and torque (leverage). The roller adjustment is not the most convenient as it uses two screws which must be turned separately and equally. These push on simple steel plain bearing blocks. All the bearings are plain soft iron on steel or soft steel on steel.
This is probably the best rolls design I have seen. The only sophisticated thing about it is that there is a bearing bushing slightly larger than the roller behind the large top gear. All you have to do is pull out a cotter pin on the far side and the whole top roller comes out so that work that has been rolled to the point of overlapping or becoming a multiturn coil can be removed easily. This happens fairly often.
This Champion ring roller (technically a blacksmiths tire bender) has a heavy two sided frame which makes it very strong and simplifies bearings. But there are other open sided designs that work well for narrow stock. There are also simpler and more complicated designs. This one has the advantage of working very well and not being more complicated than it needs to be. Nearly an optimum machine design.
|
|
- guru
- Saturday, 06/26/10 08:09:15 EDT
|
Have a big old anvil looks like the one under your Anvil Gallery picture in the middle and a smaller one sitting on it.Dont know what I have or its value. Looking only at the pictures on your website; it look's like a Hay-Budden.36"Lx14"T. Can you help! Thanks; W.A.
|
|
Wayne Adams
- Saturday, 06/26/10 08:31:42 EDT
|
Found another piece of old wrought iron in the Neshaminy creek yesterday. Looks suspiciousy similar to the piece I found in there a few years ago. It looks as if it was originally 1/4x1" flat bar, but has deteriorated into a really neat appearance. Must take a pic and send it to guru for his wrought page. You can clearly see the woodgrain like iron fibers. I forged one end of it to 1/2" square, had to bring to welding temp to keep it from splitting apart during the forging.
|
|
- Nippulini
- Saturday, 06/26/10 08:34:12 EDT
|
Wayne if you send me photos I will try to identify it. Note that Hay-Buddens have a distinct depression in the bottom of the anvil and even the unbranded ones had serial numbers on the front of the foot under the horn.
It helps to clean the anvil thoroughly and take a rubbing of the sides to detect any lettering as stamped markings can get filled with rust, dirt or paint.
|
|
- guru
- Saturday, 06/26/10 08:38:18 EDT
|
Thanks for the info guru. I'll have to dome some more homework.
Slim
|
|
Slim James
- Saturday, 06/26/10 10:13:09 EDT
|
I have a complete 60-65-lbs vise very old w/part of a crown, can you tell an appoximate value of it? thank you
|
|
Jim Mercer
- Saturday, 06/26/10 13:40:43 EDT
|
I do not understand "Part of a crown"? Is this a marking?
In general, in the U.S., this size blacksmiths leg vise sells for between $75 and $150. The most important thing is the condition of the screw and box (nut), followed by having all the parts (springs and bench brackets are often missing).
Occasionally some exemplary examples with markings of known makers sell for more to collectors but in general these are WORKING tools that are going to be used. The farther away from the "rust belt" in Pennsylvania and Ohio you are the higher the price. In Southern California prices are about 50% higher than in Ohio.
|
|
- guru
- Saturday, 06/26/10 20:25:05 EDT
|
Could part of a crown be a partial impression of a six pointed star? If so it's an Iron City vise from Pittsburg.
Need more details for a value including what continent you are on. Shoot post vises tend to cost double to triple her in New Mexico to what they go for in Ohio and both places are in the USA.
Wayne: "Big old anvil"---to me that means "over 300 pounds and 200 years" To a lot of auctioneers that seems to mean "75 pounds and 50 years" To you---I haven't a clue!
A major part of anvil value is the construction and condition---can mean a factor of 5 in pricing. With the information you have provided I can say that that anvil is worth somewhere between about a penny a pound to about $6 a pound. More details could significianetly narrow that range!
Thomas
|
|
ThomasP
- Saturday, 06/26/10 23:32:58 EDT
|
Thomas, Don't you know all anvils look alike to all non-anvils?
|
|
- guru
- Sunday, 06/27/10 01:42:45 EDT
|
I just aquired a small rivet forge ,it has the belt missing , are they available anywhere or is it something you make up.......also I am hearing of lining the bottom with sand or clay is this necessary ?
|
|
dale d bostic
- Sunday, 06/27/10 07:42:58 EDT
|
Forge Belts: Dale,
The belts are custom made from leather or a nylon leather combo. I have been recommending leather belting which you can get from many industrial suppliers including specialists called "power transmission" suppliers. However, in recent years the quality of leather belting has become atrociously poor. If you get good 3/16 thick top grade leather from a leather shop that would be fine. But I am now buying the leather faced nylon belting. It is much more uniform and does not stretch. The down side is since it does not stretch the length must be perfect.
Blets are "made up" either by a number of methods. They can be skived (tapering the ends) and glued, laced by hand (a method of tying together with thin lacing), or by using patent mechanical lacing methods.
The best mechanical method is the Clipper system which uses rows of wire loops that make an interlocking joint held together by a removable pin. Many power transmission suppliers have the machine for making Clipper lacing. One advantage of the Clipper lacing is the removable pin makes it possible to get the belt on and off places you cannot use and endless belt. You can also adjust the length by removing 1/2" of one end of the blet and putting in new Clipper laces.
Then there are systems known as Aligator laces which are a light steel hinge that crimps into the ends of the belt. They are OK for large belts but too heavy for small machine belts.
So your choices are gluing and Clipper laces. Leather or a modern composite belt material.
Some light cast iron forges were marked "Clay before using" but if your rivet forge has a pressed steel pan it does not need claying. As a portable forge is was designed to have the ashes dumped out, moved, the setup again by putting fuel in it and working right away. Those that need claying require a thing layer (about 1/2" in the bottom). Moistened wood ashes can be used and is easier to obtain than a good clay that will not shrink and fall to pieces.
|
|
- guru
- Sunday, 06/27/10 09:17:55 EDT
|
I'm trying to locate information on the piping requirements for pneumatic counterblow forging hammers. A local forge shop has aquired several hammers and I was asked to research the requirements but, so far no luck. I came upon the Anvilfire website (neat site I plan to visit often) and thought I would ask. Do you know where I can find this information? Thank you, Larry
|
|
Larry
- Sunday, 06/27/10 10:35:21 EDT
|
Counterblow Hammer Piping: Larry, The engineering information is difficult to find. Much of this was unpublished and died with the manufacturers going out of business.
There is a little about counterblow hammers and their power requirements in the ASM Metals Handbook covering Forging. My edition is Volume 5 Forging and Casting but they reorganize the sections often. They also have some information on common drop hammer power requirements. These could be extrapolated to the counterblow hammer. Note however that these are not machine design or mechanical engineering references.
As far as piping goes look at the machine. The inlet pipes (or ports) on them should not be reduced. It is often recommended to have a large air receiver nearby and the pipe run from the receiver to the hammer as straight as possible. Piping to the receiver is then designed based on standard pressure loss calculations. The receivers are needed for the high volume gulps of air the hammer needs. The piping supplying the receivers must simply the consumed air at a steady rate rather than in large gulps.
I have an old Chambersburg catalog that gives piping sizes for steam hammers. Runs from, 1000# with 2.5" pipe, 3" exhaust to 24,000# with 7" pipe and 10" exhaust. Serious piping on those big hammers. . .
|
|
- guru
- Sunday, 06/27/10 11:42:45 EDT
|
Can anyone help me out?
I'm making my own sword and i need to know around where would the handle go? ==|=========> its a 44 inch blade... ex. 8 inches?
Thx
|
|
Jonathan
- Sunday, 06/27/10 19:35:43 EDT
|
Hey you guys...
can you help me out? about where on a 44' sword would a handle go?
I almost have it finished but don't want to grind the bottom half as i don't know where the handle should go exactly?
-Thx
|
|
- Jonathan
- Sunday, 06/27/10 19:40:35 EDT
|
Crown? Some of the Peter Wright vises that were exported to cognate countries such as Australia and Canada had the British coat of arms stamped on them...a small crown at the top, a large shield in the center, lion on one side and unicorn on the other. Some of these also had very slight chamfering on the legs as opposed to the deeper chamfering that we find on U.S. Peter Wrights.
|
|
Frank Turley
- Sunday, 06/27/10 21:27:58 EDT
|
Sword Grip: Jonathan, Sounds like you are the designer. In the middle? Ends? Both ends (a Peace Sword :) ? Length depends on the type of sword and weight. Single handed, double handed?
As a custom made work it should fit the user. If its for you it should fit you, if its for a client it should fit them. Is it to be used with gloves or gauntlets then there should be allowance for those.
|
|
- guru
- Sunday, 06/27/10 21:53:40 EDT
|
Greetings:
My question is concerning hooking my whisper mama forge to the 500gal. tank that goes to my house. Here goes. What should I do? T in the line that goes to the house. My question is will there be enough psi? I think the line is 5 or 7 psi. Or should I take the regulator of the tank and replace it with my 150 regulator and run it to my forge. NOTE: I do not heat with propane any more. What would you do?
|
|
Ben Overton
- Sunday, 06/27/10 22:12:58 EDT
|
Greetings:
My question is concerning hooking my whisper mama forge to the 500gal. tank that goes to my house. Here goes. What should I do? T in the line that goes to the house. My question is will there be enough psi? I think the line is 5 or 7 psi. Or should I take the regulator of the tank and replace it with my 150 regulator and run it to my forge. NOTE: I do not heat with propane any more. What would you do?
|
|
Ben Overton
- Sunday, 06/27/10 22:13:39 EDT
|
Ben, There are a lot of questions and problems here.
First, I would not count on the pressure being that high.
Given enough pressure the forge MAY operate if on a large enough line and its not too long. Pressure can drop significantly with distance.
Does the propane tank belong to you or the propane company? They may frown on your changing the regulator. Some are very sticky about customers messing with the tank and local building codes. If they own the tank you may want to ask them to put on a high pressure regulator (probably 30 PSI max).
T'ing into the line and putting on a new regulator will also raise the pressure at the end of the line in your house (used or not). Building and fire codes generally do not allow high pressure gas lines in a residence. High pressure in this case is defined in relatively low PSI (10 PSI is high pressure in this case). Codes also call for licensed plumbers to make these connections. Consult you local codes.
Breaking the building codes in this case can cause issues with homeowners or fire insurance. Even if the gas is not a contributory factor the insurance co would have grounds not to pay or tie up funds for a significant time. This may or may not be a consideration.
If the forge is located in a seperate building and you do not need the gas in the house you would be best off to disconnect the line to the house and run it to the forge.
Seems like a simple thing but the devil is in the details.
|
|
- guru
- Monday, 06/28/10 00:00:30 EDT
|
I own the tank. You pose a good point about:Pressure can drop significantly with distance. The thing is I'll need to go 60 feet to get to my shop. I thought about just that pressure drop.
As for building codes, where I live there aren't none I live in the middle of nowhere. Also the house is no longer in uses. So what do you think?
|
|
Ben Overton
- Monday, 06/28/10 05:18:09 EDT
|
Ben, If it was my tank I would put a regulator of sufficient pressure on the tank (up to 40-60 PSI), run a 1/2" copper line to my shop, then a black iron pipe manifold in the shop with several taps and valves plus a pressure gauge. I would use the regulator that came with the forge at the shop end to adjust flow. With a little higher than the necessary pressure in the line reduced at the working end pressure drop will be unnoticeable. This setup would also let you operate a torch or other equipment on the same system. The manifold only needs to be a few feet long to have a number of T's and outlets.
The type regulators used on these tanks outdoors are weather proof as well as insect proof. I would try to locate one of these with a preset pressure for the tank end.
|
|
- guru
- Monday, 06/28/10 06:34:37 EDT
|
Ben Overton, if you're going to make up a multi-T gas manifold for your shop, DON'T FORGET to include at least one shut off valve either inside or out, for emergencies.
If it was me I would put one outside, probably right befor the regulator and, one for each T and maybe one more at the begining of the manifold so it can be shut off when not in use or when you decide to change something around. That way you don't have to bleed down the entire run from the tank to the manifold.
|
|
- merl
- Monday, 06/28/10 10:19:10 EDT
|
Thank you for your reply pertaining to pneumatic counterblow forging hammers, I will check out the ASM handbook. The steam hammer piping sizes are does the Chambersburg catalog give the pressures also? Thanks again.
|
|
Larry
- Monday, 06/28/10 11:20:03 EDT
|
Ill second what jock has said on counterblow hammers, the inlet and exhaust are usually the same diameter as the necessary pipework. The air receiver near the hammer is important.
Also, a high quality 'flexy' (braided stainless type) is vital between hammer and inlet pipe. Big hammers really rock when they are running, and a rigid pipe will fail, eventually.
Just out of interest what size are the stamps?, are they beche?
|
|
- John N
- Monday, 06/28/10 11:47:27 EDT
|
Larry, Chambersburg was primarily a steam era company and 100 PSI was the norm. They recommended no higher on their air operated machines as they were identical except for rings and seals.
|
|
- guru
- Monday, 06/28/10 13:52:24 EDT
|
Thank you both for the information.
John one is a Krupp (I think DG80) and the other is an 50,000-Lb. Erie hammer.
|
|
Larry
- Monday, 06/28/10 14:21:50 EDT
|
VERY serious machinery for folks like us that dream of 300 pound hammers. . ;)
|
|
- guru
- Monday, 06/28/10 14:45:16 EDT
|
Propane:
How I would get the answer to such a question: I would go into our local Gas supplier and Ask "I want to do *this*; whats a good way to go about it?"
if the house is no longer in use could you have the tank disconnected and moved over near the Smithy?
Thomas
|
|
Thomas P
- Monday, 06/28/10 16:00:45 EDT
|
it says on this site that you can work aluminum at low heat. What about 7075-T6 aluminum. can that be worked at low heat? if so, can it be repeatedly forge welded useing regular coals?
|
|
Ben J
- Monday, 06/28/10 16:49:06 EDT
|
Even if the truck is filling the tank they usually have 50 to 75 feet of hose. . .
|
|
- guru
- Monday, 06/28/10 16:49:36 EDT
|
it says on this site that you can work aluminum at low heat. What about 7075-T6 aluminum. can that be worked at low heat? if so, can it be repeatedly forge welded useing regular coals?
|
|
Ben J
- Monday, 06/28/10 16:55:25 EDT
|
Ben J,
I'm (relatively) sure 7075 can be hot worked. The "-T6" describes a temper condition (solution heat treated and artificially aged). It will not longer be that once you've heated it in the forge.
It may be possible to "forge weld" aluminum in a vacuum or inert atmosphere, but it can't be done even once in an ordinary forge.
|
|
Mike BR
- Monday, 06/28/10 17:52:50 EDT
|
Larry, decent lumps of kit :) If you need any labour for installing / rebuilding / commisioning them etc drop me an email, let me know where abouts you are. Its my personal email address if you click on my name below, but I will give you my company details from there.
Needless to say big lumps like that can get very spendy very fast!!!!!
|
|
John N
- Monday, 06/28/10 18:42:14 EDT
|
7075-T6 AL Forging temperature is 720-820°F and is one of the least forgeable of the aluminum alloys. In other words is is relatively tough to forge like an alloy steel. Al the standard forging processes apply (upsetting, ring rolling. . .).
Besides the fact that it cannot be done there is absolutely no reason to repeatedly forge weld aluminum alloys.
|
|
- guru
- Monday, 06/28/10 21:33:19 EDT
|
what about a softer AL? What kind if so?
|
|
Ben J
- Monday, 06/28/10 23:32:27 EDT
|
Lets start with what you are making. How strong or hard does it need to be? 7075 is very hard and quite strong. Due to its hardness it machines beautifully. 1000 series is pure aluminium, the softest and easiest to forge. But it is gummy and hard to machine of get a bright finish on. It is the weakest Al but its malleability can be an advantage. But 6061 is high strength and malleability, the easiest alloy steel to forge. It is good for things that need to be bent or formed and is not quite a nice to machine as the harder alloys.
To answer all your questions on this subject I would have to feed you the entire non-ferrous chapter from the ASM Metals Handbook on Forging as it rapidly gets to needing graphs. . It borders on copyright infringement to do so. Its a pricey book but can be found in Engineering school libraries and may even be possible to ILL it. Its one volume of about 20. A set that sells for several thousand dollars but can be purchased as individual books.
It would be cheaper to buy samples of various Al alloys and try forging them. However, keeping that temperature range without melting the metal is a trick and you should really have a temperature controlled furnace.
|
|
- guru
- Tuesday, 06/29/10 01:43:38 EDT
|
My grandfather is a horseshoer of many years and is trying to sell some old anvils that he has and i am going to do it for him because he's not great with computers but i have no idea what to sell them for or how to price them. can someone help me?
|
|
Kyle
- Tuesday, 06/29/10 02:14:57 EDT
|
I want to make good quality charcoal. I want to hear from the ones who have done this, and your methods....Thanks
|
|
Mike T.
- Tuesday, 06/29/10 02:28:28 EDT
|
Kyle, Most old anvils are just tools. Some are collectors items. Value is based on brand, size, condition (judged by an expert), location and how much time you have. Need to sell them in a hurry you will get a lot less.
Watch prices of SOLD anvils on ebay. Look at how they are sold and the quality of the photos and cleaned up condition of many of the anvils. Note that many do not sell and are listed over and over until the seller gets their price or better.
See our Anvil Gallery for a glimpse of how varied anvils can be.
|
|
- guru
- Tuesday, 06/29/10 02:30:29 EDT
|
What is the best way to weld chrome moly tubing?
|
|
philip in China
- Tuesday, 06/29/10 03:15:38 EDT
|
Phillip in China, For most of the life of chromemoly welded tube structures in aircraft, the preffered method was oxy/fuel welding. When ultra-light aircraft became popular in the US about 30 years ago, there were many experiments with mig that did not end well, and tig made nice welds that if the entire sturcture was not post weld heat treated experienced failures in the heat affected zone of the welds. TIG has so high a heat input in these thin structures that the heat affected zone has a very sharp transition to non-heat affected and cracking was a big issue. I believe this was overcome with special torches and macines to allow a heat input better adapted to these very thin tubes. In aircraft 0.032" wall is normal, and usually 4340 alloy is used.
In boiler work, there are chromemolly tubes that have heavy walls, and these are welded with arc and tig, and in some cases submerged arc and flux cored mig with gas shielding. These are P-11 and P-22 and are about 1-5%ch and 1.5 to 2% moly. Filler is similar.
|
|
ptree
- Tuesday, 06/29/10 07:57:09 EDT
|
Phillip In China
This forum may give you some good answers to your welding questions.
American Welding Society Forum
www.aws.org/cgi-bin/mwf/forum_show.pl
|
|
- Burnt Forge
- Tuesday, 06/29/10 11:01:01 EDT
|
I just acquired a small Hay Budden, I believe to be 60lbs but may be 80, I weighed it on the local truck scale and the weight fluctuated between 60 and 80.
I remembered that it has been said here that smaller anvils have more bounce and ring than larger ones. This anvil has much more ring and bounce than my 100lb Henry Wright. As a matter of fact it rings to a point that it hurts my ears. Is this common to all sizes of Hay Budden or just small ones.
I havent mounted this anvil on a stump yet. It was mounted on an old tractor cyl block and much to low for me.
The one thing strange I see is the name stamp is that the city stamp is YNNY, is this the way HBs were stamped?
Are Hay Buddens also made from Wrought or are they all steel. There is chipping on the edges that makes it look as if it was heat treated (hardened) did HB heat treat. Other wise this anvil is in fair shape except some welding on both sides appears to have had something welded to it. Yep must have been a farmer that had it they always seem to want to weld and burn on the anvil! ;))
|
|
tmac
- Tuesday, 06/29/10 11:14:04 EDT
|
tmac,
Yeah, all H-B's will pierce your eardrums if not bolted down tight. As for the YNNY, you're just missing the BROOKL that goes in front of that. Brooklyn, NY, in other words.(grin!)
Early ones were wrought with a steel face, the last ones were all steel with a forged top half and a cast base, arc-welded at the waist. I forget when they made the transition, maybe someone who has their copy of AIA handy can help.
|
|
Alan-L
- Tuesday, 06/29/10 11:21:46 EDT
|
I tried to move a propane tank over by my old shop once upon a time.
The city had grown up around the old house and shop and zoning laws changed so that i could keep an existing tank but i couldn't alter its location or change the building it was piped into.
Most gas suppliers are eager to come up with a good solution for you as if you need a tank that big they are hopeful you will be a regular customer.
|
|
Kevin
- Tuesday, 06/29/10 11:34:12 EDT
|
Small and Large Anvils, Sound: Large anvils are difficult to quench and thus are generally softer than smaller anvils AND the amount of steel hardened is less. The harder the steel the higher the pitch. The denser the steel the more sustained the sound. Thus old wrought anvils with all the layers of silica slag in a soft body do not ring nearly as loud as an all steel anvil.
So smaller all steel anvils can produce a really piercing noise that definitely hurts the ears. . . Want to get attention? Tap on the side of the heel. Makes a LOT more noise. . .
Propane Tanks: There are advantages and disadvantages to large fixed location tanks. Having the gas company come serve YOU is wonderful. But you are often tied to ONE company and there are times in the winter when you could end up waiting a week to get a refill. Smaller portable bottles (100-120 pound) can be carried to a job site and you can take them to any supplier to be refilled. We recently had ours filled by a small independent who's prices were 1/3/ less than the competition AND he was open on a Saturday. The fork lift was on empty and we needed it to work that day. We got three different type bottles filled that day, the liquid delivery lift truck bottle, a 120 pound bottle and a 20 pound bottle. It was a fair drive down in the country but the price covered the travel AND we got Saturday service.
|
|
- guru
- Tuesday, 06/29/10 11:56:33 EDT
|
Ringing Anvils. Try wrapping a heavy chain around it, or attaching a large magnet at various locations on the anvil to dampen the sound, or wear ear plugs. Your hearing cannot be replaced.
|
|
Carver Jake
- Tuesday, 06/29/10 13:55:02 EDT
|
I've been working with my new hydraulic forging press lately, making prototype hand tool heads. I've been pleased with how my small collection of tooling is doing in shaping the heads. However, the problem I've run into is punching eyes.
I just built an eye punch and have been testing it. In doing so, I've found that as I am punching the eye, it's squishing the steel around the eye down thinner.
So, any suggestions on a setup to punch eyes in a low-level production way that won't get this distortion? I have an idea, but wanted to see what y'all thought up.
|
|
- Stormcrow
- Tuesday, 06/29/10 14:56:38 EDT
|
The thing I think you are having trouble with is "suck in" , where the steel all slopes to the hole. The same thing happens with hand punching but you do not notice it quite so much. The metal cross section has not actually been reduced, the metal has just moved outward into the "frog eye". Forging over a drift usually pushes the metal back out of the sides to the top and bottom. Punching in a holder that prevents expansion sideways may help.
Other things that may help: If you crown or even point your die it reduces the problem by letting the metal flow around the punch more eaaily. Punching from both sides to the middle at the same time may also help. Punch lube?
I'm not sure if this isn't a hydraulic press thing where the slower moving punch gives the metal time to move in that direction. . . Anyone?
I've got your press photos and working to set them up.
|
|
- guru
- Tuesday, 06/29/10 16:20:31 EDT
|
Kyle; a good way to sell smithing tools is to take them to a local Blacksmithing group's meeting. Lots of the ones in the USA (as well as some out side it IIRC) are listed in the upper right drop down menu "navigate anvilfire" near the bottom "ABANA-chapter.com".
I don't like e-bay; but have been buying tools off of craigslist more and more lately. Using the local one I avoid the shipping charges and the folks selling don't have to deal with e-bay's surcharges and payment system.
Off to camp with my Y1K forge Wednesday through Monday!
Thomas
|
|
Thomas Powers
- Tuesday, 06/29/10 17:09:18 EDT
|
Phillip,
There are also millions of bicycles made with brazed chrome moly tubing. I have read some folks claim that the copper can get between the grains of the steel and cause cracking, but the bicycles seem to hold up fine. May be another option depending on the circumstances and your capabilities.
|
|
Mike BR
- Tuesday, 06/29/10 18:13:34 EDT
|
Can anyone tell me if a Trenton anvil is a good one?? It is a 175 lb for $400.00. Is that a good price for one?
Thanks
|
|
Harold G
- Tuesday, 06/29/10 22:38:44 EDT
|
Harold, Trenton is one of the best American made anvils (however, some of the earliest were German made, and very good as well). If it is in good condition and has not been repaired then the price is fair.
|
|
- guru
- Tuesday, 06/29/10 23:14:37 EDT
|
tmac, I have a 134# H-B that is FIRMLY fastened to a 187# block of steel and all that is firmly feastened to a hardwood base block that makes it to the right higth for me.
The anvil still has a very loud, sharp ring.
A very wise smith told me to stick a strong magnet under the tail were the hardy hole comes through.
Haveing done this my H-B now only "ticks" and "thuds" and I'm very happy.
I have a 110# Russian pattern the I take to demos that has a terrible ring that I tame the same way. People always ask what the big speaker magnet is for under the tail, when I take it off and rap the anvil top a couple of times they instantly understand.
My H-B was made in 1893 and is solid wrought with a tool steel top. I am not sure when they went to the all steel upper half.
I also have a 100# PW that would be nearly pristine except some clod has broken the last three inches off from the horn and has made two pock marks the size of a quarter and about 3/8 deep in the face but,I can work around them.
Otherwise the edges are as when it left the factory and the rest is in great shape.
$70.US at an antique mall and I couldn't pass it up!
Hope you enjoy your new anvil!
|
|
- merl
- Wednesday, 06/30/10 00:10:47 EDT
|
I am curious why a magnet dampens the ring of an anvil.Is it just from hanging a mass from the vibrating part? Would epoxying a mass to the anvil work as well?I have seen some pretty small magnets stuck on purportedly for silencing the ring.Its hard to believe such small masses do anything.Is there more to it?
|
|
wayne @nb
- Wednesday, 06/30/10 07:51:06 EDT
|
Guru,
What your thoughts on using non-flammable hydraulic fluid in a home-built forging press? It seems like a nice option for safety.
|
|
Landon
- Wednesday, 06/30/10 08:54:42 EDT
|
Wayne, Speaker magnets have two rings separated by a cushion and they act like a damper. The magnetic connection is also a weak joint dampens the vibration. A heavy duty horseshoe magnet will not do the same.
The noise being dampened is high frequency with little motion. It is not like trying to absorb or reduce violent shaking which would require a larger mass.
All that being said there were several anvils in Paw-Paw's shop all with heavy magnets on them. Removing the magnets made no difference. I suspect it was because they were are old wrought anvils. I have not tried the magnets on my all steel anvils.
|
|
- guru
- Wednesday, 06/30/10 08:55:55 EDT
|
Landon, short of pure water,which by the way makes a pretty poor hydraulic fluid for modern machines, all of the hydraulic fluids for flame resistant are rated "Flame resistant" and "More Flame resistant"
If you use the lower cost Poly Gylcol, mixed to specification with water it is very safe. The fluid is also pretty environmentally friendly. It is not as friendly to cobbled up hydraulic systems. None of the flame resistant or more flame resistant fluids are "plug and play". The glycols have vapor pressure issues that cause inlet cavitation in most convential pumps and suction systems that will destroy a pump in hours in many cases. All of the flame resistant and more flame resistants have seal compatability issues to more or less degree.
The high water content fluids such as the gylcols attack urathane seals, the phospate esters pretty much don't like standard nitrile seals.
The gylcols, if the water is allowed to evaporate out will become flammable. Takes a optical refractometer to measure the water to gylcol mix just like water based cutting coolant.
Safer than straight oil? Yes. A plug and play? Not usually. Takes some research and care on your part.
Ptree who worked in several commercial forge shops that used these fluids, as well as straight oil. Seen the fires, cleaned up the aftermath.
|
|
ptree
- Wednesday, 06/30/10 10:19:13 EDT
|
wayne@nb, the magnet does not "add mass" per say.
What it does is add a reactive mass with a relatively week connection as the Guru points out.
I don't know about the difference between magnet construction having anything to do with it.
I have a 50# retrieval magnet on the H-B and the 3"diameter speaker magnet on the Russian and they both seem to work equally well.
As I understand it the magnet work as a reactive mass. That is as the shock wave from sticking the anvil tries to knock the magnet off the magnetic attraction sticks back on just as fast and counter acts the shock wave ( that causes the ringing) to reduce its duration very quickly.
I have been told that loose chains are sometimes effective and strapping something like trampoline springs around the waist will help.
I have actually seen the magnet "jump off" the bottom of the tail and snap back on just as described although, too heavy of a blow will knock it off altogether.
Rigidly attaching mass to your anvil will not reduce the ring. Unless the mass is homogeneous to the anvil, it will likely fly off and probably land on your foot, if rigidly attached.
|
|
- merl
- Wednesday, 06/30/10 10:27:47 EDT
|
"shock wave from STRIKING the anvil"
Never post befor morning tea!
"Seen the fires,cleaned up the aftermath" !!!
Ever the ray of sunshine, you...ptree(insert imodicon of choice here)
|
|
- merl
- Wednesday, 06/30/10 10:38:28 EDT
|
Magnets on anvils:
You do NOT need a huge speaker magnet. A tiny little neodymium magnet 3/4" diameter will quiet the noisiest anvil if you simply stick it under the heel. I use them on my wrought anvils and my cast steel anvils with excellent results.
Old computer hard drives use neodymium magnets that work extremely well for this, too. They come bonded to a steel plate a couple inches long which makes a nifty handle for moving it - those little suckers are STRONG!
The mass is not what does the job, it is the strong magnetic force that damps the vibrations. That's what the magnets in speakers do - the voice coil supplies the motion, the magnet stops it, the result is movement of the paper cone which results in sound waves.
I'm sure you'll have to try it yourselves to believe it. You'll be astonished at how well it works.
|
|
- Buford Heliotrope
- Wednesday, 06/30/10 10:41:14 EDT
|
Magnets on anvils, continued: Or if, like me, you don't like scale stuck to your anvil, simply bed the anvil in a solid layer of silicone caulk and then bolt that sucker down to a wooden base. If the anvil can't vibrate it won't ring. My 100Kg Refflinghaus can deafen you if not bolted down tight, but at the moment it sounds like a Fisher. No magnets involved.
|
|
Alan-L
- Wednesday, 06/30/10 11:19:02 EDT
|
*Cough* I'd double check the theory of operation of a speaker if I were you. ;)
|
|
Nabiul Haque
- Wednesday, 06/30/10 11:20:47 EDT
|
Having spent some years building speakers, on the woofer production line, I would have to say that I agree with Nabiul- you guys all seem to have some "creative" ideas about how magnets work in speakers...
|
|
- ries
- Wednesday, 06/30/10 13:33:21 EDT
|
Magnets on anvils-
I agree with Alan L ,I dont't like the scale clumped on my anvil, plus I never could de-ring any of my 500 pound anvils with magnets.I mounted my large Rat Hole anvil on piece of mine conveyor belt on a wooden stump, silicone to follow later.We line the floor in the horse stalls with
mine conveyor belting,even when worn that stuff is very tough,there is a fellow not far from here that buys the worn belting from the mines and resells it,mostly for horse stalls.
|
|
Greg S
- Wednesday, 06/30/10 15:15:42 EDT
|
Merl, I am not anti hydraulic presses in the forge shop. I have been accused of being so. I am very anti cobbled up from junk, by folks who do not have the knowledge to build same in a safe manner. I have seen a number of cobbled presses that scared the heck outa me when I considered that when they failed there was going to be a piece of very hot steel handy to provide an ignition source.
In the commercial shops, with excellent design and construction of the equipment, usually good maintenance etc, we usually experienced enough small fires to use 11 to 13 extinguishers a month. Some were gear oil floating on the water in the pit that caught fire from a almost 500# hot forging falling in. Some were a hot forging or billet falling on a conduit of wire and causing an electrical fire. Some were shoe fires from hot scale or a drop that caught either the leather or sole on fire. And 3 to 5 times a year, we had a somewhat more serious fire from a hydraulic system. A pin hole leak on a fairly big system will take a long time to empty the tank. That atomized pin hole, spraying say a gallon a minute makes for an awesome oil burner if it finds an ignition source. Factory Mutual, the standard setter for industrial fire safety for the insurance industry, calls for float switches, heat rise detectors and so forth for hydraulic systems over 100 gallons in hot work situations.
I worked for a valve company for 21 yaers, and worked several cases where we were sued in fire cases. several where a hydraulic system leaked across a forging and made a flame thrower. One burned down an entire factory. Worse, killed several.
I advocate to all in our craft who will listen to design with the constant thought that hydraulics will leak, the only question is when , where and how much? The constant thought of the designer should be safety first, performance second, and cost third. I think many in our trade get those out of order.
Am I "ever the ray of sunshine" Yep you bet:)
Remember, "Life is too short to spend any of it dead, injuried, or in jail, and any combo of those three really sucks"
|
|
ptree
- Wednesday, 06/30/10 19:33:12 EDT
|
ptree,
I think, after your post, that I will just get the stuff from Tractor Supply and be extra cautious to keep accidental leaks from hitting the hot steel. Being that I am new to hydraulic presses, do you think this is the best choice. Thanks for all the advice.
|
|
Landon
- Wednesday, 06/30/10 20:20:20 EDT
|
Landon, First, make sure every single item in the plumbing is rated for at least what the system safety relief is going to be set to. Don't know what a system safety relief is? Then you need to study some more. Then plumb everything possible in Tube or hard pipe. Avoid hose as hoses are the most likely to burn thru and leak if a hot part falls on them, as well as fatique and break. Run the cylinder connection on the side away from you, and use sheet metal sheilding to protect the oil carrying stuff from the hot stuff. Put a remote kill switch somewhere handy, like at the exit to allow slapping the kill switch on the way out.
If you do not have design experience, get someone local, who has design/build experience to help you through the build. New to hydraulic presses in a forge shop is not a good starting point.
Most people use too small a cylinder, and try to run the pressure way up to get tonnage and this greatly increases the probility of system leaks. Buy 3000 psi rated components and run at 1000-1500 psi for more safety factor.
Of course as cylinder size increases so does the pump flow capacity needed for good speed and that means more Horsepower. For forging I would not reccomend less than an 8" bore cylinder. Since an 8" bore has about 52 square inches of area, that equals about 25 tons per 1000 psi. If you do not know how I got to that answer you need to study more. How fast do you want that cylinder to move when in contact with the steel? An approx is a little more than 2" per MINUTE per gallon per minute in an 8" bore. Don't know how I got to that number? You need to study more.
I am not trying to pick on you, or belittle you. I don't know your experience level, and machines that make up to a hundred tons, and move fast need good, careful and well thought out design. The frame itself is not a cut and paste and see what happens either at these tonnages.
Please consider your training and experience and proceed with care, this craft needs every single practicioner healthy and intact.
Good luck.
|
|
ptree
- Wednesday, 06/30/10 21:07:11 EDT
|
Of course you are correct on all points my freind.
It is sometimes unfortunate that SOMEONE has to do that kind of job but, guys like you do help make the world go 'round, man...
Don't forget to have a pleasent and reflective 4th of July
Hoist an adult malted bevy for me while you're at it.
|
|
- merl
- Wednesday, 06/30/10 22:43:15 EDT
|
I asked a question the other day about making charcoal. The reason for this was something I saw on TV. It was a documentary about Cuba and this Cuban lady was talking to a man living in the countryside. He said he made charcoal for a living and I perked up hoping he would demonstrate his technique. He was standing beside a small mound of dirt about 8-9 feet tall that was in the shape of a volcano. He climed to the top of it and poured a bucket full of dirt in the top opening. I know he had burned wood in it, although it was not giving off any smoke. From what I can understand there are a few openings at ground level, at some point dirt is pushed against these openings, then dirt is poured over the top opening. How would you say this is done ?
|
|
Mike T.
- Thursday, 07/01/10 01:39:03 EDT
|
Would anyone know anything specific about the steel in the tracks of a 50,s era oliver crawler tractor.I have a rather large supply in the form of two old tracks . Of course there are three parts ,chain,pins,and plates.I know,junk yard rules,but I thought the collective wisdom just might save me a lot of missteps.
|
|
wayne @nb
- Thursday, 07/01/10 08:08:19 EDT
|
Charcoal: Mike, They were using the mound method of making charcoal the same as has been done for thousands of years on every continent.
1) Make a stack of wood, with a central hole formed by a pole that is removed later. The wood stacked to form a cone or mound.
2) Cover with dirt (the hard part) leaving a vent hole at the top and a couple vents at the bottom.
3) Start a fire at the bottom of the central vent. Adjust the air so that the fire does not consume the whole.
4) Observe and adjust the fire via the vents to see that the fire has reached the outsider AND/OR judge by time. This often takes 12 to 24 hours depending on the mound size and wood type.
5) Close the remaining vents to put the fire out and wait for the whole to cool. Carefully watch that the mound does not collapse opening holes and catch fire again.
6) When cool remove dirt and seperate charcoal.
The above is described in Bealer's The Art of Blacksmithing p.33-34 and in greater detail in Eric Sloane's American book, A Reverence for Wood p.56-59.
Besides the mound method there is also the pit method that requires less work (in my opinion).
See the photos of a pit charcoal making operation I took in Costa Rica. I also have photos from Hugh McDonald from his youth when they made charcoal on the farm in Australia. Most pit methods use some sort of removable cover such as corrugated steel roofing to cover the fire. It is sealed using dirt around the edges. Operation is similar.
For descriptions of a variety of methods see Coal and Charcoal FAQ
|
|
- guru
- Thursday, 07/01/10 08:30:25 EDT
|
Time to coal. . try 24 hr's to a week depending on the mound or pit size. Charcoal makers live with their fire night and day. Often it is a family affair with members taking over from one and other but it is just as often a one man business.
|
|
- guru
- Thursday, 07/01/10 10:03:17 EDT
|
Charcoal: Here is another method a good friend of mine uses to make his charcoal.
He made a "cooker" form an old electric hot water heater vessel that he cut in half and flared the edge of the top half so it would fit over the bottom half. The two halves are also secured with a couple of straps to prevent them from coming apart during firing.
He has plugged up all but one 3/4 pipe opening and to this he screws in a 12" long, straight section of black pipe.
He fills the cooker with hardwood cuts about 3-4" long and secures the top half.
He then builds a large scrap wood fire around the cooker.
When the inside gets hot enough it will start to steam from the vent. As the cooking continues the hot exhaust gases will catch fire and roar like a jet engine.
Continue cooking until the flame goes out and the steaming stops, then let the fire die out or take the cooker out of the fire and throw several chickens on for dinner...
Leave the cooker closed until it is completely cool (do not plug the vent!)
Store in a covered drum or barrel with a good lid.
His charcoal gives off very few, if any, fire fleas.
Commercial charcoal intended for the home grill is usually cooked and then cooled with water to speed up the process time but, this adds greatly to the fire fleas as well.
|
|
- merl
- Thursday, 07/01/10 11:06:58 EDT
|
Both the tyope of wood and how well it is coaled can make a difference in fleas.
|
|
- guru
- Thursday, 07/01/10 14:42:37 EDT
|
Rustproofing formulas
Hi, Guru et al! I am working on an arbor and am looking for a good rust-resistant primer coat. I found this product on the web, "Rust Bullet" at rustbullet dot com and would like to know if anyone has any experience with it. If not, are there any product you would recommend? Thanks! Matt
|
|
Koomori
- Thursday, 07/01/10 15:43:02 EDT
|
Rust Bullet: Well, the only active metallic ingredient is a little aluminum. This is nothing like applying a zinc base coat.
The application instructions call for applying over light rust or tight mill scale and an otherwise clean surface. If you use coal then "clean" means sand blasted (due to plating with coal). If you drill tap or saw using oils then clean means thorough degreasing. If there is other paint it means stripping the paint.
Most paints will do a good job if you follow the instructions. However, those that say they can be used over scale are fudging. "tight scale" is very hard to identify and when due to flexing it stops being tight and the paint flakes off with the scale then its NEVER the paint's fault. . In paint cleanliness IS next to Godliness. Grit blasting or chemical scale removal is best.
Almost any good paint works well over a really clean surface.
Also note that you will always get GREAT testimonials from folks that have just used a simple one coat rust proofing product. "It was EASY, just paint over the rust and dirt". But until some time passes you do not know exactly how well that coating is going to hold up when applied on marginally prepared surfaces. . . You know the saying, "If it sounds too good to be true it probably isn't.
|
|
- guru
- Thursday, 07/01/10 16:41:34 EDT
|
|
|
[
CSI - anvilfire MEMBERS Group |
Getting Started in Blacksmithing ]
|