| WELCOME to the anvilfire Guru's Den - V. 3.0 |
|
THIS is a forum for questions and answers about blacksmithing and general metalworking. Ask the Guru any reasonable question and he or one of his helpers will answer your question, find someone that can, OR research the question for you. This is an archive of posts from June 25 - 30, 2006 on the Guru's Den |
|
|
|
Magnets: Miles, McMaster-Carr (mcmaster.com) has every imaginable type (and price). |
| - guru - Saturday, 06/24/06 23:50:49 EDT |
|
Guru-- Many thanks! |
| Miles Undercut - Sunday, 06/25/06 00:00:13 EDT |
|
3dogs-- Yes, indeed, I have noticed! I have read there are ways to deal with the blow, but I haven't figured it out yet myself. I therefore use the magnets as sparingly as possible. What I am doing now, though, is ultra-thin sheet, a fume hood for over my soldering bench, with oxy-acetylene. Damned HF magnets have some sort of combustible composition filler! Dave Boyer-- Many thanks! |
| Miles Undercut - Sunday, 06/25/06 00:09:55 EDT |
|
Guru: Many thanks. Although I would disagree about my being on the bottom rung, here. I think I'll need to climb up a bit to get there. :) I've found enough info on the web to keep me busy for a little while, now that you and Thomas have provided me with some terms to search for. Plus I've run across some old posts that I think were made by Thomas on a Japanese sword making forum. The link below gives some good basic info, in case anyone else is looking: http://www.unc.edu/courses/rometech/public/content/mines_and_iron/Roger_Smith/roger/BLOOM4.htm#roast Wikipedia was also helpful, once I had some terms to look for. I'll prolly go over all the online resources, then get off my lazy tail and head to the library. Thanks again, guys. Your efforts are much appreciated. I may be back by, when I've learned enough to know what questions to ask. :) |
| Craig - Sunday, 06/25/06 05:59:12 EDT |
|
Craig, Beware of some on-line sources. Wikapedia accepts articles written by anyone and they are often inaccurate. |
| - guru - Sunday, 06/25/06 07:52:44 EDT |
|
Hi, I have brushed muntz wall (unique size) plates that I would like to convert to an oil-rubbed bronze finish (or something close). I read that a "glass bead blast" process would significantly darken the brushed muntz and achieve my goal. Do you recommend this and is there an alternative process a homeowner can do? |
| Paul Malueg - Sunday, 06/25/06 07:54:31 EDT |
|
Finishing Muntz Metal: Paul, Bead blasting will remove any existing finish and possibly roughen the surface. The problem is that the beads like other blasting media come in different sizes which produce different results. So, you have half an answer. "Oil rubbed" finishes darken by application of a tinted oil with drier or varnish. In some applications you start with a chemicaly applied oxidation using aqueous sulfide solutions (professional products). Highlights may want to be polished and the solution applied again. A clear or tinted finish is applied after neutralizing the applied chemicals. The first step is to remove any existing sealer or finish. The second step is to mechanincaly refinish the surface if it needs. Then the metal is cleaned to remove any wax from buffing compounds or oil from handling. Then the finish of your choice is applied. Starting from an absolutely clean surface is critical. There are books on finishing copper and brass that will go into great detail. |
| - guru - Sunday, 06/25/06 08:32:46 EDT |
|
Guru: Thanks for the caveat. I was aware of how Wikipedia works. You might want to post that warning often, though. I was recently shocked to find out that a whole bunch of people were unaware of the process. That could be dangerous, when it comes to metal working. Looks like the online resources may satisfy my needs, though. At the very least, it's enough to keep me busy for a week or so. Maybe enough to get me up to that bottom rung you spoke of. And, since I play guru on some other forums, your help HAS been MUCH appreciated. I know the time and energy it takes up to field these questions. |
| Craig - Sunday, 06/25/06 08:57:35 EDT |
|
We want to build a vent hood for our soon to be restaurant. Since we are in the county we dont need fire supression. I am looking for a simple plan for a hood. We need one about 36x96 but could modify the plan to suit our needs. Any one got an idea? |
| mudbug - Sunday, 06/25/06 10:55:31 EDT |
|
Mudbug, Even though you aren't required by building codes to have fire suppression, you still have to worry about insurance and safety. Most commercial kitchen fires start in the hoods. Then the natural draft is greatly increadses by the flames and you have a jet engine in your roof. Keep this firmly in mind when contemplating any design. The big danger in kitchen hood is the grease that is trrapped in the filter media. Regular and conscientious cleaning minimizes this danger, but never eliminates it. Design your hood so that the filter media can be removed and cleaned without requiring any tools or tricky techniques. Set a regular cleaning schedule and stick to it. Have fire extinguishers handy. Several. In designing a hood you have to do a couple of things. The air from the cooking area must be drawn up the hood, then the grease condensed out of the air at the filter media, then the "cleaned" air exhausted. Whiler all this is going on, fresh air muyst be brought into the scavenged area to replace what went up the hood. This is called "make-up air" and is critical to the function of the hood. You may need to install forced make-up air to get the hood to function properly. Use a proper grease-extractor type of fan for the hood. This is mounted (usually) on the top of the flue above the roof, outside. Calculate the number of cubic feet of kitchen and get an extractor that will move sufficient air to change the room air once a minute if you can. Expect to spend several hundred dollars for a decent extractor; McMaster-Carr and Grainger both carry extractors, so you can see what you're dealing with. DO NOT use a regular blower for grease extraction unless you want maintenance and fire problems! The make-up air can be supplied by either natural draft or forced drafting. That depends on your climate and physical situation. Here in the tropics, we just open a lot of windows and that does it fine if your extractor is powerful enough to pull in its own make-up air. If not, or if you need to supply make-up air in a cold climate, then you will wan tot mount a blower ono the roof that is ducted down to supply the make-up air. The make-up air blower must have sufficient capacity to supply the extractor; roughly equal capacity, though available natural draft may affect this. Ony you know your particular circumstances. Make-up air is critical to the performance of the hood! I prefer the slat-type grease filters to the woven mesh type. With sufficient flow past them, they condense grease well and are much easier to clean. The don't restrict flow even when grease-laden, like mesh filters do. They never wear out, either. They MUST be cleaned regularly or they don't work. Remember, all filters work by "condensing" the grease droplets, so they have to slow the air flow and cool it. The hood should be mounted high enough above the heat source so that is stays cool enough, with the air flow, to condense the grease. Lower is not better in this case. Any hood design will still have grease condensed on it in places where you don't want it. Like all over the thing. Plan it so that the hood has a grease trough that runs to one corner and drains into a can. This will pay big dividends in cleanliness and safety. If you do a lot of frying, think in terms of a gutter like on a roof. There wil be lots of grease. Don't mount the hood so that the back of it is flush to the wall. Leave an air gap so the hood cools better. You can flash it so that it looks neat, but leave that air gap. Stainless steel is the only really good material to use. Weld all the seams for ease of cleaning. Every little fastener head that sticks out is a place for grease to drip off of. Square ducts are easier to build. More flow area, too. Grease extractors are usually made to fit square ducts. When installing duct work and extractors, seal ALL the joints. Spurious air entry really fouls up the function sometimes. Lastly, make sure that the grease extractor is easily accessible. It too, will require regular maintenance and cleaning. Offhand, that's about all I can remember from a few years of building and owning a restaurant. If I missed anything, I'm sure somebody will chime in with the answer. |
| vicopper - Sunday, 06/25/06 11:40:14 EDT |
|
Mudbug, Vicopper's answer is very comprehensive and dead-on. I will add that any resturant equipment supplier will be able to offer you the correct size and air volume of a hood depending on how much equipment you have that needs venting. The other thing is you may not be required to have fire suppression, but bear in mind these systems are not just to save the restaurant, but also the people in it from being killed. You sure you don't want one? |
| - Gronk - Sunday, 06/25/06 13:09:16 EDT |
|
Mudbug, Another thought on the fire suppression system for a hood. They're isn't all that much to one of those systems, actually. For a single hood, it is really simple. I had four hoods, so it got more complicated, but you just need a couple of rate-of-rise sensors mechanically coupled to a spring-loaded valve on the powder cannister. You can get a small system like that installed for a few hundred bucks, probably. You may find that you save more than that annually on your fire and liability insurance by having it. Insurance complanies are the "belt-and-suspenders" types and they want you to have *all* the preventative measures in place before they want to insure you. You can find out a lot of information on kitchen hoods by going to Superior Products Restaurant Supply. Google 'em, and check out their specs. |
| vicopper - Sunday, 06/25/06 14:20:05 EDT |
|
I am 48,and gust starting out in blacksmithing I have a champion 400 hand crank blower I think it takes a 3" hose to hook it up to my forge can some one help me find one? |
| - Terry - Sunday, 06/25/06 14:41:07 EDT |
|
Blower Pipe: Terry, These blowers were originally connected with rigid cast iron or steel pipe or tube designed to fit. Some had clamped connections and others flanged. Today you can use auto exhaust pipe or flex tube. I do not recomend the flex tube as it rusts out rapidly. Some people use small flexible aluminium gas vent pipe but I am not crazy about the durrability and it may not take the heat when connected directly to the forge. Hod-rod or Speed shops often have pre-bent exhaust pipe components and straight pipe to fit. I have also bought pipe by shopping through what looked like it had the bends I needed and then cutting and modifying it to suit. Brazing or welding is often needed but can ocassionaly be avoided by using fittings and clamps. The makers of these devices, like many of the era, assumed that the end user was someone with mechanical skills and know-how. There were no installation or operation instructions. Often there were no parts other than the device. Connecting hardware was up to the end user. Note that these blowers have no seals. They leak oil and need to be oiled daily to prevent wearing them out. |
| - guru - Sunday, 06/25/06 14:54:41 EDT |
|
I am 48,And a binning blacksmith and I hope ya'll can help me I have a champion 400 blower and I blev it takes a 3" hose from my blower to my forge but I am having trouble finding one can you help me find one?P.S. I live in florida. |
| Terry - Sunday, 06/25/06 14:55:25 EDT |
|
Vicopper forgot to mention the release mechanisms typically is connected to the gas mainvalve as well as the exhaust motor, electric deepfryers too. There is dozen things that can be spec'd to a system, If you are being a cheapskate and going for the absolut minimum, or not. |
| - Sven - Sunday, 06/25/06 15:17:52 EDT |
|
Terry-- that flex aluminum tubing used to vent clothes driers works well. There no doubt will be those who shake their heads, but in fact, it works just fine, holding up against heat from the forge (not much-- it mostly goes up) and the occasional methane blast from gas that collects from the smouldering coal when the forge blower sits idle. |
| Miles Undercut - Sunday, 06/25/06 15:32:48 EDT |
|
Terry-- on the other hand, there is sheet-metal piping for venting gas water heaters that works fine, too. Sturdier. Saves you from lying awake worrying if that hunk of slag that fell down into the drier vent stuff has popped or melted the tubing and is even now burning down your shop. Zzzzz.... |
| Miles Undercut - Sunday, 06/25/06 15:44:48 EDT |
|
Terry, see answer directly after your first post. |
| - guru - Sunday, 06/25/06 15:52:18 EDT |
|
Oops-- did not read up far enough to see first post and reply. Sorry. |
| Miles Undercut - Sunday, 06/25/06 15:58:22 EDT |
|
Re Wikipedia: When you find an error, correct it. Supply references for your position. At the least it will be represented. at best your rewrite will get accepted. |
| - John Odom - Sunday, 06/25/06 19:09:58 EDT |
|
I've hooked up many a coal forge blower to fire pot, and I've mostly used 3" stove pipe. It is sold either blued or galvanized. I like the galvanized. Once everything is in alignment, I spot, torch-braze all connections, including the one to the fire pot and blower, using proprietary brass rod. I use duct tape over the brazed joints, if needed. |
| Frank Turley - Sunday, 06/25/06 19:17:41 EDT |
|
I read the getting started page and have ordered the books from amazon, along with another that showed up while searching the internet. The next section said to start collecting scrap and other pieces to practice on. I have access to quite a large amount of scrap gun barrels. They cover the whole spectrum from pistols to rifles to shotguns. I realize that the steel varies by manufacturer and style. Are they worth grabbing up at scrap prices? What would they be good / not good for? The books I've ordered so far are New Edge of the Anvil Jack Andrews The Art of Blacksmithing Alex Bealer The Complete Modern Blacksmith Alexander Weygers Are there any others that anybody would reccomend? There's so many on the bookshelf and the checkbook only goes so far. I have experience building kilns for pottery, so a book on forge building would be nice. I have a ton of hard and soft brick left over(literally), several burners etc. I think it cant be that different than a micro kiln. Thanks Chris |
| Chris R - Monday, 06/26/06 00:27:34 EDT |
|
Chris R: I would highly recommend adding The Backyard Blacksmith: Modern Techniques for the Traditional Smith by Lorelie Sims to your purchases. Really an excellent introductory book with lots of color photograph and illustrations and 20 projects to get you started. |
| Ken Scharabok - Monday, 06/26/06 06:52:33 EDT |
|
The Artist Blacksmith by Peter Parkinson is considered by our reviewer to be as good or better than Andrews, Bealer and Weygers together. I have yet to see this book so I cannot comment personaly. I did not see MACHINERY'S HANDBOOK on your list. As soon as you get into heat treating and identifying alloys you will need a good metals reference and this is the most affordable and available book. Even new it costs half of what the specialty ASM metals references cost and used it is a bargain. It also includes reference tables of every kind that are needed in the blacksmith shop. Number drill sizes, sheet metal gauges, densities of materials and thousands of other things important to the shop. And then there is Decorative & Sculptural Ironwork by Dona Meilach. The books by Andrews, Bealer and Weygers do not offer significant information about anything non-ferrous or exotic such as Laminated (Damascus) steels and working bronze. Nor do they offer much in the way of inspiration. This landmark reference was published in the same year as Edge of the Anvil and had much more impact on blacksmihting today than any other reference other than The Art of Blacksmithing. See the review of this book and her latest Ironwork Today Inside & Out. Seeing what the top metalsmiths are doing today is your route to the future of this craft and nobody has done this better than Dana Meilach. THE book on gas forges is Michael Porter's Gas Burners For Forges, Furnaces & Kilns . Our review of this book is inclomplete. Porter gets into the how and why engineering details of forges which are different than kilns, they run much hotter and are frequently open while operating. While the book is very good I am not enamored with his burner plans which are a bit complicated. |
| - guru - Monday, 06/26/06 08:59:32 EDT |
|
ONE MORE I overlooked Otto Schmirler 's Werk und Werkzeug des Kunstschmieds . This is probably the best illustrated book there is on blacksmithing. Although newer books are using more and more photographs you CANNOT beat well drawn drawings for illustrating many tasks. Schmirler made wonderful use of water colored drawings to show the hot iron. I've been updating a few of our early reviews. When they were written the most common PC ran DOS 6.1 and Win 3.2 with a 9K baud dial up modem. There was no point providing large details of images as nobody could wait for the download. I've updated the format of a couple of these early reviews but they also need new scans. Always something. . . |
| - guru - Monday, 06/26/06 09:22:25 EDT |
|
Concentric washers: Two washers are nested snugly one inside the other. Given the diameter of the hole, r and the outer diameter of the larger washer O, find the outer diameter of the inner washer, R such that the areas of both washers are equal. With a little algebra I get : R^2 = 1/2( O^2 + r^2) |
| adam - Monday, 06/26/06 09:51:23 EDT |
|
Did we leave out George Dixon's "A Blacksmith's Craft, Volume I? Blue Moon Press. Good drawings and explanations. |
| Frank Turley - Monday, 06/26/06 10:59:01 EDT |
|
Chris R, Gun Barrels: http://www.winklerknives.com/knives.asp?id=31 I don't know if this interests you, but look. |
| - Tyler Murch - Monday, 06/26/06 11:21:25 EDT |
|
Dixon's A Blacksmith's Craft - another one I have not seen. I spend hundreds of dollars a year on books but they are books of my choice. If authors/publishers want me to review their books they need to send them. . . Or have serious reviewers send reviews. I don't like fluff pieces and generally do not publish them. There is also a difference between an elementary school book report and a serious review. It takes about 3 days or more to put together one of our reviews not including reading the book. I am sometimes a little slow getting reviews out but I do get them out unless the book is really horible. After showing a recent review to another author/reviewer he said the best way to handle the bad ones is to just say nothing at all. . . He helped rewrite it so that it was acceptable to publish. Artisan Ideas sends me quite a few books so I am always behind on reviews. However, they do not always carry the newest authors works. A good way to have then see your book and decide to carry it is to have it reviewed here. I am also trying to catch up on reviews of standards like De Re Metallica and Diderots Encylopedia. My original plan was to review every book in my library. It has doubled in the past 8 years so that has been difficult. Many that I thought I would have reviewed by now have not been. Books I've recently purchased for myself were, Hummingbirds of Costa Rica, China at Work (after Frank's recommendation), Forging Technology 2003, The Craft of the Jappanese Sword (very good, will be reviewing it), Machinery's Handbook 3rd Ed. (actually a 3rd printing of the first edition - added to collective review)and Sources for the History of Science of Steel 1532 - 1786 (on Thomas' list). If you pick up just one new idea from a book it is usualy worthwhile. |
| - guru - Monday, 06/26/06 12:02:58 EDT |
|
Guru, do you have the complete Diderot's Encyclopedia, or the abridged version? Thomas |
| Thomas P - Monday, 06/26/06 14:47:28 EDT |
|
I have the 1959 Dover two volume edition. 9 x 12. Probably abridged as there seems to be many details missing. |
| - guru - Monday, 06/26/06 15:25:18 EDT |
|
Hi, i just bought an 80 LB bag of Blacksmithing coal, from McKinnin Coal and Firewood, the coal , is just coal dust, they say that you just have to keep it wet, and it will coke faster and works just as good as lumps is this true, and is there anyhting special i have to do to work with it? thanks Cam |
| Cameron - Monday, 06/26/06 15:36:21 EDT |
|
Chris R-- Get Plain and ornamental Forging by Ernst Schwarzkopf, and do the exercises. Then go to http://www.countryside.gov.uk/NewEnterprise/Economies/craftpublications.asp and download The Blacksmith's Craft, as done by COSIRA, the Council of Small Industries in Rural Areas. Or find a hardback copy on the Web. Maybe Centaur has it. Work your way through it. This same site has several other smithing books, enough projects in there to keep you busy for a while. |
| Miles Undercut - Monday, 06/26/06 16:42:34 EDT |
|
The other day I was out mowing with my 7' Bush Hog and a big rock snuck up on me and RIPPED the top of the deck, maybe a 4' long rip in the steel of the deck. Pretty thin stuff, maybe 14 gage, no more than 12. Any suggestions as to how to fix this? My available resources include a Lincoln 160 mig welder (the smallest that requires 220v) and a small Oxy-Acetylene outfit (size "B" cylinder). I'd say the Bush Hog "Squealer" line does not live up to their reputation for toughness . . . |
| John Lowther - Monday, 06/26/06 17:29:27 EDT |
|
Artisan Ideas has the CoSIRA books. Centaur might as well. Coal Fines: Cameron, Normaly blacksmith coal is sold as egg or nut coal (the size of an egg, or smaller a large acorn nut). In England they use breeze or fines. Using it is an art. It should be cheaper than egg or nut coal because it is what is left over after sifting. However, coal is now ground for use in some plants in what is known as "liquid bed" furnaces but normally the fine grinding is done in-plant. Breeze works best in a side blown forge which the British are also fond of. The coal is wetted and packed around the opening of the tuyeer leaving a hollow for kindling and some previously coked coal. Once the fire is started the heat melts the fresh coal and it binds together before it gets hot enough to coke then burn. The packed breeze is constantly pushed toward the center of the fire and its moisture adjusted as needed to keep it from blowing around. It actually takes very little more care than a regular coal fire, it is just different. |
| - guru - Monday, 06/26/06 17:36:16 EDT |
|
Welding Thin Sheet John, I prefer to back up something like this with a stip of metal equal to or a little thicker than the original. I would tack the back up piece about every 6" on each side then hammer out the distortion using a bucking block or bigger hammer. Then I would tack the joint at about the same 6" spacing perhaps between the other tacks. Then I would close the gaps with more tacks until the spacing was about 1" between tacks. THEN I would run continous beads between two or three tacks and skip a group and do the same. THEN come back and finish the gaps. When the tear is finished I would weld the backing strip on both edges with 1" beads spaced 1" apart. It is lots of moving around but it keeps the sheet metal from getting out of control. Paint well when finished as farm equipment rusts faster than anything, especially when welded upon. |
| - guru - Monday, 06/26/06 17:45:56 EDT |
|
Thanks for all the extra books. Guru I already own a copy of MACHINERY'S HANDBOOK I just have to pry it away from my stepfather. Tyler Thanks I completely forgot about muzzle loaders(What he uses) alot more steel that the average shot gun. How about the gunsteel? I've had a hard time finding useful applications. I'm not set on using the stuff, I'm just having a hard time turning away from so much stock. thanks chris |
| Chris R - Monday, 06/26/06 18:00:31 EDT |
|
Chris, long pieces are turned into "rifle barrel pokers". The hollow poker was supposed to be good for starting fires by plowing through it. I don't know about short pieces. However, I am always in need of tube stock for stand off and spacers when building machinery. I almost never turn down free scrap. . . |
| - guru - Monday, 06/26/06 18:14:25 EDT |
|
thanks, I thought you could close it down and use it for round stock. chris. |
| Chris R - Monday, 06/26/06 18:46:46 EDT |
|
Does anyone have a diagram for a Champion or Buffalo blower.......Id like to see the internal mechanism..... Thanks....walt |
| berkman - Monday, 06/26/06 20:01:16 EDT |
|
Does anyone have a diagram for a Champion or Buffalo blower? Id like to see the internal design....thanks...walt |
| berkman - Monday, 06/26/06 20:04:36 EDT |
|
You need to be more specific, There are dozens of different forge blowers, The typical hand cranked blower is a crank, gearbox and fan. Very simple in principal, But dozens of variations of designs. |
| - Mike - Monday, 06/26/06 20:22:36 EDT |
|
Jock, email coming at you. |
| vicopper - Monday, 06/26/06 21:12:12 EDT |
|
New Anvils: I am planning on buying a larger 200-300lb anvil sometime in the next year. I am wondering if there are any new anvils that should warrant consideration along with high quality used anvils in excellent condition (hay budden, peter wright, etc.). I know very little about the new anvils currently available other than what the retailers post in the description. I would greatly appreciate it if anyone can direct me to where I can find more information on these new anvils or share their own opinions on them. Thanks. |
| Steven Galonska - Monday, 06/26/06 21:25:51 EDT |
|
John L - The mig is the best choice, with a small diameter wire. .035 would work but smaller is better in this case. Guru's method will work fine. The torch will make much more distortion. |
| Dave Boyer - Monday, 06/26/06 22:09:33 EDT |
|
Google has tons of interesting stuff re: Diderot (the Dover edition of whose encyclopedia just is the tip of the iceberg), for example, this: "The Encyclop�die ou Dictionnaire raisonn� des sciences, des arts et des m�tiers, par une Soci�t� de Gens de lettres was published under the direction of Diderot and d'Alembert, with 17 volumes of text and 11 volumes of plates between 1751 and 1772. Containing 72,000 articles written by more than 140 contributors, the Encyclop�die was a massive reference work for the arts and sciences, as well as a machine de guerre which served to propagate the ideas of the French Enlightment." This is from http://www.lib.uchicago.edu/efts/ARTFL/projects/encyc/ |
| Miles Undercut - Monday, 06/26/06 22:34:54 EDT |
|
Gun barrels. My old "Forging Industry Handbook" of 1970 states that gun barrels are made of 1041 steel, which is a respectable, hardenable, medium carbon steel. |
| Frank Turley - Monday, 06/26/06 23:20:06 EDT |
|
Anvils: Steven, New, Quality runs in those sizes, Peddinghaus, Nimba, Euroanvil then others. Peddinghaus has been out of production but is promissing to come back. . don't hold your breath. I think they are shopping for a buyer. Nimba is the best US made anvil today. However, the maker, Russell Jacqua just passed away from ALS. He did a lot of the hand finishing himself. Maybe they have an employee to do it now. His wife is continueing the business. Euroanvil is an OK anvil but nothing comes close to the price per pound or bang for the buck. Rat-Hole is also very good but pricey. One of the prettiest anvils made today. |
| - guru - Tuesday, 06/27/06 00:11:17 EDT |
|
What is involved in pattern welding of steel ? Is it in any way comparable to ie. damascus ? |
| Mike T. - Tuesday, 06/27/06 00:28:09 EDT |
|
Steven Galonska: If you talk to those who own one of these double-horned anvils I suspect almost all will admit to also having a London-pattern anvil of a similar size. The DH doesn't have a heel, something which is extremely useful on an anvil, nor a step. I frequenty use the one on my London pattern. How often would you use an upsetting block as part of the anvil? On some the hardy hole is at the round horn, so hardy tools will almost always be in the way of using that horn. Personally, the only way a DH would be in my shop is if was free, delivered, fastened to a stout block, at my working height and even then it will go off in a corner as a curiousity. Pretty doesn't pay the bills. If you want a trophy anvil (as in trophy wife) then fine. |
| Ken Scharabok - Tuesday, 06/27/06 05:27:16 EDT |
|
"Damascus" steel Mike, "Damascus" is a widely used term, even in the world of bladesmiths that is somwhat improperly used. It is like "wrought iron", which is a specific material but is also a type of work. True historical Damascus steel is wootz, a type of crucible steel made in India and the Middle East. It got its name during the Crusades it source believed to be the city of Damascus Syria. The patterns in wootz are the result of slow crystalization that is still not fully understood even though a lot of metallurgical work has gone into its study. Today any patterned or "watered" steel made by any method is called "Damascus". The watery sheen of Damascus steel is used in the adjective "damascene" used to describe anything with the patterned sheen of wootz. From that you have the term for the fabric "damask". Laminated pattern-welded steels are the result stacking bars of different steels and welding into a billet then manipulating the patterns by removing stock, twisting and more welding. The process is largely European but may have come from China. At one time it was used as an attempt to replicate wootz which we now know is a different product. This process starts with iron and steel that is significantly processed resulting in the layers showing a more distinct pattern. Modern laminated steels almost always use an alloy steel containing nickel for one component in order to increase the contrast. Then there is the Japanese process which may have initialy come from China or Korea and was probably the same process that the Europeans derived theirs from. In this process varius grades of directly smelted iron and steel are selected then stacked and welded, then cut and stacked and welded over and over in order to produce a more homegenous ductile product, the result of which is a faint random pattern "Danask". So. . everyone calls patterned steels "Damascus" the same as they call both decorative forged steel and architectural cast iron "wrought iron". But in both cases there are significant differences. |
| - guru - Tuesday, 06/27/06 08:50:36 EDT |
|
Yeah, I want a workhorse anvil (as in workhorse wife).... pretty wives don't pay bills either. |
| - Nippulini - Tuesday, 06/27/06 08:54:45 EDT |
|
Gosh Ken! Take it easy on the poor ole double horned anvils. The pyramidal horn is handy for small bends that turn back on themselves. A horseshoe or pony shoe with 2 side clips is more easily leveled, because the clips hang either side. On the London pattern, one clip is in the hardy hole, and you need to "jockey the shoe about". Sometimes the London pattern heel is too thick when working a split or "forked" end. With the hardy in the horn end, there's less chance of losing a finger on it (which can happen when you're weary, you have a deadline, and you're working at 11:00 PM). As for the upsetting block, it's kind of like a cone mandrel. "When you need it, you need it." I agree with you about the step, though. I use mine often as a "vee block". I own only one double horned anvil, which I don't use for forging, because it is a small, Spanish one dating from 1800-1825. I use it for show-and-tell. I started smithing in the early 1960s, when the anvils available were London pattern and mostly available at farm auctions and wherever you could find them. New, cast farrier's anvils were being marketed, but some were freaky with too thin waists and too thin heels. Therefore, my school shop is inhabited by London pattern anvils, dating from way back. I got them before the double horned anvils were being imported en masse. I should mention though, that I have a double horned bickern, which I will use occasionally when I am in need of a pyramidal horn. Many American smiths had a bickern in the shop, especially in the Pennsylvania-Ohio area of the U.S. In capsulating, we know that fantastic work was done on both styles of anvil over the centuries. We are fortunate to live in an era when we have choices to be made. How's that for fence sitting? Damascene. The term "Damascus" is further confused by the term, "damascene". According to Untracht's glossary: "A metal-decorating process that involves the application of one metal on another by encrustration or inlay." |
| Frank Turley - Tuesday, 06/27/06 09:35:13 EDT |
|
I'll weigh in on the side of the double-horned European anvil style. It is a better design in my opinion, for much of the reasons that Frank already stated. The hardy hole is not only where it won't savage you when you don't pay attention, it is also over a much greater mass which makes it more effective. The tapered flat heel is the answer to the old "my anvil face is too wide" issue. Pick a spot that is just right, a la Goldilocks. If you need a thin heel for dressing fork tines, that is what the side shelf is for, or make yourself a small bridge hardy. Works a treat, as they say. The european double horn design is a much more multi-purpose anvil that the London pattern, in my opinion. That said, I only have London pattern anvils in my shop at present, because that's what I could get. There aren't any loose anvils of any style lying around down here in Paradise. When I can afford to buy/ship a new anvil, it will be a European style for sure. |
| vicopper - Tuesday, 06/27/06 09:46:07 EDT |
|
Double horn: I use a big HayBudden - would trade for a nice double horn in a heartbeat. For the reasons that Frank states . IMO the hardy is better placed and safer next to the horn. A step is very useful but a double horn can have a step. An upsetting block on the side of the anvil will work as a step for many things. I would give up a step (reluctantly) to have the horn at the same height as the face. IMO the continental patterns are a step above the London & American patterns. :) But like Frank says, great work gets done on both styles. In fact some great work gets done with just a sledgehammer head buried in the ground. Concentric toroids: IMO the surface area of a toroid should scale with the cross sectional area , which means that the formula above can be used for toroids as well as washers. I need to do the math to check this but dont have time to play this week. |
| adam - Tuesday, 06/27/06 10:11:50 EDT |
|
May I make one comment about "pattern welded damascus". Pattern welded steel is found pretty much anywhere the bloomery process was used for refining iron ore as the final step to get usable material is repeated stacking and welding---it's only a slight variation to do it to produce patterns. As such is is found all over the world from Northern Europe migration era blades to the keris to middle eastern, indian and central asian blades. One famous example is an indian sword made from alternating chevrons of wootz and pattern welded steel forge welded together. The funny thing is that although a lot of blade forging from wootz did occur in the middle east it does not appear that much if any was made there, it being a trade item from areas that had the ores with the necessary impurities to produce the patterning of the carbides. Thomas |
| Thomas P - Tuesday, 06/27/06 10:43:58 EDT |
|
Double Horn vs. London Pattern: Well. . . everyone gets used to what they have. Professionals will tell you that they make use of every surface of the anvil to best advantage. Along that line there used to be a style of European anvil with a flat back so you could tip it over and use the sides as a large swage. The one linked here could also be set on edges for very large curves. This is one of those hornless anvils that expected the shop to have big stake anvils to go with it. I know of a number of shops that can afford to have the anvils they want and they have nothing but Peddinghaus and Euroanvils. I also know a couple folks that prefer the Nimba style and have several in their shops. The Euroanvils all come with the side shelf which provides two inside corners for some of the tasks folks use the step for. Dean Curfman of Big BLU Hammers prefers the side shelf so much he had one welded on his Peddinghaus. I myself have a Peddinghaus, a Kohlswa and several small English anvils. I've had Peddinghaus anvils twice and had to let them go for financial reasons. . . Although I used the step on the London/American pattern anvils a lot I have tended to use V blocks and bottom swages in the hardy hole more and more because they give me better control. I used the step more when I was traveling and didn't carry every bottom swage I had. In the shop I also use swage blocks for this purpose but I need to set them up more convieniently. All that said, Hay-Budden manufactured a double horn anvil with steps on both ends and so did Kohlswa and I've seen images of other European anvils that had double horns and double steps. And although I cannot afford either I dissagee with TGN's comment about pretty wives and anvils. The Rat-Hole anvil is a fine anvil that just happens to have lots of style and is one of the best finished anvils I've seen. 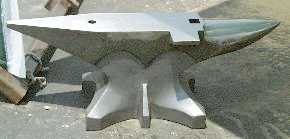 Rat Hole anvil |
| - guru - Tuesday, 06/27/06 11:15:37 EDT |
|
Thanks for the advice on the welding repair. On closer examination, there is more mangling of the metal than I initially thought. Some parts I'm not sure that I can straighten up enough to close the gap, so I'm going to have to piece in some new steel. Where there is too much mangling, should I cut out the mess, tack up a backer and then inlay the new steel? Oh, yes it is also closer to 12 gage than the 14 gage I initially thought, if that makes a difference. (Too bad, I have a lot of 14 gage left over from when I was playing SCA armorer.) |
| John Lowther - Tuesday, 06/27/06 12:00:39 EDT |
|
Hello Everybody Sorry that I have been away for so long, but with family matters finished I am getting back into the swing of things. I am moving to Oklahoma next month and noticed in the events calendar the October Saltfork Craftsmen ABA Blacksmithing Conference and was wondering if anyone has been to it before? It will be 30 miles from my new house and since I gave my anvil to my friend, I need to pick up an anvil to get started again. Also if anyone knows some people or businesses near Oklahoma City (10 to 50 miles) where I can get/scrounge metal and equipment I would greatly appreciate any information. Guru I was thinking of ordering a 175# Euroanvil before reading that you consider them just O.K. Would you mind giving some likes and dislikes about them? |
| Arron Cissell - Tuesday, 06/27/06 12:01:32 EDT |
|
Arron, The Euroanvil is about as good as any cast anvil made today. Nobody makes them as hard as they used to for chipping and libility reasons. For the price you cannot beat a Euroanvil. However, you will need to finish the horn and perhaps the sides near the face. On the other hand Peddinghaus had some horrible finish problems in the late 1990's. But the Peddinghaus is also as hard as any of the old "golden age" anvils made. You get what you pay for. . . I still prefer old anvils over most of the new due to face hardness. But you have to realize that old anvils WILL chip and sharp corners are not good. For folks that insist that sharp corners are good we have soft anvils. . . AND. . currently old Hay-Buddens in good shape are selling for NEW Peddinghaus prices. There are exceptional anvils and there are "OK" anvils. I've had some exceptional anvils and prefer them to most of what is made today. "OK" is what you get. . . |
| - guru - Tuesday, 06/27/06 12:44:16 EDT |
|
Anvil Hardness, It seems to me that the TFS (Texas Farrier Supply) anvils sold by Kayne and Son and Centaur Forge are pretty hard. But then I do not think they make a large anvil either. Its all Apples and Oranges. . |
| - guru - Tuesday, 06/27/06 12:46:57 EDT |
|
While I am biting my tongue on the topic of pretty wives and the best location for hardy holes, please tell me where does one shop for Rat Hole anvils and what do they cost? |
| adam - Tuesday, 06/27/06 12:48:20 EDT |
|
Adam, Click on the picture of the Rat-Hole anvil. They asked me not to post prices but they are in the Peddinghaus range. |
| - guru - Tuesday, 06/27/06 12:53:05 EDT |
|
Im looking for a new horizontal bandsaw. I have a Grizzly 7x12 but it is a piece. I have looked at Dake and Doall and others do you have a suggestion to a brand of saw. I use the saw 7 days a week, not hard or constantly but consistantly. |
| MThreeD - Tuesday, 06/27/06 13:17:44 EDT |
|
I have not personaly used this saw but I like the looks of it. http://www.shopoutfitters.com/BandSaw.html In bigger saws you are going to have to go with an industrial brand. I have not been impressed with most of the asian import saws including those that cost $15,000 to $20,000. |
| - guru - Tuesday, 06/27/06 14:07:13 EDT |
|
Scrap rifle barrels: Rondy folks and reenactors may like these for use as blowpipes for helping to start fires. Just forge a taper on one end and clean it up. Would be pretty cool to have one made of a rifle barrel... heavy though. |
| T. Gold - Tuesday, 06/27/06 14:28:52 EDT |
|
We all have gotten spoiled by the extreme low prices of chinese tools- like their bandsaws. I too have one of those Grizzly 7x12's, bought for one job where I needed to miter 6" and 8" square tube, and I hate the darn thing- it is really crummy. But the next step up is a lot more money. Used Do-Alls and Dakes are both a good idea. If you want a new one, I would recommend looking at Hyd-Mech. They are made in Canada, quite reasonably priced for what they are, and have a very good reputation from hard industrial users. MSC carries them, full swivel heads, about $3500 to $5000 depending on price. The Kama saws from Italy also get good reviews. Italians have been making, and using, swivel head bandsaws for a long time. google Kama. Ellis makes a simple but sturdy american made bandsaw. I have used them, and like them. They are not as elegant as a Do-All, but they cost 1/3 to 1/2 as much. I have seem em used very hard in fab shops, and keep coming back for more. When Guru says "Asian import saws" I would assume that means he has never seen and Amada, from Japan, as they are without a doubt some of the best bandsaws in the world. Not cheap, either. |
| - Ries - Tuesday, 06/27/06 15:04:48 EDT |
|
Nimba Anvils- I gotta disagree with Ken- I use my double horned Nimba much more than the London Pattern Arm and Hammer right next to it. The step is about the only thing I go to the London pattern for- and I really ought to make a nice V shaped bottom tool, that fits in the hardy hole of the Nimba. Russel was sick for some time, and unable to finish the Nimba's- so Jim Garrett, one of the best blacksmiths around, has been doing it lately, and will probably continue to- Jim actually LIKES to grind, and the quality of fit and finish of current Nimba's is still very good. |
| - Ries - Tuesday, 06/27/06 15:07:20 EDT |
|
Thanks for the input Guru. I did not know that there would be a difference between a good new and an old anvil. I had a Peter Write and I liked it a lot but it was my first real anvil as opposed to the Russian POS I had before that. I think that I will look for another one once I get to O.K. |
| Arron Cissell - Tuesday, 06/27/06 15:41:04 EDT |
|
Arron, I was the first demonstrator for Saltfork in 1997, and they called me back in 2003 for another! A very good and friendly group. As you know, Perry is centrally located; there should be a good turnout. Eventually, you'll want to check out King's shop in Guthrie; it's fixed up like a museum. The association is named after the river, Saltfork of the Arkansas, if anyone is wondering. OK City is big; you probably won't have trouble locating junk and stuff. |
| Frank Turley - Tuesday, 06/27/06 15:55:18 EDT |
|
Arron, Mail your way. |
| - guru - Tuesday, 06/27/06 15:59:22 EDT |
|
I have a EuroAnvil 175, and like it a lot. So far I've managed to make a few marks on it, but nothing you can feel when you run your hand over it. I do miss a step. I guess I should cut a piece of 1/2" plate and weld a hardy shank to the bottom. Has anyone tried that? One other thing I can't figure out is what the big 70 on the side means -- 70KG ain't 175#. On the "Asian imports," it sound like Guru let political correctness get in the way of accuracy. Happens to the best of us. |
| Mike B - Tuesday, 06/27/06 17:16:18 EDT |
|
Yeah.. . Japan currently makes some (most) of the world's finest machine tools. We had a 12x9 automatic purchased through E?? tools in the 1980's, manufactured in a China wannabe. Cost over $14,000 then. Lousy POS. It was rigid enough that it cut OK but most of the fancy automatic features that raised its price 30% did not work. It also had the world's lousiest saw vise. When you buy import machine tools you do not always get what you pay for. The guys in the shop wore out our little 4x6 saw that was also a crummy saw but but at least it worked more than you worked ON it. |
| - guru - Tuesday, 06/27/06 18:59:51 EDT |
|
Anvil Weights: Actually the 70 is a little over 150 pounds which was the target weight of the patternmaker who was given the task of scaling the pattern. Not very good at volumetrics. Steve Finestien had a fit with these guys. I could hit within a couple pounds on complex parts weighing tons. Even the draft and fillets were calculated when accuracy was important. There is nothing on these anvils that is difficult to calculate. Now those Rhinocerous shaped London pattern horns are a trick. But Kohlswa's designers hit their anvils +/- 1 pound on the English unit anvils. Besides the organic horn the base is a mass of curved surfaces. It is just a matter of spending the day to do the calcs and a little craftsmanship making the pattern. |
| - guru - Tuesday, 06/27/06 19:20:15 EDT |
|
I was going through the archives and saw/read the Morte de Paw-Paw archive. Now the shop in my head has vent fans and some kind of hood for the forge. Is there a standard formula for amount of ventilation required per cubic foot of work space? Any resources out there on building a safe shop? He appears to have been a beloved member of your community and I am sorry for your loss. What is the historical significance of tolling the anvil? |
| Chris R - Tuesday, 06/27/06 20:41:13 EDT |
|
Amada makes a VERY nice saw. Do-all is good, and Kalamazoo is also still a good rugged, made in the USA saw. |
| - ptree - Tuesday, 06/27/06 21:04:32 EDT |
|
When it comes to calculating volumetric mass of things like castings, I just fall back on the silversmith's method (no surprise there, huh?) - I take the wood or wax pattern and dunk it in water. Measure the displacement times the specific gravity of the model and factor that by the specific gravity of the steel. As Archimedes was reported to have said, "Eureka!" I can calculate the weight of the finished anvil within a small fraciton that way. Considerably faster than doing calculus that is waaaaay over my head, too. (grin) |
| vicopper - Tuesday, 06/27/06 22:02:30 EDT |
|
Guru (et al), Two questions. First. I've used my JYH (the Ray Clontz "Big Green Machine" style), for over a year now with no problems but I'm still stumped on how to figure out the optimum spring size. I remember a post you made a while back about the "snap" of the hammer, being almost more important than it's actual weight. My hammer weight is 35# and I'm using a motorcycle shock spring (approx 8in long out of 1/4in+ steel), on my dupont style arms...am I close? Secondly, I recently traded up from a 100# Vulcan to a 158# Columbian anvil and love the difference, however, it's solid wrought instead of having a plate welded to it like the Vulcan, how deep is the penetration on the surface hardening as I would like to reface it going down no more than 1.5mm, I only want to remove rust pitting as there are no hammer or abuse marks needing attention? |
| Thumper - Tuesday, 06/27/06 22:04:58 EDT |
|
Thumper: A Columbia is solid cast steel, not wrought iron. Polishing the top shouldn't affect temper. |
| Ken Scharabok - Tuesday, 06/27/06 22:09:46 EDT |
|
Bandsaws: The absolute finest cutoff bandsaws I ever used were Do All, for the price of what a new one would cost today You could outfit 5 blacksmiths shops.They made some more basic models allso. The Wells saws are a really nice "simple" bandsaw, The Marvel verticle cutoff saw is great If You come across one. |
| Dave Boyer - Tuesday, 06/27/06 22:28:22 EDT |
|
Thumper 1.5mm or 1/16" is pretty deep for rust pits. Are they really that deep? I have never even seen that brand anvil, but I would guess that it is probably hard at least 1/4" deep. If there are any chips out of it You might get an idea from them. If You are refinishing it with hand power tools, I suggest a belt sander with the dust bag and ALL sawdust removed. You will work pretty hard to remove .5mm or .020", and that may go a long way to giving a good face. I have a 158# swedish cast steel anvil that is HARD, that is what I did to it. |
| Dave Boyer - Tuesday, 06/27/06 22:38:13 EDT |
|
Those of us that can't afford the finest anvile should probably stay away from a TROPHY wife. :) |
| Dave Boyer - Tuesday, 06/27/06 22:40:29 EDT |
|
Tomorrow I'm going to look at an anvil cache. He says he has several from 350 lbs. on down. Found it from talking to a worker at Ace Hardware. |
| Tyler Murch - Tuesday, 06/27/06 23:44:51 EDT |
|
A few weeks ago I mentioned speaking to a guy who was having 100# anviles cast. He said that the present day cast anviles rere all in the 40's to about 50 R"C". He said the foundries don't want to make them harder than that. This is not nearly as hard as the old Swedish anviles or most of the hard top plate anviles. If powerhammer dies are hard enough at 50-52 R"C". I guess an anvil would be good enough in this range from a wear standpoint, but if hit with the edge of a hammer hard enough it will leave a mark. Somebody at Rough&Tumble commented that the 590# Hay Budden that was just donated wasn't really all that hard, it is a late model with the high carbon top welded at the waist. My comment was that it is hard to quench something of that size, maybee that is all the harder it got, or maybee residual heat drew it back that much [the hardness wasn't measured in any meaningfull way anyhow]. |
| Dave Boyer - Wednesday, 06/28/06 00:19:23 EDT |
|
Predicted Anvil Weights: Old time pattern makers used the weight of the pattern and based on the wood type there are conversion factors to metal. However, when making something odd shaped that you want to weigh exactly X amount you have to start with a detailed drawing with dimensions that result in the desired outcome. If you want a 250 pound anvil you need the shape to add up to exactly 882 cubic inches. Today with computer programs this is not too difficult as you define the the shapes pieces with a proportioning factor and then scale up and down until you get the exact result you want. After that you can also make any weight anvil you want. However, doing this by hand requires a lot of itteration and you have about 30 volumes to calculate in a typical anvil per itteration. Someone that is good can do it in two or three steps but an amateur will take about 6 to 8 tries. That is a ton of calculations and a lot of frustration. But it used to be done. Relative Hardness: Power hammer dies are softer than good anvils because they do not see nearly as high of impacts. Although a power hammer does a ton of work it does it with less relative force than when you strike an anvil with a hand hammer. Power hammers just do it more often. I've often reported that the bigger the anvil the softer it is. The hardest old anvils were in the 100 to 150 pound range. Above that they get considerably softer due to the inability to quench them fast enough. A friends 350# Hay-Budden does not appear to be very soft but under his watchfull eye the corners have gotten rounder and rounder from normal use. Modern deep hardening steels can be used to make a harder large anvil than was possible at the beginning of the 20th century. Hardness depth on anvil faces drops off continously with depth. So removing the surface removes the hardest surface. Anvils faced as much as 1/8" are noticably softer than they were originally. The bigger the anvil the worse the problem. |
| - guru - Wednesday, 06/28/06 00:58:05 EDT |
|
Dupont AKA Little Giant Linkage: Thumper, it is not just the spring but the proportions of the arm, the work height and many factors. The spring needs to have sufficient force to absorb the upward inertia at the fastest the hammer operates. The linkage should have gone past center such that the ram is traveling its fastest at about 5 o'clock and then strike the work before 6 o'clock. The spring should be lifting the ram off the work prior to 7 o'clock. If it is on the work longer the dies cool the metal and make forging inefficient. If the ram contacts the work any time after 6 oclock it is already losing speed and the spring is starting to lift the ram. This often occurs when the hammer is misadjusted and the the faster it goes the softer it hits. This is the reason a height adjustment is critical on hammers of this type. For different height work you need different die height OR a ram adjustment. On all these NC-JYH hammers I have used the dies needed raising by several inches. You cannot just arbitrarily build in tooling or work height into these hammers. They are efficient in about a 1/2" range. When you increase the work size OR use tooling you have to compensate. If you allowed 2" extra for tooling and you work die to die then you need to adjust the bottom die UP 2". To see all this in action you need the Dave manzer Little Giant tune up video we sell. His diagnostic tips apply to all Dupont linkage type hammers. |
| - guru - Wednesday, 06/28/06 01:12:12 EDT |
|
Hi John Lowther. Your method of repairing the riding mower made me think of a repair that I was working on. I tried to fix a wheelbarrow this past weekend that had a severely dented bottom. I suspect that it was overloaded, pounded, then left for dead. I cut a strip of 5/64" steel to put below the most banged up part in the front, then pounded the dent out over a piece of wood with an engineer's hammer. The problem was that the patch did not fit well. It was too thick to bend to shape. As a result, there were lots of gaps. This compounded the problem of welding, since only an AC stick welder and 3/32 6013 was available. Careful examination of the sheet metal showed paper thin spots with a few pinholes. Just touching these with the rod opened up an annoying hole. Fortunately I was patient and eventually was able to fill in all the holes to good metal pretty well, but used up a lot of rods. The repair turned out OK. One question: you mentioned SCA armorer. Can one use armor making techniques to make the patch fit better? How would one do this? Does it only work for 14 gauge metal, or it would also work with 12 gauge if you procured some? Thanks, Eric |
| EricC - Wednesday, 06/28/06 01:17:54 EDT |
|
Sheet metal welding: a chunk of copper, brass, or aluminum clamped on to the sheet metal as a backing plate will do a lot to help with the burn thru problem. I keep a variety of such scrap just for welding dams |
| adam - Wednesday, 06/28/06 10:17:15 EDT |
|
Thin sheet metal welding is not exactly a matter of holding your mouth right, but it requires a somewhat different mindset from welding heavy plate. (Arc is theoretically possible but so is cold fusion.) It is slowwww, with the smallest, gentlest O/A flame possible, lotsa tacks as the estimable Guru says, then touch and go, flicking the torch onto the metal and the rod, and off again before the burn-through. Adam's backing plate will serve as a heat sink (and if you can clamp to it as a stiffener, too) and help a lot to keep the thin sheet from pulling away. |
| Miles Undercut - Wednesday, 06/28/06 10:49:45 EDT |
|
Chris R, Paw Paw will be missed until at least this generation of smiths goes to meet him in person. His forge was probably quite safely ventilated for forging plain steel but was not set up to deal with burning off the zinck on galvanized steel. The problem is what are you going to engineer to? If you are going to engineer to cover the worst case scenario possible the wind will probably blow you off your feet and cool your work before you get it to the anvil. I suggest doing a good job and then being *safe* when you forge---I don't allow galvanized metal in my scrap pile---or other plated metal as they can be worse than the Zn. I try to avoid painted metal as well---especially old heavly coated pieces. Look at your original question: Does it indicate what type of forge you are using or it's size. Does it explain how your hood is built/positioned? These factors affect how much ventilation you need. My basic suggestion is err on the side of too much. I have a 10"x14" propane pipe forge. I use it inside my shop near a 10x10 roll up door with another 10x10 roll up door at the opposite end of the shop (20'x30') our area is blessed with pretty constant breezes and I have not had a forge headache yet. May I suggest investing in a CO monitor---one with a guage and not just an idiot alarm. If it's reading OK you're OK. if it's not modify your system until you are. Thomas |
| Thomas P - Wednesday, 06/28/06 11:23:45 EDT |
|
Paw-Paw's shop has tall ceilings and is on a windy hill that is difficult to work in much of the time because of the breeze. In fact he had not finished the back wall so 1/2 the front was open and all the back. But you cannot rely on natural air currents when dealing with toxic fumes and gases. The wind did not blow the day Paw-Paw needed it. And when it is hot the uninsulated tin roof makes it unbearable when there is no breeze, like today. |
| - guru - Wednesday, 06/28/06 11:38:16 EDT |
|
The Shop I built had tall 16 foot insulated ceilings and an attic space which keeps it fairly comfortable. Over the forge area there is a 3 foot square industrial ventilation exhust fan and there is a 12 x 14 foot door. When there is no breeze the fan is enough that you can feel air move in most of the shop. However, the fan is just barely enough. When there IS a breeze you cannot be sure where smoke and gases are going to go or collect. Half my shop has an upstairs when my office is. Ocassionaly when a gas forge was operating in the far end of the shop under the exhust fan the office would get enough fumes that I knew I needed to get out. So, in my 20 x 40 x 16 foot ceiling forge bay I probably needed a 4 foot fan and better isolation and ventilation for the office. I think the isolation would fix the office problem. I had planned for a seperate hood and fan over my welding bench and a chimney for a coal forge with a second stack for a small gas forge hood. The gas forge hood was going to be on a light jib crane with articulated vent pipe so that it could be moved with the forge as needed. But all was for naught as I must sell the property. . . I would do it similarly if I have it to do again. In many situations turbine ventilators can help as well. |
| - guru - Wednesday, 06/28/06 11:58:07 EDT |
|
Uncontrolled Air Movement: Breezes going the direction you do not want are a problem with all types of forges and ventialtion systems. Cross breezes at coal forges will smoke up your shop. Window and door locations often need considering. Breezes can also blow gas forge exhaust across the air intake. This causes "waffeling" and high CO levels as well. I have worked many hours using an outdoor forge and most of the time a breeze is welcome. But ocassionaly ther would be one blowing from behind the forge very slowly that caused the smoke to roll and hang in front of the forge. |
| - guru - Wednesday, 06/28/06 12:37:23 EDT |
|
M-16 barrels - about a 0.40 carbon steel with Cr, Mo, & V. Some barrels were made out of 12L series steels averaging around 40 carbon. At least J & L Steel was selling I believe 12L41 for that purpose around 1982. |
| - Gavainh - Wednesday, 06/28/06 12:43:22 EDT |
|
I recently moved up to a 100-kg (223lb) double-horned continental pattern Refflinghaus anvil, and I love it! I started out on a badly chipped 100-lb Columbian, then went to a 143lb Peter Wright. Loved them both, but the Refflinghaus is a cadillac by comparison. It is noticeably softer than the Columbian, but then so are most things. Good hammer control is a must, regardless. I have a bunch of old forged bottom swedges that fit the hardy hole, and on the rare occasion I need a step, I use one of those. I don't miss the wide square heel, as I have found I just have to rotate the work and use the 90-degree edge of the far side for that kind of work. |
| Alan-L - Wednesday, 06/28/06 12:48:55 EDT |
|
Gun barrel pipe hawks: I like them, and they're popular among the mountain man set, but I have yet to see a historical example of one, so I don't make 'em. The two modern muzzleloader barrel makers whose steel I know use 12L14 and 4140, respectively. Original barrels were wrought iron, of course. At least until Remington started selling cast steel barrels just prior to the American Civil War. Also, there were pattern-welded barrels on fowling guns from at least the last half of the 18th century, but they were also generally wrought iron with some steel included. Muzzleloader barrels should be dead soft, so they are not generally made of a hardenable steel anyway. |
| Alan-L - Wednesday, 06/28/06 12:53:52 EDT |
|
Hi Guys, I read the forums every day but only post infrequently. I just yesterday got my real anvil, a 104# PW in decent shape, rounded a bit on the corners, but the ball bearing comes off the face like a superball and I paid $2.77/#, not gloatable price but the anvil was local so I got it on a lunch hour. Much better than the I beam section I've been using. My question pertains to a cut off hardie. The hardie hole is 7/8 and I've got a nice piece of jackhammer bit that I was thinking of using to make my own. One of the IForge demos cautions against square hardie bases as they can wedge and snap the heel off the anvil, not something I want to do. Its going to take me a while to neck down the one inch plus bit to a hardie shank size, am I going for a very loose fit, snug, or something in between? is the jackhammer bit a good canidate for a hardie? Thanks, Michael |
| Michael - Wednesday, 06/28/06 13:10:55 EDT |
|
One other thing, I keep reading about losing a finger by leaving the hardy in the anvil. How does this happen? Thanks again. MS |
| Michael - Wednesday, 06/28/06 13:13:28 EDT |
|
Michael, People lose fingers from leaving a hardy on the anvil by accidentally hitting it with their hammer hand when hammering on the face on the anvil. It's best to remove the hardy from the anvil immediately after you finish using it so you won't inadvertantly strike it if you become distracted. |
| Steven Galonska - Wednesday, 06/28/06 13:42:05 EDT |
|
Hello everybody Quick question about adding accent shading to forged leaves and flowers/roses. I was making a simple leaf for a key fob (iForge #8 idea) and was told that heating the piece then rubbing a old penny on it will give it highlights. I know about using a wire brush but never heard of a penny before. |
| Arron Cissell - Wednesday, 06/28/06 13:56:53 EDT |
|
I am building a coal forge for my shop. I have ordered a 24 inch hood from Centaur Forge. Where should I locate the firepot in relation to the hood IE: distance from the face of the hood, I assume centered side to side in the forge. The firepot is 12 x 14. Thanks |
| Rob - Wednesday, 06/28/06 13:59:35 EDT |
|
Rob, center the pot under the hood, as close to the back of the hood as possible. Long side of the firepot against the back of the hood is best. It'll limit your working space somewhat, but will help with the smoke problem. Half hoods are better than overhead hoods, but not nearly as good as a side-draft hood. You'll have smoke in the shop, but careful placement to limit breezes will help also. Make the stack as tall as humanly possible to increase draft, and use the low-loss stack cap. Use the biggest pipe you can find for the stack, and good luck! |
| Alan-L - Wednesday, 06/28/06 14:06:12 EDT |
|
Hardy Hole Fits: I like mine loose enough that they fit all directions and slip in and out easily. Others like theirs so tight that they only fit one way. Drives me nuts but some folks like them that way. First, Hardies should not have a TAPERED shank. You may have missread the iForge demo. Using sheet metal stakes in a hardy hole is a sure fire way to wreck an anvil. Second, The tool should have a fairly wide base so that it is supported on the flat of the anvil. Most hardy holes have a significant corner radius (as they should). Be sure the tools are supported beyond the radius. Third, If the hardy hole has a good radius then the tool can as well. This makes a stronger tool. Jackhammer bit is good material for this purpose. |
| - guru - Wednesday, 06/28/06 14:07:23 EDT |
|
Steven and Guru, thank you, that is exactly the information I was looking for. Must have misread that IForge demo. Mounting the anvil tonight, hope to get some hammering in this weekend. MS |
| Michael - Wednesday, 06/28/06 14:13:52 EDT |
|
Older US cents are really a brass alloy though mostly copper. Newer ones have a very thin copper coating over zinc and the zinc will melt at a pretty low temp. I have not tried what you mentioned but I would guess it's with the older pennies. Thomas |
| Thomas P - Wednesday, 06/28/06 14:34:06 EDT |
|
Penny Coloring: Arron, I never heard that one. You also have to be SURE those pennies are pre 1983 or you will end up with a melted mess of zinc. Since even the current pennies are worth more than a cent you will find very very few old ones in circulation. I remember as a kid that 1919 pennies were very common (they made a lot that year) and ocassionaly you would find one well into the 1970's. But after they changed to the zinkies the old pennies rappidly dissapeared. |
| - guru - Wednesday, 06/28/06 14:34:20 EDT |
|
On the thin stuff I agree with Miles. I Use OA, on most things. My second choice is TIG. On thin Stainless, thathe OA is not an option. Once you get Thicker than about 16 GA MIG is fine. I know people who can run 22 GA with MIG all the time. I can't! If the metal is badly rusted, I really like the OA. I use Tiny tips. Skip-stiching and avoiding distortion caused by overheating any spot is the real Key to a good job. I repair Platinum crucibles for the lab, using the Smith Little Torch and scrap from non repairable crucibles for filler. The crucibles are about .020" thick. |
| - John Odom - Wednesday, 06/28/06 14:36:08 EDT |
|
Thanks everyone for the discussion on new anvils. I will certainly consider buying one of the new anvils if I can't find a suitable used anvil. One other question I have. Does anyone know if there is a distributor for new Kohlswa anvils in the US? I have read several times that the older kohlswa anvils are of very good quality, though I haven't heard anything about the anvils they are producing today. Thanks. |
| Steven Galonska - Wednesday, 06/28/06 17:32:20 EDT |
|
Steven, Kentucky Farrier Supply supposedly carries them but their website is dead and nobody answers the phone. . . 502-633-3598 I like my Kohlswa's but they were pre Centaur Forge. They tend to be a little brittle and edges spall if you do not radius them well. My first anvil was a 100 pound Kohlswa and my current big anvil is a 300 pound Kohlswa. |
| - guru - Wednesday, 06/28/06 18:07:30 EDT |
|
And I thought all this time, they were saying cole slaw! |
| Frank Turley - Wednesday, 06/28/06 19:19:45 EDT |
|
Hello everyone. I have a question concerning a lathe of mine. Its a 1901 lodge and shipley lathe, everything is there except for the taper acttachment and the compound hand crank. I can see the threads but I can't find a bolt suitable. Is there a commen thread pitch for this? Thank you for all your help. John S |
| John Scancella - Wednesday, 06/28/06 19:54:34 EDT |
|
Guru, It would appear from the phone prefix that the Kentucky Farriers Supply is in Shelbyville KY area. As I am currently commuting there I will look tomorrow in the phone book at work and see if they are in biz. |
| - ptree - Wednesday, 06/28/06 20:04:29 EDT |
|
This site answered meny questions for me. See if yall like it. http://www.materialsengineer.com/E-steels.htm |
| Chris R - Wednesday, 06/28/06 20:18:13 EDT |
|
I need to know what the Rockwell C hardness will be of 5160 tempered at 475 F, 500 F, and 525 F. If any body has a chart that tells, please help. Thanks. |
| Tyler Murch - Wednesday, 06/28/06 21:37:10 EDT |
|
John Odom-- I would dearly love to have me a TIG. Someday.... Meanwhile, I just got a book from Lindsay re: aircraft welding that sez oldtimers used O/A on stainless and aluminum sheet and the secret is... ta da!... the FLUX! They do not (that I see yet) specify the ingredients of same. Anybody know? Expanding a bit on the aforementioned state of mind in welding thin sheet: I just totaled the edge-to-edge I recently did on a soldering hood, and it comes out to: 12 inches of .102" sheet steel edge to edge, 82 inches of .102" to .057" sheet edge to edge and 64 inches of .057" to .057". I found you gotta get down there and practically live in the puddle, or guess what! If you don't-- no puddle. The edge just pulls back, or melts away. Going from shade 3 to shade 5 lenses helps a LOT to see what's going on. I was going to try the Little Torch, but found a No. 1 Harris worked okay with almost the smallest sustainable flame. |
| Miles Undercut - Wednesday, 06/28/06 21:54:24 EDT |
|
Tyler, See our Heat Treating FAQ. For more exact values on any given section using any specific heat treatment you will need to do your own testing. |
| - guru - Wednesday, 06/28/06 22:21:43 EDT |
|
Tyler, Since 5160 is marketed as a spring steel, especially for leaf springs, my old Jorgensen stock book says that the tempering is between 800�F and 1300�F. The leaf spring temper which is sought is 38-44 Rockwell C. Of course, the book is addressing the professional leaf spring manufacturer, assuming that a Rockwell tester is available. By tempering at 500 or 525�F, I think the Rockwell number would read considerably higher, but I don't have an answer to your question. I would suggest trying to locate a Rockwell testing instrument in your area, and seeing if you might have access. The alpha guru says to do your own testing. The hardening prior to tempering must be done correctly, 1525�F in oil. |
| Frank Turley - Wednesday, 06/28/06 22:36:21 EDT |
|
I'm pretty sure I'm getting full hardness out of it. Using the corner of a 12" nicholson flat file it doesn't bite into it at all. Been quenching in about 150F canola oil. I don't have any way to tell exact temps. I let it get to non-mag, then wait a few more seconds. |
| Tyler Murch - Wednesday, 06/28/06 22:51:31 EDT |
|
Guru and Ptree, I did a little more digging and found that the Kentucky Horseshoeinging School is/was a distributor for the new Kohlswa anvils in North America. The source of this info was the website beautifuliron.com. According to that site, the school keep some of the more popular sizes in stock, and can also get any anvil on the Kohlswa website although delivery would take a few months it it wasn't in stock. This info may no longer be valid as the page was created about 4 years ago, but I'll look into it further. The website for the school does not mention anything about selling anvils, but does have a link to the Kohlswa website on the school's list of suppliers. The number for the school is (502) 738-5257 and (800) 626-5359 if anyone else is interested. I'm going to try to call them tomorrow. On that note, I have one stupid question: What is the proper way to pronounce the name Kohlswa? |
| Steven Galonska - Wednesday, 06/28/06 23:09:24 EDT |
|
Miles, I have done a bit of gas welding aluminum, and the flux is indeed the trick. But you can just buy it- Kent White sells it, and I think that Ron Covell and Ron Fournier do too- the big 3 in sheet metal forming, all of whom teach, sell tools, books and videos. These 3 guys can make you a new version of any car ever built, by hand, and make it look easy. www.tinmantech.com www.fournierenterprises.com www.covell.biz Kent gets 12 bucks for aluminum welding flux, and it is well worth it. It isnt the easiest thing in the world, but if you can gas weld, you can pick it up pretty quick. The auto body guys like gas welding aluminum because it leaves no heat affected zone, so they can planish out the weld, and then curve the metal more, and the welded area acts just like the rest of the sheet. Even Tig welding makes the weld zone act a bit differently, and when you are making a fender for a $1 Million dollar Ferrari, those little things count a lot. |
| ries - Thursday, 06/29/06 00:38:57 EDT |
|
A/O welding aluminum flux: I have a can of brazing/welding flux from Sears [about 1970-71 vintage] that says it will work on CAST aluminum [I never tried]. IF there were ingredients listed on the can that part of the lable is no longer readable. It is a really dark brown, nearly black powder. Anti Borax "#2" and J W Harris "Weldco" don't claim to work on aluminum. The Henrob torch claims that it's completely mixed gas/oxy flame shields better than other A/O flames and works better for aluminum and stainless than other torches. I would be interested to hear from owners. |
| Dave Boyer - Thursday, 06/29/06 00:39:05 EDT |
|
Lodge and Shipley threads- If you are going to run a lathe, you need to start thinking like a machinist- which means you need to measure those threads, and then you will know exactly what Thread per inch and diameter you are looking for. There was no industry standard for compound handles- you will have to go buy yourself a screw pitch gage set- I like Starrett, myself, although their prices are also the highest- But General, Mititoyo, and SPI all make and sell them as well. $40 or $50 new. If you want to find the Lodge and Shipley gurus, go over to www.practicalmachinist.com and ask your questions- John Oder, in particular, down in Houston, knows an incredible amount about old L&S lathes, and has original factory catalogs for most models he can refer to. |
| ries - Thursday, 06/29/06 00:50:24 EDT |
|
Miles: I have some flux for SS. I have welded it with OA, but I wasn't pleased with the result, and have never sat down to just practice. I just use TIG. I have nevered tried with aluminum. I never had the spare moola for the Tinman's video and flux! |
| - John Odom - Thursday, 06/29/06 08:17:58 EDT |
|
Aluminium Flux: A friend of mine used just plain old borax for welding a custom aircraft manifold. The only problem he had was the porosity bled borax crystals for years. But I have had the same probelm with regular brazing if boraz got caught in the joint. For brazing aluminium bronzes Machinery's Handbook is not specific but the base is borax with addition of chlorides, flourides and a wetting agent. I suspect the chloride is sal ammoniac and flouride powdered flourspar. . . so the whole is adding up like the flux used to forge weld high alloy steels and nickel. One Aufhauser flux MSDS lists salt (sodium chloride) as 45 - 60%, then Potassium Chloride 20 - 30%, then lithium and sodium flourides equaly as the balance. So I am wrong about the Flourite as it is calcium flouride. Ah. . . for $59 you san purchase the SAE AMS 3414D Aluminium Welding Flux specification. . . A more general aluminium brazing flux lists Sodium Aluminium Flouride and Zinc Chloride but does not list 75% or the ingrediants. . . could be an error. Here is a very informative article on torch welding aluminium http://www.tpub.com/content/construction/14250/css/14250_111.htm |
| - guru - Thursday, 06/29/06 09:52:41 EDT |
|
Note that most of the ingrediants in these powdered fluses are anhydrous. Then they are made into a paste. When you do this the flux does not stop being anhydrous because it takes time (days weeks years) for most of the ingrediants to become hydrous crystals again. |
| - guru - Thursday, 06/29/06 09:56:18 EDT |
|
Measuring Internal Threads: It is often the case that an internal thread is too small to get a thread gage into. So what you do is melt some sulphur, pour it into the hole making sure you have a "head" to hold it by, then after is solidifies unscrew it and then measure it. Sulphur does not shrink or expand on solidifying so it produces a very accurate model of the thread. It is accurate enough that you can use it to machine a matching thread if necessary. Method #2: This is a little pickier. You make a bent wire pointer and attach it to a standard inch range dial indicator. The bent point shuould be just a little deeper than the thread and short enough that it can be lifted over the thread inside the hole. A paper clip is a good springy wire for this. Line up the indicator with the hole and clamp rigidly, set the wire in a thread, zero the indicator. Then lift the point over a thread and record the distance, then repeat several times to insure accurate readings. From this you should be able to determine the thread pitch which for most common English threads also determines the screw size. Personaly I would just take whatever screws I had an hand and try them in the hole until I found one that fit. It would probably be the second or third try. . . . In the worst case you would need to goto the local hardware store and buy samples of 2 sizes in fine and coarse pitch. On the other hand, most machinists can look in a hole and tell you that is a 10-32 or 1/4-20 and be done with it. . . The micrometer calibrated eyeball is an amazing tool. I used to be able to do it but I have been out of the shop for a while and I am out of calibration. |
| - guru - Thursday, 06/29/06 10:12:02 EDT |
|
I have had success welding aluminum alloy outboard motor castings with an O-A blowpipe and a stick of flux-coated aluminum arc welding electrode. The electrode flux was white, and acted pretty much like the borax flux on a pre-fluxed brazing rod. |
| - 3dogs - Thursday, 06/29/06 10:15:04 EDT |
|
So, you can buy flux that works for 12 bucks, or a book that tells the specs to make your own for 59 bucks- I can guess what most blacksmiths will do..... All the lathes I have had, even my itty bitty tabletop Atlas, had compound wheels held on by at least a 1/2" bolt. So a screw pitch gage ought to the job, but if you must use sulfur, I know where there is a mound of it about 200 feet tall and 400 feet in diameter, right across the bay from downtown Vancouver BC- they probably wouldnt miss a few tablespoons. |
| ries - Thursday, 06/29/06 10:49:27 EDT |
|
Dave, I started refacing my anvil yesterday. This is definitely going to be done in stages!! In 1/2 an hour I ran through 2, 80 grit belts. Made some progress but I still have a long way to go. My first estimate of taking off 1.5mm was a bit high, .5mm should do just fine ( it's hard to guess depth on a brown surface). Guru, I'll eventually get the video you suggested, first I want to change my JYH anvil from 100# to 300#, I've got 2 pcs of rr track I'm going to bolt and weld together to do that with, but I'm saving it for a winter project. |
| Thumper - Thursday, 06/29/06 10:54:46 EDT |
|
Many thanks to all for info re: Al and SS oxy-acetylene welding fluxes!! I will check 'em out forthwith. |
| Miles Undercut - Thursday, 06/29/06 11:05:26 EDT |
|
Kohlswa :- I would guess "kolsva" but it doesnt really matter because you have no hope of getting the vowels right and you might as well just say "Cole Slaw" like Frank suggested :) Northern European languages tend to have complicated, subtle vowels that are hard for non native speakers to bring off convincingly. Consider the vowel in the English word "ship" AFIK it's unique to English. People from Mediterranian countries pronounce it "sheep" - gotta wonder what they are referring to when they say "sheet" :) |
| adam - Thursday, 06/29/06 11:33:17 EDT |
|
Anvil Pattern weights.... wouldnt the patternmakers have just dunked the pattern (or a representative of the finished anvil - once all contractions have been considered) - into a big tub of water?? displacement at .283lbs cu" and eureka.... :) |
| - John N - Thursday, 06/29/06 12:06:24 EDT |
|
John N, Mold patterns are always slightly larger than the finished part due to the shrinkage that occurs during cooling. How much larger depends on the dimensions of the part and the metal being poured. For an part as large as an anvil, the increased dimensions to allow for shrinkage would add up to a fairly significant volume. |
| Steven Galonska - Thursday, 06/29/06 12:47:39 EDT |
|
re: Hardness of 5160 - when I worked at Crucible Steel in the 70's we had a nice program to predict the hardness of quenched and tempered bar stock. It was usually correct to +/- 2 points of Rockwell C. To use it, I needed to know the exact chemical composition of the bar stock I was quenching, temper time was a constant - 46 minutes per inch of thickness. We controlled quench temperature and agitation, quench media (oil or water), austenitizing temperature, and tempering temperature. We checked uniformity of the furnaces and the quench media with NIST traceable thermocouples and new the total temperature uncertainty at all points in the process. If you don't do the above, the best you'll get is a WAG as to what your final hardness will be. For a home shop, it's a lot easier to just do a run and see what the resultant hardness is, and then change 1 variable and recheck. |
| - Gavainh - Thursday, 06/29/06 12:50:21 EDT |
|
Steven, thats why I said 'representative of the anvil' to allow for the contractions.... an anvil is not a large casting by any standard, and any pattern maker worth his salt can calc the contraction (or use a simple contraction rule) and be very very close to finished cast size. My point is that volume is the perfect way to calculate the weight of a part made from a material with a known density. |
| - John N - Thursday, 06/29/06 13:27:36 EDT |
|
sorry Vicopper..... just seen your post - great minds think alike and all that (although some may read the earlier posts better than others :) |
| - John N - Thursday, 06/29/06 13:35:17 EDT |
|
John, Guess I missed the part of you post about considering shrink allowances. My apologies. |
| Steven Galonska - Thursday, 06/29/06 14:05:22 EDT |
|
Patterns and Weight: Nope, the standard method is simply to use the conversion factor for the weight of the pattern in a given wood in pounds and a multiplying factor. The factor includes shrink for various metals. Pattern woods are still fairly standard most being a top grade mahogany but good clear pines are also used. If the pattern is a non-standard material (not in the books) I can give you the conversion factor in about 1 minute if the density of the pattern material is known. The problem for anvil makers is NOT knowing what a given pattern will weigh once cast, that is easy. The problem is designing the pattern so that it will weigh what you WANT not what it just turns out to be. If the shape were a simple geometric one anyone could calculate it and get the proper results. But anvils are a sculptural work of art with a combination of organic shapes, odd geometrics, fillets and holes. To calculate a typical london pattern anvil requires a couple dozen non standard shapes plus a couple common geometric ones. Defining these is an art in themselves. The other method is to produce an accurate 3D CAD model. However, this is not so simple as it would seem as the shape IS nearly all organic as well as quite specific. Once fully defined the 3D program will return the exact volume and then you can scale the drawing to give any result you want. But creating the model accurately is quite a trick and requires the eye of an artist that is very familiar with the subtleties of anvils. I've seen a lot of 3D anvil models and they usualy lack the details that make a first class anvil. In the end the job is more difficult than doing the math and summing the parts. If you want to discuss the real-world problems of getting this done with current crop of foundry pattern makers just ask Steve Finestiene. He asked for specific weight anvils for Euroanvil and they all came in weighing 15 to 20% more than he specified. The problem is not technical, it is the problem dealing with foundries and pattern makers. On the other hand, there are designers such as myself that can give you a perfectly dimensioned drawing that will produce a part of any shape within a very small weight tolerance if you are willing to pay for at least a week's work. Then as long as the patternmaker follows the drawing (adding shrink and machining allowance as necessary) the part will weigh exactly what you want. |
| - guru - Thursday, 06/29/06 14:08:41 EDT |
|
EricC - Armoring techniques in heavier steel: Whereas most armoring is done cold, your ability to move the metal declines with the gage. 13 gage is about the heaviest I could do much with cold. I've seen some really nice helmets raised out of something like 7 gage, but that involved a whole lot of hot work. |
| John Lowther - Thursday, 06/29/06 14:42:05 EDT |
|
Archimedes method is best if it can be used. Density is no problem since one can just weigh the thing. I say this as a math person who can do the calculations needed and has the experience to know that when this many calculations are involved there is a nearly 100% chance of getting one of them wrong. I was once shown an surprising application of Archimedes' method when I had photo of an oscilliscope trace and needed to calculate the area under the curve. I carefully transcribed the data onto a sheet of graph paper (there were no digitizing tablets or scanners at that time) and went upstairs to do some tedious calculations. Meanwhile my technician took a pair of scissors to the photo, cut out the region of interest and weighed on a lab scale! He then cut out one square unit of of the graph weighed that, did one calculation, a simple division, and was done! 10 mins work compared with several hours and his method was likely to be much more accurate |
| adam - Thursday, 06/29/06 15:00:28 EDT |
|
Update I decided to try the Penny to add some highlights. I heated the leaf up to bright cherry and then to red. All I got was a scorched 1969-Penny. |
| Arron Cissell - Thursday, 06/29/06 15:19:37 EDT |
|
what are the aging heat treating cycles to obtain artificial age steel representative of natural aging for API X52 steel at 5, 10, 15, and 20 years old? |
| Marco - Thursday, 06/29/06 16:12:59 EDT |
|
Marco, Sounds suspiciously like a homework question. For special (usually propriatary) alloys you go to the manufacturer for detailed property data. Volumetrics: Adam Etal, Read my posts on the subject CAREFULLY. Imperical methods DO NOT work in this case. You want to predict something that does not yet exist, NOT measure something you already have. We are also not determining relative densities or volumes, those are all knowns. The problem is how to define a complex shape that results in a specific volume (thus weight). There are TWO ways. 1) Is to calculate the complex geometries and apply a scaling factor OR itterate. This can be done via standard mathematical methods or using 3D-CAD. 2) Is to start physicaly with the known volume and shape it to the desired shape without adding or removing material (such as starting with a 1/2 cubic foot of clay and making your anvil pattern, resultant weight = 245 pounds steel). Then measuring the pattern or using it directly. Since the goal is to have a patternmaker (perhaps on the other side of the world) make the pattern then method # 1 is prefered as it leaves you with all the necessary detailed dimensions. |
| - guru - Thursday, 06/29/06 16:50:08 EDT |
|
Now. . . if you want to determine if your anvil is made with 100% of the gold that the King gave you for its manufacture then Archimedes' works. The technician's method of physicaly weighing the graph is a brilliant solution. But still does not answer our question. |
| - guru - Thursday, 06/29/06 16:55:50 EDT |
|
Yes I did read your post carefully and I understood that empirical methods would not work in your case. That is why I said in my post "Archimedes method is best IF IT CAN BE USED". (caps added for emphasis) I get the impression you just skimmmed over my post instead of reading it uh... carefully :) Not everything I say is contentious. Sometimes I actually AGREE with people and like to add a tidbit of my own! |
| adam - Thursday, 06/29/06 17:11:11 EDT |
|
I read a article one time about a system they were using for custom tailored clothes. They had a laser scanning system that would generate a 3-d digital image of you, then they'd design clothes to fit that. Maybe you could make a model of an anvil to get the shape right, stick it in a scanner like that, then scale it on the computer to get the desired volume. I'd thought maybe they'd added the upsetting block after they designated my anvil as 70KG. Didn't occur to me that the patterns could be off that much. |
| Mike B - Thursday, 06/29/06 17:18:05 EDT |
|
Bright cherry is hotter than red---they are referring to orange-red pie cherries not the dark black-red bing cherries. At a bright cherry red the penny should have melted as they do when making a penny weld. Thomas |
| Thomas P - Thursday, 06/29/06 18:18:43 EDT |
|
Adam, I'm sorry I did not read closer. However, Archimedes method and any post model method does not apply. In 10 years of calculating very odd shapes of roughly a million pounds of machinery I was never off by more than the amount of error in the published density values. The worst I was off was 200 pounds on an 18,000 pound casting but that was because they changed the material from grey iron to ductile. I was within about 5 pounds when recalculated. When you design expensive one-off machines there is no room for errors. Mike, It used to be they were not off that much. The problem is dealing with foundries and patternmakers that want to do it their way, not the customers way. I suspect the were expecting to get paid to make a second pattern after screwing up the first. . . But it could just be a I don't care attitude. If you look at several of the swage blocks being made today they are parted down the middle of the working surface (see the Salt Fork block). This is just plain WRONG. It makes all the side features useless. Blocks of this type are supposed to be parted at the corner of one face and all good block are. The foundries do not want to do this because the deeper draw is harder to get out of the sand cleanly and it is easier to feed the metal at the center of the mass. However, "easy for the foundry" does not make it right for the customer. But with fewer foundries in the world and products for blacksmiths almost being nuisance jobs you get lousy service. If an auto maker said a part should not weigh more of less than X amount by a very small amount you know it will be exactly right. |
| - guru - Thursday, 06/29/06 18:20:22 EDT |
|
I tried the phone for Ky Farriers supply and got no answer. Looked in the book and found no listing. I called the Ky Horseshoeing School and talked to a helpfull person named Mark. He said that indeed they do sell Kohlswa anvils and are putting together an order for November delivery. He said that the current price will go up 6% with that order. He suggested that the B-36 double horn anvil is the one I would be interested in, and a 150# would $1200, +6% +approx. $150 shipping to the US and whatever it would be to ship to my door. The 360# would be $2400 + approx$150 shipping. I went to the website and did see that Kohlswa has london pattern, sawmakers and farriers as well as the double horn. The web site is kohlswagjuteri.se The phone # for the school is 1-800-626-5359 |
| - ptree - Thursday, 06/29/06 19:15:09 EDT |
|
Second set of questions in as many days, must be the anvil. Speaking of which, How do I go about finding out how old a 104 Lb Peter Wright is? I didn't notice any numbers or dates on it, and the guy I bought it from got it as a lot with a machine shop he bought whole. http://www.wdynamic.com/galoots/4images/details.php?image_id=4379 Can more experience eyes than mine estimate an age from a picture? next question, is the difference between a handled hot cut and a handled cold chisel just the angle? I got this one for a $1 http://www.wdynamic.com/galoots/4images/details.php?image_id=4380 thinking it MIGHT be a hot cut? thanks. MS |
| Michael - Thursday, 06/29/06 19:26:36 EDT |
|
Arron Cissell, you might try the penny at a black heat, if you try to use a brass brush at a glowing heat it does not seem to transfer to the steel. |
| Habu - Thursday, 06/29/06 19:39:44 EDT |
|
Chisel. Yeah its mainly the angle - the cold cut is usually heavier all around because it works much harder. Nowadays a hot cut is likely to be made from one of the fancy hot working steels like H13 or S7 - with these steels the chisel can be made quite slender and penetrates more easily leaving a narrower "trench" |
| adam - Thursday, 06/29/06 19:50:53 EDT |
|
Thats a pretty little anvil. Should clean up very nicely. |
| adam - Thursday, 06/29/06 19:52:58 EDT |
|
Michael, That is a cold cut. PW looks to be a late model by appearances (early 20th Century). Modern hot cut chisles are pretty amazing. part of the reason is they are very high alloy. Some steels start to have less iron in them than other things and get real tough at very high temperatures. Atlantic 33 is one of these very high alloy steels and I think the French hot cuts are made from something similar. |
| - guru - Thursday, 06/29/06 20:27:15 EDT |
|
do you mind if I use you as a resource for my research project? I am doing free topic research report and I decided to do the chaanges in blacksmithing between when it began and now. I am interested in blacksmithing and am thinking about starting it. I would be useing ypou as a interview type resource, would this be ok? |
| steven - Thursday, 06/29/06 20:44:35 EDT |
|
Michael: One clue is to see if it has ENGLAND on it. In 1910 England enacted a law saying all exports had to be so marked. |
| Ken Scharabok - Thursday, 06/29/06 21:16:56 EDT |
|
Michael, Yep, that's a cold cut. If the edge is too soft, it may have been through a fire and thus drawn too soft by the heat. You could try re-hardening it and draw it to about a purple oxide color on the cutting edge and a light blue or even softer at the striking end. Then grind the edge to a 60� included angle. Before anyone gets their knickers in a twist, I'll say right now that I do not favor dead soft striking faces. They invariably mushroom severely, while simultaneously work hardening severely and then spall off little bullets that embed in soft flesh. Striking ends should be hard enough to resist mushrooming, but not brittle. |
| vicopper - Thursday, 06/29/06 21:18:09 EDT |
|
Hot Cut Tools: Is there a reasonably reliable source of junk-yard steel that is suitable for hot-cut tools? For example, I have read about leaf-springs being suitable for some wood-working tools, knives etc. Furthermore, it is generally assumed to be 5160 & so has many descriptions on hardening/temporing processes. I've also read of jack-hammer bits often being S-series steel which I understand to be suitable for hi impact tools. So, is there some commonly available component which can be forged into hot-cut tools with a reliable hardening/temporing process? thanks ps Thanks for the welding tips. Have tried with carbon steels & everything seems to hold well. |
| andrew - Thursday, 06/29/06 22:18:20 EDT |
|
Ptree, Thanks for the info on the Kohlswa anvils. I had to stay late at work today and didn't get a chance to call the school myself. Sounds like things have changed a bit over the last few years as the site that listed the school as a source also said that the prices were competitive with the Czech anvils (Euroanvils and Branco based on what was listed on the page). These prices are on the high end of what I have seen, but then I have always been told that Kohlswa anvils are some of the best made. Does anyone have an opinion on how Kohlswa anvils compare to the Nimba anvils? |
| Steven Galonska - Thursday, 06/29/06 23:21:23 EDT |
|
Hot Cut Tools / found steel (part 2) Adding to the previous question, how 'bout car or truck axles? Thanks! |
| Paymeister - Thursday, 06/29/06 23:25:49 EDT |
|
Hot Cuts: Old hot cuts were made of the same steel as hot cuts. However, the smith was expected to use some common sense. You don't embed tools in hot steel and leave them there. You use coolant or lubricant (which often helps cool) and you cool the tool after every couple blows. The difference that the high tech steels make is that modern hot cuts can be incredibly thin and still work. Old hot cuts were maybe 1/2" thick tapering to 3/8" then had a 60 degree included angle edge. The only difference between this and a cold cut is the thin body. Tools in the SAE 5160 steel class also include cold chisels and prybars. Many springs are made from this steel but not all. It is not considered a hot work steel but compared to a plain carbon steel with higher carbon it is much more resistant to deformation at high temperatures. In thin sections it is air quench but this does not make it as hard as a hot work steel at a red heat. Since springs are many steels you can never assume a spring is any particular steel. Scraps from a spring shop where they make springs using primarily SAE 5160 is a very good bet. |
| - guru - Thursday, 06/29/06 23:37:03 EDT |
|
Axels and Such: See the bottom of our JunkYard Steels FAQ. Steels suitable for hardies include anything from about 60 point carbon UP. This means SAE 5160, most all tools steels rail-road rail. Hardies do not really need a hot work steel because of the short use. It does not hurt but it is not necessary. |
| - guru - Thursday, 06/29/06 23:44:42 EDT |
|
Hot Tools: Sorry, I probably wasn't specific enough. I'm trying to make hand-held tools like punches, drifts and slitters - rather than hardie tools. It seems to me that it's difficult (even with regular quenching) to prevent such tools getting at least a red heat. This is especially true when slitting/drifting largish holes such as through a hammer head. I have tried spring steel, but it seems to quickly loose it's edge when used for these kind of tools. |
| andrew - Friday, 06/30/06 02:33:00 EDT |
|
Andrew, That is because it is neither a tool steel or hot work steel. The old tool steels were equivalent to SAE 1095 which is quite high carbon. Most alloy tool steels are high carbon plus alloys. More. . . |
| - guru - Friday, 06/30/06 07:18:14 EDT |
|
Could you please tell me what would give you a hotter fire in a forge Coal or Charcoal? Thank You Kevin |
| Kevin - Friday, 06/30/06 08:03:13 EDT |
|
Andrew, I use 5160 spring steel for hot work tools all the time, with pretty good results. They will soften if left in a cut for too long, but there are ways to avoid that. A good punching lube makes a really big difference. Jeff Reinhardt, aka "ptree", has a source for a water-based punch lube that is the best stuff to hit town since canned beer. I've never used anything else that performs as well. With that lube, a hot chisel moves through hot steel very easily, dramatically shortening the time the tool spends in the cut. Thus, less absorbed heat. I also use a pretty big hammer when slitting/drifting in larger stock, a 6 pound short-handled sledge that I can still swing accurately, but it really drives the punch deeply and quickly. It helps to have a shallow cut started with a cold chisel before you take the heat, so you're not fumbling around trying to get located, all the while heating the cutter. You just find the cut by feel and whale away. After five or ten seconds in the metal, pull the tool and cool it. I cool it in the punch lube, which preps it for the next cut. |
| vicopper - Friday, 06/30/06 09:27:48 EDT |
|
Jock, The forums seem to not be picking up my log-in for the posting boxes for name and email. I'm logged in, but it doesn't show. |
| vicopper - Friday, 06/30/06 09:30:07 EDT |
|
Tool Steel: The amount of carbon makes quite a difference in hot strength. Many modern tool steels are over 1 point carbon (1095 being 95%). When the range of carbon in steels is .1% to 1.5% max. seemingly minor differences make a big difference in overall properties. Modern tool steels in general have a lot of chrome in them which in itself is very hard. Manganese helps increase strength and hardenability. In some of the hot work steels such as H21 to H26 the alloys are very significant leaving as little as 75 to 80% iron in the steel. There is so much alloy addition that the carbon content is actually quite low (.26 to .55). There are no "Junk Yard steels" that fall into these categories unless the junk is from a significant machine shop or tool making operation. |
| - guru - Friday, 06/30/06 10:08:28 EDT |
|
Keven both of those fuels get hot enough to forge weld---all the pattern welded early medieval swords were made with charcoal and the japanese swords still are when made by the masters in Japan. (use of coal in the forge didn't start to High to late middle ages and never totally replaced charcoal as good coal is hard to find and you can make charcoal just about *anywhere*) Both get hot enouth to burn up your piece. Both get how enough to smelt iron from iron ore The BTU content of coal and charcoal is about the same *per* *pound* though coal is a lot denser. Whay is "hotter" important? Of course we are talking *real* charcoal not briquettes and using forges designed for each fuel. |
| Thomas P - Friday, 06/30/06 10:35:33 EDT |
|
Coal vs. Charcoal: Kevin, if you are talking about absolute flame temperatures I believe they are identical as in both the fuel is pure carbon (after coking and coaling). For practical purposes coal is hotter. This is because it is a more dense fuel and you can make a smaller more intense fire. Coal fires run as hot as 3,500°F (1927°C) and charcoal about 3,300°F (1815°C). The difference is heat losses due to the difference in fire size. However, those are maximums. In the heart of a forge fire you may see temperatures near these values but at the bottom where air is coming in and combining with the fuel it is lower and at the top where heat is escaping it is lower there. That is why a deep fire is necessary to have a non-oxidizing high temperature fire. The big differences between the two fuels are weight per unit volume. Per pound they have the same fuel value but it takes over twice as much volume of charcoal to get the same as coal. |
| - guru - Friday, 06/30/06 10:35:33 EDT |
|
Anvil / Pattern weights... I agree that you can easily convert one volume with a known density to another / factor in contraction etc and thus calculate weight. but... my point was you would have to make the pattern (or more likley a model of the part) to know its (timber / clay etc) weight in the first place, thus archemedies principle would be easiest to use to work out the finished weight. (many patterns are hollow as well!) I am speculating but I think (in days gone by) the anvil designers would not have presented the pattern maker or foundary with a drawing of the part - but a model / mock up of it, simply because, as guru points out the shape is very organic, and would not be easy to commit to paper. Thus, I stand by my 'dunk it in water' original post :) |
| - John N - Friday, 06/30/06 11:21:12 EDT |
|
Hello everyone I know this is against what most people want, but I was wondering how you could induce rust quickly on mild steel. Thanks in advance. -Boogerman |
| - boogerman - Friday, 06/30/06 13:31:00 EDT |
|
John, In the modern era detailed blueprints are provided. I have a set of British anvil detail drawings from around WWII that include everything to make them as well as calculate the weight. The horn shape is defined by multiple cross sections that also would have been used to calculate the weight. The trickier parts to calculate are the mitered fillets at the feet. However, this is one of those places where it takes a little logical legerdemain and using the subtractive method starting with rhomboids or frustra and cylindrical sections. Dunking it in water doesn't tell you how big to make it in the first place. |
| - guru - Friday, 06/30/06 14:14:56 EDT |
|
Major score. I went yesterday to the saw mill to get the first load of lumber for my new smithy. The foreman gave me two chipper blades and anvil, leaf springs from a repair job and two pins ( 2 1/2" DIA" X 8")from his loader bucket. He also had four brake drums from a front end loader, these are massive, about 14" deep and about 24" across. I think they are too deep to used for a forge, what else can they be used for? I hate to see them go to waste. I love the smell of fresh lumber, especially went it's mine :) vicopper same thing is happening to me with the log-in. |
| daveb - Friday, 06/30/06 14:29:53 EDT |
|
I've made quite a few knives from tool steel (i.e., old halves of pliers, wrenches, etc.). Is this 1 point carbon? All this talk of designing anvils reminds me of when I wanted to have an anvil made of cast aluminum... any you guys remember that? |
| - Nippulini - Friday, 06/30/06 15:23:07 EDT |
|
Quick Rust: Start with CLEAN metal (no oil or hand prints). Apply chlorox bleach, wait. |
| - guru - Friday, 06/30/06 15:41:27 EDT |
|
TNG, Those tools are more likely SAE 1050, SAE 4140 or other medium tools steel. In industry when talking tools steel we are generally talking about cutting tools and dies of all sorts. Dave, Those big brake drums make good bases for tool and stock supports, small tooling like stakes. Most folks fill them with concrete to make them heavier for these purposes. However, concrete is not very heavy compared to steel. I would mix scrap with the concrete (old heavy bolts, torch scrap, rebar) to increase the average density. To keep the stuff IN you need a ledge or anchors welded to the flange. If the drum is all cast you will need to use a cookie bolted on. Add concrete anchors to the the cookie. |
| - guru - Friday, 06/30/06 16:31:00 EDT |
|
More uses for heavy brake drums. Dave, those BIG'uns would make a good tumbler drum for small parts. Sculpture bases, flower pots. . . |
| - guru - Friday, 06/30/06 16:34:33 EDT |
|
MO' RUST...... Put the object in a closeable box along with a bottle with a little Hydrochloric acid with the cap off. Close the box for a couple of days. It'll rust. |
| - 3dogs - Friday, 06/30/06 16:53:30 EDT |
|
I have been reading all of the posts and I want to say that everything is conducted in a professional manner. I have learned a lot just reading them every day. Since I'm here, I want to ask a couple of questions. Can high carbon stainless be pattern welded with regular high carbon steel ? If so, What types would be most compatible ? What type flux would you recommend ? Also when making mocume (sp.), what metals would be good to use ? I guess, what I'm wondering is how to deal with the seperate welding temperatures of each metal. Also what flux ? |
| Mike T. - Friday, 06/30/06 16:56:18 EDT |
|
I remember the cast aluminum anvil proposal well. John Odom |
| - John Odom - Friday, 06/30/06 18:35:14 EDT |
|
Mike T, When making mokum� gan�, the most critical factor is not the melting point of the respective metals, so much as it is the relative ductility. As mokum� gan� is often forged or otherwise mechanically stressed/stretched/compressed, it necessary that the differing metals have reasonably close amounts of ductility or they will separate as one layer stretches more than the adjoining layer and shears the interface zone. As an example, copper and nickel silver have a nice contrast, but the nickel silver is significantly less ductile than the copper, presenting problems if you want to do extensive forging. The melting points of the metals should not be significant if you are doing a true solid-state diffusion bonding process. Mokum� can be done by heating to very near the melting point of the metals using flux, but it is a much less satisfactory method than a solid-state process. In SSDB, the metals are cleaned until they are absolutely free of oxides and contaminants and then sandwiched in a press or clamp that will exert several tens of thousnads of pounds of pressure per square inch (Kpsi). Heavy stainless steel plates clamped with a number of 5/8"d. or larger bolts make a pretty good press. After clamping, the assembly is placed in a kiln with an inert atmosphere and brought up to a heat a few hundred degrees below the melting poiint of the lowest melting metal. (In many cases, the metal in the mokume will have a higher coefficient of thermal expansion than the stainless bolts, so the increased temperature actually increases the clamping pressure.) The higher the pressure and the cleaner and more carefully fitted the metal, the lower the temperature it will bond at. Working with sufficent pressure in a pure vacuum, it is theoretically possible to get a bond at room temperature. For specific metals that work and play well together, and that provide good contrast, I suggest you check out the books written by Steve Midgett. He is an authority on mokum� gan�, and a good writer as well. |
| vicopper - Friday, 06/30/06 18:49:44 EDT |
|
I missed it, would someone like to recap the aluminum anvil discussion? I know there some with aluminum bases but the whole thing?? It'd be great for forging marsmallows LOL. |
| Thumper - Friday, 06/30/06 21:17:21 EDT |
|
Thanks Guru, I went and picked up the last load of lumber today and got a couple drums while I was there, I'll use one for a grinder base and give one to my brother. |
| daveb - Friday, 06/30/06 21:24:32 EDT |
|
Ralph Douglas 1960 - 2006 Ralph passed away this morning June 30, about 1:30 am. Ralph was our one of our first CSI members and first CSI vice Chairman under Jim Paw-Paw Wilson, his close friend who passed away May 13, 2005. Ralph was a long time friend to anvilfire and is survived by his wife Dawn, son Nathan and daughter Shannon. Dawn's cartoon business provided the cartoon on our story page. Ralph's service is this coming Wed, July 5, at 11am, with a reception (luncheon) following at 12:15. There will also be a rosary for Ralph at 10:30, for anybody who would like to participate. St. Matthew's Catholic Church 475 SE Third Avenue (that's 3rd and Oak) Hillsboro, OR Time to ring the anvil for Ralph would be July 5th at 11 AM pacific, 2 PM Eastern, 1 PM central, 12 mountain. He last posted here a week ago. He will be missed by us all. |
| - guru - Friday, 06/30/06 21:38:10 EDT |
|
for quick rust I have found ammonium chloride, gotten from a chemical supply as powder and mixed with water say a tablespoon or two per quart, and sprayed on, works very fast, overnight. It might be helpful to neutralize it after you get the colors, because I've had it lift flakes months later, when I was impatient and keep spraying it over and over. If the steel turns black, it is going to look rusty when it dries, no need to hit it again. I have also found that it tends to lift the mill scale en masse in flakes after a few months, so you might want to grind that away first to prevent this. |
| brian kennedy - Friday, 06/30/06 23:47:45 EDT |
|
Vicopper, Thank you for your reply,I will print your response and place in my folder. |
| Mike T. - Saturday, 07/01/06 04:31:00 EDT |
|
The Aluminum anvils were to be objects of art, not tools for forging. |
| - John Odom - Saturday, 07/01/06 07:20:47 EDT |
|
|
|
|